How to insert into an existing water supply system under pressure

Do you want to organize the water supply of a country house by connecting it to the existing central highway? Automatic water supply will greatly simplify the life of households, right? But for the implementation of your plan there is no way to block the water in the main pipeline and you need an insert into the water supply under pressure?
We will tell you how to make an insert in practice, avoiding disconnecting consumers that are powered from the mains - the article discusses the process of making the connection, taking into account all the requirements of the law. The material is equipped with thematic photo materials and useful video recommendations.
A careful study of the stages of connecting to the central water supply of your household will help to avoid fines for violating existing standards when unauthorized insertion into the pipeline. If you wish, you can also save by completing part of the earthwork on your own.
The content of the article:
Work Permit
Inserting into water mains, both by welding and without it, cannot be carried out without obtaining the relevant permits.
The execution of an illegal tie-in traditionally ends with bringing the owner to material and administrative responsibility.
The site plan can be obtained at the Federal Land Registration Center, and the technical conditions in the central department of the water utility.
In the specifications for the connection will be indicated:
- connection place;
- diameter of the main pipeline;
- data required for insertion.
In addition to the local structure of Vodokanal, specialized design organizations with an appropriate license are involved in the development of design estimates.
You can order design estimates from them tie-ins centralized water supply network. Perhaps their services will be cheaper, but it is possible that problems may arise with the approval of the design development by Vodokanal.
Then the sidebar documentation should be registered at the local SES office. Simultaneously with the submission of the collected package of documents to the SES branch for registration, it is necessary to leave an application for issuing an opinion on the need to connect to the water supply.

According to generally accepted standards, the execution of a pipe insert under pressure and the installation of metering devices must be performed by qualified specialists who have the appropriate approval. It is forbidden to independently perform such work independently.
You can save by making your own efforts to connect, only on earthworks during the development and backfilling of the trench.
Conditions under which insertion is not allowed:
- if the pipeline network has a large diameter;
- if land ownership is not connected to the central sewer system;
- if the insert is supposed to bypass metering devices.
Even with all the permissions, only qualified personnel should perform the insertion of pipes to the existing network.

These include: excavation (digging and backfilling of trenches), material delivery and other types of utility work that are not directly related to the insert procedure.
Of course, no one can forbid the owner to perform the insertion on their own. Therefore, the article describes in detail the sequence of actions.
Construction of a well for arrangement of a node
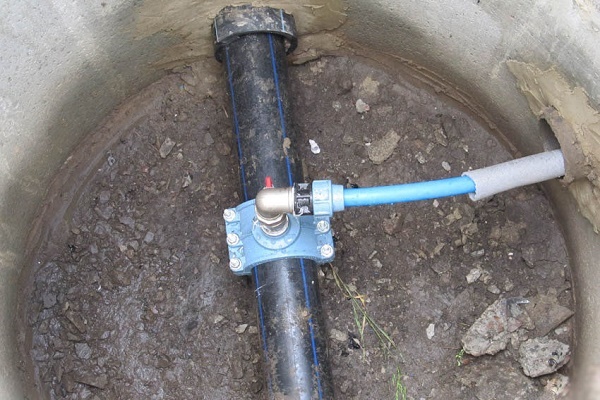
To simplify tapping into an existing water supply system, it is convenient to use manhole. The diameter of the structure should be about 70 cm. This space is enough to accommodate shut-off valves (in the form of a valve or gate valve), as well as perform all necessary manipulations for insertion.
In the future, during the operation, the presence of such a structure will facilitate the repair of home water supply.

To erect a well, they dig a new pit of the appropriate size. The bottom of the pit is covered with gravel "pillow", forming a layer 10 cm high.
To make a reliable foundation, lay out ruberoid cuts on a leveled gravel bed and fill the concrete screed with a thickness of 10 cm. When creating a fill, concrete of the M150 and M200 grades is used.
Three to four weeks later, when the concrete gains the necessary strength, a shaft is erected over the slab. For this, the walls of the pit are lined with brick, cement blocks or reinforced concrete rings. The neck of the structure should reach zero.
If the well is supposed to be installed on the site where the groundwater level rises to one meter during the flood period, it is necessary to build a waterproof structure.
It is most convenient for this purpose to purchase a finished container made of plastic. From below it is anchored to a concrete slab; from above, such a structure is covered with a cast plate equipped with an opening for installing a hatch.
Tie-in depending on the type of pipe
Since the main water pipes are assembled from polymer, galvanized and cast iron pipes, consider all the available options for arranging the sidebar.
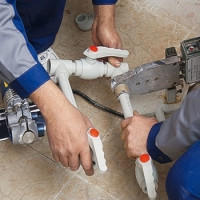
No. 1 - work with polymer fittings
When dealing with polymer fittings, the insert technology is implemented in this sequence. Having decided on the place of the pipe insert, they prepare the site. For this, an even place in the puncture zone of the body of the pipe is thoroughly cleaned with sandpaper from accumulations of rust and paint residues.
A clamp equipped with terminals is fixed to the prepared place by means of bolts for the possibility of connecting a welding machine. After installing the site and attaching the contacts of the welding machine to the terminals, voltage is applied to it.
When an electroweld collapsible collar is installed on a polymer pipe, the structure is first disconnected into a vertical nozzle with a valve, through which a nozzle for drilling is deepened, and direct-flow nozzles.

At the other end of the lining in the area where the drill will be buried, mount a valve with a sleeve. Drilling equipment is attached to it, after which, using a conventional drill, a hole is carefully made in the trunk.
The drill must be inserted only through the shut-off valve so that after the “breakdown” of the pipe body, the water flow is blocked and the cutting tool can be removed freely. To ensure the tightness of the joint during drilling, a special nozzle is used.

A new section of the input pipe is connected to a flange located on the valve. The clamp is mounted above the insertion point, and then, by heating the spirals of the welding machine, solder with the pipe body. The result is a high-strength, sealed connection.
No. 2 - connecting cast iron pipes
In the presence of a cast-iron pipe, which is much harder than polymer analogues, the procedure is performed in the following sequence:
- In the place of the future “breakdown”, the area is cleaned of rust and a layer of hot iron is removed by a grinder.
- Set the saddle on the site, not forgetting to lay rubber seals.
- A shut-off valve is attached to the flange outlet, into which a crown is inserted.
- They begin to drill the pipe, not forgetting to cool the place of the cut and to change the dull crowns in time.You need to drill in several stages: first with a small diameter drill, and then a little larger.
- After removing the crowns from the valve, they close the valve, cutting off the water supply from the nozzle.
- Recover anti-corrosion coating and insulation.
To create holes in the cavity of cast-iron pipes, crowns equipped with carbide cutting inserts or drills with feather sharpening are used. When working with them, it is important to exclude overheating of the tool by wetting the cutting parts periodically with water for this.
In order to protect the power tool from water ingress when the cutting part is removed from the hole, a protective screen is constructed from thick cardboard or rubber. It is placed between the housing and the cartridge.

When using a saddle clamp for insertion into a metal pipeline, to ensure a snug fit to the surface, apply rubber bands.
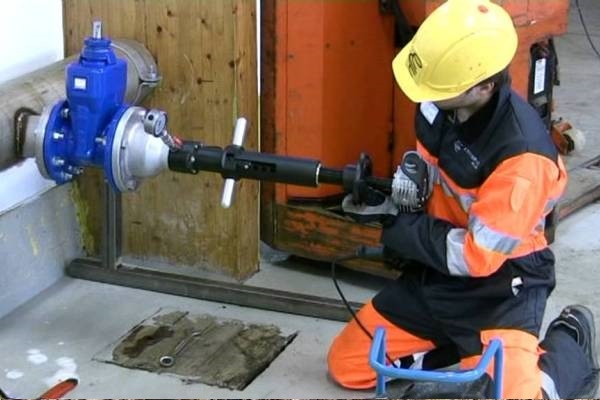
A special machine can additionally be attached to such a device, the main elements of which are:
- locking bolt;
- ratchet handle;
- flushing valve;
- shaft with a drill.
All structural elements are enclosed in a metal case. The presence of a guide sleeve allows you to simplify the drilling process, in which the drill is conveniently positioned in any direction.
No. 3 - features of working with steel pipes
Steel pipes in ring stiffness are not inferior to cast iron fittings. But steel is a more ductile iron-carbon alloy. Therefore, the insert can be implemented by implementing a different technology, in which the joining method resembles that used for the installation of polymer pipes.
The technology of tapping into a steel pipeline includes a number of basic steps:
- The area to be tapped is excavated and cleaned from rust.
- A threaded or flange pipe is mounted on the pipe section by welding.
- Weld seams.
- Check the seams for leaks.
- A flange or threaded valve is fixed to the nozzle.
- Through the valve, the pipe of the trunk is drilled.
- A branch of an external water supply system is installed behind a mounted valve.
Ideally, the pipe should be made of "main" fittings. But it is also allowed to use any other kind of rolled pipe, the basis for which is structural steel.

Such a “trick” will help to clearly determine the tightness of the seams: they are smeared with kerosene from the inside, and outlined with chalk contours. Oil stain defects will be indicated by oil stains on the outside of the structure.
The specifics of tapping into a plastic pipe when assembling a water pipe are described in detail in another popular article our site.
The main stages of the procedure
The choice of insertion method depends on the material used to make the pipes, the working pressure in the system, and the conditions of its operation. It can be performed at an angle of 45 and 90 degrees, positioning up or to the side.
Step # 1 - Defining the Sidebar
Before you start tapping into the water supply, you must clearly determine the location of the route. The central highway should be located in a straight line.

For regions of middle latitudes, this indicator varies in the range of 1.2-1.5 meters.
At this stage, it is also necessary to determine what other communications “lie” within the site, so as not to accidentally damage them in the process of excavation and installation.
Step # 2 - selecting the required materials
To connect using pipelines made of polyethylene, cast iron or galvanized steel with a diameter of 50 mm and above. Work on highways with pipelines made of polyethylene excludes the use of electric and gas welding.
When working with cast iron, it is worth considering that this is a rather fragile material. Therefore, the pressure on the tool during operation should be minimal, and drilling must be performed at low speeds.
When choosing pipes for tapping, it should be borne in mind that the diameter of the outlet pipe should not exceed the size of the one in which the hole is made. To connect to a plastic pipeline, the pressure of which is about 1.6 MPa, saddle clamps are used.
The fixtures are equipped with a heating coil and a milling cutter, necessary to create a hole. The presence of a bar code on the part body allows welding parameters to be set with the necessary accuracy.

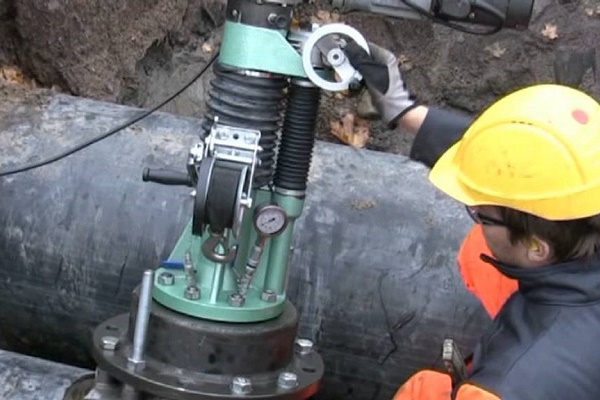
To insert without disconnecting the water supply on pipes made of asbestos-cement steel or cast iron, use a saddle or saddle clamp. It consists of two parts and is equipped with bolts, thanks to which it tightly compresses the pipe from two sides. The device is mounted on the pipeline using a bracket.

Recently, clamps are often used, the modules of which are equipped with a mill and integrated valves. They are used for inserting pipelines with a pressure within 16 bar. Such devices are equipped with couplings and allow insertion by welding.
The main advantage of these clamps is their resistance to corrosion, due to which they are able to last more than half a century. Often, for inserting pipes under pressure, craftsmen use drill collars. They are sold complete with nozzles and swivel connectors.

On sale there are several types of drilling clamps that can be installed on pipes with a diameter of 80 to 300 mm.
From the tools you also need to prepare:
- bayonet and shovel;
- drill with a drill;
- cutter device;
- crown;
- Bulgarian;
- sandpaper cut.
When choosing the diameter of the drill, they are guided by the rule of equality of the size of the tool and the internal section of the insert pipe.
Step # 3 - excavation
To bare the highway, dig a pit. It can be dug manually or using an excavator. But even when carrying out excavation work by means of mechanization, as soon as the metal strip laid on top of the highway is exposed, further manipulations should be performed manually.
Having exposed the pipe section, they start digging trenches in the direction of the house. It is laid below the level of freezing of the soil.

Any manipulations with the pipeline under pressure require strict adherence to safety precautions and the strict implementation of all stages of the operation.
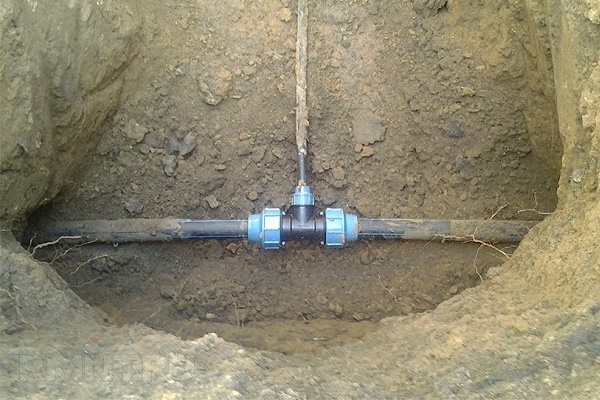
Step # 4 - retraction from the trunk
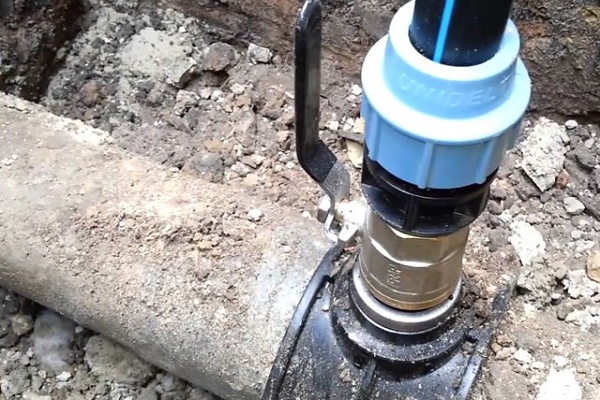
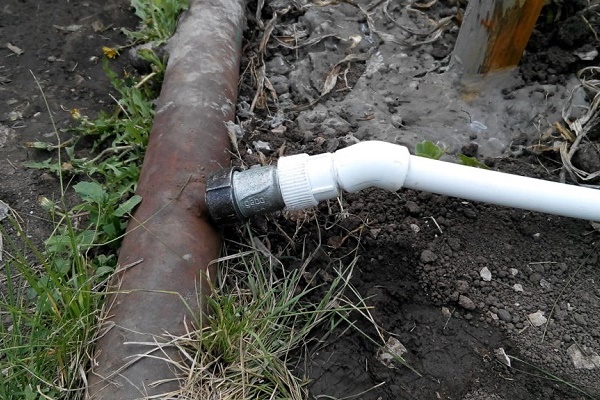
Applying one of the above methods, they insert into the existing water supply under pressure. At the final stage, the pipe of the external branch of the water supply pipe is laid in a trench and is connected to the shut-off valve by means of a crimp sleeve.
When you divert from the water main new water supply will be located on the clamp valve, and the end - on the meter for water consumption.The meter, whose main purpose is to register the volume of incoming water, is positioned so that it is between the shut-off valves.

To protect the meter from reverse fluid flow, it is necessary to install a non-return valve.
If the insertion into the water supply system involves the passage of the input through the wall, then during installation it is necessary to provide a clearance in the structure - a space measuring 0.2 meters. After installation is completed, this space is sealed with waterproof glands or with a resin strand. To mask the formed seals, they are covered with a cement finish.
Step # 5 - Adjusting and Testing the System
The correct connection and connection of all elements of the system is checked by test. To do this, pressure is supplied to a new pipeline line, and air accumulated in the system is vented through a valve located at the other end of the pipe.
Having ascertained the tightness of the water supply, it remains only to dig a trench laid from the insertion point to the house.
Conclusions and useful video on the topic
Clip # 1. Tips of the master for the production of tapping under pressure:
Clip # 2. The principle of operation of the insertion device:
Clip # 3. The consequences of poor installation:
Manipulations for tapping under pressure must be carried out taking into account all the recommendations and rules listed. Failure to comply with the conditions is likely to violate the integrity of the system, which will reduce all efforts to "no" and lead to disastrous consequences.
Want to share useful information about tapping into an existing water supply? Have questions about the topic of the article, find controversial issues in the material? Please leave comments in the block below.
 Do-it-yourself polypropylene plumbing: everything about installing a system of plastic pipes
 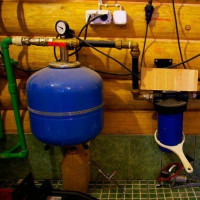 How to make a water pipe in the country with your own hands: the rules for laying, installing and arranging
 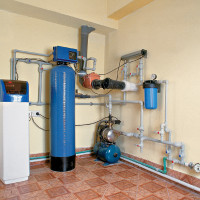 Plumbing in a private country house do-it-yourself: the rules of arrangement
 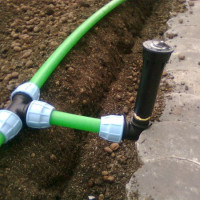 How to organize a summer water supply in a country house: laying and arranging a water supply for irrigation
  Insulation for water pipes: the choice and methods of laying thermal insulation of water pipes
 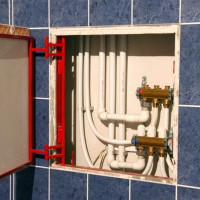 Water distribution in a private house: design rules + an overview of the best schemes
  How much does it cost to connect gas to a private house: the price of organizing gas supply
  The best washing machines with dryer: model rating and customer tips
  What is the color temperature of light and the nuances of choosing the temperature of the lamps to suit your needs
  Replacement of a geyser in an apartment: replacement paperwork + basic norms and requirements
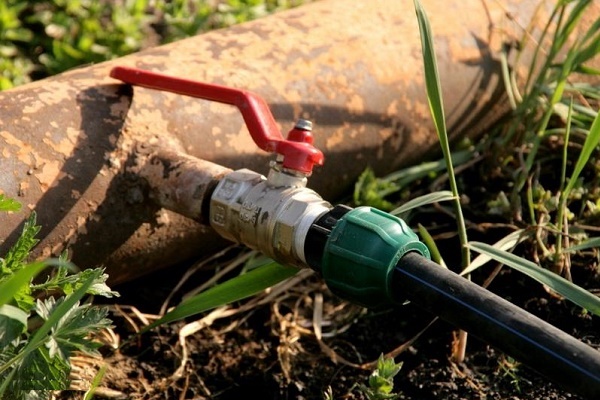
I have a problem - in the kitchen of the old house I rotted a pipe section due to rust, a leak formed, which I eventually drowned out. In this article I wanted to find an answer for myself to the question - how to crash into an old, rusty water pipe, but only in another place, and restore the water supply to the house? How to ensure the tightness of the insert on the rusty section of the old iron pipe, and with what clamps can this be done?
Hello. In your case, it makes no sense to crash into an old pipe, since it is very dilapidated, which you yourself wrote about. You can not do without turning off the water, you will need to replace the damaged section of the water supply.
Here, see for yourself what will be easier for you:
- cut off the shabby gas section with a hacksaw or burner, then cut the threads and connect;
- cut the damaged area all the same ways and connect using welding.
After that, the insertion is very simple. In your case with a pipe that is damaged by corrosion, the insert will be dangerous, leaks in the future are possible.
The insertion methods are described in detail in the article. If the question is about the very poor condition of the pipes, then it is better to replace them initially. No latki will not help such wear.
Although this is not often found, but when tapping without disconnecting, in any situation, you can not do without a saddle clamp. Otherwise, you can arrange such a breakthrough! We made a similar insert by the water utility itself (it was impossible to turn off the main system). Well, then everything is according to the rules and officially: they made a tap with a tap, and you can handle the pipe supply to the house yourself before connecting to a centralized network.