The head for the well: device, types of structures, installation and installation rules

Installing the head is not the most difficult part of the work in constructing your own well. Neither the device itself nor the installation procedure are particularly complex. Observing certain rules, you can set the head for the well with your own hands without any problems.
But previously it will not hurt to get acquainted with some of the nuances of this process. We will tell you which head is better to use, and also describe the technology of its installation. Fans of homemade handy instructions for self-assembly of a simple device for the well.
The content of the article:
What is the head for?
In short, the tip is the cover for the well. With its help, the upper part of the casing is protected from the influence of negative external factors. You can do without this device, replacing it with an inverted tank of a suitable size, which simply cover the well.
Some people wind up a pipe with a large piece of plastic film and believe that this is enough. However, none of these options is completely reliable with well completion.
A film or an inverted tank can only be considered as a temporary option for protection. These funds almost always turn out to be powerless before the spring flood, the penetration of insects and other similar factors.

The functions of the head of the well in practice are much wider than it might seem at first glance.
The device helps to successfully resolve a number of important practical tasks:
- hermetically protect the upper part of the well from the penetration of flood waters and other unwanted liquids;
- prevent dirt, dust, debris, etc from getting into the well;
- protect the mine from small objects that may fall there;
- additionally protect the well from freezing in winter;
- securely fasten the submersible pump and water pipelines;
- prevent theft of pump and well equipment.
Reliable tip improves well operation and maintenance. It is even believed that a sealed head positively affects the flow rate of filter wells, as this creates additional pressure.
A good tip can also be used as an adapter if it is necessary to use water supply pipes of different diameters.
What you should know about the heads
It is not difficult to purchase a headpiece in a hardware store; the choice of these devices is quite wide. First of all, you should choose the head in exact accordance with the size of your casing pipe. The second important point is the material from which the device is made.
The following types of heads are available for sale:
- plastic - withstand loads up to 200 kg;
- steel - allowable loads of not more than 500 kg
- cast iron - able to withstand over 500 kg, but they themselves weigh a lot.
For the sake of economy, many prefer the steel head of the cast-iron model. Of course, a steel product costs significantly less. But it should be remembered that the life of such a model is noticeably shorter.

Usually for a relatively shallow well, up to 50 m deep, you can take a plastic or steel model, since the load in such cases rarely exceeds 100 kg.
But the weight of more powerful equipment for an artesian well can exceed 250 kg. A stronger headband should be used here.
Exact information about the characteristics of the equipment is contained in the technical passport of the product, which allows you to find out all the nuances before buying.

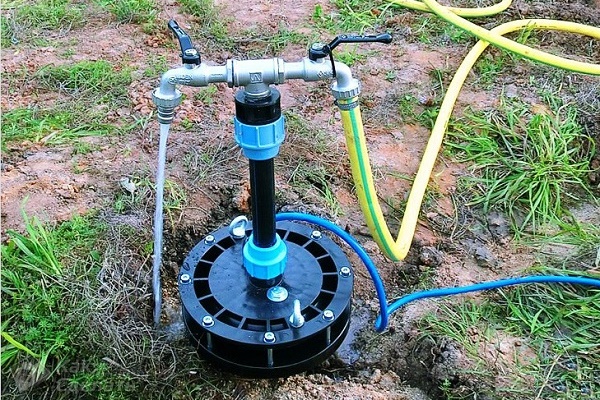
One of the advantages of a wellhead device is that it is quite simple.
Such an aggregate consists of three main elements:
- covers;
- flange;
- o-ring.
Additionally, depending on the model, the device can be equipped with:
- eye bolts;
- cable gland intended for electric drive;
- a set of carbines;
- fitting for a water supply pipe;
- fixing bolts.
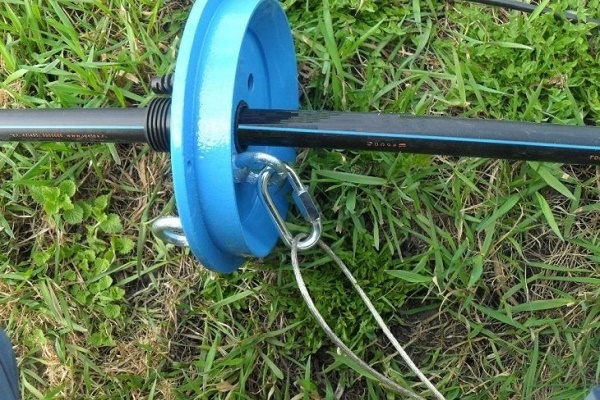
An eye bolt is a regular bolt, the upper part of which is made in the form of a ring. These elements are used for hanging equipment, securing cables, etc. On the head, eyebolts are placed on top to make it easier to lift the cover, and also below to hang the pump.
If for some reason the eyebolts are not included in the model kit, they can be purchased separately if desired and welded to a metal head.

Cable entry is a useful element that helps protect the power cable from accidental damage. Usually it is equipped with a special spring, which provides reliable fastening and tightness of the structure.The bolts connecting the cover and flange may be of a special “secret” design.
This allows you to further protect the well from outside interference. If the head is equipped with ordinary bolts, it makes sense to replace them with fasteners with a secret.
There are elements specifically designed to work in high humidity, protected from corrosion by a special plastic coating. If possible, it is worth giving preference to just such components.
Downhole heads are usually equipped with a special marking, which allows you to immediately get an idea of the characteristics of the product. At the beginning of the inscription are usually letters OS, they are deciphered simply: “borehole head”.
The first number indicates the dimensions of the casing for which the product is intended. If only one number is indicated, then the device is only suitable for pipes of this particular diameter.
If the range is indicated, for example, 140-160, then such a head can be installed with casing pipes of various diameters within these limits. The second number indicates the parameters of the water supply pipe, which can be connected to this tip.
Plastic heads are additionally marked with a letter "P", and on metal products such marking is absent.
Thus, if the product is marked OS-152 / 32PThis is a head made for a casing pipe with a diameter of 152 mm, which is equipped with an adapter for a water pipe with a diameter of 32 mm. The product is made of plastic.
If the marking looks like OS-152/32, This is a product with exactly the same characteristics, but made of metal.
The price for the finished head can vary in the range from 50 to 120 dollars. These are approximate prices, if you wish, you can find a cheaper option. However, it should be remembered that acquiring a model at too attractive a price can be fraught with unpleasant surprises associated with poor quality workmanship.
Nowadays, wellheads for a company’s well are very popular. Gilex.
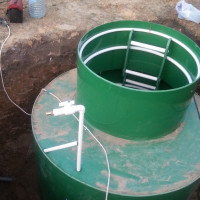
Installation Rules
Since the design of the head as a whole is very simple, its installation should not cause any special problems. And yet there are certain rules that must be observed during the installation work.
When installing the head on the well, the following procedure is usually followed:
- Prepare the edge of the casing.
- The flange is put on the pipe so that its flange is directed downward.
- Install the o-ring.
- Secure the pump cable.
- An electric cable is passed into the corresponding input.
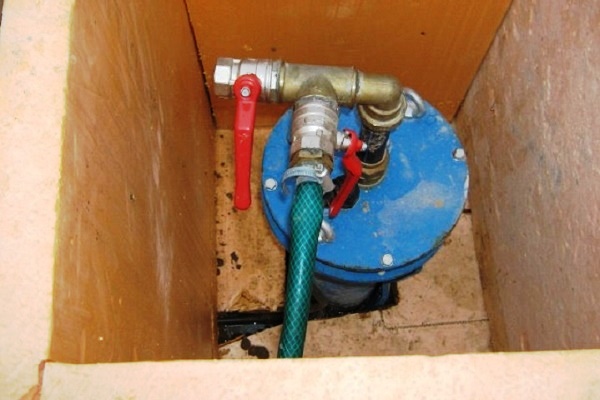
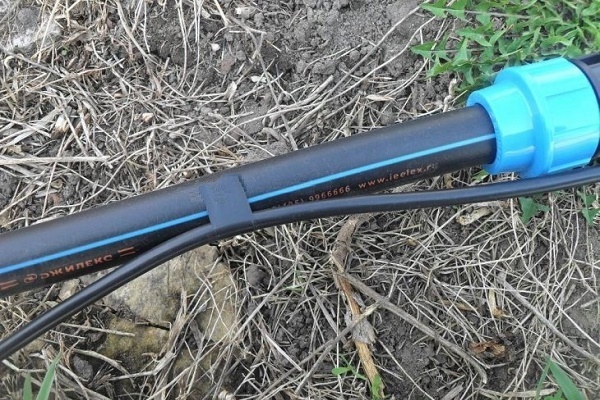
- A hose or part of a water supply pipe is attached to the fitting, the second end of which is attached to the pump.
- The pump is lowered into the well.
- The cover closes due to the weight of the submersible pump.
- The flange and the cover are connected with bolts that tighten evenly.
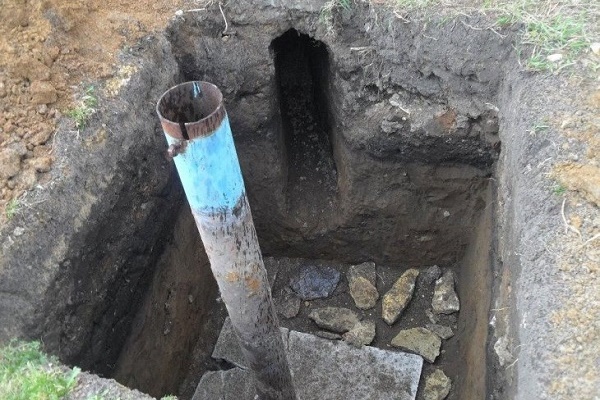
Preparation of the edge of the casing begins with the fact that its edge is cut strictly horizontally. This will allow the tip to be placed in a plane that is perpendicular to the casing.
After the pipe is correctly cut at the desired height, its edge should be carefully polished. To perform these operations, the usual “grinder” with a set of appropriate nozzle circles is quite suitable.
Before installing the head, the metal casing is recommended to be additionally protected with a special metal paint. The o-ring is sometimes difficult to put on the casing, and pushing it down is also not always easy.
To solve the problem, it is recommended to use a suitable lubricant, for example, autol or special oil.

In a hurry to get water from the finished well, some site owners immediately lower the pump into it, postponing the installation of the head “for later”. This is the wrong procedure. First put on the flange and o-ring, and then you can lower the pump into the well. Otherwise, to mount the head, it will have to be pulled out and lowered again.

This is not the best option, since the risk of damage to the columns and equipment increases, and the procedure itself is quite time-consuming. To fasten the cable to the pump and the head, special carabiners are used.
The cable length should correspond to the immersion depth of the equipment. The pump should not be lowered into the well until all other elements have been placed in the corresponding connectors of the head cover.
There is a special clip on the hole for the electric cable. It must be slightly loosened so that the cable can slide freely. If the wire is pinched, or located so that it accounts for part of the weight of the equipment, it may break.
Before attaching a water supply pipe or hose to the head, its lower end is connected to submersible pump.
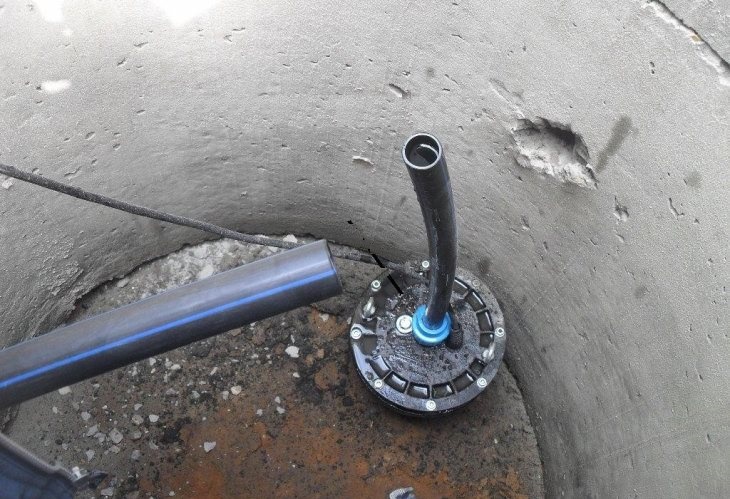
When lowering the pump into the well, you should gradually release the cable. When the equipment is at the selected depth, the cover is closed and the weight of the pump presses it against the flange. The sealant then falls into a special groove and is pressed tightly against the casing, which ensures reliable sealing of the structure.
If the cap is installed correctly, the o-ring will be pressed evenly by the flange to the cover, and the connecting holes will be opposite. If this does not happen, then you need to look for a reason, maybe you should just slightly change the position of the cover.
The connecting bolts should be tightened evenly so that there is no skewing of the cover on any one side. Do not strive to make maximum efforts.
Excessively tight connection of the cover with the flange can cause damage to the rubber ring, which leads to a violation of the integrity of the structure. But too weak a connection is unacceptable. If the bolts are not tightened enough, the head can simply be removed from the pipe, in which case their installation loses its meaning.

After the cover is installed and fixed, there is almost always some sagging of the power cable.The wire should be selected so that it does not sag, but is not in a tense state.
Now you can attach a water pipe to the fitting. Then the pump is usually turned on to assess the correct installation of the head and its condition under the workload.
Homemade wellhead
Since the head is not so complicated, you can make it yourself. To do this, use stainless steel sheet 10 cm thick.
A head made of less thick metal will not be strong enough. But too large material sizes are not needed, since this creates an unreasonably high load on the structure.

The flange is cut out first, i.e. round element with a hole inside. The dimensions of this hole should be such that the casing passes into it freely. The lid is another metal circle, but the holes in it are completely different. In the center, a hole is usually made for the plug of the water pipe.
Then cut a hole of a smaller diameter, it is intended for electric cable. The hole for the plug must be made quite large, it can be cut using a welding machine. The cable hole can be drilled with a suitable size drill.
At the end of the cutting and welding operations, the holes and other elements of the headband should be filed to eliminate bumps, burrs, etc.
You will also need to weld three eyebolts to the cover. One of them is welded to the underside of the cover, it will become a loop for attaching the cable on which the pump is suspended.

Two eyebolts are welded to the top side of the cover. They will become a kind of handle, with which the head can be freely opened. If desired, the eyebolts can be replaced with an eyebolt, sometimes it is even more convenient to use it than a bolt.
Some craftsmen have successfully replaced this element with a piece of metal rod rolled up in a circle of a suitable diameter.
It is also necessary to drill holes for the mounting bolts in the cover and flange. It is recommended to drill both elements at the same time, connecting them with a vise or clamp. This will ensure more accurate matching of the holes during installation of the finished tip.
Also, experienced craftsmen are advised to first make all the necessary holes in the flange and head, and then weld the adapter, eye bolts and so on. Of course, mounting bolts should be purchased in advance.
Their diameter should correspond to the holes, and the length should be sufficient to connect the cover, flange and gasket installed between them.
If cutting and welding of sheet metal usually does not cause difficulties, then even experienced craftsmen may have problems finding a suitable strip. The most reliable way to purchase the necessary item is to buy it from the manufacturer or in a specialized store.
Unfortunately, industrial-size gaskets with standard sizes are not always suitable for a homemade tip. The gasket can be cut from a piece of thick rubber, if one is at hand. It is believed that a 5 mm thick rubber layer will be sufficient. The inner diameter must be made so that it fits snugly on the casing.
This will ensure sufficient sealing of the head after it is assembled. Some craftsmen recommend using a ring rolled from an old car camera as a gasket. A non-standard idea for the manufacture of gaskets is to cast it from silicone. True, in this case, you need to make a mold of the appropriate size and configuration.

In any case, the gasket must be strong enough to ensure reliable sealing of the head and last a long time. This element is under constant compressive action. Low-quality rubber may soon collapse, which will weaken the connection structure.
When installing a homemade wellhead, it is recommended to protect the electric cable with a special heat-shrink sleeve. For its installation you will need a building hair dryer.
Some craftsmen use three metal corners instead of the bottom flange, which are simply neatly welded to the metal casing. The cover design in this case remains the same, and the mounting holes are drilled in the corners and in the cover.
Conclusions and useful video on the topic
The installation process of the head can be seen in the video below, although it does not reflect the procedure for connecting communications, hanging the pump, etc.
Here you can see an overview of various models of downhole heads:
An interesting version of the head made by yourself is presented in the following video:
A good borehole tip is an important part of the water supply system of the house and the site. If the model is selected and installed correctly, the head will reliably protect the well and extend its life.
Do you have practical skills in installing a head for a well? Share your knowledge or ask questions on the topic in the comments below. If you made the tip yourself, you can attach a photo of your craft.
 Caisson for a well: what is it, types, purpose, comparative review of structures and installation rules
 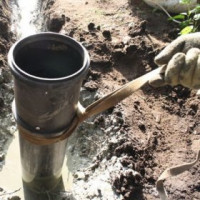 How to pull a casing from a well: rules for dismantling
 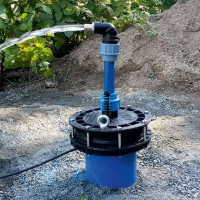 Maintenance of a well for water: rules for the competent operation of a mine
 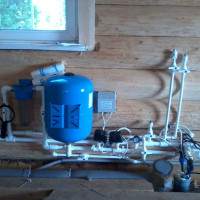 Rules for arranging an autonomous water supply system for a private house from a well
 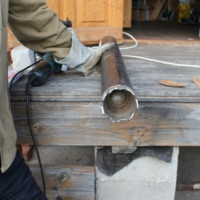 Well bumper: device, options and do-it-yourself manufacturing schemes
  How much does it cost to connect gas to a private house: the price of organizing gas supply
  The best washing machines with dryer: model rating and customer tips
  What is the color temperature of light and the nuances of choosing the temperature of the lamps to suit your needs
  Replacement of a geyser in an apartment: replacement paperwork + basic norms and requirements
At my summer cottage, I made and installed the head for the well myself. Indeed, there is nothing complicated, but the water is always clean. My neighbor in the country decided to make it simpler and use a plastic film instead of a tip. He constantly has problems not only in the fall and spring, but also in the summer, when heavy rains occur. But, as soon as I saw my design, I asked him to do the same. The borehole head is a really necessary thing.