How to make a caisson for a well with your own hands: device options and methods for their implementation

Autonomous water supply on a site remote from urban infrastructure is not a luxury, but an urgent need. Is not it? Most often, a well is used as a source of water, which needs a special arrangement - a caisson, which is required to protect the head from adverse influences and vandals.
Those who wish to arrange a caisson for a well with their own hands will tell you how to make it better and where to install it. Based on our recommendations, any home foreman will be able to equip the mouth of the water source. Here you will find out what materials and tools will be required for this.
We will consider four options for the construction of structures in detail, we will analyze the nuances of their installation. And the videos contained in the material will clearly demonstrate the installation process of various types of caisson.
The content of the article:
What is a downhole caisson and why is it needed?
A caisson is a container that is reliably protected from water penetration. Initially, they were used exclusively for underwater operations; later, other areas of application were found for them.
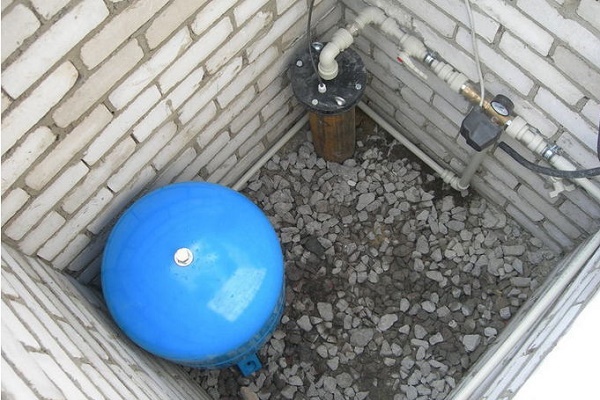
In particular, sealed chambers were installed on the top of the well. The standard caisson has a very simple design. This is a container that closes on top of the hatch.

Through it, a person descends into the chamber to carry out maintenance and repair work. In the bottom of the device is the input of the casing, in the side walls there are inputs for cable and water pipes.
The lid, and in some cases the walls of the caisson, are insulated. Most often, foam or a foamed polymer is used for this purpose. The chamber of classical design is made in the form of a cylinder about 2 m high and at least 1 m in diameter.
Such sizes are not chosen by chance.The height of the tank is due to the need to protect the equipment installed inside it from the effects of low temperature. The water pipe insertion section and the head of the well should be placed below the level of soil freezing.
Most often, this is a depth of the order of 1-2 m. It is this quantity that determines the depth of placement of the bottom of the chamber and, accordingly, its height.
The diameter of the container is also not chosen randomly. It should be sufficient to install the necessary equipment and place inside a person who will go down to carry out maintenance or repair of the well.
At choosing a caisson you need to understand that too small a design will be inconvenient to operate, and too large will cost too much. After all, sealed cameras are quite expensive equipment.

An airtight container buried in the soil performs two main functions:
- Protect equipment from low temperatures. In winter, the water supplied from the well is exposed to negative temperatures. In such conditions, it can freeze and ruin, or even break the pipeline.
- Groundwater protection. A caisson prevents soil from entering the head of the well, thereby extending the life of the equipment.
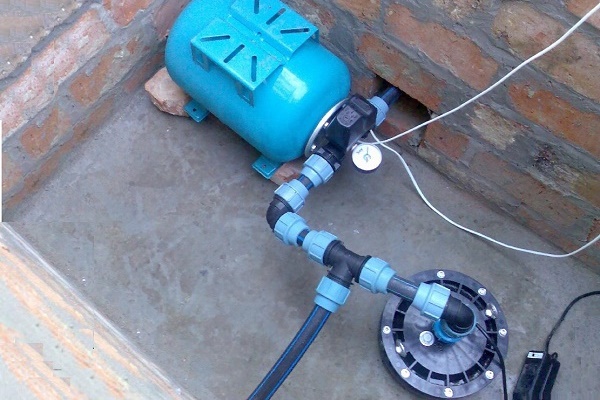
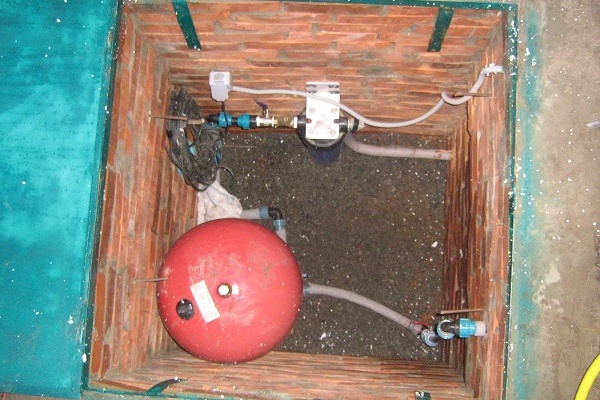
In addition, the caisson is a convenient place to place all the equipment necessary for the operation of the well.
They usually install here pumping station, various water treatment systems, a downhole adapter, shut-off valves with electric or pneumatic drives, pipelines and automation that controls an autonomous water supply.
A moisture-proof camera reliably protects all this equipment from unauthorized access, from damage by rodents and insects.

Practical Varieties
For the manufacture of caisson can be used any material that provides good sealing and sufficient thermal insulation of the inner chamber.

Practice shows that most often a caisson is installed on the head from:
- Plastics. A practical solution, characterized by excellent sealing and low weight, which greatly facilitates installation and transportation. The insufficient rigidity of the structure and its tendency to float is compensated by pouring concrete in place of the chamber with concrete along the contour.
- Metal most often steel. Sufficiently durable and very durable option. A well-made metal chamber is tight, it does not pop up and does not deform. To prevent corrosion damage, high-quality waterproofing is required.
- Concrete. Very strong and durable construction. The large weight prevents the ascent of the tank and significantly complicates its transportation and installation. Concrete is hygroscopic, therefore, high-quality waterproofing of the chamber is required, otherwise moisture will penetrate inside.
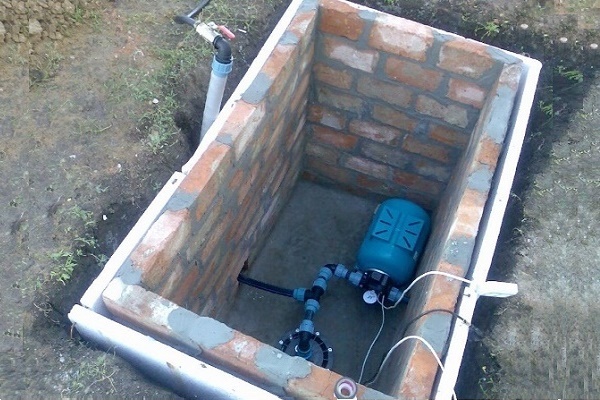
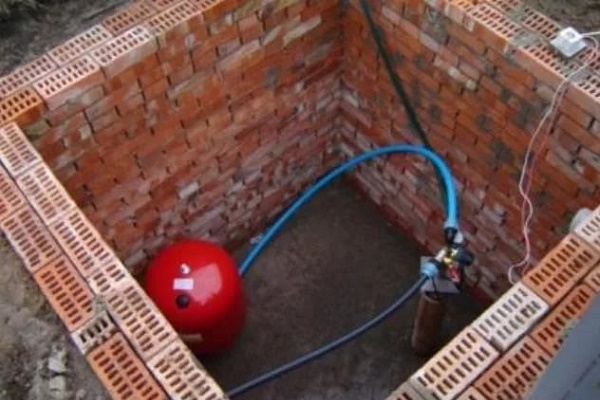
- Bricks. Strong, economical and durable option. It has good thermal insulation characteristics, which allows not to resort to additional insulation. The installation of a brick chamber is quite complicated, it can only be done by a person who has masonry skills.
- Polymerpesca. Relatively inexpensive, sealed, strong, lightweight and very durable construction. It is notable for easy installation: it is assembled from elements connected by locks of the “groove-spike” system.
All of these options have their pros / cons.To choose the best design, you need to weigh what will be more important for you personally, for example, high cost or speed of construction, long-term operation or efficiency of construction, etc.
Those wishing to compare practicality and technical specifications plastic and metal caisson We suggest that you familiarize yourself with the pros and cons of both varieties.
How to make a caisson yourself?
If desired, the home master can produce any type of caisson. It is important to determine the material from which the container will be made, and its size. Consider several options that are easy enough to implement.
Option # 1 - monolithic concrete structure
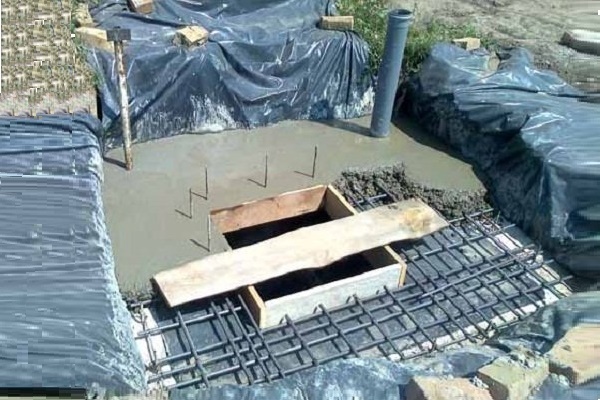
For a monolithic concrete caisson, a quadrangular shape will be optimal. This will greatly facilitate the process of erecting formwork. To begin with, we determine the size of the pit, which we have to dig under the structure.
The length of the base is usually equal to the width and is calculated as follows. To the inner size of the caisson we add the thickness of two walls equal to 10 cm and two sinuses of 15 cm each. In the latter we will subsequently backfill the soil.
Having determined the width and length of the pit, we calculate its depth. It should be 0.3-0.4 m more than the height of the chamber wall. Thus, it will be possible to equip the drainage layer at the bottom of the pit.
This technology is selected when it is not planned to concrete the base of the structure. If a concrete bottom is required, its height is taken into account. In addition, the depth of the pit is calculated so that the surface of the structure cover is flush with the soil level.
To determine the type of future design, we conduct a hydrogeological assessment of the bottom of the pit. It is optimal to do this in spring when groundwater rises to the maximum height.
If the bottom is dry, you can do with a drainage layer. If the bottom of the pit is wet, it makes sense to equip a completely sealed bottom of the structure. Otherwise, groundwater can flood the caisson.

When marking the future pit, pay attention to the fact that it is better to position the camera in relation to the casing not symmetrically. So inside the tank there will be more free space for the work of a person who has descended into it.
In addition, in this case, the equipment can be positioned with great convenience. Having decided on the size and location of the pit, we proceed to earthwork.
In the course of their implementation, you can immediately dig a trench to the house under the water pipes. After the pit is ready, proceed to the arrangement of the drainage.
It will consist of two layers:
- Sand cushion with a height of about 10 cm. Pour sand and tamp it thoroughly.
- Crushed stone about 15 cm high.
Such drainage will not allow water that has fallen into the caisson to remain inside. She will quickly go underground. Next, we proceed to the arrangement of the formwork. You can perform two options for its installation.
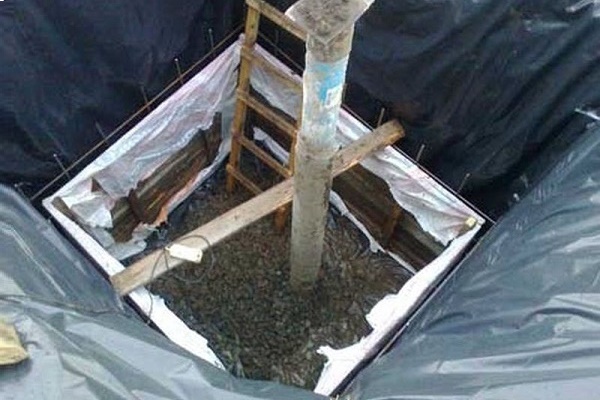
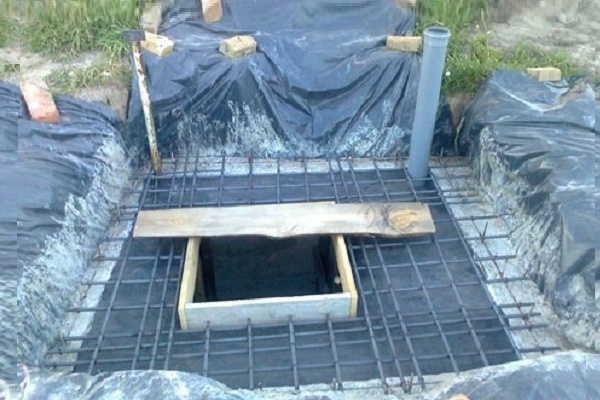
The first involves the use of the walls of the pit as the outer walls of the formwork. We close the sides of the pit with dense polyethylene so that water from concrete does not go into the ground. After that, we proceed to the arrangement of the frame from the reinforcement.

For it, you can take a coarse-grained steel mesh grid or tie it yourself with a step of 30 cm. We fix the reinforcement so that it is inside the future concrete layer, after which we install the second wall of the formwork.
For it, you can take boards or wood-polymer slabs.The second option for arranging the formwork involves the use of downed boards from boards.
They are installed in the pit so that they form double walls. The fittings are mounted between them and the structure is ready for pouring. This method will require the use of more boards, but it gives the opportunity to equip the drainage sinuses, which is impossible in the first embodiment.
Sinus sinuses are necessary with a high occurrence of groundwater, otherwise the caisson will flood.
Getting started pouring concrete. Manually mixing the solution is a very laborious process. It is much easier to rent a concrete mixer for rent or make it yourself from a metal barrel of a suitable size.

To feed the solution into the formwork, you need to make a special tray, a vertically cut downpipe that was previously used is also quite suitable. Concrete is poured into small layers, each of which must be carefully compacted.
For compaction we need an electric vibrator. This is a special tool that is quite expensive. If possible, it would be nice to rent it. If not, you have to use another method of compaction - baying.
For its implementation, you must first make a special device. We take a thin pipe, pin or piece of reinforcement and weld handles to it.
The resulting tool is sharply immersed in freshly poured concrete. Then we begin to remove it, we do it slowly, swinging the device from side to side. In the process of baying, air and water rise to the surface, and concrete becomes denser.
After the entire structure is flooded, it must be properly dried. The first 3-5 days, the concrete has not yet set and needs to be maintained in humidity.
The fact is that during the solidification process, the active evaporation of water continues in its upper layers. If there is not enough moisture, the upper layers of the concrete structure begin to crack, which leads to a decrease in the strength of the entire chamber.
Therefore, after pouring, the concrete is regularly sprayed with water or, in case of heat, covered with a damp cloth. After a week, it will be possible to remove the formwork.
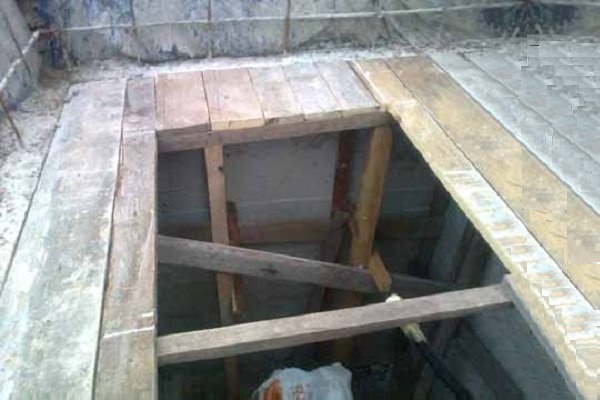
However, concrete will gain full strength only after 28 days. It is then that you can begin finishing work. The easiest way will be to install a factory-fitted floor slab.

Another option is to fill the floor, having previously performed horizontal formwork. All work on installing formwork and pouring concrete mortar is carried out similarly to those already carried out. After complete drying of the structure, do not forget to carry out waterproofing work.
The process of pouring a concrete caisson in steps will be presented by the following photo selection:
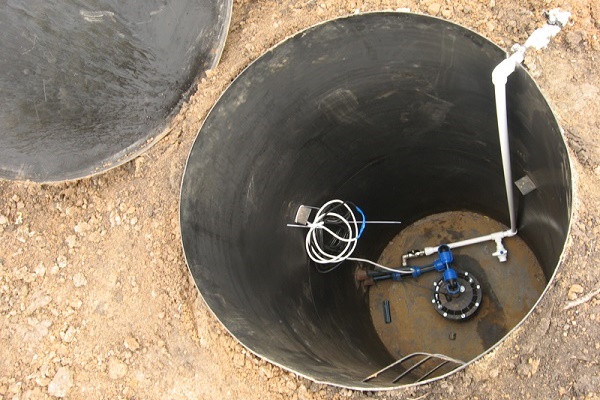
Option # 2 - caisson made of concrete rings
The device of the downhole caisson made of concrete and reinforced concrete rings begins with the preparation of the pit. Its depth is calculated similarly to a monolithic design. The height of the bottom of the structure depends on its type.
It can also be airtight or constitute a drainage layer. The choice of type is carried out taking into account the level of occurrence of groundwater.
Consider a sealed bottom option. We dig a foundation pit of the required depth, level the bottom and lay a sand cushion on it about 10 cm high. Tamp it well.

We are preparing the concrete bottom for installation. We drill a hole under the stove downhole pipe. Then, using special equipment, gently lower the bottom down, passing the casing into the prepared hole. We put the stove on a sand pillow.
We begin to prepare for the installation of concrete rings. We gently coat each of them with a waterproofing compound, for example, bitumen mastic and let it dry.
We lower the rings into the pit, carefully treating each joint with a fastening composition. Some experts advise foaming the seams, explaining that the solution will collapse when the earth moves, and more plastic foam should remain unharmed.
We process the resulting seams with waterproofing. We lay on top of the ceiling with a hatch.

Caisson is ready. It remains only to fill up the voids around the structure.
Option # 3 - a budget brick camera
Its arrangement resembles the construction of a monolithic caisson made of concrete. We start by digging a pit. You can dig it exactly under the future capacity or make a little more.
The second option is preferable. It involves filling all the voids into which rainwater can be poured, after the walls of the chamber are erected and dry.
In the first case, the brick will be laid against the wall of the pit, but no one can give guarantees that there will be no voids behind it.
Regardless of whether the caisson’s bottom is leakproof or not, a strip foundation is made for the brick chamber, the width of which should be slightly larger than the thickness of the future masonry. On the perimeter of the structure, we dig out a trench about a half meter deep, fill it with a layer of sand 10-15 cm high and ram it well.
The future foundation does not have to be concrete. Alternatively, you can fill the trench with brick fragments, large gravel and pour sand-cement mortar.
After the clutch is set, you can proceed to the masonry. We put waterproofing on the foundation, it can be either roofing material or any other suitable material.
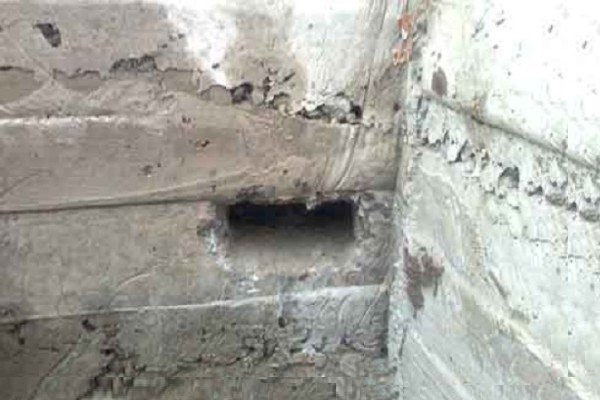
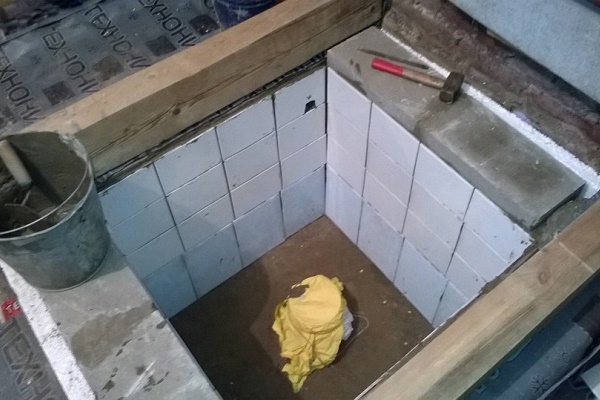
We start laying from the corner, we fill the seams well with the solution. From time to time we control the quality of work with a plumb line and level. When the masonry height reaches the cable entry level and outdoor water supply, between the bricks we insert sleeves under the entrances.

We bring the masonry to the desired height. Let it dry, then plaster it or treat it with a special solution for waterproofing.
We proceed to the arrangement of the bottom of the tank. If it should be airtight, at an altitude of 4-5 cm from the bottom level, we install an arm belt. Then pour concrete. Its height should be about 15 cm. If the bottom should not be airtight, we lay a layer of rubble and tamper it well.
Overlapping a brick caisson can be different. You can lay the finished plate or do it yourself. In the second case, we put segments of channels, beams or boards on the upper walls of the chamber.
We fix the ventilation duct, hatch and sleeve under the sprinkler pipe at the right level. Then we cover the resulting structure with tin or plastic film, if the crate is laid without gaps.
To strengthen the structure at a height of 4-5 cm from its base, we expose a reinforcing mesh. Pour concrete and wait for it to dry. After that, we equip the neck of the camera. Then we fill up the tank to the soil level and mount the hatch.
If there is a desire to reduce the cost of construction, the upper floor can not be filled with concrete. It can be covered with soil, equipping a hill with a height of 0.3-0.4 m.
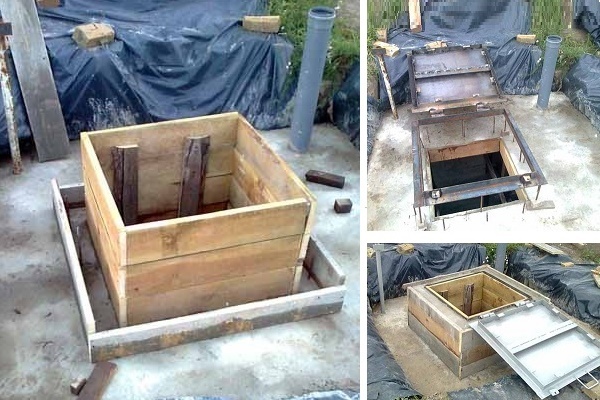
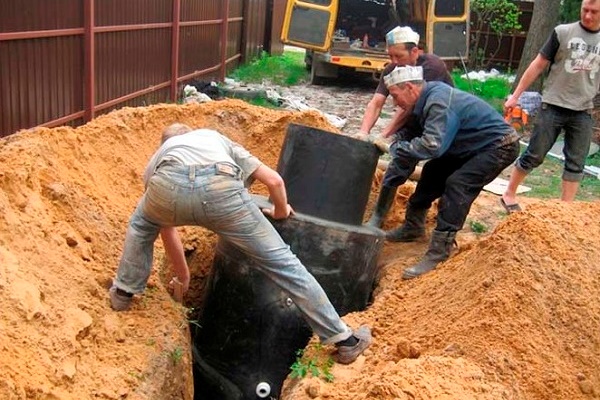
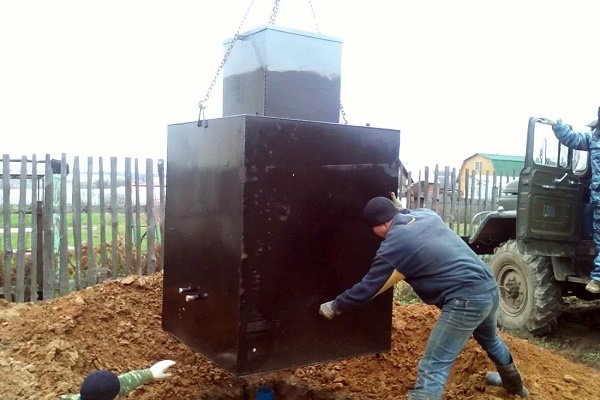
Option # 4 - sealed metal container
The metal caisson can be of any shape, it is most often determined by the available material. For a quadrangular camera, you need 3-5 mm metal and a bar or reinforcement with a cross section of 10 mm.
A round container can be equipped with pieces of industrial pipe with a diameter of 1250 mm for the body and about 600 mm for the neck.
Choosing the shape of the future capacity, we take into account that the smaller the number of welds, the less chance of their destruction and, accordingly, the loss of sealing of the chamber.

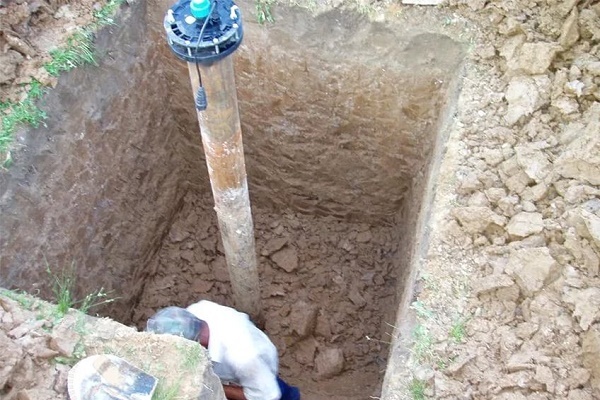
We start by calculating the preparation of the pit. Dig a hole of the right size and level its bottom to level.
We cut the casing pipe at a height of 40-50 cm from the bottom and temporarily cover it with plastic or rags. We clean the prepared metal parts from rust and put them on the plank flooring, which will prevent their possible pollution during operation. We start by making the bottom.
We prepare the part of the desired shape and cut a hole in it into which the sleeve for the casing will be inserted. For its installation we use a bilateral welding seam.
If we make a quadrangular chamber, we cut out the side walls from metal. We mark them and cut out the holes for the cable and pipeline entries. We connect the bottom and side walls.

We put in place the lid of the tank. Do not forget that all welds must be performed only double-sided. This will provide the necessary caisson tightness.
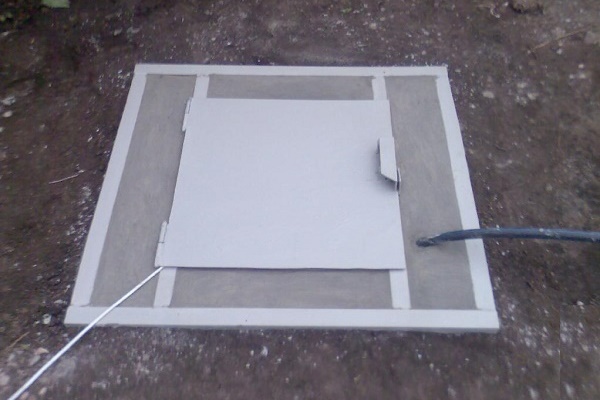
We weld the neck and a pencil case for ventilation. We weld the sleeves under the cable and pipeline to the walls of the chamber. We fix the loop of the bar or reinforcement, which will be needed to fix the slings. Attach the hatch or cover.
We proceed to waterproofing work. All welds, both external and internal, are thoroughly cleaned of slag.
After that, we process them several times with a protective compound. We do the same with the whole structure. As a result, we should get a multi-layer external bitumen waterproofing. Inside we apply a primer, paint and anti-corrosion compound.
If necessary, we insulate the camera. To do this, you can use extruded polystyrene foam or other insulation. It is important that it is not hygroscopic.
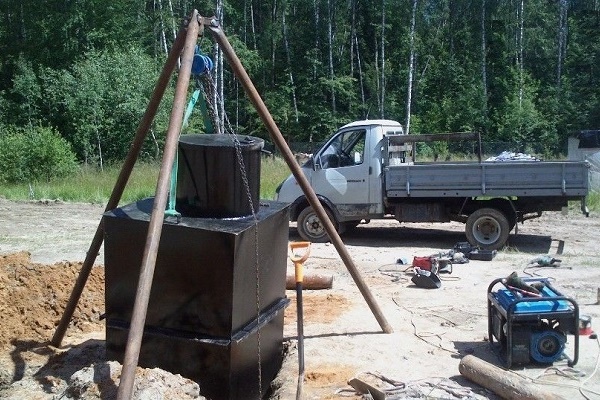
The metal caisson is ready, it can be lowered into the pit. For installation of the structure, a crane equipped with soft slings is used. We install wooden blocks over the foundation pit, on which we place the container.
Then we remove the supports, and the structure is very carefully and slowly lowered down, pushing it onto the casing. The caisson, which has risen to the bottom of the pit, is necessarily leveled.
We put pipes and cable into the sleeves. Checking waterproofing. Re-treat the areas where it was damaged during installation.

We weld the sleeve to the casing or we foam it if the casing is made of plastic. We carry out work on sealing the input sections of the power cable and pipeline. Then you can fill up the caisson.
If you do not want to build an underground chamber in a small summer cottage for equipment, we recommend that you familiarize yourself with the option well arrangement without caisson. In the case of seasonal use of a water source, this is a great option.
Conclusions and useful video on the topic
Video # 1. How to install a metal caisson:
Video # 2. The process of manufacturing a monolithic concrete caisson:
Video # 3. How to equip a brick caisson:
There are many ways to independently make a caisson for a well. Which one to choose depends on the features of the site, the qualifications of the home master and his financial capabilities.
In any case, if all work is carried out correctly and efficiently, the resulting sealed chamber will reliably protect the well head from freezing and the ingress of surface melt and flood waters. This ensures an uninterrupted supply of clean water to the house.
Tell us about your experience in arranging a caisson for a well in a suburban area. Please write in the box below. Here you can comment on the information provided by us and ask questions.
 How to make a drill for a well with your own hands: the best homemade schemes
 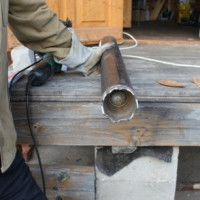 Well bumper: device, options and do-it-yourself manufacturing schemes
 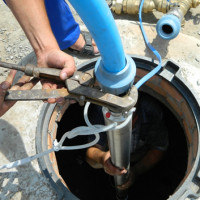 Do-it-yourself water well setup: how to properly equip a water source
 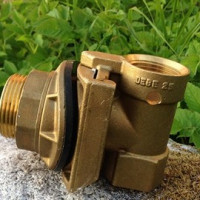 How to install an adapter for a well with your own hands: the best alternative to a caisson
 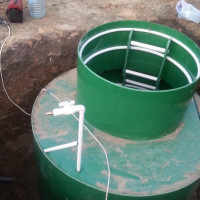 Caisson for a well: what is it, types, purpose, comparative review of structures and installation rules
 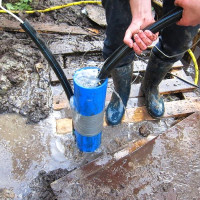 Do-it-yourself well cleaning: a review of common clogging causes and best cleaning methods
  How much does it cost to connect gas to a private house: the price of organizing gas supply
  The best washing machines with dryer: model rating and customer tips
  What is the color temperature of light and the nuances of choosing the temperature of the lamps to suit your needs
  Replacement of a geyser in an apartment: replacement paperwork + basic norms and requirements
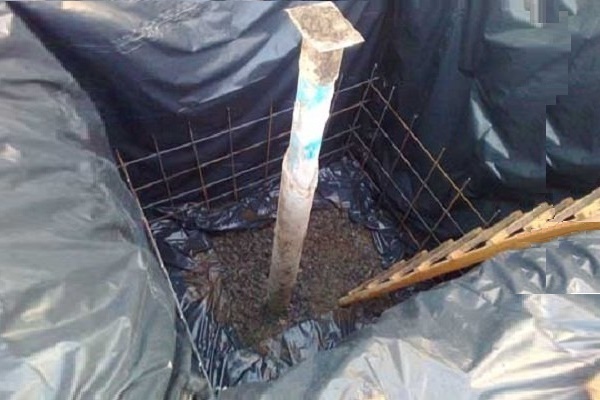
What budget coffer to choose in Siberia with freezing of land by 2.5-3 meters in winter? Brick?
Hello, Vitaliy. Brick is a good solution for the implementation of a budget caisson for a well. Only use red brick, which is not afraid of moisture, unlike white.
In the north of eastern and western Siberia, the depth of soil freezing can actually reach three or more meters, but this will not affect the equipment that will be in the brick caisson.
I note right away that if you have groundwater, you will have to make a foundation of concrete and waterproofing the caisson.
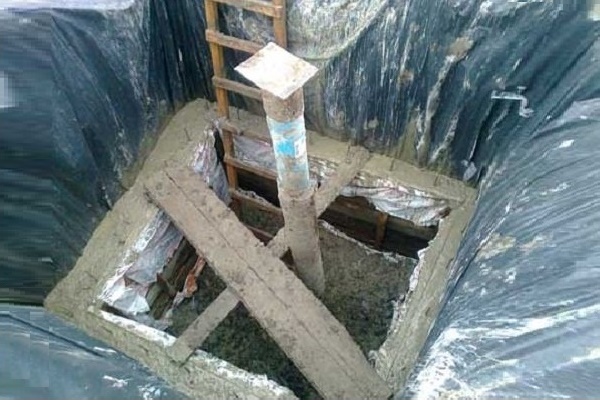
The implementation of a brick caisson is not so complicated, the most difficult thing will be to dig a pit. As an example, I will give a photo of personal implementation. The lower part of the caisson 1.4 × 1.4 m turned out, 2 m high. Next, the upper concrete floor with a hatch was poured, reinforcement with reinforcement 8 mm, cover thickness 15 cm.
There is a metal head on top, as the brick is over. In winter, in a caisson for control, there is a bottle of water, which has never frozen for 2 years.