How to make a fountain pump yourself: a step-by-step workshop

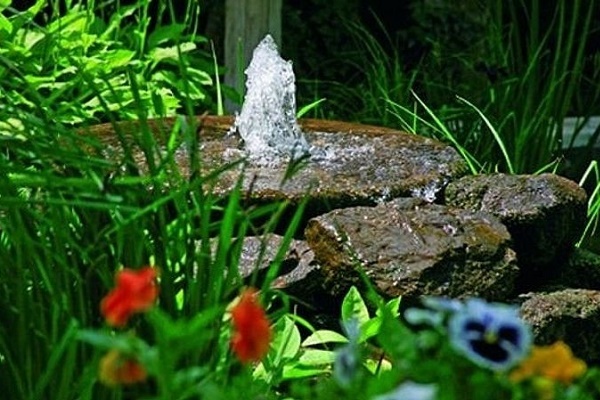
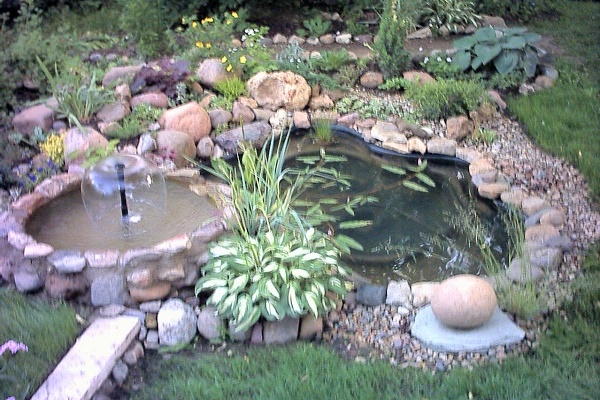
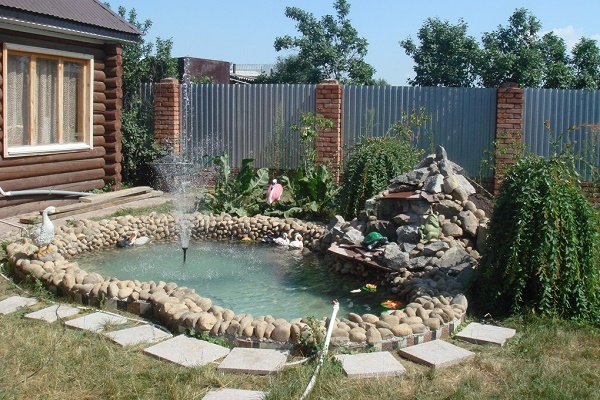
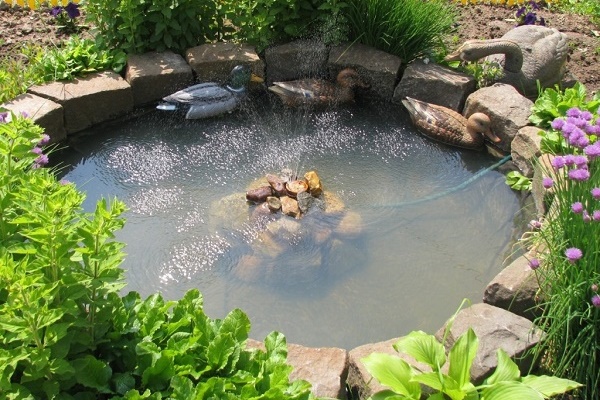
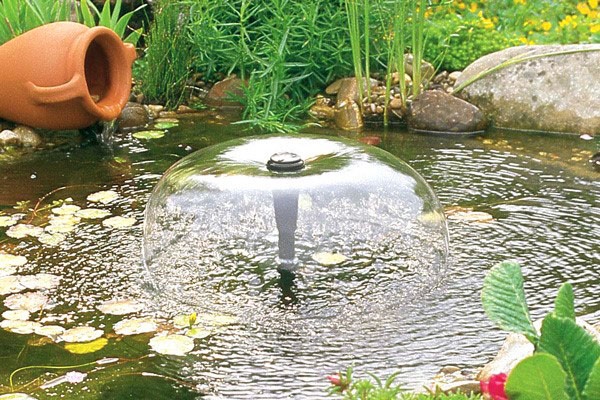
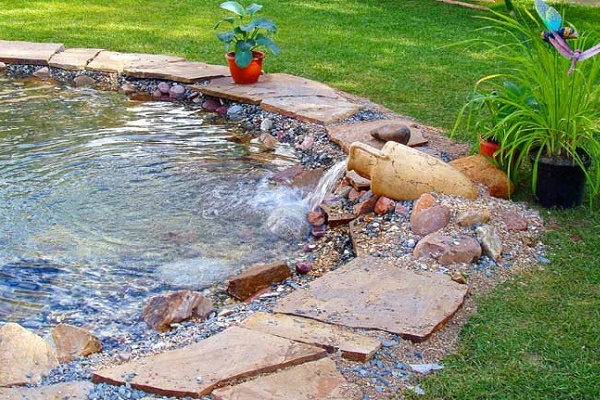
To improve the aesthetic appeal of small decorative ponds, pools and artificial ponds, fountains are used. The main structural element is a water pump, which pumps up pressure, as a result of which a stream of water is supplied to a certain height.
You can buy a ready-made water unit or build a small pump for the fountain yourself, using available materials.
The article describes the principle of the pump, as well as provides detailed instructions for assembling a simple model. If you have at hand all the materials, you can make a pump in a couple of hours.
The content of the article:
Materials for creating a water pump
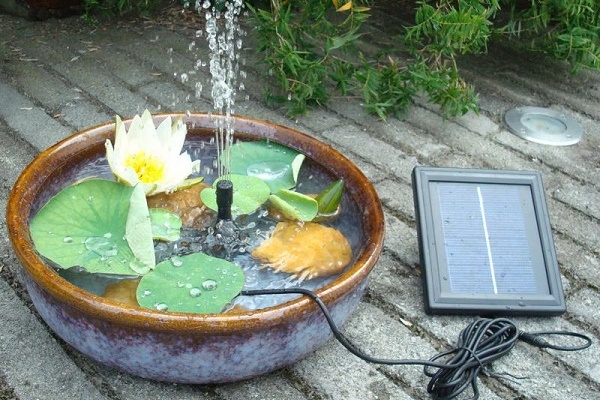
Designing a full-fledged pump for the fountain is quite simple, but it should be remembered that the unit, made independently, has low power, so it’s suitable for decorating small decorative bowls, sometimes - pool arrangements or fountains.
It is impossible to increase the pump power and assemble a system capable of supplying water at atmospheric pressure of 1 bar or higher at home - it is more expedient and cheaper to purchase a finished design.
Before you start assembling a water pump, it is important to familiarize yourself with the principles of its operation.
A typical fountain pump consists of a casing resembling a snail shape. It houses a motor and blades similar to fan blades. Two pipelines are connected to the body - through one, water is drawn, through the other - its supply.
With the help of the motor, the blades rotate, which contribute to the intake of water from the outside, the injection of pressure in the system and the supply of water to the discharge line.

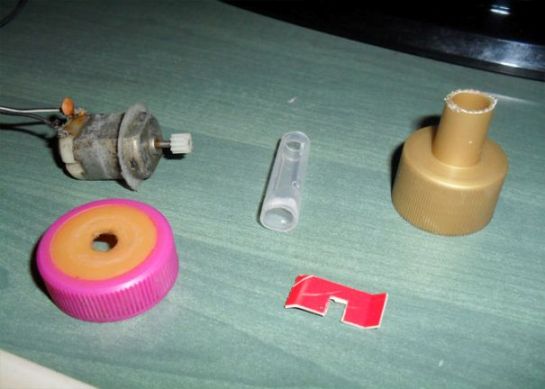
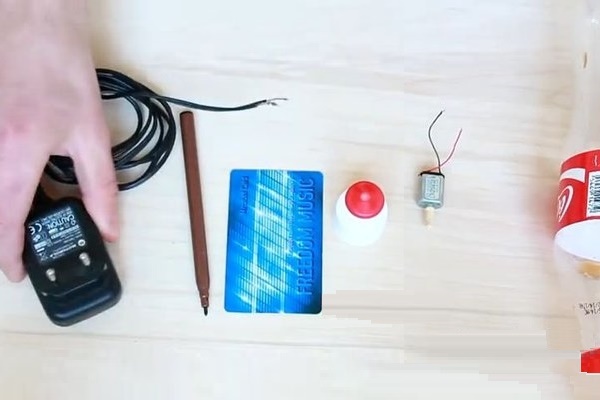
To create a fountain pump, the following elements are required:
- micromotor;
- 3 regular plastic drink caps;
- 2 pens, felt-tip pens or any tubes of different diameters made of durable and water-resistant material;
- a piece of plastic (you can take a mayonnaise lid, an unnecessary plastic card, a disk, etc.);
- worm or gear;
- Power Supply.
The micromotor is the main element of the system. Thanks to it, the fan blades rotate. The device can be taken from a toy car, a DVD player, an old tape recorder, or purchased on the market.
It should be remembered that micromotors, depending on power, have different dimensions and shapes. In this example, a device is borrowed from a toy car.

Depending on the size of the motor, you need to select the dimensions of the case. In our case, the case will be made of three plastic caps. If the motor is larger, you can take a can of shaving foam with a lid.
A casing from under a pen or felt-tip pen will serve as a supply and discharge pipe.
The back wall and the blades for the pump are made of plastic, which will be mounted on a worm or gear. The mini fan will stick to the motor shaft, which during operation will facilitate their rotation.
As tools and excipients you will need:
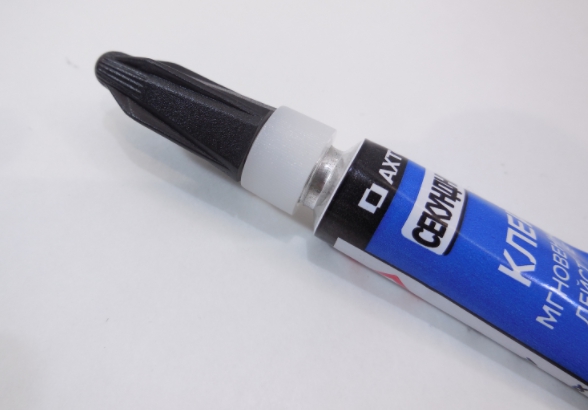
- ordinary quick-action super-adhesive, hot-melt adhesive or waterproof universal adhesive;
- nippers and wire stripper;
- knife, drill or awl;
- a piece of sandpaper;
- soldering iron, file for metal, jigsaw or grinder engraver with special circles for cutting, stripping, drilling, etc.
Any glue can be chosen. Standard Moment glue has a high gluing speed for elements, while water-resistant universal substances require more time to harden.
Sandpaper, tools are necessary for processing edges and surface cleaning, a knife will be required to create holes.
Step-by-step example of assembling a micro pump
To make a small low-power pump, the assembly process of which is given in the example, you need to stock up on a 5-liter plastic bottle, a body from an old felt-tip pen and a motor that can be removed from an old DVD drive.
Preparatory measures have been taken, now you can safely proceed to the assembly of our pumping unit in miniature.
Having collected all the necessary parts, you can begin to assemble the pump.
It will occur in several stages:
- Create a plastic case.
- Making a paddle wheel.
- Creating a discharge area.
- Assembly of all elements.
- Power supply connection.
- Installation.
Let's consider each stage in more detail.
Step # 1 - Designing the Case
First of all, it is necessary to form the body of the structure. To do this, take the plastic cap and, using a knife, an awl, a soldering iron or a drill, make two holes in it.
The first hole is made on the flat part of the cover. To do this, you need to find its center (it is usually indicated by a small bulge), and then use a knife, awl or any other sharp tool to cut a hole.
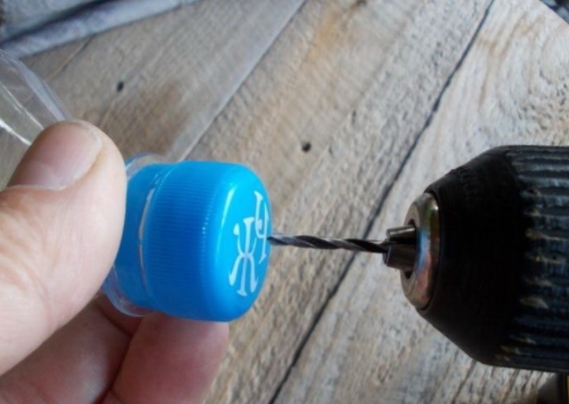
A second hole is made in the side of the cap. Its size should coincide with the diameter of the pen or marker body with a smaller diameter, but not exceed it. In the future, the manufactured case will be called the main one.
A micromotor, discharge tube and impeller are glued to the main body. Pressure build-up will occur in this part of the device.
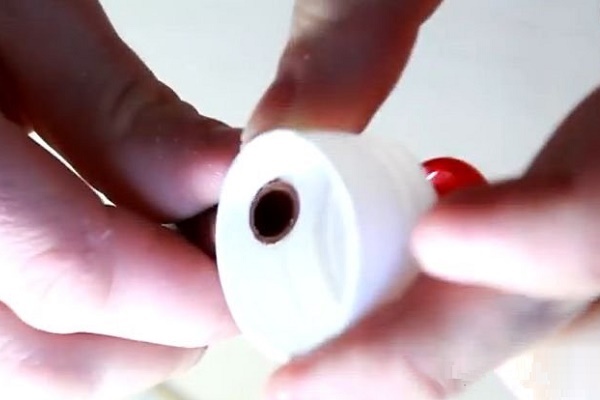
Next, you need to take the second cap and cut its bottom. In the third one you need to drill one small hole - the motor wires will pass through it.
Also at this stage it is necessary to create a back wall that will be mounted on the front of the main body. To do this, use a piece of plastic. You need to put the lid on a sheet of plastic, circle it around the circumference with a pencil.
The resulting contour must be cut, and then drilled a hole in the center with a diameter that corresponds to the diameter of the circumference of the larger tube.
A feed water pipe made of a handle of a larger diameter will be placed in the hole in the back wall. It should have a length of 2-5 cm and slices at an angle of 90 °.
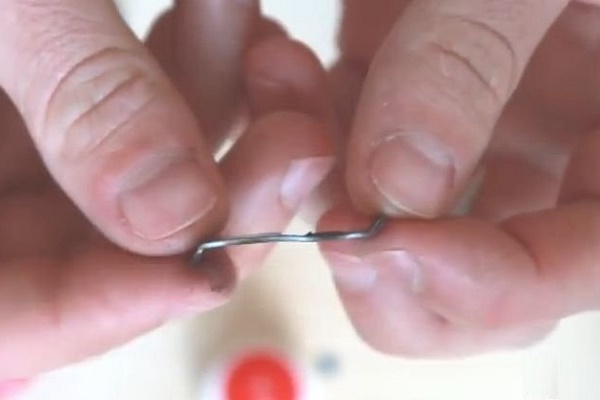
Step # 2 - making a paddle wheel
The blades for the pump can be made of plastic, part of the old disk, card or other dense waterproof materials. In our example, the manufacture of the blades will come from plastic. It is enough to take the sheet that was used to create the back wall.
From it you need to cut a rectangle with dimensions of 1 * 3 cm. From the resulting rectangle, you need to make 2 small blades.
The blades are glued to the gear or worm at an angle of 90 ° or under attack to each other (at an angle of 45 °) on the same line, since such installation increases the pump performance several times. Glue the blades with superglue.
It is necessary to make sure that the blades fit into the lid, and also visually evaluate that during rotation they will not rub against the walls and base of the main body.
Step # 3 - assembly of the discharge area
Take a handle with a smaller diameter and cut off its edges. On the resulting tube, you need to measure 5-8 cm and cut one end at an angle of 45 °.
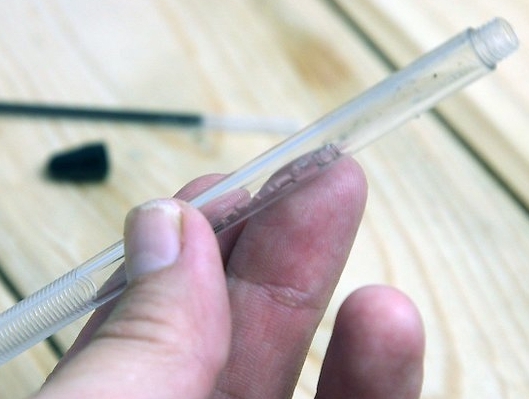
One side of the discharge area must be cut at a right angle, the other at a 45 ° angle. The pipe to the main body must be glued with the side cut at an angle.
After creating the pipeline, it is necessary to clean its inner area from pieces of plastic so that nothing prevents the water from freely leaving.
Step # 4 - gluing all the elements
Before assembling all the elements, some preliminary work is necessary.
Firstly, you need to carefully clean the holes of the main pump casing. To do this, use a layer of emery tissue and nippers. It is important to erase flaws and inscriptions from the lid at the joints. It is necessary to clean until a smooth surface is formed.
This will avoid structural damage, the occurrence of holes through which water will pass.
Using nippers, clean the inner surface of the lid. This is usually necessary in cases where the holes are made with a knife. For stripping, you need to cover the areas of plastic that have formed on the contour of the holes, and with the application of force to eliminate defects.
After the main body is cleaned, you can proceed to gluing.
First, glue the engine to the main body. It is necessary to take the glue, grease the outer surface of the lid with it, and then place the engine in the hole so that the tongue and its convex part fall into the hole. Joints can also be glued with superglue.
The engine and the cap must be pressed firmly for a few seconds to make sure there are no gaps, otherwise water will leak in the future.
Next, the discharge line is glued to the main body. To do this, apply a pipe from the handle to the side opening of the lid with the side cut off at 45 °.
It should be remembered that it is impossible to glue the pipeline at right angles, since pump performance will significantly decrease - the blades will not drive water directly into the discharge area, as a result of which the water will slip, not enter the pipe, but circulate in the body.
To glue the pipe and the body, it is necessary to apply a thin layer of superglue to the surface of the lid in the hole area, and then put the pipe in place.The holes should coincide with each other, parts of the pipe hole should not protrude outward.
Bonding the discharge pipe is a rather complicated process, so it is important to hold the pipe with your hands for 5 minutes, and then also wait 20-30 minutes until it dries completely.
The blade wheel must be mounted on the gear. It is important to check again before bonding that the blades do not touch and rub against the walls of the casing. You also need to consider the direction in which the blades will move - they should drive water into the pipeline, and not push it out.
Depending on the location of the discharge pipe, the movement of the blades can be either clockwise or counterclockwise.
Next, you need to glue the back wall with a pipe made of a plastic tube of a larger diameter. If you install a supply pipe with the same or smaller diameter, the pump productivity will decrease.
It is important that there are no holes at the junction of the pipeline and the back wall, otherwise this will lead to incorrect operation of the pump. If the holes appeared, then they must be covered with glue
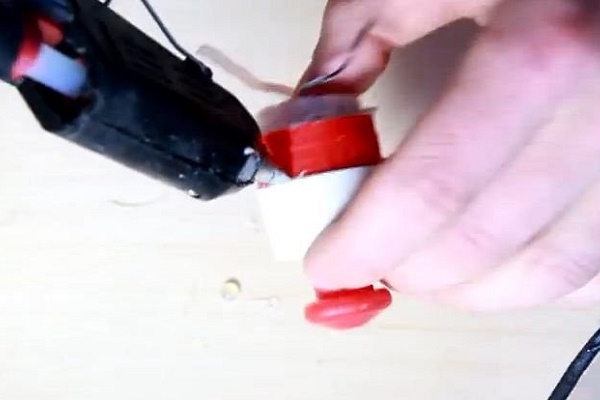
Now you need to glue the design to the base of the cover. To do this, the base of the main body must be cleaned with a thin sandpaper, to remove bumps and roughness.
After you need to shake off the dust along the contour and clean the inner surface of the mechanical elements, then glue the back cover with the body with superglue.
The back wall should be located exactly in the center. It is important that when sticking, smudges do not form in the inner surface. You should also make sure that there are no gaps. If they are, then a layer of glue should be applied to the places of their formation. After that, we wait 30 minutes until the substance finally dries.
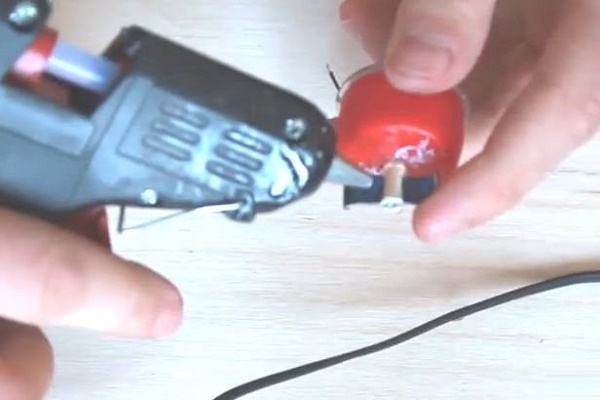
Next, we form a block in which the micromotor will be located. To do this, put the cap without a bottom on the micromotor and glue it with silicone glue so that no cracks form.
The micromotor is sensitive to water ingress, therefore it is important to carefully insulate with a glue a cover which is put on the device
Then, after the glue dries, it is necessary to pass the wires through the third cover with small holes, then glue the body, seal the gaps with glue at the joints and the area where the wires are located. Then you need to wait for the structure to dry.
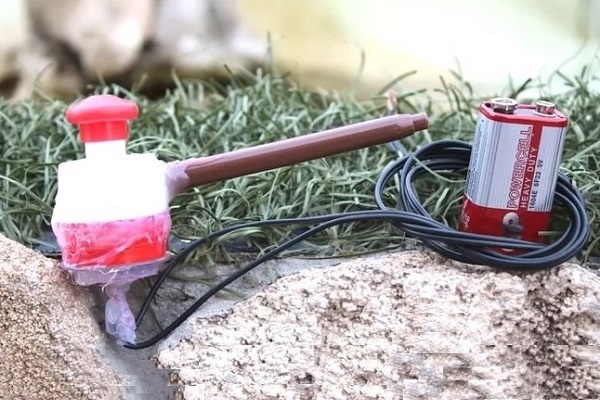
Step # 5 - connecting the power supply
For the motor to work, you must connect a power supply to it. The wires are insulated, so they can be located in water. It is advisable to take the power supply on batteries if the design is located on the street. If it is assumed that the fountain will be at home, then you can use a conventional power supply unit operating from a 220 V network.

The place to connect the power supply and the micromotor wiring should be located outside the water. You can also provide for the connection of the housing, which will give the aesthetic appeal of the design. The wiring itself may partially be in the water.
Features of the operation of a water pump
The pump, made at home, is suitable exclusively for artificial small fountains located in separate bowls. They are not installed in open ponds and ponds, since the mechanism is sensitive to dirty water and quickly becomes clogged.
The blades are small in size, so if small pebbles hit, they can break, fail. It is important from time to time to change the water in the bowl, to clean the device.
Also, when immersing a homemade device, you need to equip the place on which it will stand.It is enough to put a small brick at the bottom of the bowl, and the pump can be held with a few pebbles.
When installing, it is important to consider that electrical cable also a sensitive element. Therefore, it can be further protected.
In winter, the pump should be removed from the water and stored indoors.
To equip large street fountains and waterfalls, you need to purchase a powerful pump. Tips for selecting and installing such units are given in this article.
Conclusions and useful video on the topic
The video contains information on how to create a pump based on a micromotor with large dimensions:
Another option for manufacturing a low-power fountain pump:
There is nothing complicated in making a home-made fountain pump. The materials used for assembly are in every home, and the technology itself is simple and straightforward.
If you have experience in making a fountain pump, please share information with our readers. Leave comments and add photos of your homemade products in the form below.
 How to make a pool in the country with your own hands: the best options and master classes
  How to make a pool with your own hands: step-by-step instructions for the construction
  Do-it-yourself pool waterproofing: technology overview + step-by-step example of work
  How to choose a pump for the pool: a comparative overview of different types of units
  Pool heat pump: selection criteria and installation rules
  Pumps for fountains and waterfalls: how to choose and install yourself
  How much does it cost to connect gas to a private house: the price of organizing gas supply
  The best washing machines with dryer: model rating and customer tips
  What is the color temperature of light and the nuances of choosing the temperature of the lamps to suit your needs
  Replacement of a geyser in an apartment: replacement paperwork + basic norms and requirements
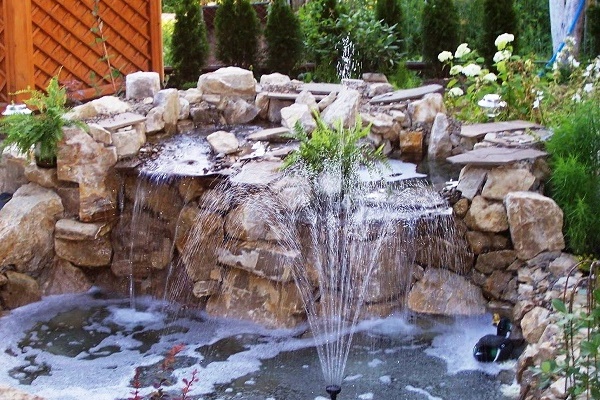
He himself made small pumps for miniature fountains in the house. I had to look for the right material for a long time to get started. For a long time I selected suitable materials both for assembling pumps and for making fountains. It was difficult, but the result was worth it. It is very beautiful and pleasant when a couple of fountains murmur in the house. And now I’m thinking about how to make the backlight.
At the cottage there is a small fountain. I'm just delighted with him - very beautiful, looks impressive against the background of the green area. Just the soul rejoices when you are next to it. I persuaded my husband to make another one, bigger than the previous one. But he says that now it is very difficult to find all the details in order to assemble the pump and the fountain itself. I hope he comes up with something. After all, I was already inspired by your beautiful photos.
We live in the private sector. We have a fairly large yard, and we are trying to decorate and ennoble it. I really wanted to have my own fountain in the yard: it is beautiful and unusual. The husband, of course, at first decided that it was impossible - he couldn’t make it like that. But then he began to study, read and question everything from knowledgeable people. And after some efforts and difficulties he succeeded. Now we have such beauty near the house, guests always admire it.
Too many troubles, if you do it yourself. Despite the fact that they are inexpensive, on Aliexpress from 250 rubles. In my opinion, it’s easier to buy.