How to make a pool with your own hands: step-by-step instructions for the construction

Sitting near a private house or summer house in the summer heat, you probably imagined how cool it would be to plunge into the cool water of your own pool. Probably, you immediately drove away the thought of its device, but it persistently returned and literally pursued on hot days. Maybe you should not give up such an excellent idea?
After all, you can build a simple pool with your own hands, investing a minimum of money in the construction. And in this we are glad to provide you effective assistance by providing full information support. Here you will learn about the varieties of artificial ponds and the features of choosing a place for the location of the bowl.
We have collected for you popular design options and technologies for their construction. A detailed description is supplemented by explanatory diagrams, step-by-step photo instructions and videos.
The content of the article:
Planning and design selection
You should start, of course, with the project. First you need to assess the condition of the site, determine the place where the pool will be located, choose the dimensions of the tank, the configuration of the bowl, etc.
An important point is the level of occurrence of the first groundwater horizon on the site. If this indicator is less than one meter, i.e. groundwater runs high, it is not recommended to build a stationary pool in the pit.
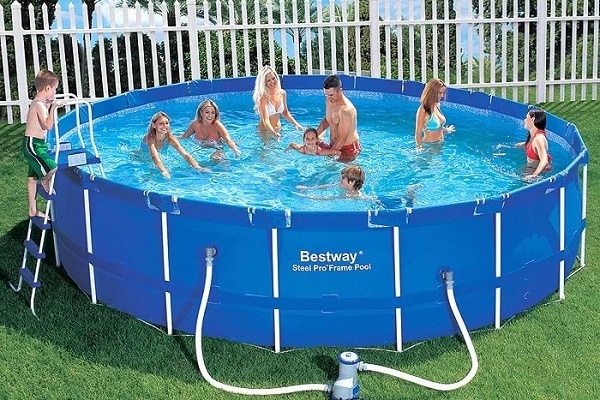
Alternatively, consider installing a portable frame or inflatable model.
Choosing a place for own pool facilities, the following recommendations of experts should be considered:
- The pool should be located at a sufficient distance from the apartment building and other buildings, since the close proximity of these structures can destructively affect the integrity of the foundation of the building.
- It is undesirable to place a pool in the immediate vicinity of trees or plant them later, so that the root system, attracted by a large amount of moisture, does not grow and does not destroy the frame of the structure.
- The presence of a large number of trees near the pool also increases the intensity of its pollution by extraneous debris and stimulates the growth of algae.
- Clay soils are best suited for the construction of the pool, which serve as an additional barrier to ground moisture, if there is a choice, such a site should be reserved for the pool.
- Digging a large pit manually is an extremely laborious task, it is better to choose a place where construction equipment can be brought to: excavator, concrete mixer, possibly a crane, etc.
When the place is chosen, you need to take a sheet of paper and draw a future structure on it. You should choose the configuration of the bowl and its depth, as well as indicate the location of all communications: the place of water supply, the ladder for the descent, the installation location of the filter, overflow, backlight, external lighting, etc.

In addition to the main drainage area, it is recommended that an emergency water discharge system be provided. Electric wires must be laid in the corrugation.
At this stage, it is necessary to take into account the preferred direction of the wind in the area. Garbage that has fallen on the surface of the water will be blown away by the wind to a specific side of the pool.

In construction stores you can find sets of equipment for pools, including everything you need for installation.
Such a set may include:
- waterproofing materials;
- materials for the erection of the walls of the pool;
- fittings;
- flanges and nozzles;
- filter, pump, skimmer;
- stairs;
- PVC film for decoration, etc.
The basic set can be supplemented with other elements, depending on the features of the design of the future pool.

When choosing the dimensions of the structure, it should be remembered that for one adult, a depth of 1.5 m is considered suitable for swimming, and the recommended length of the pool is about 5 m. If you plan to set a diving board or tower, you should build a pool with a depth of 2.5 m or more.
The deeper the pool, the larger the volume of its bowl, the thicker the walls of the pool should be made, respectively, the more materials will be needed to perform the work.
Separately, it is worth discussing the configuration of the future pool. The following principle should be remembered here: the more complex the outline of the bowl, the more effort will be required to implement the project and the subsequent maintenance of the pool.
The easiest way to build a pool with rectangular, round or oval outlines of the bowl. If all these points have been taken into account in advance and the project has been drawn up correctly, much less problems will arise during construction.
For example, if there is no clear design, after pouring the bowl, concrete has to be additionally drilled to make holes for communications.

Installation of a concrete pool
Since working with concrete mix is familiar to most builders, a pool cast from this material is considered the most affordable option for self-production. But you cannot call it simple and easy.
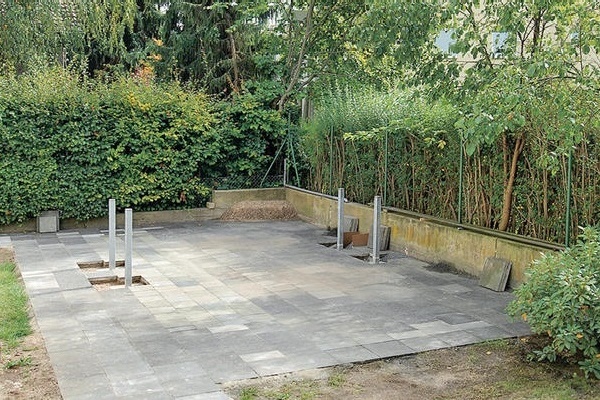
Excavation pit and sand and gravel pillow
As mentioned earlier, it is best to use an excavator to dig a pit. If this is not possible, for example, there are no access roads for such bulky special equipment, you can perform these works manually, although this will require significantly more time.

So that the walls of the pit do not crumble, in the process of excavation they are given a slight bias. In the center of the bottom of the bowl make an additional recess for the device of a separate drainage well. The bottom of the pit should also have a slight slope (5-7%), directed to the place of water flow.
Backfill begins with a drainage well. It is simply filled with crushed stone and rammed flush with the surface of the bottom of the pit. After that, the bottom is covered with a layer of sand and gravel. At the same stage, one should consider the features of the installation of drain structures, etc.
First, a layer of sand with a thickness of about 20-30 cm is laid at the bottom, which is carefully and uniformly compacted. Then put a 10-centimeter pillow of gravel on top, which should also be tamped.

Concreting the bottom of the pool
After installing the communications, you can begin to fill the bottom with concrete.
The mixture can be prepared independently according to the following recipe:
- 625 kg of sand;
- 325 kg of cement;
- 1250 kg of crushed stone;
- 170 liters of water.
Since a lot of concrete is needed, it makes sense to buy, rent or even make a concrete mixer with your own hands. To calculate the required amount of the mixture and its components, you can use the online calculator. Such services are on many sites of suppliers of cement and building materials.
It also makes sense to consider the possibility of acquiring a ready-mixed concrete mix for industrial production, especially if special equipment can be adjusted directly to the construction site.In the recommendations on how to make a pool of concrete with your own hands, there are two options for concreting the bottom of the pit.
In the first case, a layer of concrete screed 5 cm thick is first poured. Then, a reinforcement layer is mounted on top, which is poured with another layer of screed.
Some masters recommend reducing time and effort using the second fill option. In this case, first install the reinforcement, which is installed at some distance from the sand and gravel cushion using supports (pieces of brick will do).

Then concrete mortar is poured onto the bottom so that it covers the bottom of the pit and all the reinforcement. For the preparation of concrete mortar, it is recommended to use cement grade M 400 or higher. Reinforcing mesh can be made of metal wire 6-8 mm.
The recommended cell size is 150-200 mm. The rods can be welded, but it will be easier to simply fix their position with a thin wire. Now you need to wait for the concrete screed to dry. From time to time, the surface of the concrete is wetted with water to achieve uniform drying.
Formwork and wall filling
Now you need to make the formwork to make the walls of the pool bowl of concrete. for this you need a 30 mm board. Immediately make sure that mounting holes are provided in which the pool equipment will be installed.
To improve the adhesion of the fresh mortar to the already laid concrete base, the base must be moistened before starting work. For the same purpose, aluminum powder is added to the solution for the first layer of wall filling.

It is not necessary to use new boards for formwork, even old used structures are suitable, for example, with traces of old paint, etc. The main thing is that they support the weight of concrete. Moisture-resistant plywood is also suitable for these purposes. It is bent, so it is more convenient than a board when creating a formwork of a non-standard configuration.
The formwork should be further strengthened with stiffeners. They are made of timber 50X50 mm. The ribs are set approximately 500 mm apart. If the stationary staircase is to be made of concrete, then the crate for it must be done separately.
Reinforcement is also done in advance, which is needed to give additional strength to the concrete walls of the pool. Metal rods are installed immediately after the first layer has been poured, until the concrete has time to harden.
After this, concrete is poured in layers, each thickness is about 150 mm. After about four days, the concrete will become hard enough so that the formwork can be removed.
Waterproofing and finishing
After the concrete has completely dried, work can continue. Perform first waterproofing works. Some masters consider it necessary to isolate only the so-called cold seams, others advise laying a layer of waterproofing over the entire surface of the pool bowl.
Roofing material is quite suitable for the role of waterproofing, the sheets of which are laid with an overlap of about 200 mm. You can also use liquid rubber, bitumen, a PVC membrane or modern building mixtures with hydrophobic properties. It is important to consider the costs, since the area of the pool bowl is usually large, and such building mixtures are quite expensive.

To improve the quality of waterproofing, you must first align the walls by grinding. If liquid waterproofing is used, which is sprayed onto the walls, two layers must be applied.In this case, it is recommended to lay a reinforcing mesh between the first and second layer.
After the waterproofing has dried, it is necessary to check its quality. To do this, the pool is filled with water and left for 10-12 days. Measure the water level at the beginning and end of this period. A slight difference between these indicators is quite expected, since water evaporates from the surface.
But if the water decreases too fast, it means that the waterproofing is not done correctly, the work should be repeated. After that, the surface of the pool can be plastered with a suitable composition to prepare the base for further finishing. On the top of the pool make a decorative border. It can be cast from concrete or laid out of brick.
It remains to install the remaining equipment, and then lining the pool walls with decorative material. Most often, ceramic tiles are used for this. Due to the pressure of the water layer, the walls of the bowl may be slightly deformed. This does not reflect well on the state of the tile: it cracks or crumbles.
To prevent such an unpleasant phenomenon, you need to make a wide seam between the tiles, and use a composition with increased elasticity for grouting. It is quite difficult to lay tiles on uneven surfaces. It is better for owners of pools with complex configurations not to use tiles, but mosaics.
At the end of the finishing work, you need to wait a little more time for the glue to dry well. After that, you can fill the pool with water to check the quality of its manufacture and the operation of the equipment.

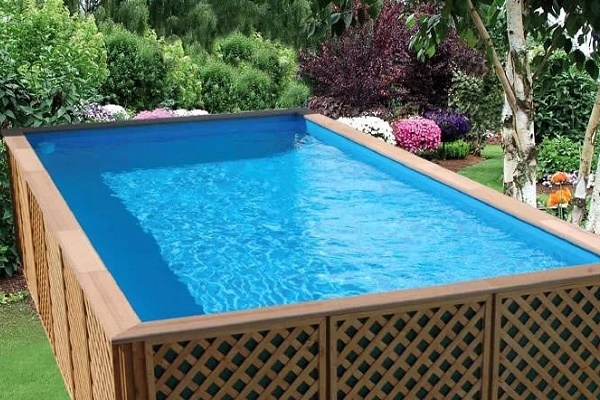
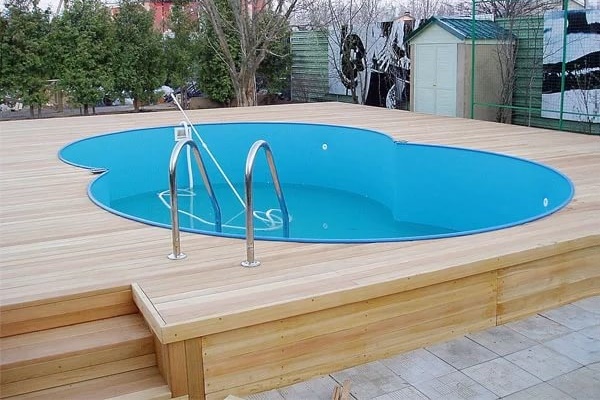
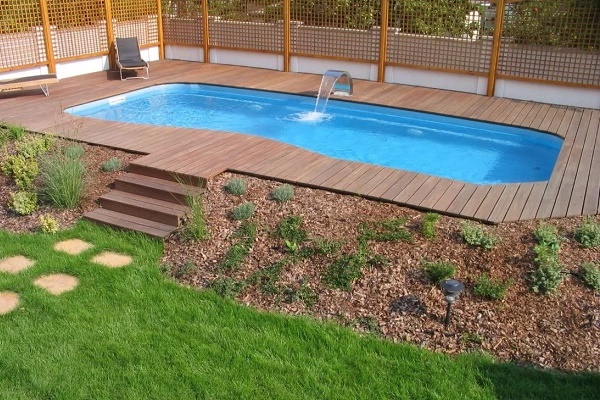
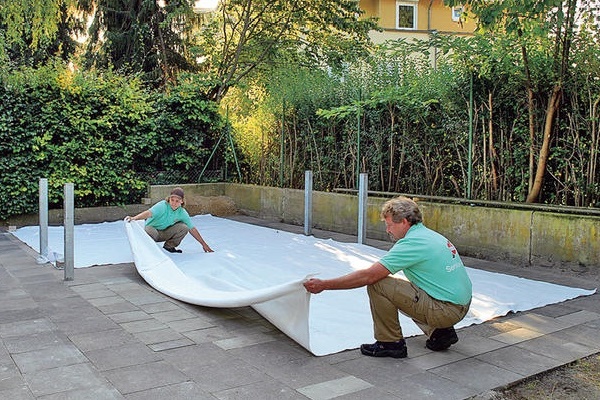
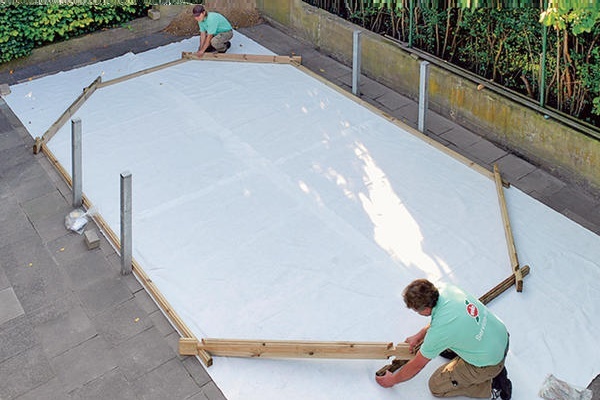
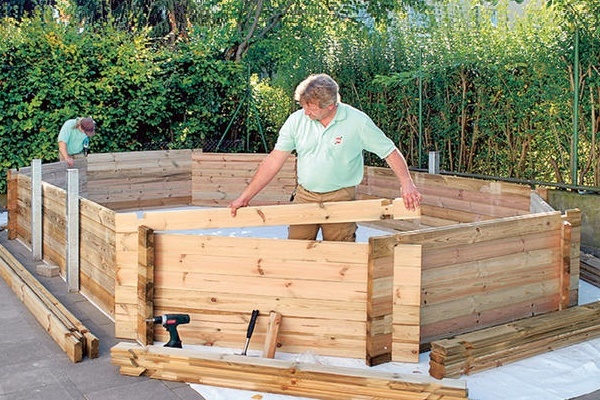
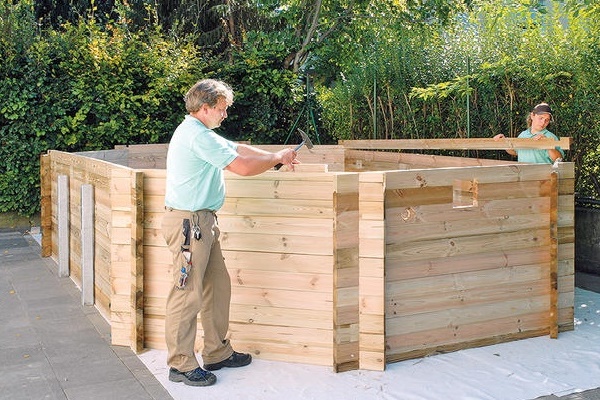
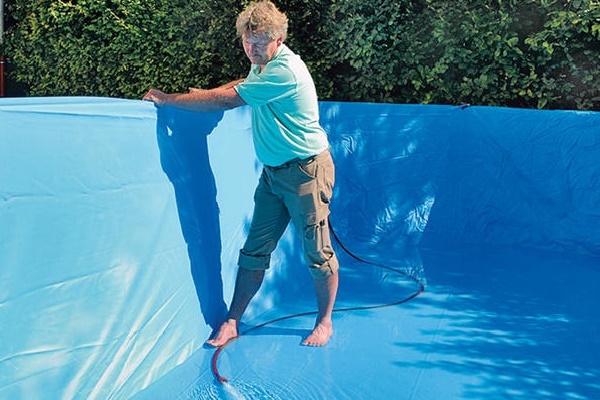
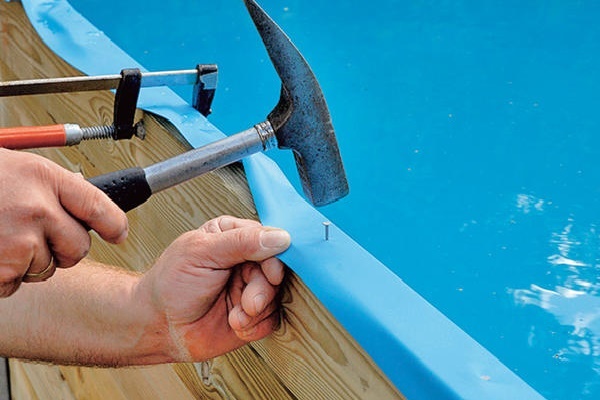
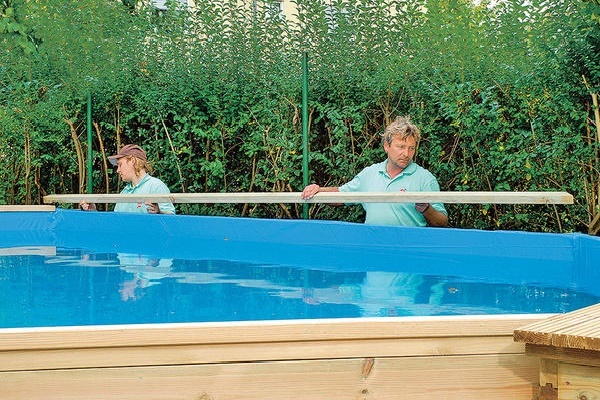
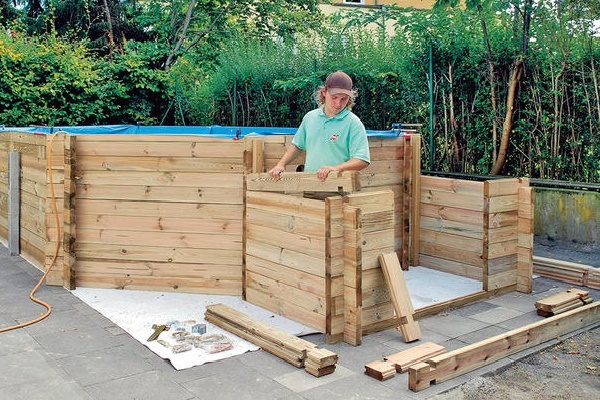
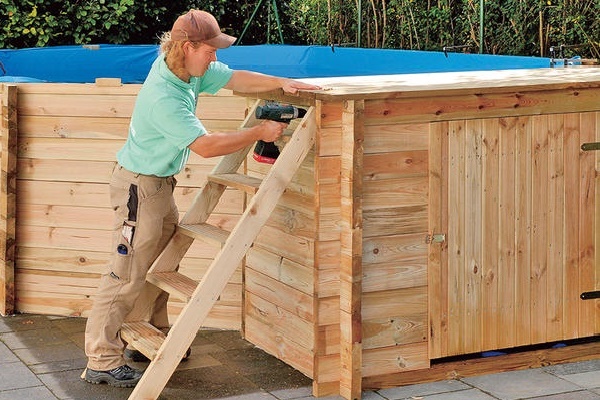
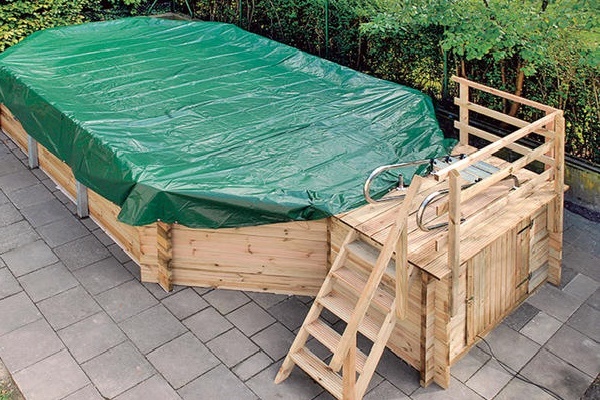
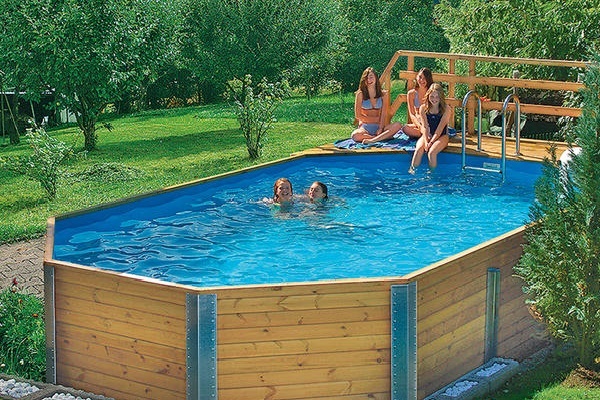
The construction of the pool with a bowl on the surface
The option of organizing a pool at a summer cottage, which is quite acceptable at the price and cost of construction, is to erect a frame from a board with a waterproofing sheath inside.
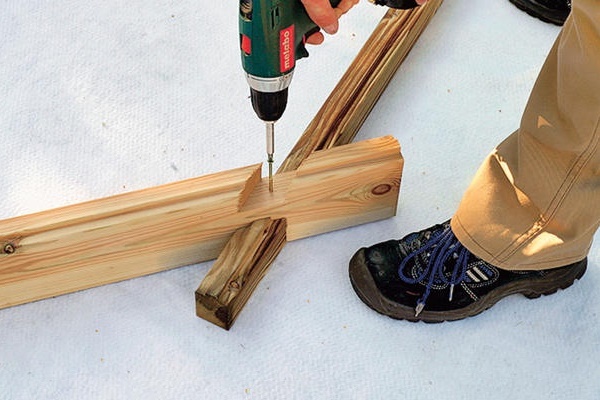
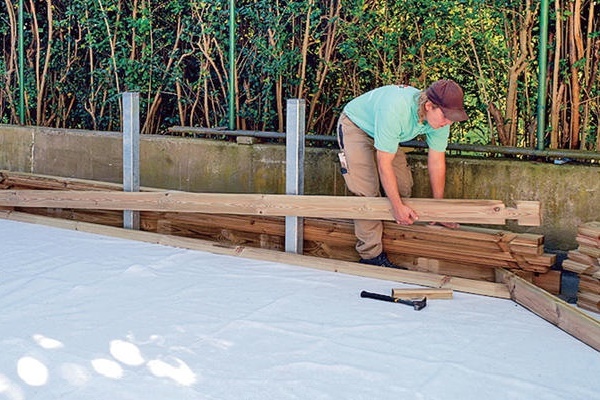
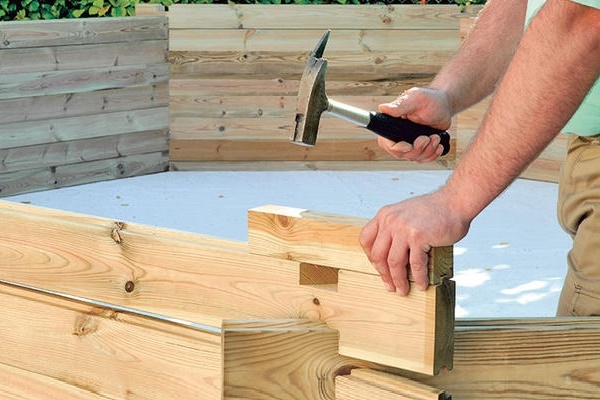
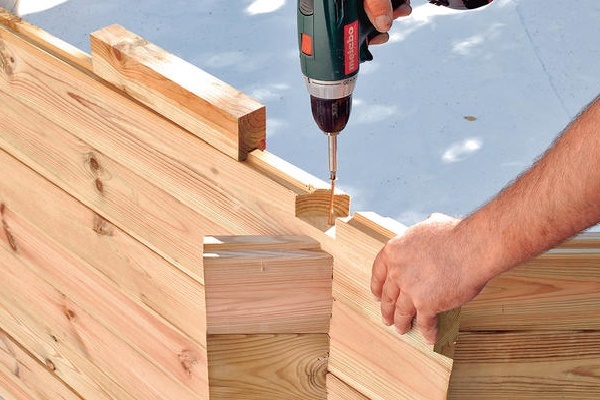
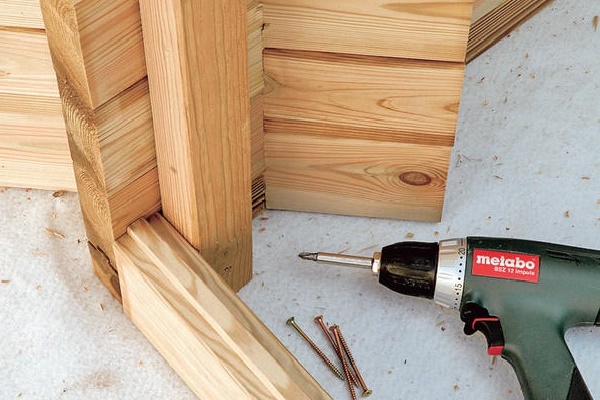
Stage # 1 - base and frame
To install a structure located completely on the day surface, you need to build a rigid, even base, able to withstand the weight of the water and bathing people collected in the bowl, and build a frame:
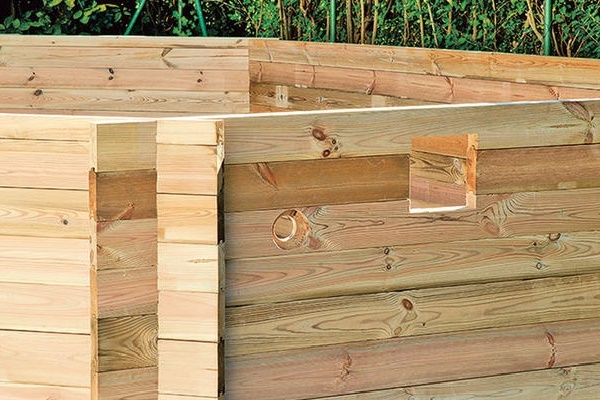
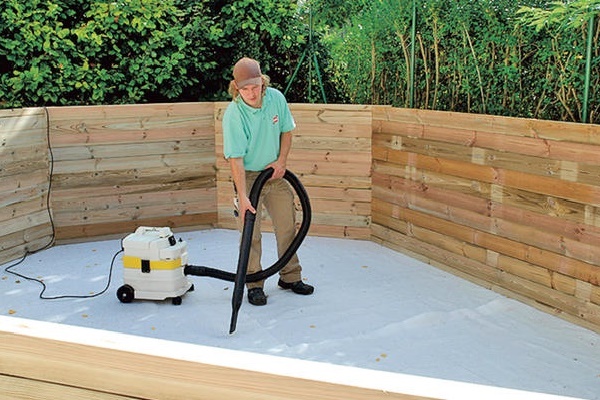
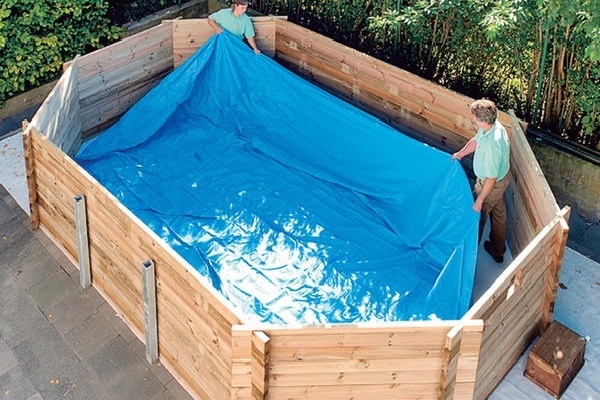
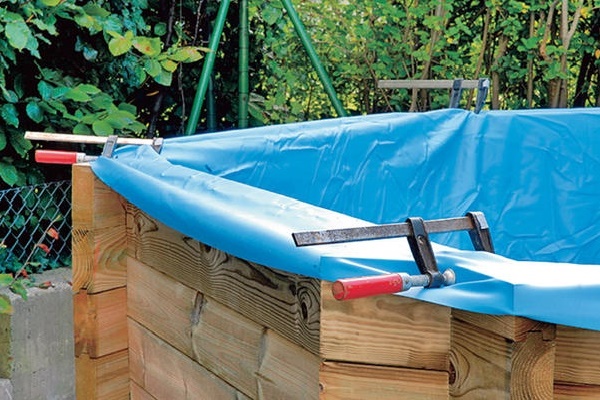
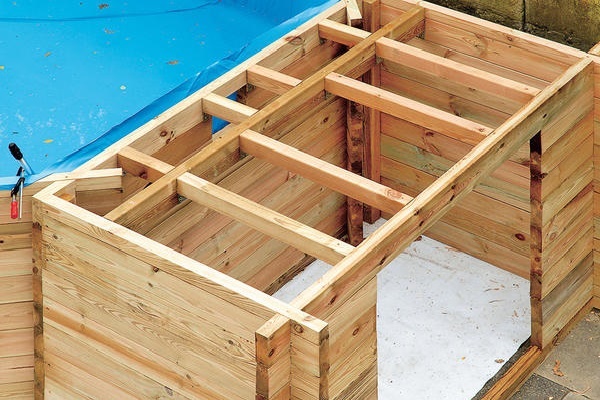
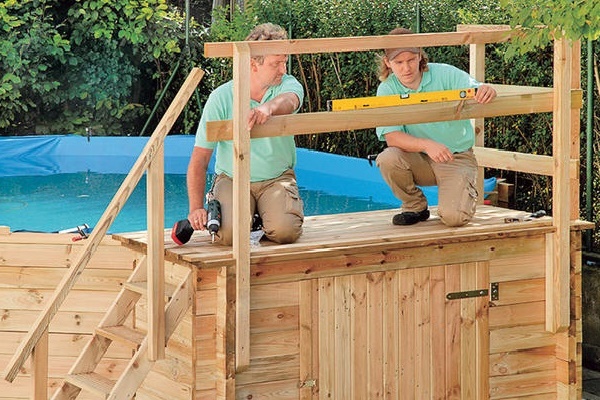
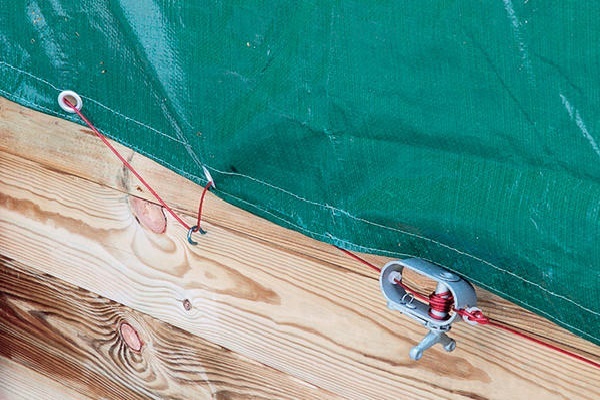
Stage # 2 - frame waterproofing
After the construction of the frame, it should be equipped for connecting communications, pumping and control equipment, prepared for laying the internal waterproofing coating and for installing additional devices.
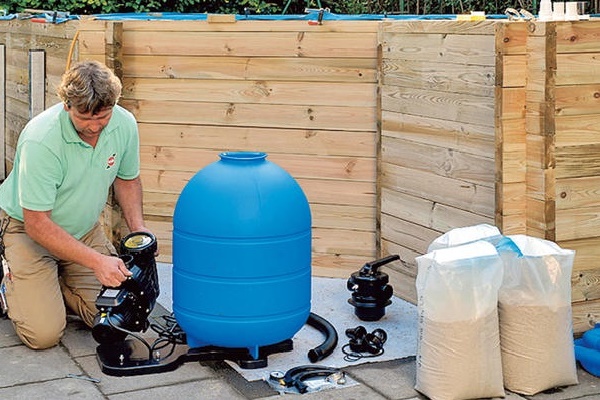
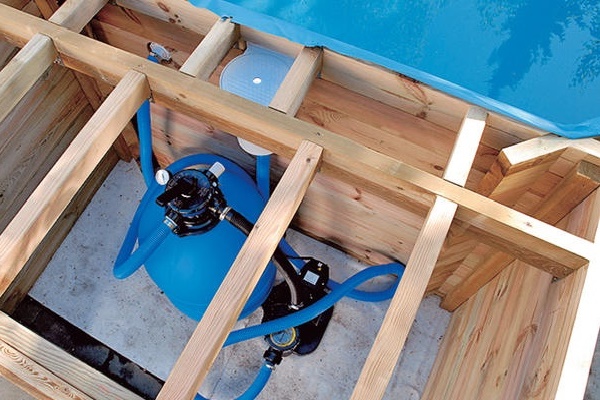
Stage # 3 - connecting communications
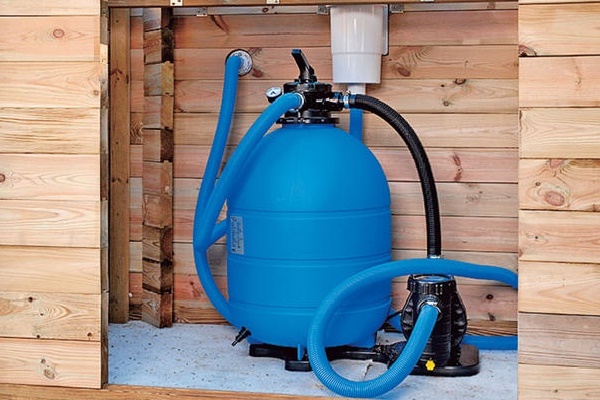
A swimming pool is a hydraulic engineering structure, for the normal operation of which and to provide bathing conditions, a number of technical systems are required: a pump, a group of filters, etc.
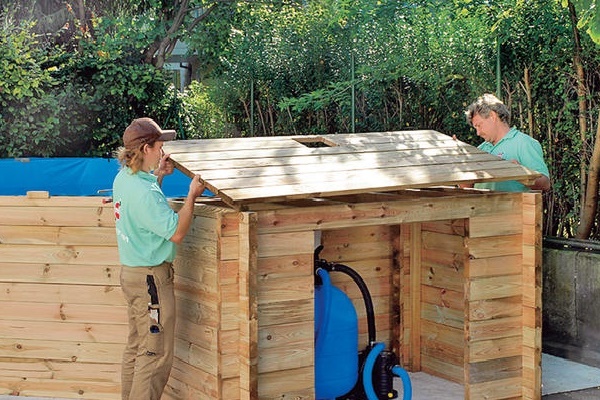
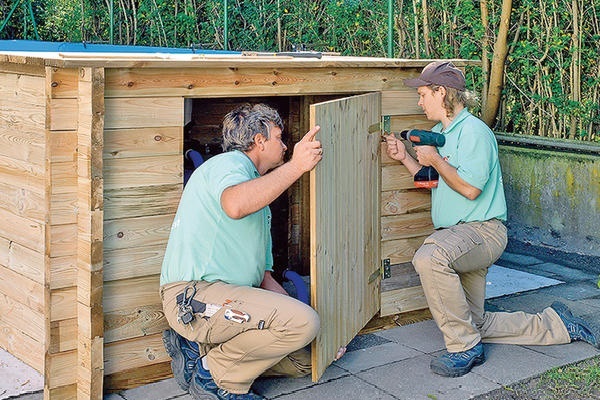
The technique requires weather protection, which will be performed by boxing, confined to the narrow wall of the bowl.
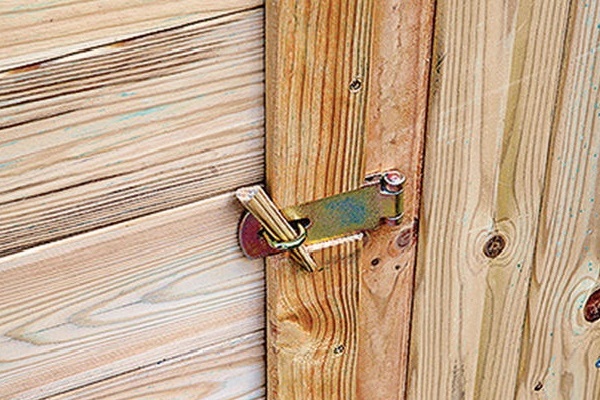
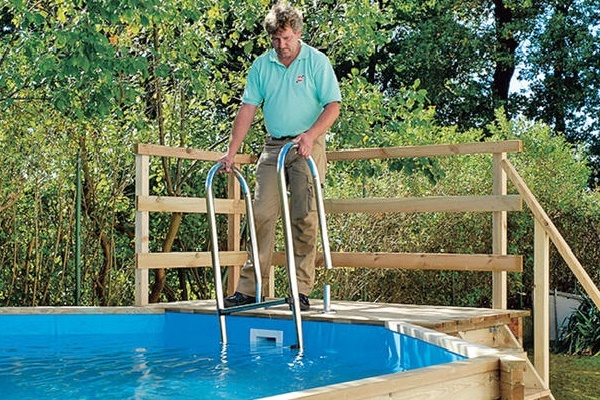
Stage # 4 - arrangement of important details
At the end, the pool built on the summer cottage is equipped for ease of operation and maintenance.
Alternative bowl erection options
When figuring out how to build a concrete pool, do not forget about alternative options for erecting a bowl.
For its construction, you can use:
- concrete blocks;
- polystyrene blocks;
- steel sheet;
- finished construction made of fiberglass or plastic.
When using concrete blocks, the bottom of the pool is first poured, but the walls of the bowl are laid out from these same blocks. Every third row of masonry should be reinforced to give the structure additional strength. Of the blocks, you can make a stationary staircase, instead of a stepladder, which is not so convenient.

Further, the bowl is processed in the same way as the monolithic design: waterproofing and finishing work are being carried out. As a decorative coating, you can use a special PVC film.
It looks very attractive, it is much cheaper than ceramic tile, and laying it is much easier. But the life of this material is only 5-7 years, then the finish will have to be updated.

Large-format polystyrene blocks are also laid on a concrete base. They are connected using the design of the grooves and ridges.
The material is very convenient to use because it weighs a little. If necessary, the blocks are cut with a conventional hacksaw.

After the masonry is finished, install the pool equipment, as well as the fittings. It is placed inside the cavities in the blocks.
The space between the communication pipes and polystyrene foam is blown with foam. After that, liquid concrete is pumped into the cavity with the reinforcement. When the structure has dried, you can begin to finish the finished bowl.
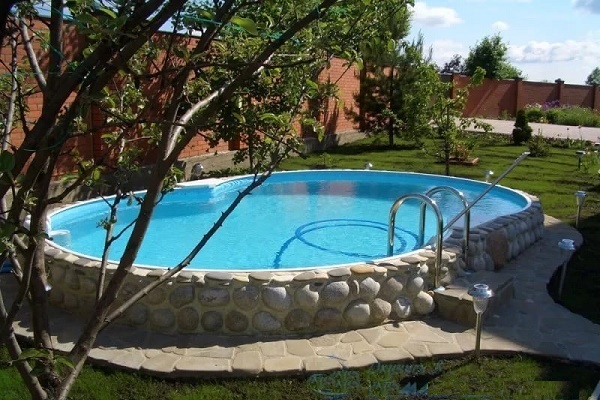
A steel sheet pool can be made both on a concrete base and on carefully compacted soil, although the latter option is not as reliable as a screed. Since the steel sheet is supplied in a roll, it is most convenient to make a bowl out of it in the form of a circle, oval or “figure eight”.

The edges of the sheet are connected with a special profile, which eliminates welding work. After installing the bowl, it is covered with PVC film and filled with water so that the finishing material is pressed tightly against the walls of the bowl. To fix the film on top of the side using a mounting profile. After that, the technical equipment of the pool is installed.
A finished bowl made of fiberglass, plastic or modern composite materials is an expensive pleasure, even if you choose a standard design, rather than custom-made.
For delivery and installation of the bowl will have to use a crane and other special equipment. First dig a pit of a suitable configuration. Then its bottom is leveled, covered with a layer of rubble or gravel and rammed.

After that, you can lower the bowl to the bottom of the pit. The space between the walls of the pit and the bowl is covered with soil and rammed. Such structures usually do not need additional waterproofing and finishing. It remains to install equipment and start operating the pool.
The weight of such pools is usually relatively low, so caution should be exercised for owners of sites with high levels of freezing. In winter, frozen groundwater can simply push the bowl to the surface.
Useful on the topic
Here, the experience of pouring the bowl of a small rectangular pool of concrete was clearly demonstrated:
This video details the process of finishing the pool with PVC film:
Practical experience in the operation of the pool and an overview of possible errors, as well as ways to resolve them can be seen in the following video:
Arranging your own pool on the site can be performed even by a novice master. To do this, you need to properly design the structure, and then perform all the necessary work, strictly observing the technology. With proper care, a home-made pool will last for many years.
Want to get your own pool, but haven’t decided which one is better? Maybe there is already experience in the construction or is there something to recommend to us and visitors to the site? Please write comments in the block below, express an opinion, ask questions, post a photo on the topic of the article.
 How to make a pool in the country with your own hands: the best options and master classes
  How to make a fountain pump yourself: a step-by-step workshop
 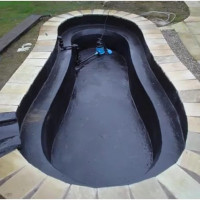 Do-it-yourself pool waterproofing: technology overview + step-by-step example of work
  Coagulants for water purification in the pool: how to choose + application rules
  Pool heat pump: selection criteria and installation rules
  Materials for waterproofing pools: a comparative review
  How much does it cost to connect gas to a private house: the price of organizing gas supply
  The best washing machines with dryer: model rating and customer tips
  What is the color temperature of light and the nuances of choosing the temperature of the lamps to suit your needs
  Replacement of a geyser in an apartment: replacement paperwork + basic norms and requirements
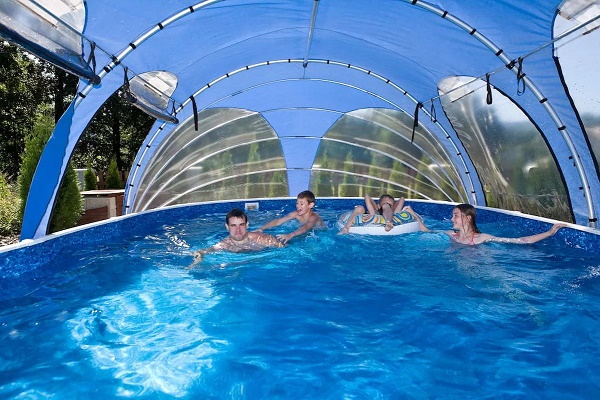
Once I came up with the idea of making a pond for watering plants and just to make it interesting to design the landscape. Dug without problems, he served me for 4 years, and then tired. There was an idea to remake it into a summer pool. Drained, poured concrete pit and waterproofed, then tiled and installed cleaning equipment. If you want and have the proper skills to make a pool in the country will not be difficult.
We ourselves rebuilt the house, I hope the pool will be designed and built no harder. The most difficult thing (for us) is to choose a place. I read something from you about the need to take into account soil features, remoteness from the foundation, etc., and the place we chose to install the pool is not at all suitable for this. You will have to clean another area under it or even put a prefabricated pool with a good cleaning system. I think it will be much easier and more convenient to care for.First of all, I want just clean and warm water.
But there is a question: can there be regions where it is impossible to build pools outdoors? What temperature (in winter) should be in order not to damage it? Do I need to dismantle the equipment for the winter?
Ideally, it is better to put the pool in a greenhouse, the effect is awesome - warm water for six months)))
Well, some really make a pool in a greenhouse! On the one hand, the idea is great. But on the other ... at +35 there will be a risk of being welded alive in such a pool. And as I understand it, if in addition to your hands you do not have an excavator and a team of workers, then you can not meddle in this adventure.
Spring began very actively with the abnormal heat, I know that for many it’s important to equip a mini-pool for children. Many people buy inflatable models, but they, at a cost of 4-5 thousand rubles, are short-lived. At our place, we equipped here such a pool on the foundation, it cost a budget, it has a drain inside. Serves for 8 years now. Inside, pour warm water from a hose for children. Immediately, no - no one was injured or killed on bricks, children adore him and practically do not crawl out of him from the end of May until mid-September on days when there is no way to take them to a pond.
In the evening, when it gets cool outside and the children go to bed, pour hot water there and sit relaxing after a hard day. In the photo there is still not enough awning from mosquitoes, we hang in the season. As an option, for those who, by quadrature or financially, cannot overpower a large pool, but can not stand the heat - perfect.