Ventilation in the dressing room: options and methods for arranging the air exchange system
Have you planned the construction of a comfortable bath? Already built it, but did not decide on the ventilation? We will tell you about what should be the air exchange in the dressing room. Agree, it’s better to spend a little more time on theory than to redo something later. Proper ventilation in the dressing room is needed for the entire bathhouse as a whole.
It is impossible to make a good bath without well thought out communications. Thanks to our material, you will find a balance between heat and cold in the dressing room, you will not have problems with condensate. The finish will be dry and the air as humid as needed. As a result, the bath will last for many years without repairs, and you will not risk anything.
The content of the article:
The nuances of air exchange in the dressing room
The bath consists of alternately connected rooms with its purpose, temperature and humidity. Each of them needs care. Some owners leave the dressing room without ventilation at all, and this is wrong. The room is waterlogged and deteriorated. For dressing rooms there are three main options for air exchange, which we will talk about a little below.
The dressing room is a strip room in front of the washing room, and it is often combined with a rest room. Usually there stoke the stove. The dressing room is aired simultaneously with heating and after bathing procedures. A well-chosen ventilation scheme will give the room more fresh air and facilitate constant care.
The ventilation system in the dressing room performs three main functions: removes dirty air, delivers clean air and heats it to a comfortable temperature.
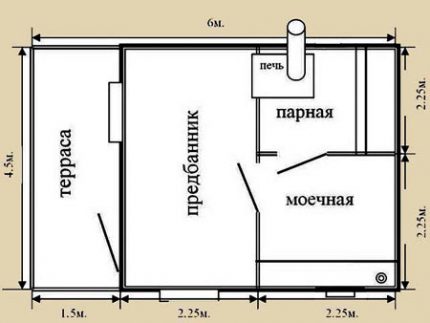
In the dressing room it is also arranged in order to regulate the humidity and temperature throughout the bath, to normalize the temperature in the rest room. This should be taken care of while the furnace and rest in the steam room. An oven also needs fresh air.
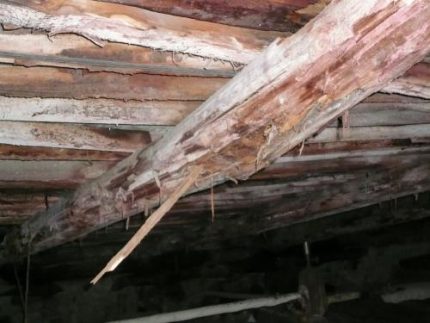
Further air exchange is directed to the drying of the room. Wood quickly deteriorates from moisture, especially in the dark. Due to moisture, windows and doors can sometimes not be closed tightly. Microorganisms in a damp room emit unpleasant odors, and the wooden finish absorbs them and “seals” them.
It will be difficult for vacationers to adapt to air quality. But, proper ventilation after bath procedures will eliminate the bad smell and extend the life of the building.
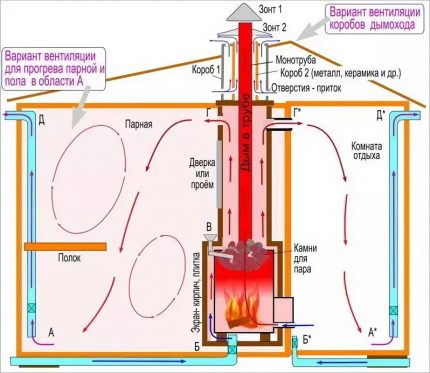
Ventilation is calculated on the basis of such conditions:
- high humidity and a lot of steam;
- condensation forms;
- air exchange and temperature in the bathhouse have to be adjusted only on some days;
- hot air;
- carbon dioxide accumulates;
- there may be harmful combustion products;
- small window size.
In an ideal bathhouse, nothing threatens the health of visitors, and the conditions meet the requirements for a bathhouse rest. In the pre-bathing room, it is worth organizing two types of ventilation, natural with gravity air and one more choice: mechanical or combined. In the latter, inflow is usually made gravity.
Which ventilation scheme should I prefer?
Achieve the right ventilation in the bath It’s not easy. If you are just designing a bathhouse, take care of the small windows, micro-openings between the rooms, the supply openings with access to the street and plugs. But do not place exhaust openings on the ceiling to avoid overcooling the dressing room.
In the bathhouse, lay the correct proportions. The optimal combination of the size of the dressing room (combined with the rest room), washing and steam room:
- 2 : 1,5 : 1;
- 1,5 : 1 : 1;
- 2 : 1 : 1.
Make a separate dressing room the same size as a sink and steam room. On the combined, take half the length and the entire width of the building.
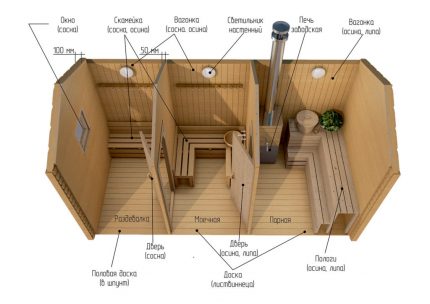
Follow the rules and recommendations:
- Achieve equality between supply and exhaust flows.
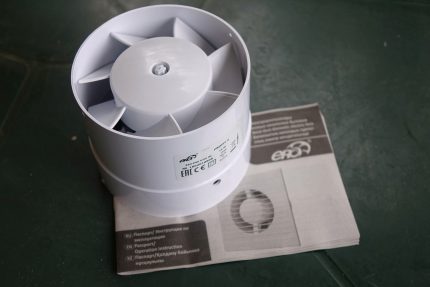
- Only buy mechanical fans that are moisture resistant.
- The required ventilation rate is more than 3 m³ / hour per 1 m².
- Combined ventilation with forced draft and natural influx should be added to the holes between the rooms and the wooden windows.
- Part of the hot air would not hurt to redirect from the steam room to the dressing room.
- Route the air exchange path between the supply and exhaust by the toilet.
Think about the universal option. ventilation steam rooms. To do this, place the door to the steam room near the ash pan. On the wall opposite the oven, make an exhaust opening 15–20 cm wide on the wall. Leave about 20 cm between this vent and the ceiling, focus on a height of 2 meters above the floor. Be sure to install an axial fan if the exhaust opening does not go directly into the street.
There is another option with a ventilation pipe. Make it vertical, but then turn it and at an angle connect it to the direct channel above the steam room, if there is one. Make the diameter of the pipe large above the place of union. In another case, take her out of the dressing room exactly through the roof.
Place the air inlet half a meter above the floor. Choose a place approximately diagonally relative to the exhaust. Make the supply aperture the same size as the output (15-20 cm). Swipe to the street and also add a blank. Thanks to it, you can influence the speed with which incoming air will push out the internal. The inflow is amplified by an additional hole next to the ash pan for supplying air directly to it.
Insulate exhaust pipe and the dressing room itself, so that there is a minimum of condensate. Thermal insulation will also make the air warmer, and after visiting the steam room it is better if the air temperature is comfortable. Make a circulation with a smooth change in temperature along the height of the dressing room and on the way from the locker room, through the sink and to the doors of the steam room.
Be sure to insulate the floor. For a combined dressing room in the relaxation room, make ventilation based on the largest possible area per person and not less than 1.3 m² per one.
Consider the tightness of the bath. The frame building requires an enhanced air supply: it is better to install a supply fan in this.
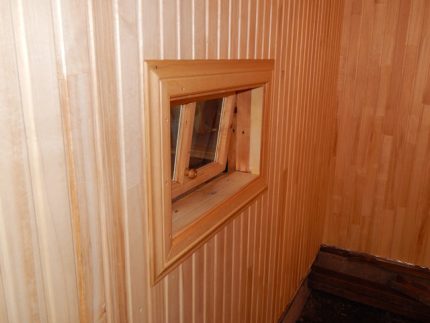
Do windows no more than 45 cm wide, preferably only from wood. Set the front door to a size of approximately 180 × 80 cm. It is better to make the interior doors a little smaller in order to reduce heat loss.
Scheme # 1 - with open circulation
Consider a combined dressing room and a classic version of the situation.
The first wall is narrow, with an entrance door. The second - with a doorway in a separate washing or combined with a steam room. A meter from the interior door, within the dressing room, have a stove. The third wall is narrow, opposite the wall with the front door. The fourth - opposite the second, with seats for rest.
Make natural air exchange in the form of windows and also collect combined ventilation.
Do the third wall air inlet and always with a stub. Place the opening at a height of 50 cm from the floor, approximately in the middle of the wall, but with a slight offset towards the stove.
At the end of the fourth wall far from the tributary, arrange an exhaust opening. Cut a hole in the upper corner at a height of about 20 cm below the ceiling. Insert the exhaust fan into the opening.
It remains to make the dressing room warmer. Together with this task, they solve the problem with the removal of air from the steam room. There he is collected under the floor, and through the pipe he will fall into the dressing room. Make not only air supply, but also disposal.
There are three solutions:
- Direct the pipe from the steam room to the dressing room and place the exit directly next to the ash pan.
- Bring the channel to the wall, and after that the air will enter through the hole.
- Lay the pipe below and make a cut in the floor next to the ash pan.
The air coming from the steam room will be warm enough, and the stove will heat up more intensively due to the fact that it takes it.
Scheme # 2 - with closed air circulation
In this case, you can organize a dressing room without air from the steam room.
At a height of 40-50 cm from the floor, cut the supply aperture with a plug - on a narrow wall adjacent to the one where the stove is. Make a hole not in the middle of the wall, but closer to the ash pan.
From the angle between the tributary and the stove, draw an imaginary diagonal and at the end of a long wall, at a level no higher than half a meter from the floor, organize an exhaust duct. At about the same height as the tributary, but possible lower.
Do not make a hole in the wall; instead, install a vertical pipe. Above the ceiling, enter the canal into the exhaust pipe rising from the steam room, and if it is absent, take it out through the roof. Install a deflector on the pipe head.
The air in the upper part of the room will already be warm, but first it will go down and go into the exhaust outlet not as fast as in the first scheme. Such a hood will also protect against excess steam, so in a waiting room, where its minimum, a closed circuit will be all the more effective.
Scheme # 3 - supply and exhaust on one wall
It is useful with different options for the location of the stove.Including if it is in the very corner.
In this scheme, you do not need to strive for a diagonal arrangement, but do not place the hood even above the inflow. Due to local ventilation, the dressing room will sooner or later become waterlogged.
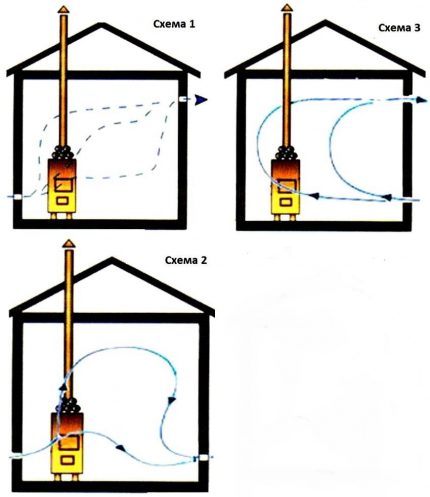
The inflow is located directly opposite the ash pan or obliquely. At the same time, you need to focus on the fact that the cold incoming air does not blow on vacationers. A stash will get inside from the street and head straight to the ash pan of the stove, which will heat the room. Part of the air will go into circulation.
With an oblique arrangement relative to the ash pan, this volume will be larger. Place the inflow half a meter above the floor or slightly lower if the furniture will interfere.
On the same wall at the top, make an exhaust hole. Cut it obliquely relative to the tributary: as far as possible from it, and not lower than 25 cm from the ceiling.
Warm-up and warming of the dressing room
Between the locker room / relaxation room on the one hand and the steam room on the other, ideally leave a smooth transition between temperature conditions.
There are four options to achieve this:
- The stove goes into both rooms.
- An additional partition between the steam room and the dressing room, combined with a relaxation room.
- Part of the heated air is supplied from the steam room.
- On the direct route from the dressing room to the steam room is the washing.
It is also necessary to take care of the insulation of the room. From the cold isolate the floor, walls and ceiling. Often take foil insulation, but on a thick layer of foil should be laid manually.
Floor insulation start with the fact that to the lower parts of the log, located with a step of 45-55 cm, cranial bars of a smaller size are nailed - longitudinally to the base. A rough coating is laid on top - oblong or wide boards. The rough floor is formed solid.
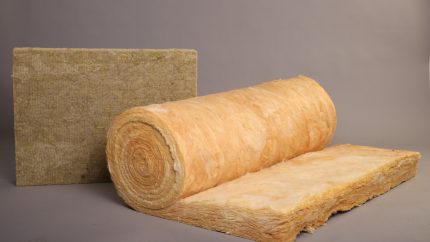
The resulting structure is coated with a waterproofing membrane. Lay so as to completely press the layer to the protruding lags. Then, in the interval between these planks, a proportionate piece of insulation cloth is laid: a little larger in width, length and height. Mineral wool is also suitable as thermal insulation. It is taken more, since the material is strongly compressed.
The vapor barrier is laid higher with a slight approach to the walls. In the process, pipes are insulated, which will be in the thickness of the floor or lower.
It remains only to make the floor itself. The surface can be paved with tiles or boards. Usually they choose wood, so it turns out a warm floor and the unity of the interiors is maintained. The coating must be made continuous, pushing the boards to each other as much as possible.
Under the ceiling, the finish spoils the most, so use a thick layer of insulation. Thermal insulation can be collected on the ceiling, between the slats. Put a vapor barrier at the bottom, a heater above, then waterproof it. You can cover with cement screed and wooden boards from above.
You can read more about ceiling insulation in this stuff.
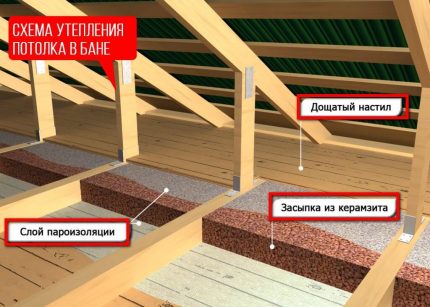
It will be possible to insulate the log houses in the finished building, but it is worth planning the thermal insulation in advance. It is also worth taking care of the insulation of the front door.
Due to thermal barriers, they effectively fight against excess moisture, but condensation can be completely avoided if some things are constantly done. Keep the doors closed, open only for a short time. Adjust the gates in the ventilation grilles.
Use plugs and first of all during warming up.After the procedures, cool the dressing room through open doors and windows. Do short drafts at the same time. Ventilate each room in turn - through their windows.
Conclusions and useful video on the topic
Combined dressing room, and how to heat it:
Analysis of the arrangement and ventilation of the dressing room, how to remove dampness and mold - in great detail:
Elements for bath ventilation - pipes, valves and grilles:
Sometimes the dressing room is a small dressing room, but usually it is combined with a rest room. In the second case, you will need full powerful ventilation. You can apply one of the three schemes described by us.
Build on the air exchange requirements that we wrote about. Remember that it is worth adding insulated surfaces to the combined or mechanical ventilation system, then the life of the bath will increase.
Write comments and ask questions about the topic of the article. Perhaps you have a bathhouse and you had to deal with the arrangement of its ventilation? Tell our readers about this. The feedback form is under the article.

 Cottage ventilation: options for organizing an air exchange system + device rules
  Natural ventilation in a private house: rules for arranging a gravitational air exchange system
  DIY garage ventilation: an overview of the best options for arranging an air exchange system
 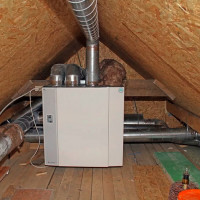 Ventilation in a two-story private house: options for organizing trouble-free air exchange
  Ventilation in the house from sip panels: the best options and layouts
 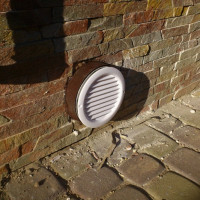 Ventilation of the foundation of the house: rules and options for organizing air exchange
  How much does it cost to connect gas to a private house: the price of organizing gas supply
  The best washing machines with dryer: model rating and customer tips
  What is the color temperature of light and the nuances of choosing the temperature of the lamps to suit your needs
  Replacement of a geyser in an apartment: replacement paperwork + basic norms and requirements