How to disassemble the exhaust fan in the bathroom: instructions for disassembling and cleaning the exhaust fan

The bathroom is one of those places in the apartment that just needs good ventilation. With its help, the excess moisture that appears after taking a shower, and the specific aromas of cosmetics or detergents go to the mine. Maintaining an optimal microclimate prevents the formation of fungus or mold, condensation on the mixer, mirrors or pipes, the gradual destruction of finishing materials and furniture damage.
But natural ventilation is not always effective, is it? Therefore, the installation of forced exhaust system sometimes it’s the only way to eliminate steam and unwanted odors from the bathroom. However, long-term operation of the fan will inevitably lead to contamination of its components and a gradual decrease in performance. To improve the performance of the device, you need to know how to disassemble the exhaust fan, properly clean its parts and perform installation again.
In this material, we will consider the structure of the hood, its step-by-step analysis, tell you how to quickly wash the appliance, mentioning why the draft in the bathroom can decrease even with a properly functioning exhaust hood.
The content of the article:
The structure and principle of operation of the hood
To competently disassemble and wash the hood in the bathroom, you should familiarize yourself with how it works and works. Most common patterns for installation in the bathroom are axial (axial) fans, which are mounted on the wall in the place where the ventilation duct passes.
The axial hood has an extremely simple design. The device captures air by rotating the axis on which the aerodynamic impeller with blades is fixed.A compact engine is located behind it, thanks to which the axis carries out movement.
Impeller blades have a certain slope. It causes the passage of air through the fan system, partially prevents the reverse capture of the exhaust stream and contributes to the formation of pressure, which carries the air into the ventilation duct.

The fan blades are the most sensitive to contamination, since most of the dust and particles of smoke settle on them if they smoke in the room.
The place where the impeller is attached to the axis also needs thorough cleaning. In addition to litter removal, this area must be periodically lubricated. A couple of drops of special oil will be needed for the front and rear bearings that are on the motor.
The fact that it is time to remove the hood and rinse it, you can understand during a visual inspection by shining a flashlight on the external grill.
Such signals may also indicate the need for purification:
- noise increasegenerated by the fan during operation;
- traction reduction due to a drop in hood performance.
All these facts indicate that the speed of rotation of the aerodynamic impeller has dropped, so the hood needs to be disassembled, scheduled cleaning and diagnosis of possible malfunctions.
Subtleties of disassembling and cleaning the hood
In order to dismantle the hood, it is not necessary to invite a specialist. First you need to find in the user manual an item on how to remove the front cover of the fan in the bathroom, and after studying the instructions proceed to the subsequent disassembly and self-maintenance of the device.
Step # 1 - turning off and removing the hood
The removal of the device begins with a de-energization of the line from which the hood is powered. This is especially important if the fan is directly connected to the light switch and begins its work simultaneously with the source of lighting in the bathroom.

The hood cover itself is often attached to several screws, which are placed at the end of the housing for aesthetics. Less often, it can be equipped with grooves, with the help of which it is fixed.
After removing the cover, you need to perform several steps:
- Unscrew the self-tapping screws that fix the device in the ventilation hole.
- Pry the case around the perimeter, disconnecting it from the wall, if it was put on glue.
- Carefully remove the device and disconnect its wires from the power cable.
If the hood worked before dismantling, allow it to cool, after which the fan can be disassembled.
Step # 2 - disassembly and maintenance
After cooling the fan, carefully disassemble the main components in order to clean and lubricate the necessary parts.
To do this, perform the following steps:
- Remove the impeller wheel. Most often it is attached to the shaft with a collet method. To detach the part, you just need to turn the fastening nut.
- Carefully remove the motor, after disconnecting the terminals. The engine itself is usually attached to the body with two screws.
After that, you can begin to clean parts and lubricate certain components with machine oil: bearings, axles. It is most convenient to brush off dust from areas not to be washed, most conveniently with a soft brush of medium size.

The fan impeller, the outer cover and the mesh that protects against insects from the shaft must be thoroughly rinsed with water. It is advisable not to use detergents, as they can be quite aggressive with respect to plastic.
An ordinary cleaning soap without bleach will be the optimal cleaning agent. An abundant dense foam is obtained from it, which can effectively remove deposits of contaminants from the hood.
Then you have to lubricate the main components of the hood. For spot lubrication, it is most convenient to use a syringe with a thin needle. To distribute the oil evenly, rotate the rotating parts.
Before you perform the installation again, you must carefully dry all the components and remove excess oil by wetting the desired areas with a tissue.
Step # 3 - reassembling and installing the instrument
Assembly of the hood also does not require a lot of knowledge. Next, we will figure out how to reassemble the built-in fan in the wall after we managed to clean it.
Restoring structural integrity includes several key points:
- installation of the engine in the housing with subsequent connection of the terminals;
- fixing the aerodynamic impeller on the axis.
The impeller should be fixed with particular care: if you install it with the back side, you can provoke the appearance of reverse traction, due to which contaminated moist air will not leave the bathroom.

All the necessary information about fan mounting contained in the instructions for the device.
Usually, after assembling the main part of the structure, the user needs:
- Coat the back of the case with glue such as "Liquid Nails";
- place the hood in the hole made in the shaft;
- screw all screws along the perimeter of the body;
- connect power wires;
- install a mosquito net;
- fix the hood cover with bolts if grooves are not provided in the design.
After the installation, you need to make sure the device is working - check it for inclusion and the ability to create sufficient traction.
Typical Causes of Traction Reduction
If after you managed to wash the hood in the bathroom, its performance has not increased to the nominal, it is worth identifying the reasons why the device is not working properly.
In addition to the natural wear and tear of the equipment, many different factors can affect the level of absorption. But more often than not, the root of insufficient air exchange is to reduce traction. So why is a working and clean forced draft not able to cope with the removal of moist air?
Reason # 1 - violation of air exchange
To exhaust air flows, a wall hood requires an influx of fresh air. To do this, in the lower part of the door there must be special openings with grilles through which air from other rooms will enter the bathroom.

If there is no opportunity and desire to replace the interior door, you should often leave it ajar, widen the opening between the door leaf and the door frame, or cut through the ventilation holes yourself.
Installation of plastic windows, thorough wall insulation and reliable entrance doors with good insulation significantly impede the penetration of street air into the housing. Therefore, even in winter it is important to periodically ventilate all rooms. And also put windows with a supply valve.
Reason # 2 - clogged ventilation ducts
If the ventilation shaft is clogged with dirt or blocked, even a powerful forced draft can not cope with its tasks.Therefore, check for natural ventilation. If the built-in hood does not have a check valve, this can be done in the simplest way. Such testing can be carried out in the cold season, since in summer, at too high air temperature indoors and outdoors, a sufficient pressure drop will not be created.
After turning off the fan, provide an influx of fresh air by opening the windows of the apartment and the door to the bathroom. Lean a napkin against the exhaust hood. If a piece of light paper is pulled to the hole, then the ventilation is functioning properly. And if the draft is completely absent, you must contact the management company, after which a special service will check the ventilation ducts and perform them cleaning.

Additionally, the presence of traction can also be determined by the condensate falling on the mirror after taking a bath. If the steam quickly disappears after opening the doors to the room, then natural ventilation is functioning properly.
Reason # 3 - installation of powerful hoods by neighbors
If the neighbors living below floors install too powerful fans, the draft in the duct can drop significantly due to the formation of rapid airflow. In some cases, a phenomenon may occur. reverse thrust, in which the air from the bathrooms of other residents will be blown into the rooms floors higher.
To get rid of these problems, you should either negotiate with your neighbors or install a more powerful forced air removal device.
However, the latter option is fraught with inconvenience for the residents above and may require widening the hole in the wall leading to the shaft. This is due to the fact that the inlet diameter of the channel also affects the rated performance of the exhaust fan.
Reason # 4 - check valve availability
To prevent unpleasant odors from entering the bathroom from the neighbors below, users often supplement the design of the wall exhaust system with a special part - check valve. It cuts off the flow of air from the ventilation duct.
But in the absence of a normal flow and the installation of an inappropriate hood, it will completely block the air duct, thereby depriving the room of a natural path for drawing air
Conclusions and useful video on the topic
The detailed process of removing the hood cover and the amount of dirt settled on the parts was captured by the author of the video below:
The author of the following video tells how to properly install the hood on the wall in the bathroom if the hole leading into the ventilation duct significantly exceeds the diameter of the fan inlet:
Detailed disassembly and repair of the hood was demonstrated by another author:
A properly working extractor hood in the bathroom is a guarantee of maintaining a normal microclimate in the entire housing, since the presence of excess moisture in one room will inevitably affect the overall humidity level in the apartment.
Like any other device, the exhaust fan needs periodic maintenance and cleaning. Dismantling, disassembling, cleaning and reinstalling the wall hood does not take much time and does not require special knowledge. However, if after performing the scheduled procedures the fan still does not provide proper air exchange, it is worth paying attention to the correct functioning of natural ventilation.
Have you recently taken apart a fan and cleaned it of dirt? Share your experience with other users, tell us which part of the work turned out to be the most difficult for you. If you still have questions about the topic of the article, ask our experts - the feedback form is located below.
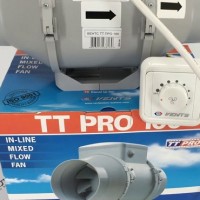 Channel fan speed adjustment: connecting the controller and adjusting the exhaust speed
 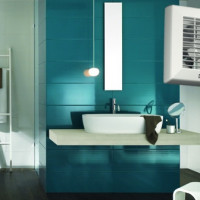 How to connect a fan with a humidity sensor: subtleties of connection and installation + selection rules
 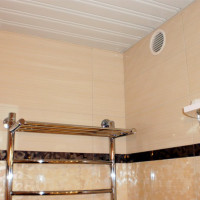 What to do if the hood in the bathroom and toilet works poorly: causes of the problem and methods for solving it
 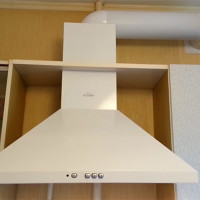 Installing a hood with a non-return valve: the nuances of selection and installation with valuable tips
  Hood installation height above gas and electric stoves: generally accepted standards
  Ventilation in the wardrobe: features of the arrangement of the hood in the dressing room and wardrobe
  How much does it cost to connect gas to a private house: the price of organizing gas supply
  The best washing machines with dryer: model rating and customer tips
  What is the color temperature of light and the nuances of choosing the temperature of the lamps to suit your needs
  Replacement of a geyser in an apartment: replacement paperwork + basic norms and requirements