Ventilation in the bathroom in the ceiling: arrangement features + installation instructions for the fan
Due to poor ventilation or its complete absence, fungus and mold can form in the bathroom, furniture and appliances can deteriorate, and the indoor climate can deteriorate. Agree, you would not like to live in such conditions? A hood in the bathroom in the ceiling will help change things, which will help in the fight against excessive humidity in the room.
The ceiling hood consists of two elements: an air duct and an electric fan. Such a ventilation system involves the installation of an additional suspended ceiling. From the article you will learn what you should pay attention to when installing ceiling ventilation in the bathroom, as well as how to do the installation of the hood yourself.
The content of the article:
Bathroom fan
The fan for the bathroom must have special technical characteristics due to the high humidity in the room. It is important to understand that the ceiling fan will work most efficiently if the ceiling height in the bathroom is more than 2.65 meters.
As for the design features of the device, it should fit the dimensions of the niche in ventilation ductin which it will be fixed.
An important indicator is moisture resistance, which is indicated by the letters IP. This indicator is considered important, because it is related to security. For the bathroom is choose fans with an indicator of 34 and higher, so that when moisture enters the device or at high humidity, a short circuit of the wiring does not occur.
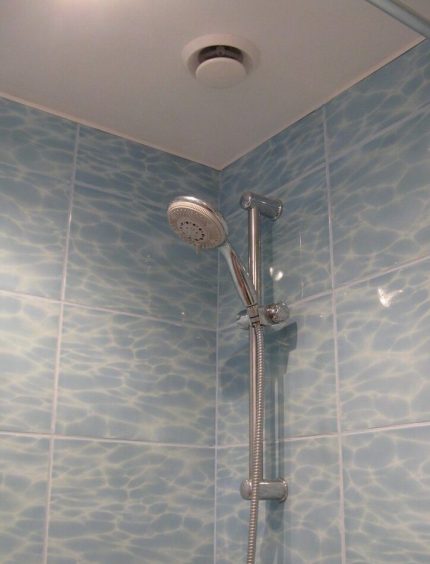
The value of the non-return valve can hardly be overestimated, but devices with such a part are much more expensive than without it.
The power of the device should be selected depending on the volume of the room, as well as the frequency of its use. In addition, when choosing, it is worth paying attention to the presence of additional functions. For instance, humidity sensors, display, remote control and others.
General installation recommendations
The process of installing a ceiling hood in the bathroom takes a little time if you have the necessary skills and have done all the preparatory work.
SNiP 41-01-2003 specifies installation standards and important indicators for ventilation systems. Pay attention to the norms of air exchange and the maximum allowable amount of dust in the channel.
Before installation, be sure to check the shaft of the ventilation duct in any way possible for you. Try the most common ones - with paper or a lighter. It is also worth reinforcing the ceiling with a special building composition and sealing the joints at the joints of the walls and ceiling.
Before starting work, also consider the connection method and, if necessary, lay the power cable. Most often, three-wire wires are used for this purpose.
The electric wires for the fan should be hidden above the ceiling structure. If this is not possible, then it is worthwhile to close the wires with special plastic boxes so that they do not get water.
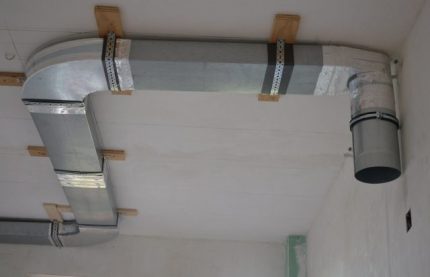
After that, you need to design the duct. It can be assembled from special pipes. There are several types, but the most common are round or square. If the height of the ceilings is small, then they are mounted rectangular, since they are quite wide and meet all the requirements.
One end of the duct is connected to the ventilation shaft, and the other is discharged to the future ceiling and connected to the fan.
PVC ventilation duct must be fixed. Corrugated pipe can not be fixed.
In order for the hood to function most rationally, the ventilation inlets should be located both on the opposite side from the place of fresh air intake. Further features depend on the type of ceiling in your bathroom.
The most common are several species.
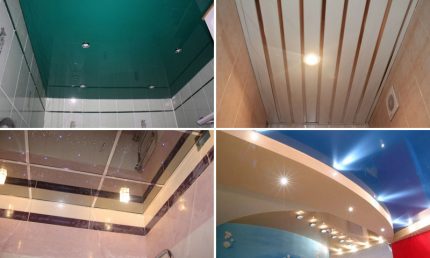
Each of these types has its advantages and disadvantages. False ceilings from panels and battens are considered a relatively budget option. But the stretch ceiling is quite an expensive pleasure.
Consider the features of installing ventilation in the bathroom for each of the types of suspended ceilings.
Option # 1 - rack ceiling
A rack ceiling is a common type of inexpensive ceiling for bathrooms, especially in private homes.
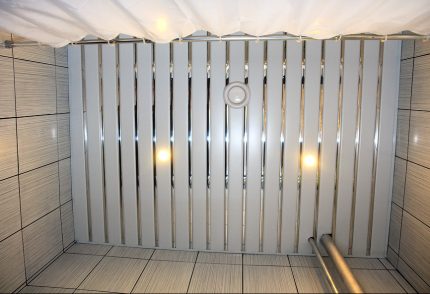
Thanks to the simple installation scheme, it is quite simple to install or dismantle with your own hands, it is also resistant to corrosion.
Ventilation can be organized in two ways: using diffusers. Then the rack panels should be bought with ready-made holes. Or from special perforated battens.
The further course of work will depend on the type of material selected.
Installation instructions:
- First, the location of the ventilation grilles should be indicated on the ceiling in the bathroom;
- mark on the slat panels and then cut out the holes of the desired size;
- using fasteners or liquid nails, fix the diffuser or ventilation grilles on the panels.
If you use perforated panels, then the rails must be mounted on opposite sides of the ceiling. This creates the conditions for the natural circulation of air under and over the ceiling.
When the rack structure is located below the ventilation duct, it is most rational to use an exhaust fan.The connection diagram looks like this:
- remove the front panel of the device;
- cut a hole inside the fastener panel;
- to the place of installation of the fan from the ventilation duct above the ceiling, lay a corrugated or plastic duct;
- connect a fan to the duct;
- the fan itself needs to be mounted inside the ceiling (a niche between the ceiling and the suspended structure);
- you need to pass the wire through the hole in the case, bring it into the grooves. Then insert the fan all the way into the ventilation duct. Then, in turn, all the wires are interconnected with the help of brands.
It is very important to fix the fasteners with electrical tape. This completes the installation.
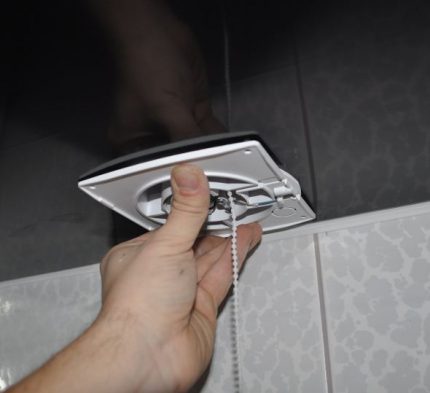
Although the installation of a rack ceiling is relatively simple, but if you are not confident in your abilities, it is better to use the services of professional craftsmen.
Option # 2 - suspended ceiling
Such a design made of plastic or drywall panels is also considered budget. Materials for the panels are durable and moisture resistant.
The panels are easy to install and do not need special care. They are mounted tightly to each other so that the seams are less noticeable.
Important to mount ventilation grates at different ends of the ceiling for better air circulation, as well as to prevent the formation of mold at the joints of the plates.
The fan is installed in the ventilation hole. The fan installation diagram is identical to that described for the rack ceiling.
Option # 3 - stretch ceiling
One-piece stretch ceilings are becoming increasingly popular. They visually increase the size of the room, add grace to the room, and a large selection of colors will allow you to choose a canvas in any interior.
After installing such a ceiling, the height of the walls will decrease by only 3-5 cm. The material is completely tight and does not allow water to pass through. Therefore, you can not worry about the fact that the neighbors may flood you.
First you need to take care of arranging the power supply, and then prepare the platform for the fan and fix it. As a platform, you can use a solid plate of durable plywood or plastic. Then, fasten one side of the metal holder to the platform, and the second to the ceiling.
Next, you need to pull the ceiling cloth and mark the places where the ventilation grilles will be located.
At the same place, fix the tread ring with special glue. It will not allow the ceiling to break or deform.
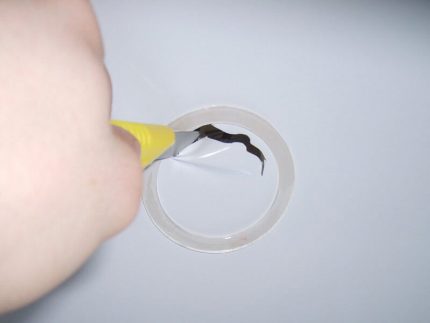
After that, remove excess material, and fix the fan inside the opening.
If you are not going to mount an additional ceiling around the perimeter, then you can install only a small niche for an electric fan and duct.
We also recommend that you read our other article, where we spoke in detail about the arrangement of ventilation in a stretch ceiling. More details - go to the link.
Useful tips from experts
We have put together several recommendations that will help while working on the installation of the hood. If the installation is carried out in a private house, then the air should be drawn out, and not under the roof.
Under the door to the bathroom should be a gap for the flow of air. If it is not there, then the effect of the fan will be reduced to zero.
It is strictly forbidden to connect the fan directly to the shaft for natural ventilation. For the ceiling model to work, you need to lay a separate duct.
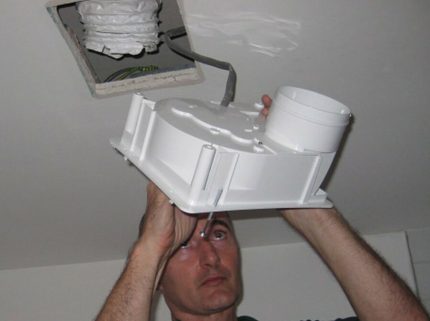
The device should be installed opposite the door and at the maximum distance from the heating devices. This will allow the fan to work most efficiently and not overheat.
To reduce the noise from the fan and create additional sealing, a layer of silicone sealant should be placed between the hood base and the ceiling.
As you can see, the installation of a ceiling fan does not require much effort. It is very important to complete it without errors, and for this you need to have certain skills and knowledge. A high-quality installation will guarantee clean and fresh air in your bathroom, as well as extend the life of furniture and appliances.
Conclusions and useful video on the topic
The author talks and shows about the key points of the process of connecting the ceiling fan in the bathroom, dwelling on some nuances:
From the video you will learn how to share ventilation in the bathroom and toilet:
The forced ventilation system in the bathroom will allow you to effectively ventilate the room at a time convenient for the user. A high-quality work will extend the life of both the fan and other household appliances.
Have you ever been involved in the installation of ventilation in the bathroom? Perhaps there were difficulties that you had to face? Please share your experience with our readers. Leave your comments in the box below.

 Ventilation in a stretch ceiling: why do you need + subtleties of arrangement
  Connecting an exhaust fan in the bathroom and toilet: analysis of schemes and tips for installing equipment
  Is forced ventilation in the bathroom necessary: norms and stages of arranging efficient air exchange
  Ventilation in the bathroom and toilet: principle of operation, typical schemes and installation features
  Ventilation in the bath: an overview of traditional schemes and nuances of arrangement
  Ventilation in the steam room: examples of proven schemes and analysis of the rules of arrangement
  How much does it cost to connect gas to a private house: the price of organizing gas supply
  The best washing machines with dryer: model rating and customer tips
  What is the color temperature of light and the nuances of choosing the temperature of the lamps to suit your needs
  Replacement of a geyser in an apartment: replacement paperwork + basic norms and requirements