Suspended ceiling fan: features of selection and subtleties of self-installation
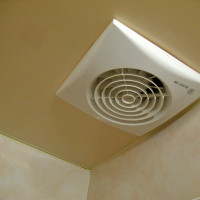
Are you planning a renovation in a bathroom with a false ceiling? Perhaps the stretch ceiling in the room began to mold and smell foul? In this case, it is necessary to install the fan in the suspended ceiling for forced ventilation.
The ceiling installation instead of the usual wall has several advantages: ventilation is not so noticeable, it is possible to build a system of different configurations with air intake at any one or several points, including living rooms.
In this article, we will talk about how to choose and install a fan yourself, consider the schemes for connecting it to electricity and the features of installing ventilation ducts under suspended and suspended ceilings.
The content of the article:
When is a ceiling fan needed?
Before stitching the draft ceiling with drywall, battens, plastic or stretch fabric, it is necessary to predict whether moist air will stagnate in the formed cavity.
If there is such a possibility, over time, a musty smell will appear from under the ceiling, mold and fungus at the joints. Prevent a similar picture can exhaust fan.
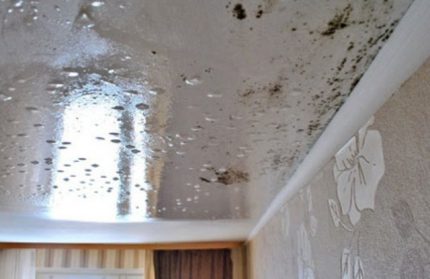
Ventilation is necessary in such cases:
- In the bathroom and toilet - both the ceiling space and the room itself need effective ventilation.
- The stretch ceiling of the kitchen should also be ventilated, even if a hood is installed above the stove. Otherwise, deformations and condensation cannot be avoided due to temperature changes.
- In a private house, if there is an unheated attic above the main ceiling with wooden beams, and the ceiling is mounted from PVC film, plastic or drywall.
- If the suspended ceiling is installed below the existing ventilation hole, blocking it.
- In the pantry, laundry, dressing room and similar rooms - the door to them opens quite rarely and not for long, and therefore the slightest excess of moisture gives a musty smell and can cause the appearance of a fungus.
Depending on the conditions of a particular room, in some of these cases it is enough to install a pair of ventilation grilles in opposite corners of the ceiling. They will combine the inter-ceiling space with the main one, and therefore compensate for temperature differences in the room and will not allow the air to stagnate.
However, if the air is dirty or humid throughout the room, you must install stretch ceiling fan for forced ventilation.
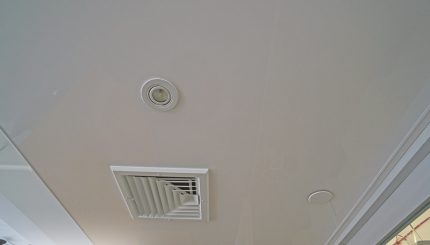
There are situations where the arrangement of the hood in the ceiling is optional and even inappropriate. For example, if the height of the room after hemming becomes less than 265 cm, the fan on the wall will be more efficient than the ceiling.
In addition, rack and fabric stretch ceilings, structures in rooms with low humidity, no temperature changes, and concrete draft ceilings need less ventilation. If in your case at least 2 - 3 of the listed factors agree, you can do with natural ventilation or even without it at all.
Features of choosing a ceiling fan
After analyzing the situation, you will already know in what conditions the fan has to work and what functions are assigned to it. Equipping ventilation in a suspended ceiling, you will need to build a channel - an air duct.
On the one hand, it’s convenient: a hidden channel can be brought out at any point on the ceiling of a house or apartment, you can create a whole system of such channels served by several independent waybills or one duct fan. Additional wiring gives independence from the location of ventilation shafts in the apartment.
However, each additional meter and channel bend increases resistance and reduces traction, and therefore requires an increase in fan power.
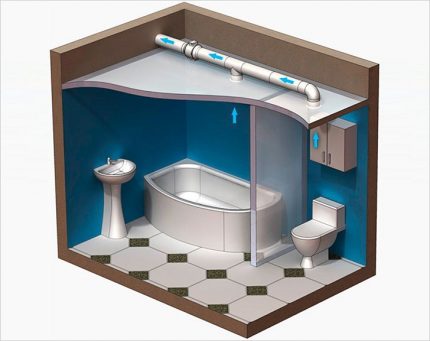
We will talk about how to choose, assemble and connect everything you need for a ventilation system.
Waybill or channel: how to decide?
When installing the fan on a wall directly in the opening of the ventilation shaft, this question does not arise: only overhead models are suitable there. Under the ceiling, you can also hide the duct fan, which provides traction through several air intakes at different points.
Its advantage is the ability to ensure uniform ventilation of the entire bathroom even with a large area, as well as connecting all air ducts from other rooms to a single device. However, this means that it will be possible to ventilate only all the rooms at the same time, and this is not always convenient. In addition, it is necessary to provide a hatch in the ceiling for fan maintenance.
In practice, overhead models are usually preferred in apartments, and in private houses with a large bath or complex ventilation system - channel ones.
We calculate the required power of the device
This parameter is one of the most important, directly related to performance. Different models are able to pass from 50 to 250 m3 per hour, and sometimes more. But this does not mean at all that a fan with a capacity of 50m3/ h is capable of efficiently servicing a room of the same volume: this can only be true for a pantry or dressing room.

For other rooms, the fan performance should be several times greater than the volume of the room: for a room - 3 times, for a bathroom - 7-10 times, for a kitchen - 6-8 times. The coefficient depends on the number of residents and the activity of using the room. In addition, a margin of productivity is needed to force air through ventilation duct: depending on the complexity of its design, from 5 to 20%.
As a result, in order to calculate the required fan performance, it is necessary to multiply the room area by the ceiling height and the air exchange rate, and then add 5 - 20%. Please note that when installing a duct fan for servicing several rooms, the required performance for each room is calculated, and then they are summed up.
Fan Noise Parameters
The noise level produced by the fan can significantly affect the comfort of residents. This is especially true for ventilation of living rooms.
The best overhead models produce no more than 25 - 30 dB, louder - up to 50 dB. Channel fans have some advantages in this regard: they can be installed outside the living area.
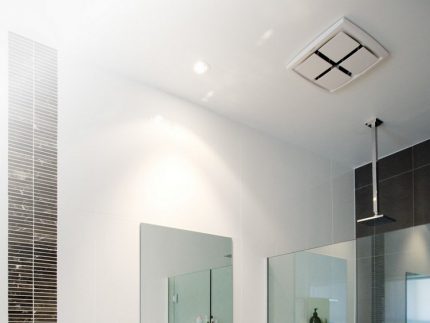
The following characteristics reduce fan noise:
- plain bearing instead of rollers and balls;
- bronze bushing instead of steel;
- plastic ventilation duct instead of metal;
- fan blades without sharp corners, including at the ends;
- solid decorative panel, with holes in the center and sides;
- small angle of attack of the blades;
- installation on silicone sealant or other vibration-absorbing pad.
Do not save on this characteristic, because a too noisy fan will be annoying, and you simply will not use it.
Dependence on the purpose of the room
Different rooms in the house differ in microclimate: in the bathroom there is a lot of steam and temperature changes, in the toilet there is an unpleasant smell and musty. In the kitchen, the air is overheated, greasy, sometimes smoky, with smells not always desired in other rooms, and cooker hood, does not solve all problems.
In addition, the air in the pantry or dressing room stagnates and gives things an unpleasant, musty smell, and sometimes the bedroom or living room lacks oxygen, especially with plastic windows or a large group of guests.
A properly selected fan can eliminate or minimize these differences. The main thing is to observe the necessary air exchange rate, picking up power.
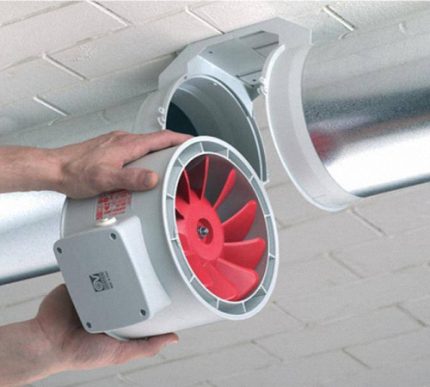
Also note that the fan in the kitchen must have removable filters, in the bathroom - protection against moisture, and for the living rooms only the quietest models are suitable.
Fan Control Methods
The efficiency of its operation and the comfort of its residents depend on how conveniently the fan turns on and is correctly configured.
Depending on the installation location and the wishes of the owner, the fan can work:
- together with light - connection to a light bulb or general switch;
- turn on and off manually - with a separate switch. For obvious reasons, a model with a lace or button on the case is not installed in the ceiling;
- after a specified period of time after turning on the light - start delay timer;
- turn on with light, and turn off by timer - work in toilet mode;
- turn on when the light is turned off, turn off by timer - bathroom mode.
- maintain a given level of humidity - at the command of a hygrometer, or temperature - at a thermometer;
- run from the sensor to open the door, light or movement - options are not for the bathroom;
- on command from the remote control.
Depending on the choice of switching method, pay attention to the presence of a built-in timer and a hygrometer, a switch on the case and a mode switch.
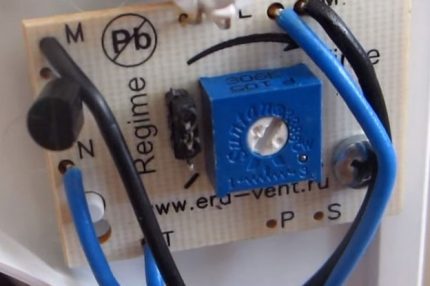
Of course, any fan can be connected using external sensors, but usually they are less reliable and durable. In addition, this will complicate the installation, and is often more expensive than buying a complete fan.
At the same time, do not overpay for unnecessary functions: for example, a hygrometer in the living room or kitchen is useless.
What else to consider when choosing?
In addition to the listed characteristics, fans differ in the presence of some additional functions and equipment. So, check valve prevents the entry of dirty air from the ventilation shaft into the room when the fan is off.
The presence of moisture protection, at least IP45 is useful in the bathroom, especially when installed directly above the bathroom or shower.
Also, security from 12 V instead of 220 will add safety. It is convenient to connect such fans to LED lighting.
The functionality may include the possibility of airing - continuous operation at minimum speed, with their increase if necessary. In addition, the speed adjustment can be smooth, 2 - 3-speed or completely absent.
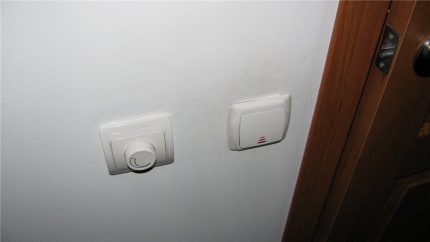
The design of some models is able to mask the fan in the ceiling or vice versa, making it a stylish detail of the interior. In addition to a variety of colors, shapes and materials of the front panel, it can be equipped with a backlight or display.
Self-installation of ceiling fan
Of course, inserting a fan directly into the hole on the wall is the simplest solution, almost everyone will cope with this task. However, in the false ceiling made of drywall, plastic or battens, you can arrange the ventilation yourself, especially if you did not hire specialists for the decoration.
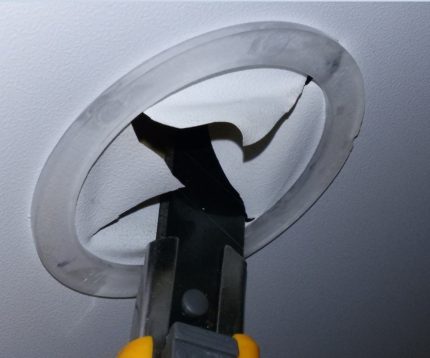
Under the stretch ceiling, you can pre-prepare and install yourself ventilation duct, when stretching the ceiling, ask the masters to cut a hole for the fan, and then connect it yourself.
In any case, you first need to think through and design everything, select and purchase equipment, and then assemble the system as a designer and connect it to the network.
Variants of ventilation duct schemes
The simplest option is a straight pipe-channel leading from the vent to the place of installation of the fan, with a square adapter for the fan. It is applicable only if there is no need to organize ventilation in other rooms, such as a toilet.
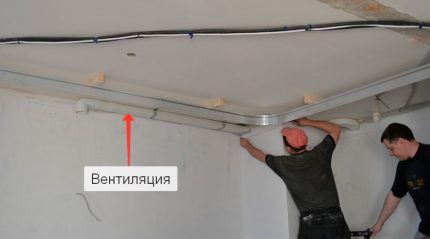
In fact, it is simply a replacement for a wall-mounted ceiling installation, without system improvement.
It happens that the ventilation shaft in the apartment is located poorly: only in the bathroom, or near the door, and not in the opposite corner. In this case, a more complex channel may be required, in which two independent fans are installed - for the bathroom and toilet.
When planning a ventilation duct, keep in mind that the toilet should be the last in a series of ventilated rooms, and the bathroom should be the last but one.Otherwise, unpleasant odors and moisture from the bathroom can get into other rooms. If this is not possible, be sure to use non-return valves, and it is better to duplicate them: both in the fan casing and in the duct.
Developing this scheme, you can bring a separate ventilation duct to any room with a false ceiling - just avoid laying the duct through living rooms unless absolutely necessary.
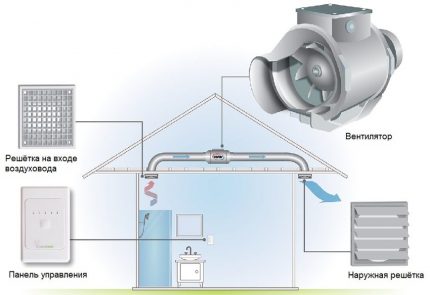
Ventilation pipes, paved in the attic, it is necessary to insulate. Also, in this case, channel fans are most often used, because their noise in the attic will not hurt anyone.
Universal procedure
The first step is to think over and design everything, it is better - on paper. Draw a housing plan and note where it is planned to install fans and where there is access to the ventilation shaft. Please note that the fan must be located in the opposite corner from the door or other source of fresh air, and also not to get on the supporting structure of the suspended ceiling.
Then connect the fan to the vent channel along the most convenient and short path. Mark all corners, tees, connectors, swivel elbows, adapters from flat to round channels and attachment points.
Recount how much you need, measure the length of the pipes and purchase everything you need. Do not forget about wires and switches for the fan.
In the process of decorating the walls, provide holes in the places where the ventilation duct will intersect the walls. Also remove the necessary wiring from the junction box by placing it in the corrugated tube. If necessary, install a switch.
Assemble a ventilation duct for each room on the floor. Attach it to the ceiling, mark the points of attachment and fix the latches on the main ceiling.
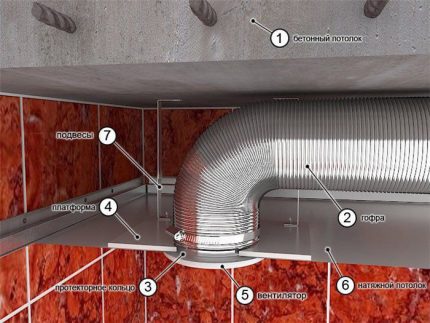
Replace the assembled channel and secure with fasteners. Connect parts from different rooms into a single system - as tightly as possible, without gaps and crevices. Make sure that the fan outlet is level with the future cover. If the ceiling will be suspended, install a special platform in advance for mounting the fan.
Only after the ventilation duct is mounted, you can proceed with the installation of the false ceiling. In a rack, plasterboard or plastic ceiling, you can cut a hole with a drill with a crown nozzle. The canvas of the stretch ceiling is first reinforced with a special ring, and then cut with a clerical knife.
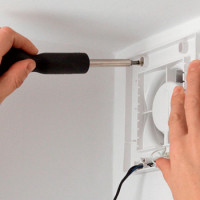
The fan casing is inserted into the hole obtained as far as it will go, along the way, the connection cable is displayed in a special hole. In the suspended ceiling, the fan casing is mounted on a molly dowel, in a suspended ceiling - on silicone adhesive-sealant to a fixed channel bell.
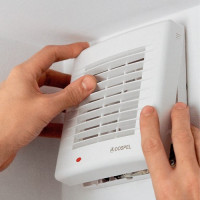
After connecting the wires, install the decorative panel - and the installation of the fan is completed.
Connect the fan to electricity
Depending on the model, the fan may have 2 to 4 connection terminals.
If there are only two, then zero is supplied to one, and to the other is the phase from the switch or the nearest light bulb.
The third contact is in models with a built-in timer.
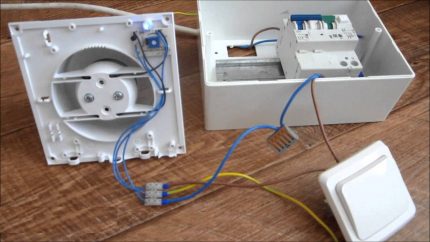
They need constant power supply to the board, so the main phase wire is pulled directly from the junction box, connecting to the wire from the shield. The switch is installed on the second phase wire, which is connected to the timer terminal.
Four contacts are rare, usually with a timer and a metal case.In this case, in addition to zero and two phases, a ground must be connected to the fan.
When connecting the simplest fan without a timer to a light bulb or light switch, keep in mind that it will work as long as the light is on. Perhaps this scheme is suitable for the toilet, but for the bathroom this time is likely to be insufficient, and you will have to leave the light longer than necessary. In addition, it is uncomfortable to wash the draft from the fan.
For a kitchen or a room, connecting a fan to the light is absolutely not suitable, because you can cook in natural light, and it is more convenient to ventilate the room during the day. In the pantry and dressing room, as a rule, the light burns very little, so it is better to use models with a timer there.
Conclusions and useful video on the topic
Summing up, we note that it’s quite possible to organize even a complex and extensive ventilation system in a false ceiling with your own hands. And so that you definitely have no questions, we offer several videos.
The simplest ventilation duct in the ceiling of the bathroom with your own hands:
Finishing the ceiling of the bathroom with ventilation and insulation:
Arrangement of a quiet hood in the kitchen with a duct fan - the channel in this scheme can be hidden not in furniture facades, but in the ceiling:
In order for the ventilation that you design and install yourself to work correctly, try not to save time or money. Approach responsibly to the choice of not only the fan, but also the section, material and diameter of the channel. Impossible tasks do not exist, and with maximum care you can install the fan yourself in the ceiling no worse than specialists.
Do you have ventilation in your home hidden by suspended ceilings? What fans and by what circuit are connected in it? Share your impressions, tips, corrections and additions to the article in the comments.

 False ceiling how to do: instructions for the work + calculation of the necessary materials
  Ventilation in the bathroom in the ceiling: arrangement features + installation instructions for the fan
  Exhaust fan in the bathroom: how to choose the right + installation rules
  Ventilation in a stretch ceiling: why do you need + subtleties of arrangement
  How to choose and install a fan in the bathroom + how to connect a fan to a switch
  How to make ventilation in the country: subtleties and rules for installing ventilation of a country house
  How much does it cost to connect gas to a private house: the price of organizing gas supply
  The best washing machines with dryer: model rating and customer tips
  What is the color temperature of light and the nuances of choosing the temperature of the lamps to suit your needs
  Replacement of a geyser in an apartment: replacement paperwork + basic norms and requirements