How to install a supply valve into the wall with your own hands: step-by-step instructions for the work
Wanting to warm the house, people sometimes bring it to the state of a thermos. After removing any gaps and installing airtight materials, the flow of clean air from the street is blocked. As a result, natural ventilation ceases to fulfill its functions.
Lack of fresh air is bad for household health, okay? To improve air exchange, you can install the supply valve into the wall with your own hands, after having studied the installation instructions.
All the necessary information is outlined in our article. We will tell you how the wall inlet is arranged, give tips on choosing a unit, and also describe a phased technology for its installation.
The content of the article:
Purpose of the supply valve
Wall air valves are designed to supply clean, fresh street air to the room. These devices can not be compared with open windows, letting in not only fresh air jets, but also all the noise, dust from the street.
The valve, equipped with a noise insulation layer, allows only clean air to enter the room.
If you compare the wall inlet with window ventilation valvethen it is more profitable. This is expressed in the fact that it does not reduce the light transmission characteristics of windows, it works at any temperature, even underestimated. In addition, it functions autonomously, effectively protects against condensation. Installation takes only a few hours.
These devices became popular after the old wooden windows began to be massively replaced with plastic ones. New window units significantly improved insulation performance, but a small amount began to flow into the room as well.Inadequate ventilation created a problem such as high humidity.
The heat in tandem with moisture creates wonderful conditions for the replication of mold, fungi. First, their colonies appear in hidden places - under the wallpaper, tiles and other decorative materials.
When multiplied, colonies of microorganisms become visible, fight mold it’s getting harder - you have to destroy the old finish and replace it with a new one.
Wall Valve Design Features
The design of the valve is extremely simple.
Its main elements are:
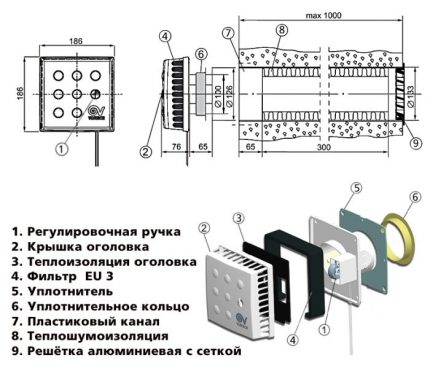
- Air duct - plastic pipe. Through it, air from the yard enters the room. Its length should be greater than the thickness of the wall.
- Inner casing in the form of a cylinder. Most often it is made with plastic. The diameter of the body ranges from 6-13.3 cm.
- Filter - a layer of foamed polyethylene. It is located inside the housing and is designed to direct the air stream into the room.
- Protective cover. It is located at the entrance and is a barrier to the entry of various debris into the room.
During frosts, the pipe from the outside can be covered with ice. Condensation and its freezing lead to the formation of an ice crust and a decrease in the diameter of the supply valve.
In order to prevent this process, a rotary cover is installed. Since condensate flows down through the openings in it, an ice crust does not form.
The air ducts of individual products are equipped with a polyphom sound insulator. It reduces noise and protects the wall around the enclosure from freezing.
The wall valve may have a manual adjustment system or an automatic one. The second is equipped with a hygro-regulation sensor, which detects the humidity level indoors. When this indicator is exceeded, the damper opens slightly, and the air masses enter the interior in a larger volume.
The degree of opening of the channel can be seen on the scale located on the valve head. Adjustment is carried out smoothly until the ventilation stroke is completely closed.
Manufacturers equip some more complex supply valves with a recuperator for heating the air mass. Sometimes in the kit there is a remote control that controls the heater and fan.
Wall inlet options
Each valve model has its own characteristics. They are distinguished by the cross section of the duct, the presence of such an option as complete closure of the device. The design of some provides for the possibility of installing sound insulation, while in others there is no such possibility.
The operation of some mechanisms is regulated manually, but there are also models with automatic adjustment. Different models of supply valves have different diameters, therefore they provide the house with clean air in different volumes. Different and length of supply valves, as well as the material from which they are made.
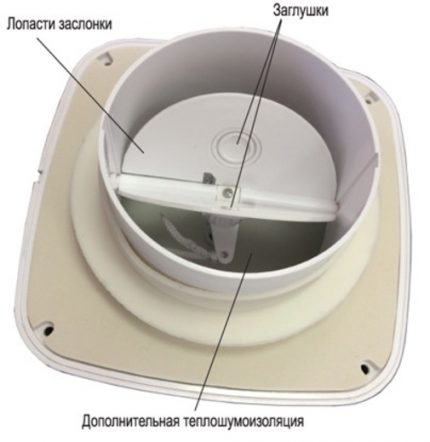
The inner part of the head is inserted into the channel and fastened to the wall using screws through a gasket for sealing. Wall ventilator needs periodic maintenance.
The external grill is cleaned of contaminants at least once a year. Once a quarter, clean the filter in the head. At least once every 6 months, it is necessary to clean the pipe in the wall using a vacuum cleaner.
Choosing a supply valve, you need to check for what temperature range it is intended. Otherwise, in case of violation of this condition, he simply will not be able to function fully.
There are two types of valves: for air infiltration and for forced ventilation. They have one and the same function - supplying the building with fresh air.
The infiltration valve operates autonomously, it does not need to be controlled. It is almost invisible, effectively warms the air. You can install it both during the construction of the building and in the wall of the house where people have been living for a long time.
Where to install the supply valve
There are three main options for installing a supply valve:
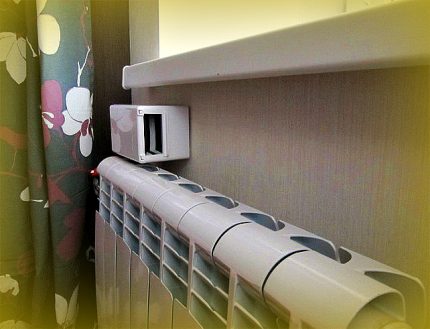
- Over heat source. In this case, the outside air enters the room already warmed up, and its convection is also stimulated.
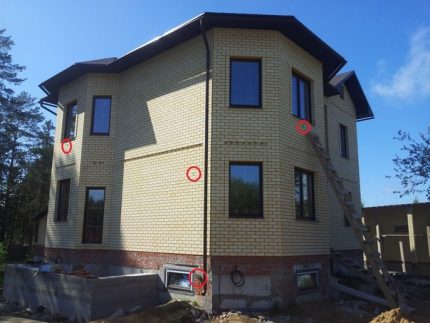
- At a height of 2/3 of the window, which is about two meters from the floor, and at a distance of 0.3 m from the window slope. The air mass will be directed to the ceiling, where it mixes with warm room air.
- In places with high humidity. This may be the corner of the house that has already begun to mold.
Wall ventilators are installed not only in the walls of private houses, but also used to improve ventilation in the apartment. Often they are placed on the lower floors of apartment buildings - the best place will be the space between the windowsill and the radiator.
These devices are in demand in children's institutions, where fresh air is especially important. With the help of this design, they provide an optimal microclimate in rooms for keeping animals and birds.
It is a mistake to think that by installing one valve, you will solve the problem with a lack of clean air. This is only possible if a forced ventilation device is included in its design. When this is not the case, air exchange occurs as a result of the pressure difference indoors and outdoors.
One wall valve with a pressure drop within 10 Pa, which is observed under normal conditions, provides up to 30 mᶾ / h. This is the norm for one person.
With a larger pressure difference, the volume of air entering the room also increases. Therefore, to achieve the desired effect, you will have to install another valve additionally or forced ventilation.
Produce and supply valves, which are built into the ventilation shafts. This is usually done in the bathroom, in the bathroom, in the kitchen. Before installing them, you should test the traction. To do this, check the presence of air flow with an open window, using a lit match brought to the hole.
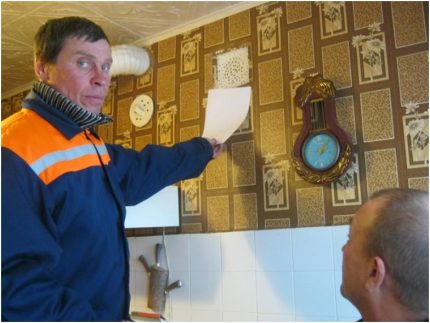
These manual verification methods may not work during the hot season. The air warmed by the summer sun becomes heavier than during the cool. Because of this, the pressure in the ventilation duct will decrease and even with a satisfactory system, a flame or a sheet of paper will not be attracted.
Read more about methods for checking apartment ventilation in this article.
In addition, the following rules should be considered:
- If the throughput of the supply valve is quite large, and its design does not provide for adjustment, you cannot install two such devices opposite each other. In winter, when ventilation functions most actively due to pressure inequality inside and outside, drafts will appear.
- The valve cover must fit freely in the space between the window sill and the heater. If the radiator is half-warm, then the air entering through the wide valve without adjustment will not have time to warm up and the room temperature will drop. And with an insufficient amount of incoming air, you will have to think about additional ventilation.
When choosing a valve installation location on the facade, you need to consider where this wall is directed. It is better when the air intake is not from the side of the street, where there is active movement of vehicles, but from the yard.
How to install the valve yourself
The most difficult part during the installation of the supply valve is to create a through hole in the wall. If it is provided by the project, then the work ahead is not at all complicated. When the house is built and it was not planned to install supply valves in its walls, you will have to do it yourself or invite a specialist.
Permission for this work is not required, because it is permitted by the regulations to make single products with a cross section of up to 30 cm in the bearing wall without any approval. There are two ways to cut a hole in the wall.
Drilling a hole in the first way
Most often, a perforator is used to drill holes. First, a contour is marked on the wall, adding a tolerance to the diameter of the cylinder so that the body passes through the hole freely. Since the thickness of the bearing wall usually varies between 40 - 100 cm, the valve length is also selected within the same limits.
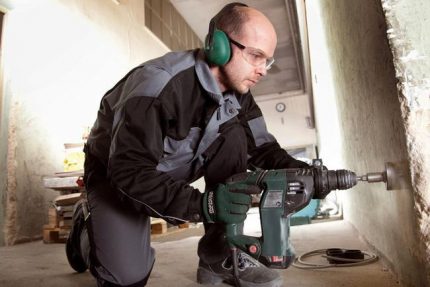
The next step is to drill a series of small holes from 10 to 12 mm according to the external outline of the contour. The distance between these holes is about 10 mm. Then, between the holes, the remaining material is knocked out using a hammer and chisel.
An ideal form hole cannot be obtained in this way; moreover, chips and cracks on the wall are not excluded.
The second way to drill holes
Faster and more efficient you can get a hole using diamond drilling.
The drilling rig used in this case, supplemented by a diamond core bit replacing a drill, is equipped with:
- powerful engine;
- drilling drive;
- a set of diamond crowns with different diameters;
- resistant guide fixed on the bed.
Due to the fact that water automatically enters the drilling zone to cool the tool, the dust is also washed off. The hole in the wall will have exact dimensions and an absolutely smooth surface inside.
A step-by-step description of the diamond drilling process is as follows:
- Mark out the place for installation of the drill rod. To do this, lay a segment on the wall equal to the distance between the base anchor and the crown.
- Drill a technological hole using a hammer drill.
- The bed is fixed, for which the anchor is first driven into the technological hole. To prevent the bed from damaging the wall, lay a piece of soft material under it.
- The film is fixed to a floor length and a width of about 300 mm under a place intended for installation of a rubber cuff. This will prevent contamination of the wall with coolant.
- The cuffs are inserted into the body of the drilling machine, where a special place is provided for this. Next, connect the hose for the outflow of coolant, pushing it on the pipe and securely fixing the clamp.
- Consistently collect a drill. At the end, put on a corresponding diameter diamond crown. To supply water, connect the hose to the handle of the unit.
- After reaching the operating pressure by pumping up the pump using a manual pump, wait until the installation reaches full speed and begin drilling. At this time, the coolant irrigates the drilling site, not only cooling the tool, but also removing dirt.
When the wall thickness exceeds 50 cm, the length of the crown may not be enough to drill through it in one go. Therefore, at the first stage, the concrete core is knocked out of the crown, and then the extension cord is mounted and the process is continued.
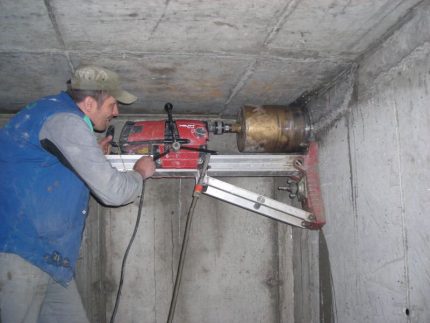
After completing the drilling, the installation is dismantled in the reverse order. Wet concrete dust under the cuff is cleaned with a damp cloth.
Supply valve installation
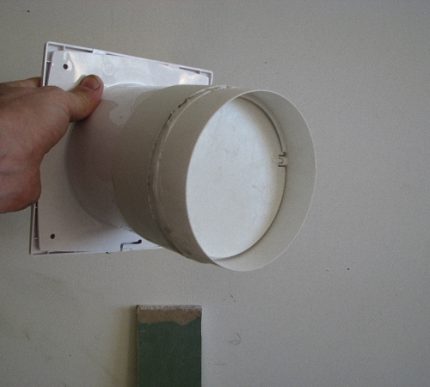
Having prepared the hole, proceed to the direct installation of the valve. To do this, the channel for infiltration is driven into the intended place for it from the outside flush with the wall.
The pipe is pre-wrapped with insulation. Indoors, the pipe should protrude slightly. The free space remaining in the hole is foamed, and thermal insulation is inserted into the pipe. It will also protect against noise.
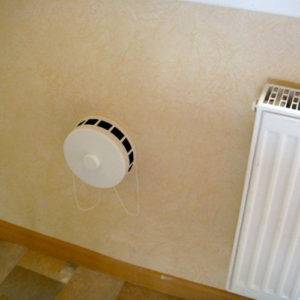
The next step is to install the grill. The seat on the grill and on the outer wall is covered with silicone, then inserted into the duct. Next, the inside of the valve is mounted, after applying silicone to the seats. By attaching the filter washer to the inner wall, the installation process of the valve for inflow is completed.
Demanded inlet valve models
The supply valve is especially popular among consumers. Domovent. Its labyrinth shape allows for coarse filtration of air masses with the subsequent direction of the jet to the heater. It is equipped with a mechanical adjustment of the air supply and a filter that does not require periodic replacement.
Demanded and model CPV 125manufactured by a domestic manufacturer. Since its length varies between 400-1000 mm, it is always possible to choose a suitable housing for installation in the wall. Outside, this ventilation duct is closed by a round-shaped cast aluminum grill with a mosquito net located next to the grill.
The same valves are produced in Finland, but their cost is half higher than domestic ones. Products from China are also on sale and they are cheaper than those produced in Russia. Italian valves are distinguished by good performance. Kiv quardo. They are equipped with a square-shaped head that distinguishes them from their Finnish counterparts.
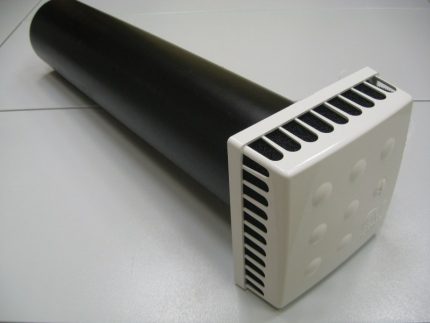
Rectangular ducts have wall valves SVK-75. An improved variant of the supply valve is a breather Tion O2. It has a rectangular shape, small dimensions and is equipped with heating, so it can function at low outdoor temperatures.
If the wall cannot be drilled for certain reasons, then the indoor microclimate can be improved with air conditioner.
Conclusions and useful video on the topic
A good choice of products for installation in the wall:
Video about the usefulness of a vent valve with heat recovery:
If your home has a problem with the intake of clean air masses, a wall-mounted ventilation valve is the best solution. The market has a wide variety of wall inlet valves. Choosing a model suitable for a particular room is not difficult.
Have experience restoring fresh air? Or maybe they did the wall valve installation themselves? Please share information with our readers. You can leave comments and ask questions in the form below.

 DIY inlet valve into a plastic window: manufacturing procedure and valve installation steps
  How to install the hood if the gas pipe interferes: briefing on the work
  False ceiling how to do: instructions for the work + calculation of the necessary materials
  DIY hood installation in the kitchen: detailed step-by-step installation instructions
  How to connect a kitchen hood to ventilation: a work guide
  Ventilation in a country toilet with a cesspool: step-by-step instructions and recommendations for arrangement
  How much does it cost to connect gas to a private house: the price of organizing gas supply
  The best washing machines with dryer: model rating and customer tips
  What is the color temperature of light and the nuances of choosing the temperature of the lamps to suit your needs
  Replacement of a geyser in an apartment: replacement paperwork + basic norms and requirements
We have neither window nor wall valves in our apartment, but I plan to improve natural ventilation, and I encountered some difficulties. Before installing such a ventilation device at home, I want to clarify questions about the shortcomings of the wall valve. Why is it installed only on the lower floors in an apartment building? For example, the fourth floor is already considered average, so only a window valve is suitable?
It is installed not only on the lower floors. I have a 5th floor, two years ago I made a supply valve without any problems, everything works. True, he didn’t do it, but he called specialists. Inside, the wall was drilled and set.
Shortcomings are everywhere, but fresh air is more important for the body than any shortcomings. If the valve does not work properly, you will have to add a duct fan. And if the noise is annoying, you will have to power it through the daily timer (the issue price for both of these things is 1000 rubles).
At the initial stage of building my own house, I did not take care of this, so I had to do it in the already built one. As it turned out, it’s not difficult at all, they did it with a friend, bought the most suitable materials in a hardware store, looked at the Internet for detailed instructions. They installed 5 valves in 3 days, the air in the house became much cleaner, it’s nice to breathe, they are above the batteries.
I want to make a supply valve in the apartment, but comrade dissuades. He says that his temperature in the apartment decreased by 3-4 degrees after its installation. Is there any way to avoid this?
If this is a private house where you pay for heating, then the economic efficiency of the recuperator may be justified. In the apartment, it’s enough to add one or two sections to the radiators and solve the problem with heating))
Do not listen to your friend, there will be no temperature drop in the room as much as 3-4 degrees. This can happen if you put a supply valve in the wall with various violations. In addition, there are models where you yourself regulate the air flow, and it is also possible to block it completely, in such cases there can be no heat loss. The maximum is a temperature drop of 1 degree, and then only when the supply valve is opened to full, but after a while the temperature in the house or apartment will return to normal.
If you follow all the recommendations that are given in this article, then there should not be any problems after installing the supply valve in the wall.