Connecting an exhaust fan in the bathroom and toilet: analysis of schemes and tips for installing equipment

It happens that you take a hot bath or shower, steam up, relax - it's time to put yourself in order. You approach a mirror - and it is completely foggy, and even a towel cannot drain it. Or in the toilet for a long time there is a smell from the previous visitor or an obsessive air freshener. Familiar situations? Solving such problems will help the connection of an exhaust fan in the bathroom and toilet, common or two separate.
It is not worth neglecting the quality of the ventilation of the bathroom, because this is a matter of not only convenience, but also safety. Over time, mold and fungus are created along the bathroom, in the corners and in the seams between the tiles, which are dangerous to human health. It is often possible to completely remove them only during overhaul, so the acquisition and installation of an exhaust fan pays off with interest, preventing similar problems.
In this article we will tell you how to organize a system of forced ventilation of a bathroom, what to look for when buying equipment, how to install and connect everything yourself. We will consider options for connection schemes suitable for different models of fans and conditions of use, as well as give some useful tips on ventilation in the bathroom and toilet.
The content of the article:
Choosing a fan and starting method
There are many exhaust fan models, including - for the bathroom. They differ not only in size and appearance. There are a number of characteristics that should be considered when choosing and buying.

The first thing that determines the connection diagram of the fan for extracting air from the bathroom is the way to start it.
Depending on the model, there are such options:
- Turning on the fan case with a button or cord - they are the easiest way to connect, but it’s not very convenient to reach the ceiling each time.
- Start by a separate switch or in parallel with the lighting. The fan itself also has only 2 wires, but the possible connection schemes are more complex and diverse. Including, with an external timer or hygrometer, motion sensor or door opening.
- Management through the built-in timer or hygrometer. Such models are connected by a three-wire wire.
- Remote control through the remote. These models combine the ease of connecting the first option and the maximum ease of use, but they are also the most expensive.
In addition, not every exhaust fan is suitable for the bathroom. The fact is that this is electrical equipment, and for operation in high humidity conditions the protection class must be at least IP45, which is confirmed in the documents.
At the same time, each digit of the marking should be considered separately, that is, IP62 protection is not suitable, since the second digit indicates resistance to moisture, it should be at least 5.
In practice, protection is implemented in the form of isolated connection contacts, a hidden or moisture-proof control board, and a sealed motor housing.

You should also determine the type of design of the device. Axial models are cheaper, but noisier, because the air passes directly through them. Centrifugal fans form vortex flows that push air in a circle - it is much quieter. In addition, for a private house, you can choose which are installed inside the ventilation duct, and not at the exit from it.
Another critical parameter is the power and performance of the fan. To do this, the volume of the room must be multiplied by 6 - 8, depending on the number of residents. The resulting figure is the minimum required volume of air exchange per hour.
A fan that is too weak will not do its job well, it will have to be left on for a long time. Too powerful will not only add strong drafts, but can also provoke a return air flow from the general ventilation shaft, with all the neighboring odors.
Also pay attention to the diameter of the fan. If it does not correspond to the diameter of the existing ventilation hole, an additional pipe and construction foam or perforator will be required for installation, as well as much more effort.
The comfort of use is significantly affected by the noise level of the equipment. Quiet models produce no more than 25-30 dB, less successful solutions - about 50 dB, and sometimes more.

In addition to these parameters, please note whether fan check valve, ventilation function, mode switch, display with indication of temperature and humidity. Design decisions include original or replaceable protective panels, sometimes with backlighting.
Fan wiring diagrams
The most critical part of the installation of the ventilation system is the connection of electrical wiring. The correctness, efficiency and safety of the system, as well as the convenience of its use, depend on this. It is not uncommon that no one uses the installed fan in the bathroom just because it is inconvenient to turn it on or off.
Various connection schemes, as well as built-in and external devices allow you to automate fan control, or minimize the cost of installing it.
Devices with a switch on the case
An inexpensive and reliable option is to install a fan with a built-in switch.It can be connected to a power outlet or directly to a wire that supplies electricity to the apartment, whichever is closer.
In the same way, the most expensive models that are controlled by the remote control are connected. They also have a shutdown button on the case - emergency.
However, before you connect the fan directly to a power outlet, think about whether you will reach the button or cord on the unit body each time? After all, you need to install it under the ceiling, where steam accumulates. Of course, the lace can be lengthened - but this is not aesthetically pleasing, and it is not always convenient.

The advantages of this connection include ventilation control from inside the bathroom - because according to the EMC any other switches and controls for electrical appliances should be located outside, in the corridor.
Connect the fan to the lighting
The simplest and most budgetary option for arranging forced ventilation of the bathroom is to connect the fan to the nearest light bulb, spending a minimum of wires and effort. In this case, the hood will work exactly as long as the light is on.

Installing a fan with three wires is a bit more complicated. Such an assembly requires constant power to the board, so both phase and zero are drawn directly from the box to it.
The switch opens the additional phase wire that controls the timer. All connections are described in more detail in the diagrams below.


Connection through the box is safer, since all connections are outside the bathroom, but have the same operational disadvantages as the connection to the bulb. On the one hand, you will never forget to turn on the hood, you will need few wires, and you can hide them even after facing the walls - to the ceiling.
On the other hand, few people will like the draft and noise during bathing, and working hours from light for effective ventilation may not be enough. As a result, you have to leave the lighting on after leaving the bathroom or toilet, and this is an additional energy consumption.
The presence of a built-in timer in the exhaust fan eliminates these shortcomings: in the bath mode, it will turn on only after turning off the light and work for a specified time, and in the toilet it will start along with the lighting.
Connection via switch
This connection scheme is the most universal, reliable and widespread. Using it, you can connect any fan model and control it manually, regardless of lighting.
Connecting a fan with a timer is carried out almost in the same way as we described in the previous paragraph about the connections in the junction box. The fundamental difference is that the phase wire of the fan does not close together with the lighting phase, but separately - to the individual wires of the two-gang switch.

To connect simple models in this way without a built-in timer, it is enough to bring the zero wire from the junction box directly to the fan, and the phase from the switch. If a single-key light switch is already installed, replaced by a two-key, and the wire from it to the box is three-core. To the new core and connect the phase wire to power the fan.
Such a scheme can flounder most often for one reason: phase and zero are mixed up.

If in the bathroom when the light is off, the LEDs blink, and the electronically controlled fan behaves in a strange way, it makes sense to open the junction box and double-check the presence of phase on the wire leading to the switch.
For more information on how to connect a fan to a switch, read Further.
The inclusion of an external sensor in the circuit
In any of the above schemes, you can include an additional humidity sensor, air pollution, a timer (if there are no built-in sensors), a motion or door sensor.
The most effective ventilation will be in the bathroom, controlled by a humidity sensor, and in the toilet - a timer or air pollution sensor.

It is worth noting that external sensors, as a rule, are much less durable and reliable in a bathroom than built-in fans.
Fan mounting procedure
As in any construction work, the ventilation system must first be designed. It is better to do this even at the very beginning of the repair of the bathroom, in order to be able to hide all communications in the walls and under the ceiling.
If we are talking about a bathroom in an apartment where there is already a hole in the wall into a common ventilation duct, you just need to turn natural ventilation into forced ventilation. To do this, it is enough to determine the model of the fan and the circuit for connecting it to electricity.

In a private house, you usually have to build a system from scratch, leading the ventilation pipe to the street through the roof, less often through the wall. In this case, it is necessary not only to think over everything, but also to draw up a plan diagram according to which it will be convenient to consider the necessary materials and make installation.
It is worth checking the presence of natural traction in the existing mine, and in case of its complete absence, contact the Housing Department for cleaning. For effective air exchange, it is better to place the hood opposite the door or flow valve, if any.
The next stage is the purchase of everything you need. It is even worth buying in advance that will be installed at the very end of the repair, because another model of the fan may not be connected to the wires already supplied.
Having figured out how to connect the purchased fan and choosing a ventilation scheme, you can proceed to repair the bathroom.
During the decorative decoration of the walls and ceiling, wires are laid in corrugated insulating tubes, if necessary, a ventilation duct is built and the size of the fan hole is adjusted. Connection of wiring and installation of switches is also carried out at this stage.

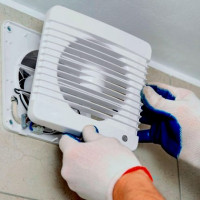
The fan itself is installed after finishing. The installation procedure is as follows:
- Make sure that the wires that are routed to the fan are de-energized.
- Remove the front panel, insert the housing into the hole and mark the places for fastening on the tile with a marker.
- Drill holes with a drill with a ceramic drill, hammer in the dowels. This step can be neglected completely or only part of the provided fasteners can be used. Plastic fans weigh a little, usually for fixing enough liquid nails or polymer glue.
- Even when mounting on self-tapping screws, the perimeter of the fan casing must be lubricated with silicone or another polymer - to absorb vibrations and prevent noise.
- Insert the housing into the hole, check the level (for models with a square front) and press firmly until the sealant seizes.
- Connect the wires to the terminals of the device and fix so that there are no exposed areas.
- Turn on ventilation, check operation in all provided modes.
- Install the front panel.
This order is universal, suitable for overhead fans of any model. It also doesn’t matter if the fan is installed in the wall or in the ceiling - only the installation is different channel models.

If the fan is designed with a timer, a hygrometer, a mode switch or other equipment, do not forget to set it up until you put on a decorative panel.
Often from the factory, the timer adjustment screw is unscrewed to a minimum - select the necessary duration of work experimentally.
There may also be a mode switch that looks like 3 or 4 metal pins with a removable jumper on two of them.
In the "toilet" mode, the fan starts immediately, at the same time as the light is turned on, and the time set by the timer runs. In the “bathroom” mode, the turn-off signal is a turn-off of the light, so that noise and drafts will not disturb you in the shower.
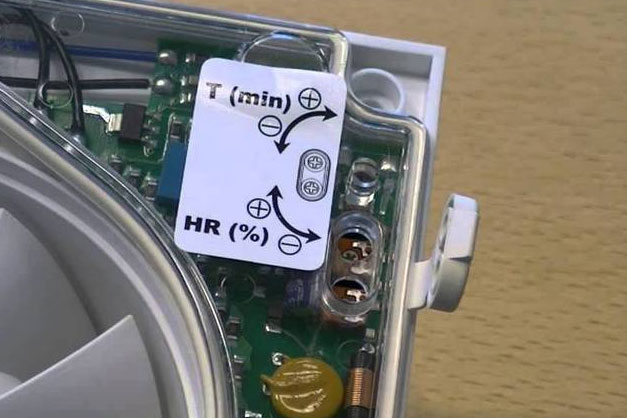
The built-in hygrometer can be adjusted to a certain level of humidity at which the fan will start.
Common mistakes and additional tips
Errors in connecting the fan can cause not only incorrect operation of the hood, but also a short circuit or fire. Do not forget that the bathroom is a room with high humidity, which means it is especially dangerous for electrical appliances and wiring.
In order to arrange ventilation without errors on the first attempt, consider the following tips:
- The fewer bends and the simpler the design of the ventilation duct, the better the draft.
- With a single ventilation system for a separate bathroom, the air should move from the bath to the toilet, and not vice versa.
- For all wire connections, use terminal blocks, not tape.
- Strip exactly the part of the wire that goes into the terminal strip.
- Check for a mosquito net in the fan. If suddenly it is not there, add it, because mosquitoes and other insects feel great in warm, moist ventilation shafts.
- In a private house, be sure to insulate part of the ventilation duct or mines passing through unheated rooms. Otherwise, there will be no traction in cold weather.
- Do not neglect grounding for metal fans.
In addition, so that the fan does not interfere with natural ventilation when it is turned off, you can use double rectangular grilles, with a hole for the fan at the top and a regular grille under it.

If it is not possible to install a double grille, you can preserve natural ventilation by substituting 1–2 cm foam legs under the corners of the case, in the places of fastening with self-tapping screws.As a rule, the ventilation window is square, and the fan casing is round, and these gaps are quite enough for air circulation.
Please note that even a perfectly installed and sufficiently powerful fan will not work efficiently if there is not enough supply ventilation. Usually it is provided by a gap of 1.5–2 cm under the door to the bathroom, but for beauty it can be replaced with a special grill that cuts into the bottom of the door.
Also, make sure that fresh air enters the housing at all, because after installing plastic windows and new doors, insulating walls and concrete screed on the floor, the apartment is hermetically sealed like a thermos.
In addition, the exhaust fan may need cleaning. Therefore, we recommend that you also read the step-by-step instructions for disassembling and cleaning the device. More details - go to the link.
Conclusions and useful video on the topic
The construction of the ventilation channel for autonomous ventilation of the toilet and the bathroom with only one shaft is clearly shown in this video:
Connecting a simple fan is described in detail here:
Summing up, we can say that it’s quite possible to independently equip an effective ventilation system in an apartment, but you need to be careful and think through everything carefully in advance. If you are not confident in your abilities, entrust the matter to a specialist, because errors in working with electrical wiring can lead to sad consequences.
Have you ever installed a fan in a bathroom or toilet? Please tell us which connection scheme did you use and were there any difficulties in installation? Leave your comments, share your experience - the block for communication is located under the article.
 Connecting the hood in the bathroom to the light switch: analysis of popular schemes and detailed instructions
 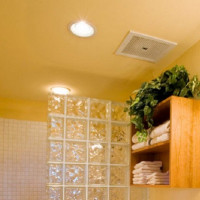 Ventilation in the bathroom in the ceiling: arrangement features + installation instructions for the fan
 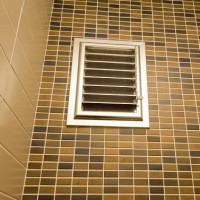 Ventilation in the bathroom and toilet: principle of operation, typical schemes and installation features
  Ventilation in the steam room: examples of proven schemes and analysis of the rules of arrangement
 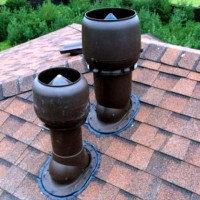 Ventilation pipes for the roof: tips for choosing a pipeline + installation instruction
 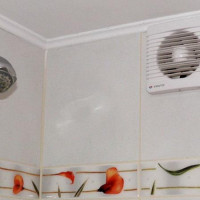 Is forced ventilation in the bathroom necessary: norms and stages of arranging efficient air exchange
  How much does it cost to connect gas to a private house: the price of organizing gas supply
  The best washing machines with dryer: model rating and customer tips
  What is the color temperature of light and the nuances of choosing the temperature of the lamps to suit your needs
  Replacement of a geyser in an apartment: replacement paperwork + basic norms and requirements