The washing machine drum does not spin: 7 possible reasons + repair recommendations
You habitually loaded the laundry, turned on the machine, she took water and started to work. But after some time she suddenly stopped. The program is not completed, things are inside, panic is approaching, the world is turning over at the mere thought of hand washing.
We will figure out how to get rid of breakdowns if the drum of the washing machine does not spin - the causes, consequences and solutions to the problem.
The content of the article:
What can be done right away?
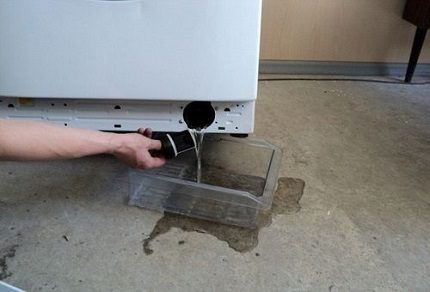
Calm down, turn off the machine with a button on the panel and pulling the cord from the outlet. We cover the floor with rags, find the drain filter on the front panel from the bottom, put a container under it (scoop, suitable container), open it and drain the water. We take out the clothes from the machine and understand further.
Determine when the drum stopped. If, during the spin cycle, the laundry in this case remains simply wet, with no signs of soapiness. If when washing, things will be in powder.
You need to try to scroll the drum by hand. Did not work out? A foreign body or a failed part physically interferes with the rotation. When the drum spins with the machine turned off, the reason is hidden in the electronics.
And one moment. A common consequence of drum immobility is normal overload. Try splitting the laundry in half and restarting the wash with less “workload”.
Modern washers are equipped with special sensors that monitor the weight: when it is exceeded, they stop the process. On some models, this information is displayed.
Do not forget to check the external conditions that affect the operation of the machine. Some washers are equipped with sensors that are sensitive to water pressure.
While the user disassembles the device and changes the details, the clamped hose, a bursting gasket or a dirty filter will not inform themselves to attract attention.
What malfunctions lead to the problem?
Breakdowns in the machine are divided into rare and typical. The drum stop belongs to the second group. The causes of damage can be mechanical, technical, domestic problems.
If the washer worked for a long time within its capabilities and without proper preventive maintenance, technical malfunctions appear. They require specialist intervention. You can handle the rest yourself.
Breakage # 1 - a foreign object in the tank
Take a flashlight, inspect the drum from the inside. It is important to carefully examine everything to see if a foreign object is found there.
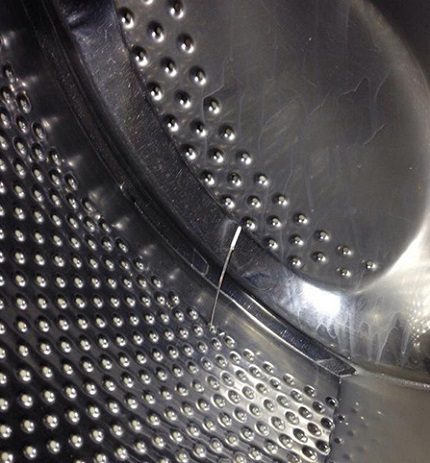
We get other foreign objects:
- Extend the machine to allow access from all directions.
- Remove the bolts on the rear panel that hold the top cover.
- Slide the cover back to remove it.
- Loosen the screws of the back cover, remove it.
- Take out the heater, this will facilitate the process of extracting foreign objects.
- Separate the wires that go to the heating element, unscrew the fixing nut. It is easy to pull out the heating element if you hook it with a screwdriver.
- It turned out a hole - we shine a flashlight into it.
- Did you see the problem? We twist a wire of sufficient length, we get out with its help a stuck object.
- We install TEN in place, we monitor the excellent fit, tighten the nut.
- We collect the machine.
When the object is in the space between the drum and the tank from above, you cannot see it through the hole of the heater.
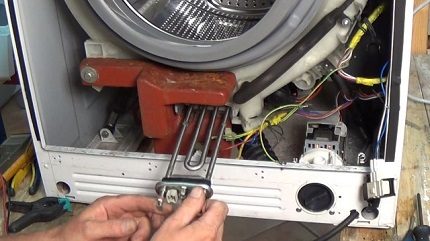
We lock the pulley with a bar made of wood, unscrew the fixing bolt, remove the pulley, fasten the bolt, but not completely. Now hit the bolt with a hammer, try to keep the thread.
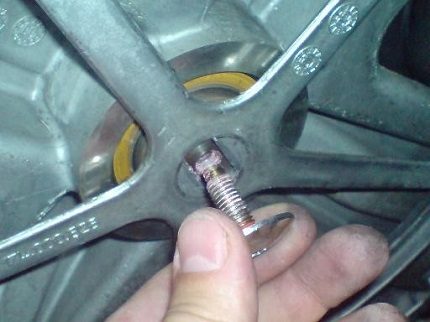
As a result of the blows, the shaft and the drum will slightly move forward, and the excess object will go down, where it is convenient to get it. Return the pulley in place, fasten the bolt until it stops. We install the back wall of the machine, we fix all the bolts.
Breakage # 2 - the sash in the vertical opened
In vertical typewriters, tank flaps are often opened during spinning. The reason is sometimes not related to a leaky latch.
Perhaps too smart a child got and cranked the drum with the wings open. Or an adult has loaded too much laundry and a piece of cloth has landed on the catch.
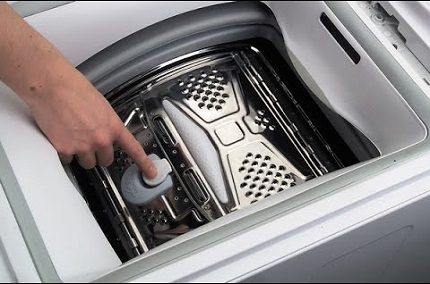
The problem does not look serious. But the severity of the consequences depends on the moment when the sash was opened. If on a delicate wash, in most cases, nothing bad happens.
But during a strong spin, open blades can turn into meat grinder knives and spoil everything that gets in the way.
The flaps break through the protective barrier at speed. The heater is the first to be hit, for the walls of the tank itself and the barrel of the drum are damaged. When all three elements break down, repairs are expensive. Cheaper to buy a new washing machine.
Let's try to solve the problem differently. You need to try with minimal effort and carefully return the drum to its original position.
If it doesn’t work, try closing the sash.You will need a strong, elastic steel wire with a diameter so that it passes into the holes of the drum.
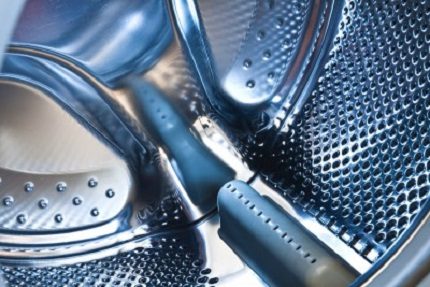
Bend the end of the wire with a pair of pliers about half a centimeter to form a hook. Carefully push it into the hole. Using a flashlight in one hand and a wire in the other, we try to close the wings.
If possible, you will be able to scroll the drum. When the wire cannot catch the sashes or they cannot be held in rotation and they still open, you will have to disassemble the washer.
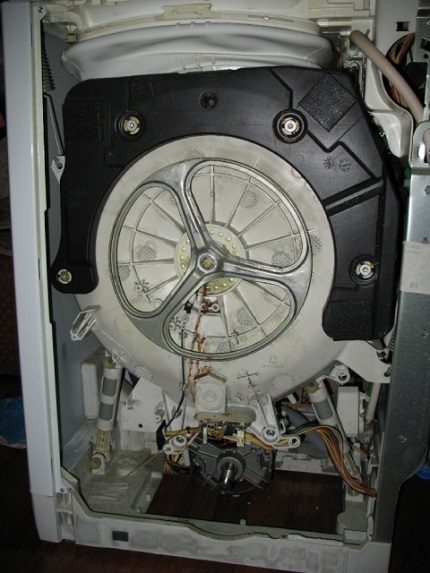
General procedure:
- We unscrew the latches of the rear panel, set it aside.
- We shift the sidewall to the side, we also remove it.
- We photograph the location of the wires, disconnect them.
- Unscrew the screw holding the shaft.
- Close the loading door, get the tank.
- Separate the halves of the tank, get the drum.
- We clean parts from dirt and debris.
Now try to close the sash several times. If the lock is broken, this part can be ordered from the manufacturer and replaced.
We examine the flaps themselves, the integrity of the tank, damage to the heating element. Significant deformations are an occasion to think about buying a new washing machine.
Failure # 3 - jammed rusted bearing
Bearing wear is another malfunction that causes the drum to stop. We have it disassembled, check the bearing. Carefully knock out the part with an improvised tool.
In addition to the bearing itself, the oil seals must be replaced. The bearing mounting location is treated with lithol, we return the elements back. Fasten with a hammer.
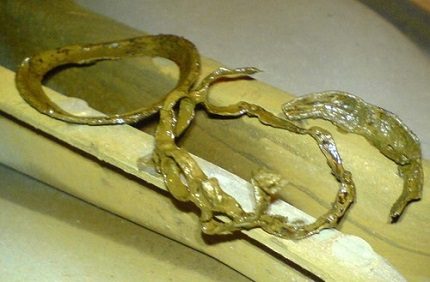
If you have a horizontal machine, the procedure is as follows:
- Unscrew the fasteners, remove the back and top cover.
- Dismantle the dispenser.
- We remove the control unit, having previously unscrewed the latches.
- We open the loading hatch, we turn out the rubber cuff, we fill it into the drum.
- We remove the lock.
- We remove all fasteners, remove the front panel.
- Weaken the clamp, remove the counterweight.
- Now you need to pull out the heater. Here we pay attention to the order of connecting the wires, turn them off, pull out the heating element.
- We remove all remaining obstacles that connect the tank and the body - pipes, drive.
- Turn off and get the engine.
- After that, nothing prevents removing the tank with the drum.
To make it more convenient to work, the tank can be moved to a solid table. Next, we do everything similarly to the algorithm with a vertical machine: knock out the bearing, remove the seals, lubricate the socket, install new parts.
When assembling the drum, carry out the installation very carefully. Seal the joint with a sealant to avoid leaks. There are models of cars with non-collapsible tanks, it is reasonable to entrust their repair to the master.
Detailed instructions for replacing bearings in the washing machine are given in this stuff.
Failure # 4 - the drive belt has flown or damaged
Remove the rear panel of the machine, look at the condition of the belt. If it just slipped, put it back in place, close the lid, turn on the washer and check if it works. In the event of complete wear, damage will require replacement.
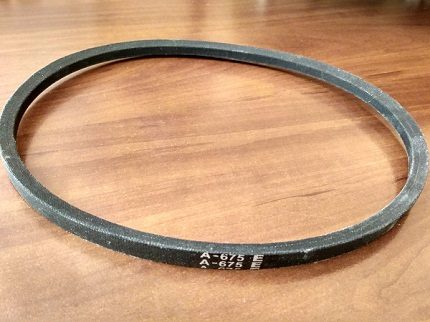
They are made of chloroprene rubbers, polyester cords, cotton material, due to which they are elastic and have increased strength characteristics.
The V-belt is pulled, moving the engine, so you need to loosen the fasteners. When the adjusting stroke of the engine is small or such a maneuver is excluded by the design of the machine, the belt must be replaced.
We install the V-belt like this: wrap it on a pulley, then put the strip in the drum groove and completely seat it there, rotating the pulley.
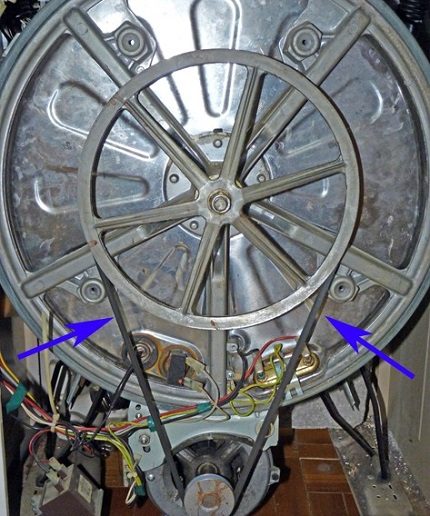
The V-ribbed belt has a gear section. Parameters are also marked on the outside. It changes in the same way as a wedge. But he needs careful position control after the final installation.
We measure the middle of the reciprocal part of the engine and drum pulley - the belt is installed strictly along this line. V-ribbed belts stretch less than V-belts.
We also recommend that you read the detailed instructions for selecting and replacing the belt in the washer.
Breakdown # 5 - worn motor brushes
When worn brushes do not provide the desired electromagnetic field, the motor rotor stops rotating. During the operation of the washer, this part is shortened and the collector is no longer available. Need a replacement.
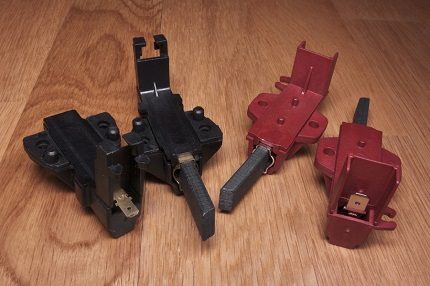
If the machine is assembled, remove the back wall, belt. We disconnect the engine from the power by pulling out the connector with wires. We dismantle the engine itself.
Next, we lay the engine on its side so that the brush body is on top, and we unscrew the mounting bolts, pull out the spare part on one and the other side.
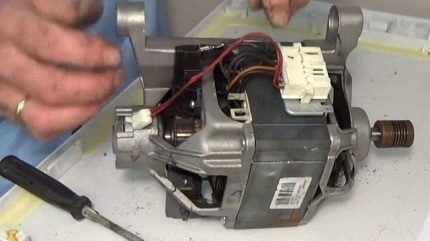
Do not rush to change, inspect the elements. Measure the rods: if their length exceeds 1.5 cm, the brushes do not cause the drum to stop.
Also, do not forget to clean the collector from black deposits, remove scratches with sandpaper. That's it, now you can put new elements and tighten them with bolts.
Breakdown # 6 - the control module is broken
The drum may remain stationary due to the lack of a signal from the "brain" to start washing. Most often, the control board fails due to voltage surges or natural wear.
There are three solutions to the problem - to reset the programs, “flashing” or replacing the module.
Some models have a self-test function. It allows you to determine the source of the problem. How to enable this feature? They do not write in the instructions, but the starting method depends on the manufacturer and the specific model.
As an example - Ardo it is tested like this: we drain the water, the tank should be empty, set the mechanical program switch vertically down, set the temperature to zero. To start the test mode, click on all buttons at once.
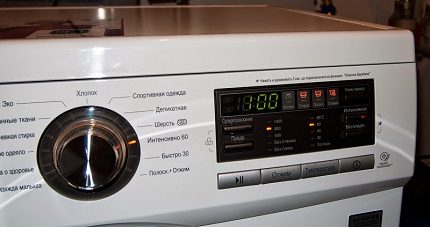
If you still need to remove the board, it is removed quite simply. We remove the top panel, dismantle the top of the machine, remove the retaining bars and remove the module.
Repair of the control unit requires special skills - you need to check the parameters of the elements, track the chain. We carefully inspect the board.
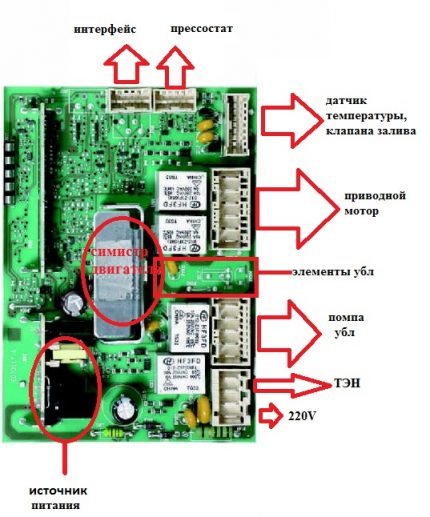
4 signs of the need for serious intervention:
- The tracks darkened, the color changed in some places, tan marks appeared.
- The bulges on the caps of the capacitors are visible.
- The varnish coating on the damping coils burned out.
- The main processor darkened at the installation site.
If any of the above is found and there is no experience with a soldering iron, multimeter, entrust the repair to a specialist.
Failures related to sensor problems can be fixed by yourself. Contact groups become greasy and clogged over time, they just need to be cleaned. Remove the program knob, disassemble the handle and clean it.
If there is a soot layer on the power coils of the line filter, brush it off with a dry rag and brush. The block of the hatch lock is exempt from soapy plaque.
Failure # 7 - engine burned out
The motor is usually reliable and you need to try very hard to break it. But there are a couple of cases when this happens. The winding closes or breaks at the stator and rotor.
A characteristic sign of the first situation is that an empty drum spins normally, and with full washing, traffic jams break out. When a second situation occurs, the drum stops rotating at all.
Repair is possible if the drum has stopped, but the included machine is buzzing. Full engine replacement needed when there is no start at all, it smells of burning, there is dark smoke, the washing machine sparks. To begin, remove the electric motor, see what can be done.
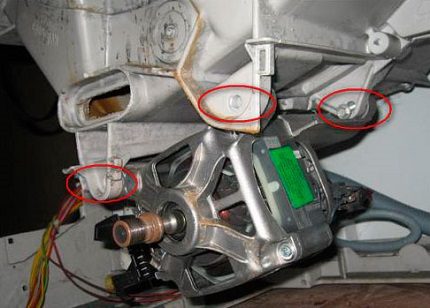
The motor is removed in the same way as when replacing the belt. If it is clamped by the tank, slightly raise the tank and release the engine. Sometimes you have to remove the side wall. There are three main faults - brushes, lamellas, windings.
How to replace the brushes, we have already considered. The windings can be tested with a multimeter when probing adjacent lamellas alternately. The discrepancy should be less than 5 ohms.
We also check the closure of all windings: we place one probe on the case, and the second we go through the lamellas. If everything is OK, the resistance will be high.
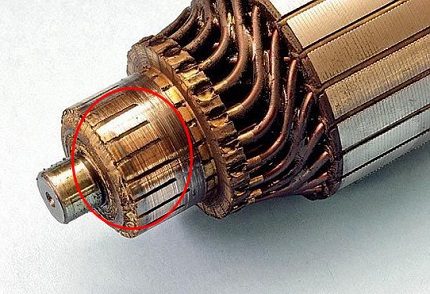
If the windings are faulty, it is better to find the same part and replace it. Rewinding will cost more. Slight delamination of the lamellas can be machined on a lathe.
But such an event will not become a panacea; the factory look and quality cannot be returned to them. Conclusion: we change the details to new ones.
Future Prevention Techniques
Empty pockets thoroughly before washing. Load all the little things (baby socks, handkerchiefs) and bras in special mesh bags.

Connect the washer through an uninterruptible power supply or at least an extension cord with a differential lock if you live outside the city or simply have problems with power surges.
This is especially true for models with many programs and too smart “brains”. Pay attention to the correct grounding of the machine.
In addition, regular preventative drum cleaning - this will protect the washing machine from breakdowns and the occurrence of unpleasant odors.
Conclusions and useful video on the topic
More details about repairing faults can be found in the videos presented by the service center masters and ordinary users.
Front-loading machine disassembly diagram:
Removing and opening the washing drum is considered in the following video:
Removing the belt, engine, replacing the brushes in the video:
When you change everything, install, close the machine, be sure to check the performance of the equipment. Run your regular program. The washing machine works in the usual mode or sounds louder than usual - the order, everything is done correctly. Creaking, chattering, too loud noise of the washing machine - an occasion to seek help from a service center.
Had to face a problem when the drum of the washing machine stopped spinning? Please tell us how you managed to deal with this problem, what caused it. Write your comments, share your experience, ask questions - the contact block is located under the article.

 LG Washing Machine Errors: Popular Trouble Codes and Repair Instructions
  Do-it-yourself washing machine repair: an overview of possible breakdowns and how to fix them
  Cuff for a washing machine: purpose, instruction on replacement and repair
  Ariston Washing Machine Errors: Decoding DTCs + Repair Tips
  DIY Samsung washing machine repair: analysis of popular breakdowns and repair tips
  Bosch washing machine errors: troubleshooting + recommendations for resolving them
  How much does it cost to connect gas to a private house: the price of organizing gas supply
  The best washing machines with dryer: model rating and customer tips
  What is the color temperature of light and the nuances of choosing the temperature of the lamps to suit your needs
  Replacement of a geyser in an apartment: replacement paperwork + basic norms and requirements
When I started cleaning the filter of my washing machine, I just couldn’t find it there. Starting from pebbles and ending with coins. I now try to do prevention at least once every 3 months. And I also encountered the problem of a stuck bone from a bra, but the drum continued to spin, there was only an extraneous sound. I had to turn it off, remove all the laundry and take out a bone with tweezers. There were no more problems. It turns out that most of the problems can be solved independently and it is not necessary to contact the service.
Just yesterday I watched a program where they showed how the belt flies, and that this is a common cause of damage to washing machines. But still, I would not have risked repairing it myself or trusting my husband in search of the causes of machine breakdown. I would rather trust this question to the master, since he knows what spare parts are needed for repair and where to get them quickly. After all, staying for several days without a washing machine is very, very difficult.
The article is helpful. And the problem turned out to be banal simple - engine brushes! For 22 years (!) The car, Siltal SL348X, during the last year the situation with the stop of the drum began to appear. Then she could continue to work again, and the other day she got up completely. Pours, warms, does not twist, merges 🙂
The brushes are worn to the limit, they just hung over the collector. Replaced without removing the engine. The machine is in the “on its side” position, do not forget to shut off the water, disconnect the water hose and unplug the machine!
Hello, yesterday the Bosch maxx 4 washing machine broke; 2001 release - there was a pop / click, the mn turned off, and the machine on the shield turned off. The electrician on duty said that everything was fine from the shield to the outlet, the outlet was working, but the meter did not turn on. Further, after unloading the laundry and draining the water, she noticed that the drum began to scroll with effort. What could happen? Does it make sense to repair and how much it can cost ?! Thanks in advance.
Hello. Very similar to a short in the appliance motor. In your case, the diagnosis of a service specialist is necessary, since the problem can be both significant and quite fixable.
Mego useful article. I replaced the brushes, ten and cleaned the filter myself. It all worked! thank!