Do-it-yourself summer shower: step-by-step construction instructions

Country life attracts with the opportunity to enjoy fresh air and unity with nature. Outside the city, everything is fine, except for difficulties with the reception of hygiene procedures. Agree, it would be nice to make a summer shower with your own hands to solve this problem?
This option will help to increase the comfort of staying in the country, but it will not greatly affect the family budget. We will show you how to implement this idea.
The article details the best design solutions and technologies for the construction of cabins. Useful tips on choosing the materials required in construction, arranging a drain, and simple and quick heating of water will become effective help. The information provided is supported by photos and video applications.
The content of the article:
Shower Design Options
The comfort and convenience of using the construction depends on how well-designed the summer shower is. The task of the zealous owner is to build an economical, easily constructed and at the same time maximally functional shower equipped with heating.
The simplest option is an outdoor shower.

When choosing this option, the tank is installed on the supporting wall of the building, positioning it so that the sun's rays hit it at right angles.
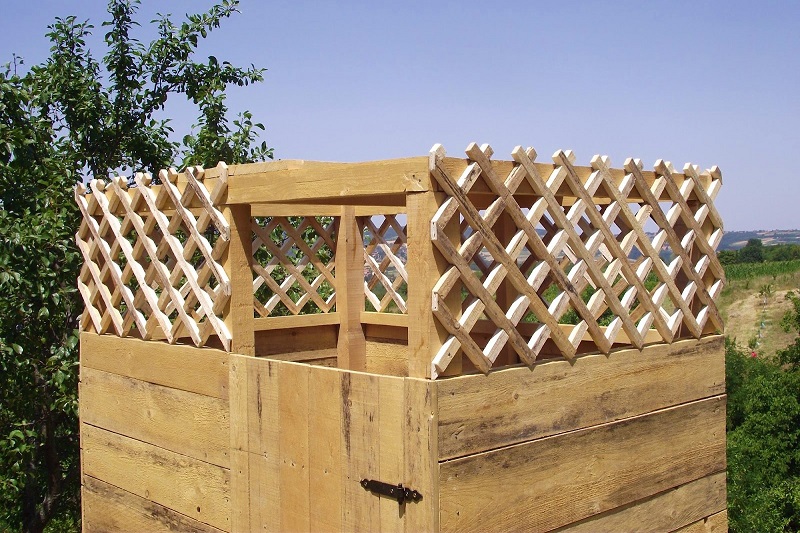
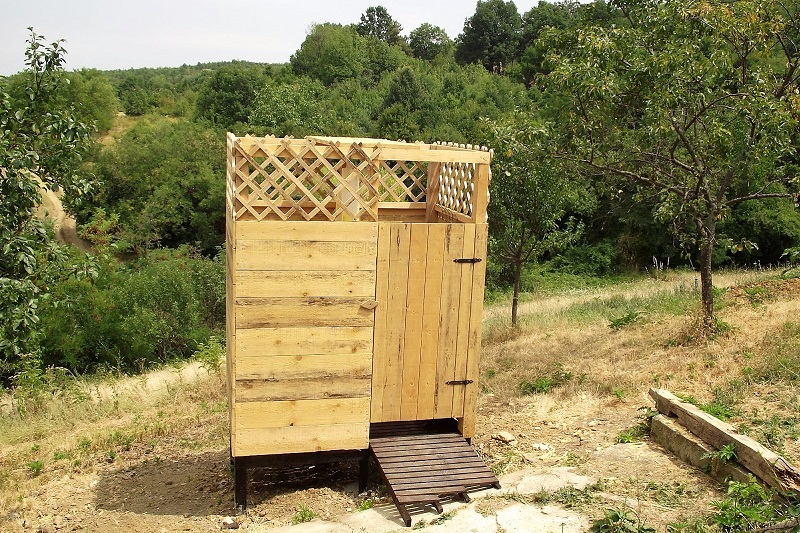
Do you prefer enclosed designs that are convenient to use both in the warmer months and in the colder months? Build a stationary outdoor shower with a simple heating system. It can be a frame structure or a capital building.

Traditionally, during the construction of the shower, in which there is enough space for an adult to bathe, they are guided by the following parameters:
- height - 2-3 m;
- width - 1.5 m;
- length - 1.9-2 m.
These dimensions are convenient for the construction of wooden planks. Given the thickness of the walls in the finished form, the structure over the area is approximately 2 * 1.5 m, of which an area of 1 square meter will be allocated for a shower cubicle. m, and under the locker room - 60 * 40 cm.
When using boards of standard sizes, the material is consumed with virtually no residue.
In addition to wooden boards, the following materials are most often used as building materials for the construction of cabins:
- polycarbonate sheets;
- moisture resistant plywood;
- sheet metal;
- flat slate;
- lining;
- brick.
When choosing a facing material, it is important to focus on the exterior of the site so that the building harmoniously complements the already created architectural ensemble.
Polycarbonate shower stall:
Tank Recommendations
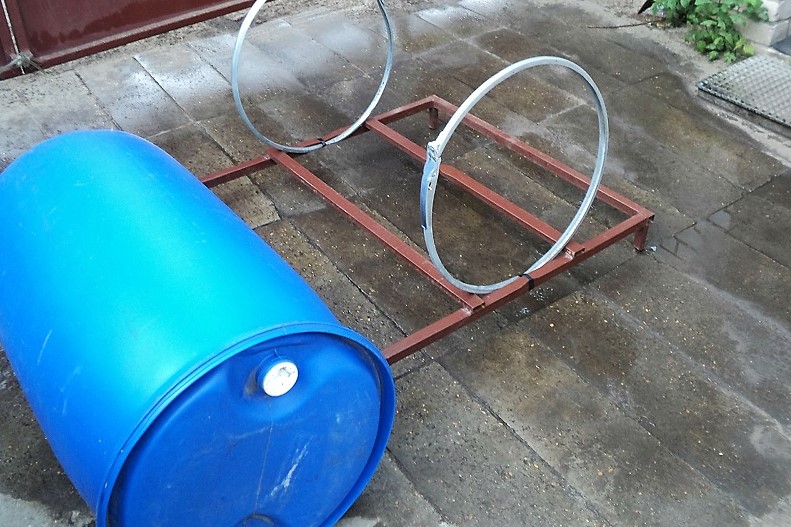
You can buy a ready-made water tank by choosing one of the models you like, or else make a tank yourself from improvised materials, for example, from a 200-liter barrel.

Ready-made tanks can be made of plastic, metal or galvanized steel. On sale there are tanks of simple design, the design of which has a bevel and holes for the installation of a heating element, and models that are already equipped with heating elements.
When choosing a tank should be guided by two criteria:
- the material from which it is made;
- tank capacity.
For a family of two, a 100 l tank is enough. And for the adoption of water procedures by three or four family members, it is better to set the option to 200 liters.
Want to make a tank with your own heating? There is nothing complicated about it. Buy any suitable container. Separately, in the construction market, purchase a heater.

On sale you can find heating elements with external power controllers, in which the adjustment varies from 0.5 to 2 kW. Their only drawback is that they are not able to maintain a given temperature.
Under the installation of the heater in the center of the tank, having stood 15 cm from the bottom, make a hole. At the bottom of the tank, closer to the edge or in the center of the bottom, make another hole for the arrangement of the drain. The outer part of the heating element is hidden in an electrical box.
To drill a hole for a heater with a nut, a drill D 40 mm is required, for overflow by ½ inch - a drill D 20-21 mm.
Determining the location of the building
To ensure quick flow of water, it is better to place the building on a slightly elevated platform. For this purpose, an even part of the site is quite suitable. The main thing is that she should not be in a strong lowland.

Choosing a sunny area for showering, you will ensure that the tank is able to warm up well in a natural way. Such a solution will reduce the expense item by combining forced heating of water in cloudy weather and with natural heating of the water tank from the sun on fine days.
When choosing a place, take into account that moment so that electricity is brought to the future building. It will be required to power the heater, which will serve as a heating element.
Wooden shower on the slope:
It is not recommended to place an outdoor shower and too far from home. Not everyone likes, after water procedures, to carry out long runs across the street, preferring to immediately find themselves in a warm, enclosed area.
Drain pit equipment
From the point of view of biochemistry, it is a gross mistake to reduce drains into a common pit from a shower and an outdoor toilet. A separate pit must be built under the cab. To equip a summer shower, which is supposed to be used only from time to time, a drain pit with a capacity of no more than two cubes is enough.

The drain should not be located under the very structure of the shower and not even near its walls, but two or three meters from the building.
This arrangement option allows you to solve two problems at once:
- prevent the appearance of unpleasant odors of decomposing organic matter;
- minimize the risk of destruction of the foundation.
For the construction of a drain pit, a pit is dug up to a depth of 2-2.5 m. At this depth, the sewage will be discharged into the soil below the fertile layer. Due to this, soil micro-viability will not suffer from such a “neighborhood”.
To make drainage, the bottom is lined with gravel and sand. The thickness of the drainage layer should be 20-30 cm.
When creating a water-resistant layer, clay should not be used, since during the operation period as a result of the natural erosion process, it can simply break the drainage system.

The upper part of the drain pit must be tightly closed. The lid can be made of a wooden shield or sheet metal.
The technology for constructing a drain pit from tires is described in this article.
Purchase of necessary materials
In addition to the manufacture or purchase of a heating tank, it is necessary to purchase plastic water pipes D 50 mm. It is convenient to use a flexible silicone hose for water supply.
To equip the system from materials, you will also need:
- a mesh reinforced trough;
- ball valve;
- crane with a float;
- divider.
To make a foundation fill when arranging a cesspool, cement with marking from M150 and higher is required. Covering the drain can be done with waterproofing roll materials or hydroglass.
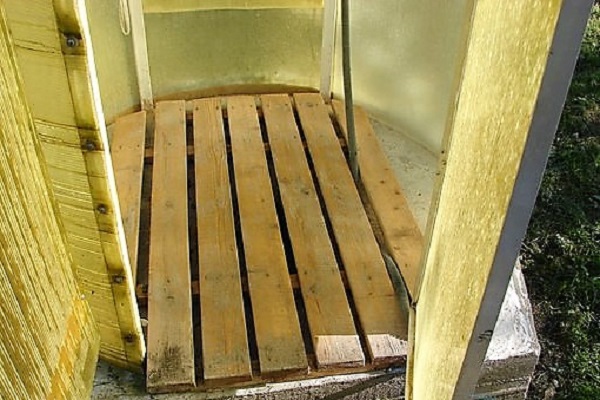
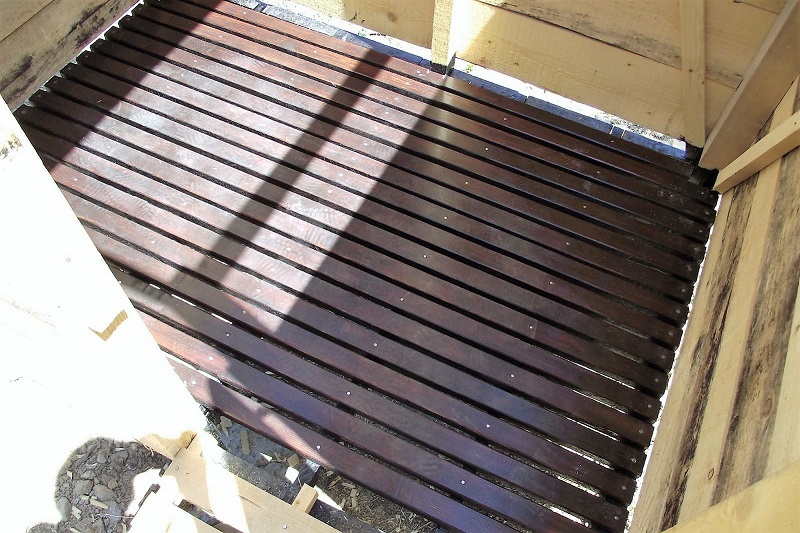
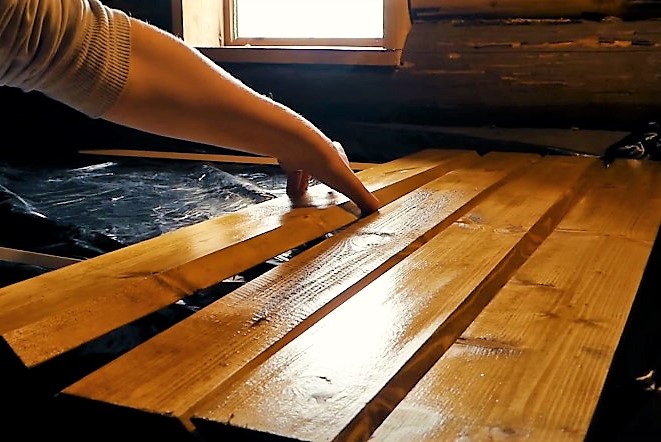
For the manufacture of a wooden floor in the shower, it is best to use a grooved grooved board treated with a water-polymer emulsion or white oil.

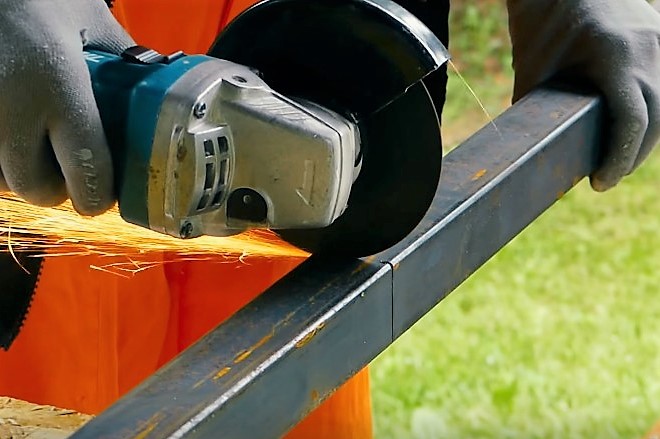
To erect the structure, you will need the following tools:
- building level;
- roulette;
- corner;
- screwdriver;
- self-tapping screws.
For preliminary marking of the territory, it is also necessary to stock up on a skein of twine and wooden pegs.
Instructions for building a summer shower
There are no special difficulties in building your own summer shower in the country. The only stumbling block for a novice master may be the question of how to mount a heated tank and how to organize a drainage system.
Step 1: Conduct preparatory work
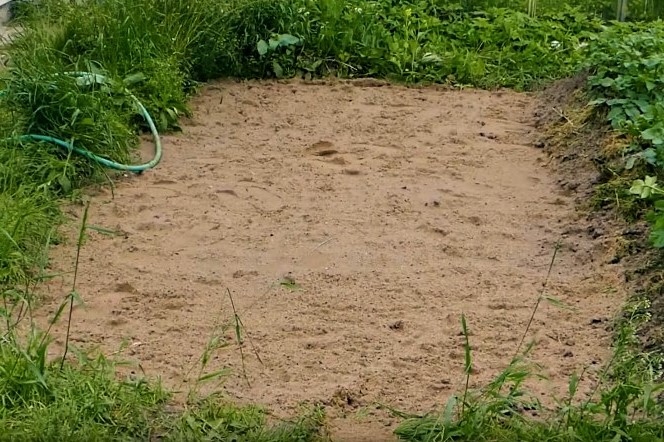
The scope of work during site preparation depends on the type of construction being constructed. If you plan to build a temporary frame structure, to prepare the foundation, it is enough to remove the 15-centimeter layer of earth from the marked area, and then level the bottom of the dug “foundation pit” and fill it with sifted sand.
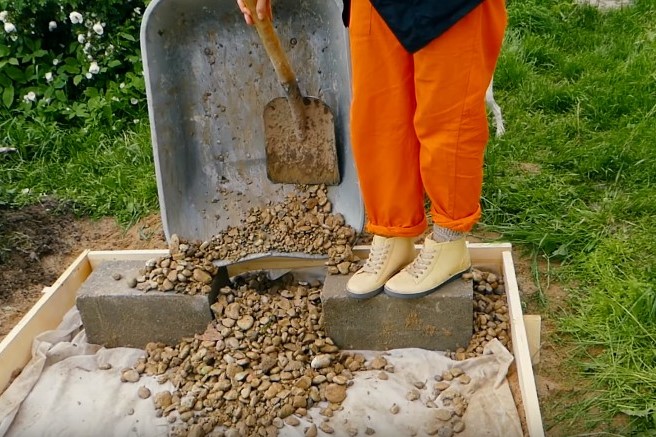
When installing a shower cabin on highly heaving soils, in order to reduce the risk of it toppling over, the thickness of the non-porous “pillow” made of gravel and sand should be increased to 30-40 cm.

Are you planning to build a capital summer shower with heating? To build it, you need a foundation tab. The depth of the foundation depends on the type of materials used. For example, for a brick building, a foundation deepened by 30-40 cm is quite enough.
Foundation laying is performed in the following sequence:
- Territory Marking. To create the right foundation, the wooden stakes are driven into the outer corners of the future building and the string is pulled between them.
- Digging a pit. A soil layer is removed from the marked area, deepening depending on the type of construction by 15-40 cm.
- Preparing a place for laying pipes. Dig trenches and level the bottom in such a way as to ensure unimpeded flow of waste water in the direction of the drain pit.
- Installation of drain and discharge pipe. A reinforced trough is installed on a flattened and tamped bottom, not forgetting to maintain the angle of inclination.
- Concrete mortar. To create an even base, the fill is carried out using a level and guides.
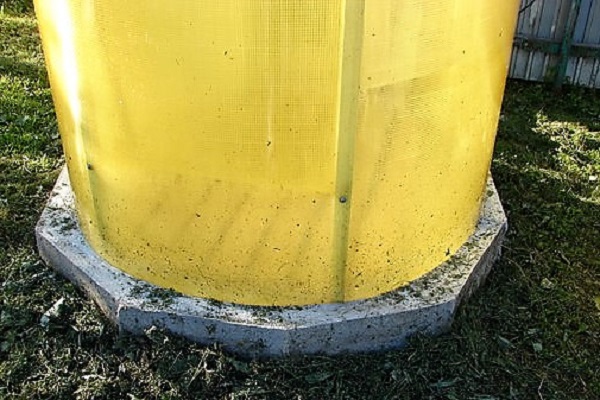
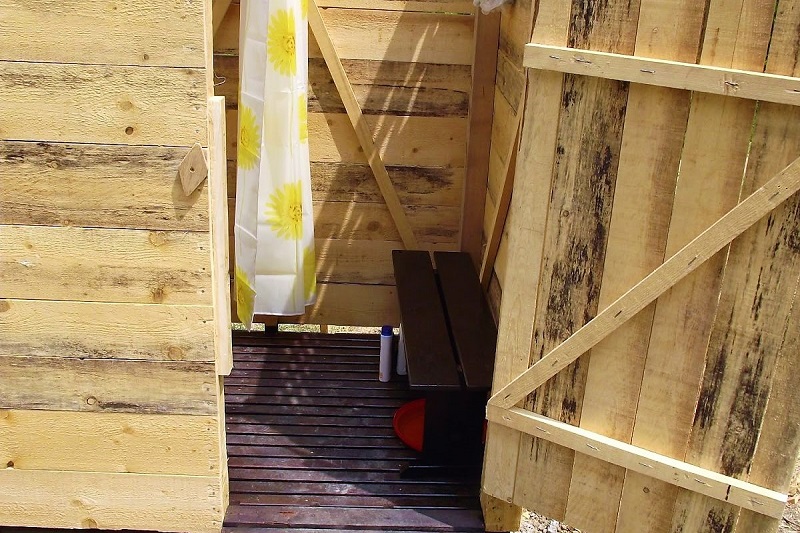
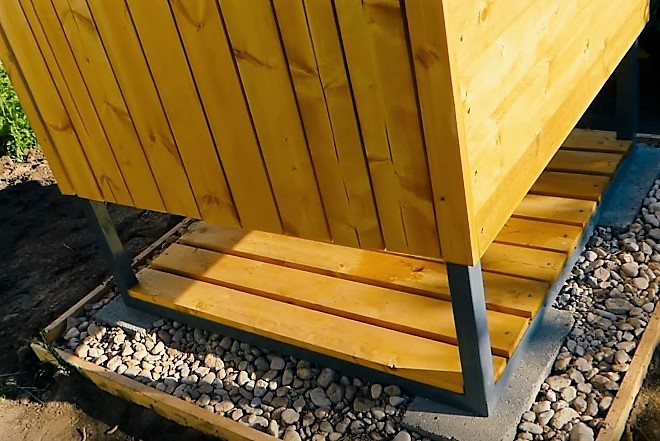
At wood frame construction it is advisable to raise the shower cubicle 20-30 cm above the ground.

When equipping the floor between the shower and the locker room, in order to minimize the likelihood of water leakage, it is worthwhile to provide a low threshold.
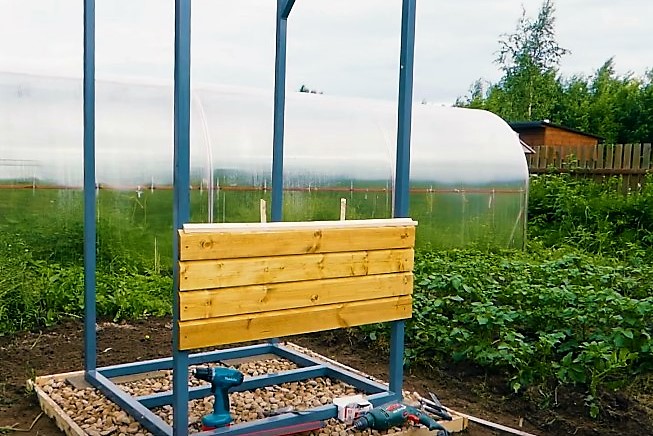
Step 2: Building a Shower Stall
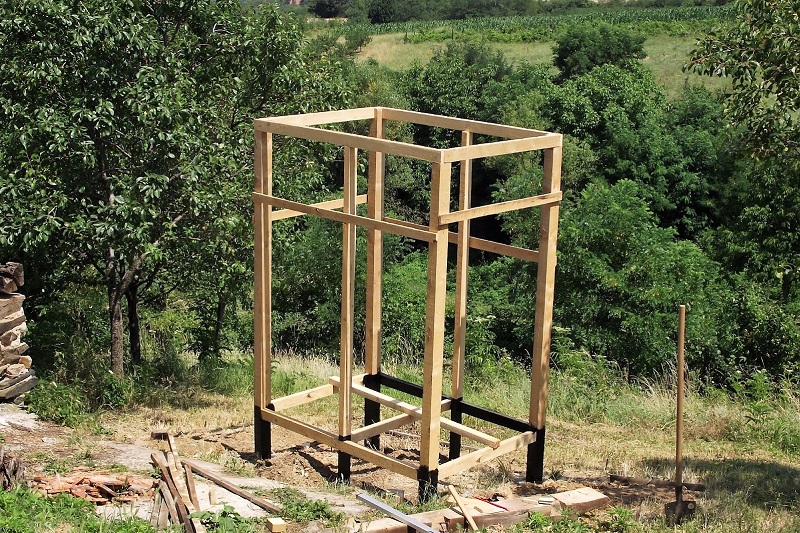
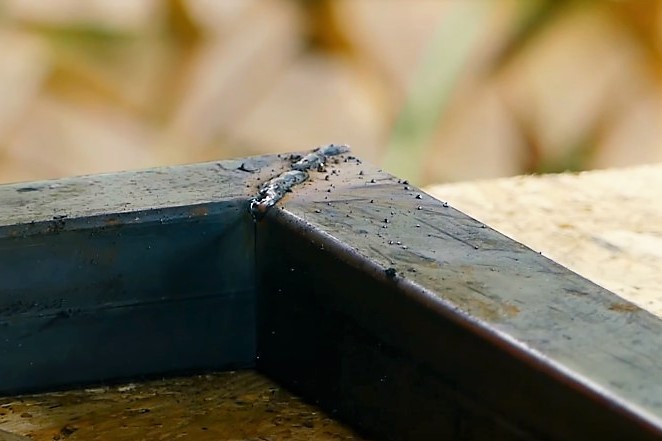
To erect a simple frame structure, you will need to install support racks. Since a tank filled with water will be installed on the frame, the frame should be strong enough.
Support racks can be made of such materials:
- wooden bars with a cross section of 10 * 10 cm;
- aluminum profiles;
- metal pillars.
To extend the “life” of wooden structural elements, it is advisable to double-treat the workpieces with a water-repellent and antiseptic composition. For greater reliability, the lower part of the support pillars, which are planned to be buried in the ground, should be treated with bitumen mastic.
In accordance with the marking according to the size of the shower, at the corners of the foundation and every 1.5 m of the circuit, supports are installed.

To make holes, it is convenient to use a screw or a garden drill, which can be rented in the center of building materials. Depending on the type of execution of the lower ends of the supports, they can be buried in a driven way or by screwing them into the ground.
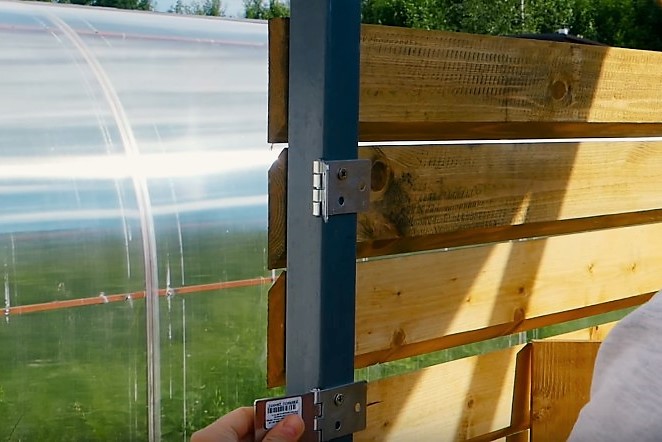
When arranging a doorway, two adjacent support stands are placed, having stood the distance of the width of the door. Mechanisms and a frame are attached to them, which serves as the frame of the future door.

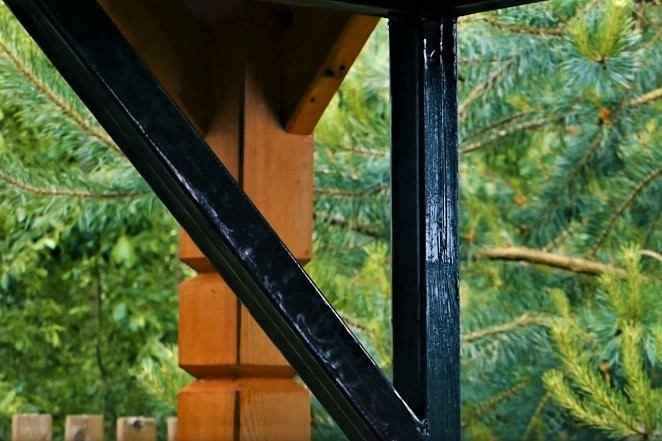
Having deepened the supports, they begin to dress the pillars. To simplify the task, the frame is first assembled on a horizontal even surface. The finished structure is attached to the supports with long bolts. To create a lag of the floor in the shower, perform dressing inside the frame structure. The roof in the shower is made simple and inclined.
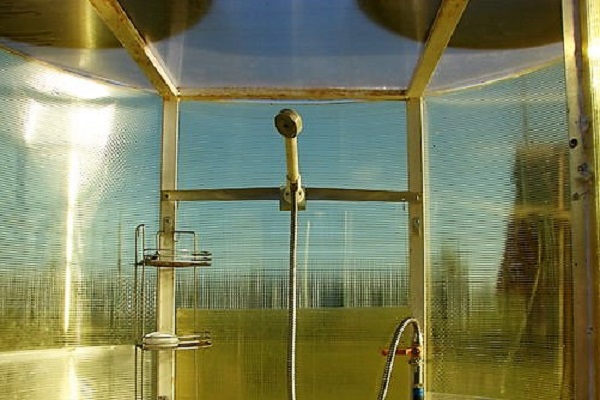
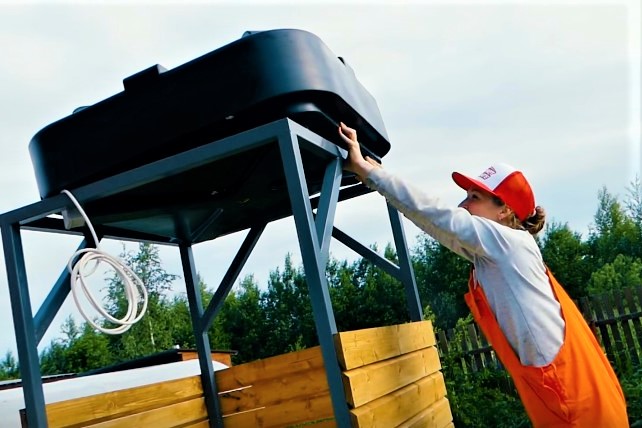
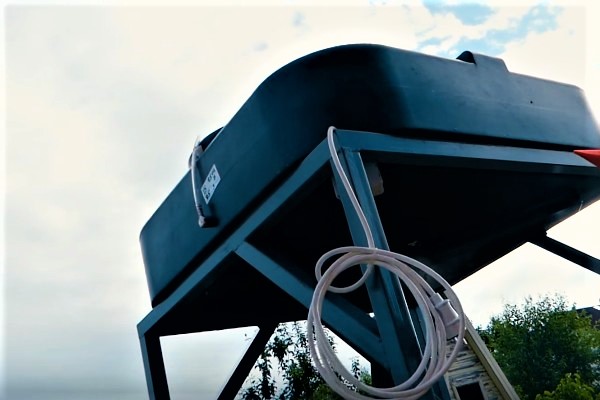
Step 3: Installing the Heated Tank
A tank is installed on the roof of the structure, the outer walls of which are painted black. Dark colors attract sun rays well, thereby contributing to the speedy heating of the surface.
Ready-made shower tanks are already equipped with tap holes. If you make the tank on your own, for example, from a barrel, then before installing it on the roof in one of the walls, you must first make a tap for the thread. The diameter of the hole should correspond to the cross section of the nozzle connected to a ball valve with a mounted watering can.

An important point: when choosing a storage location, consider: the greater the distance between the spout point, equipped in the upper tank, and the sprayer, the greater the pressure of the water.
Since the heating elements are very sensitive to an anhydrous environment and can even burn out if there is a lack of water, it is important to control the filling level of the tank. To do this, a plumbing valve is mounted on the installed tank, which indicates the amount of water.
A hose, tap and watering can are attached to the bottom of the tank. In order for clear water to flow from the watering can, and not sediment, the selective pipe must be placed higher. At the same time, the hot supply should be 1-2 cm above the mark of the source of selection.
The same requirement should be observed when installing the supply pipe in order to provide thermosiphon circulation inside the tank. In this case, do not forget to take into account the moment that the mouth of the supply pipe should be attributed as far as possible from the source of the discharge.
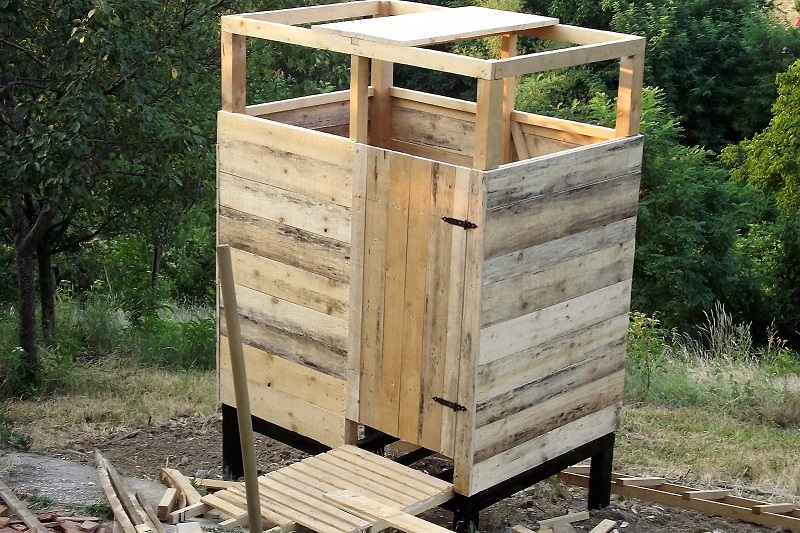
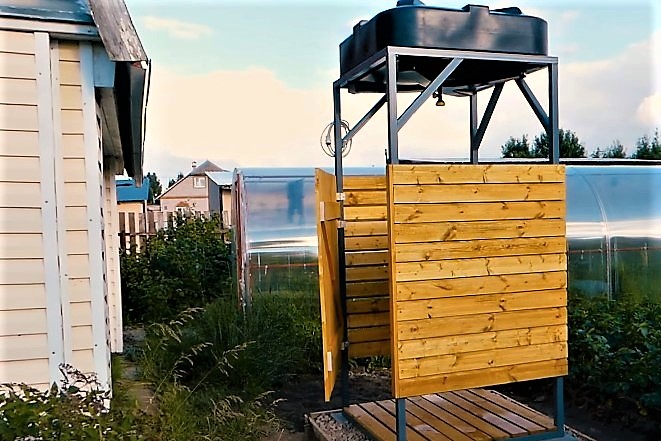
Wooden cabin with a tank of 250 l. The tank is equipped with a built-in heating element; heating is carried out from the mains.
The booth is ready. It remains to install a water tank and make a connection for heating.
Step 4: Ventilation and insulation of the shower
One of the common mistakes when arranging a summer shower is the construction of thick walls that absolutely do not let air through. Inadequate air flow contributes to the formation of mold in the corners and the spread of fungus on the walls.
To ensure air circulation and water flow, the floor is made with gaps between the boards, and a gap is left in the upper part of the wall.
When arranging the drain and flooring, ready-made pallets can be used.

To seal the pallet at the stage of installation along the contour of the cutout, construction foam is applied. Immediately, until the foam has frozen, lay the pallet. The extruded excess is neatly cleaned.
At the installation stage, it is important to think about how to ensure water supply.
Pour water into the tank in one of three ways:
- manually by buckets;
- by pumping by a circulation pump;
- in the presence of a water supply system by connecting to it.
If funds permit, it is better to make the water supply automated so that each time you need to fill the tank, you do not have to climb up with a bucket of water along the ladder.
When planning to use a shower cabin in the cold months, it is worth taking care of the insulation of the structure. The easiest way to solve this problem is by covering the walls with slabs. extruded polystyrene foam.
Finishing Tips
For interior decoration, choose facing materials with increased moisture resistance: PVC film, linoleum, plastic. When choosing wood cladding, the surface must necessarily be treated with drying oil and painted.

The grate is assembled from wooden slats 30-50 mm in size. The preparation of wood is the same. If you want to increase its resistance to shoe wear - treat the material with an acrylic compound used to repair bathtubs.

If desired, both the inner and outer walls of the facing material can be painted and decorated with drawings. The original design will turn the shower not only into a place for taking water procedures, but also into a decorative element of a suburban area.
Additional interesting options for arranging a garden shower are proposed in these articles:
- DIY polycarbonate summer shower: step-by-step instruction in design
- The design of the country toilet with shower: the choice of scheme + construction briefing
Conclusions and useful video on the topic
In interesting videos you will find a lot of useful information for the device of a country shower with heating.
Construction and repair of frame structure:
Shower tank from an old washing machine:
Organization of the heating system:
Summer heated shower is ready. To prevent stagnation of water, it is advisable to operate the shower at regular intervals. Before a long break in use, so that the sediment does not clog the watering can, it is recommended that the tank be completely emptied.
Do you have personal experience building a heated shower? Want to share practical skills or ask questions on a topic? Please leave comments, participate in discussions and add photos of your home-made showers. The contact form is located below.
 Do-it-yourself waterproofing in the bathroom: a comparative overview of materials + installation instruction
  How to arrange a shower drain in the bathroom floor: step-by-step installation instructions
  Connection of a shower cabin to the sewerage and water supply: step-by-step instruction
  Sliding screen for the bath: step-by-step instructions for assembling the factory design + tips for craftsmen
 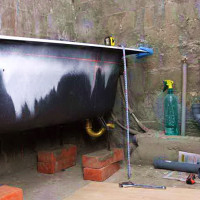 How to install a bath on bricks: step-by-step instruction on how to install
  Restoring a cast-iron bath at home: step-by-step instruction
  How much does it cost to connect gas to a private house: the price of organizing gas supply
  The best washing machines with dryer: model rating and customer tips
  What is the color temperature of light and the nuances of choosing the temperature of the lamps to suit your needs
  Replacement of a geyser in an apartment: replacement paperwork + basic norms and requirements
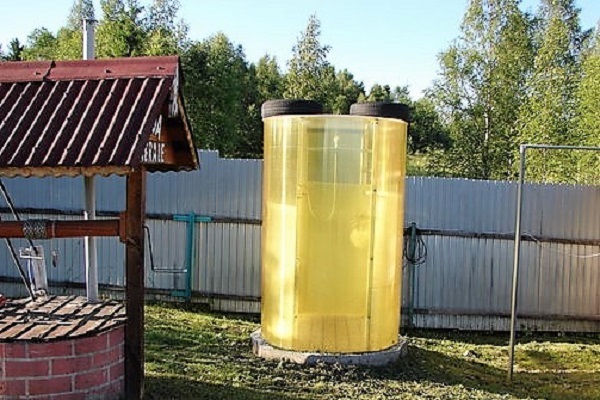
It is not very clear what to do with the heating element: how to install it correctly and whether it affects the plastic of the tank. In general, I would like more information specifically about heating water, since there are many questions left, nevertheless, security plays a huge role here. And it’s also interesting whether it is convenient to pump water with a pump, or whether it would be better to connect a shower to a centralized water supply.
As for the installation of the heating element in a plastic container, you must embed it so that it does not come into contact with the sides of the barrel and is not too close to them.I will attach for you a detailed visual diagram with a description. I advise you to use a threaded TEN 2500 W with a temperature regulator.
To organize a summer shower with hot water you will need:
- a plastic tank of the required volume;
- threaded TEN 2500 W with a temperature regulator;
- water level sensor;
- hose and bay fitting;
- a watering can with the crane 1/2;
- cable and plug;
- automatic 10 A.
How you will connect the shower to the water supply, then decide for yourself: you can distill or connect to the central water supply using a pump. As simple as it is, realize it is not so important.