Bath frame: how to make and install a support structure

The desire of developers of new types of plumbing to minimize its weight is fully justified by the desire to facilitate installation and reduce the load on the base. Specialized markets offer a wide range of products, the installation of which can easily be done independently.
However, lightness deprived the tank of an important quality - stability. To avoid overturning, a bath frame that can be built with your own hands will help.
We will tell you in what cases you can’t do without additional support, designate suitable materials for assembling the frame, and give tips on choosing the type of design. Step-by-step instructions with photo accompaniment will help to make a reliable frame for any bath.
The content of the article:
Prerequisites for the device frame
Frames are constructions that provide stability to light types of plumbing. On an industrial scale, they are purposefully produced for installing bathtubs made of acrylic, multilayer fiberglass, kvar, and if necessary, they are independently arranged for bowls made of steel alloys and cast iron.
Structurally, the frame is a system of one or two horizontal strapping and vertical supports. Factory-made products are usually clearly designed for average human weight and the mass of water collected in the tank.
However, many of the owners of light fixtures feel insecure, plunging and leaving the bath, especially since the real weight of users is often far from the average data.
In bathing tanks of traditional dimensions, from 150 to 170 cm long, from 140 to 200 liters are placed. We equate the weight of one liter to a kilogram, add the weight of the body immersed in the bath and as a result we get a load equal to about 250-300 kg.
The total weight, of course, solidly loads the bowl, but it does not give complete confidence in unwaveringness, especially if the bathtub has a fantasy configuration. The support legs, on which all considerable weight is distributed, are doubtful.
Their plan area is approximately 10 cm², which makes us think about strengthening and increasing the reference area.

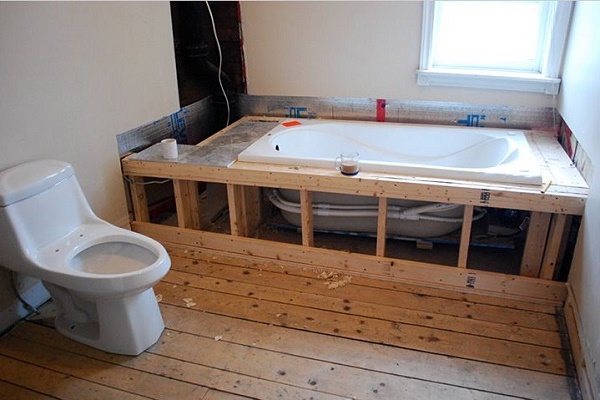
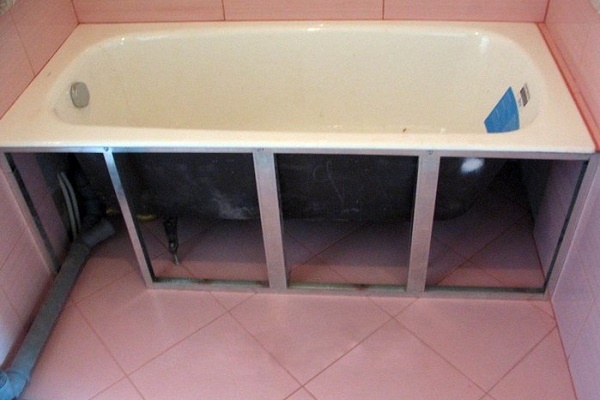
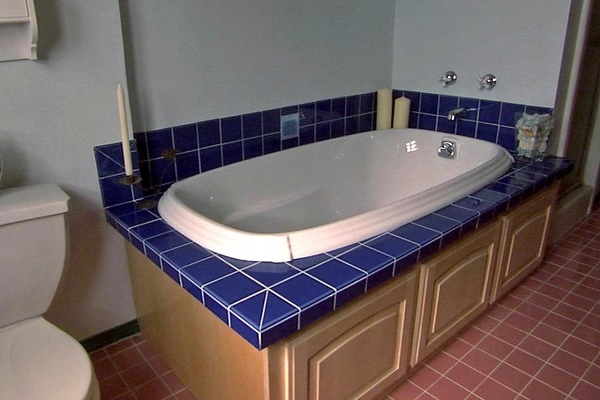
In addition to the desire to secure the reception of procedures by ensuring stability for the frame device, there are a number of good reasons. It is built if you plan arrange a bath screenclosing communications and fixtures. In this case, the weight of the bowl does not matter at all, the frame under the screen is mounted around the cast-iron products.
Arrange the frame if there is a need to raise bath height to form a normal drain of water or to arrange a podium around a luxurious jacuzzi.
Naturally, to solve various problems, structures are built according to different schemes, but the principle and technology are the same. There are no particular differences in the materials used.

Materials for homemade frames
Choosing material for the construction of the planned structure, you should focus on your own skills, knowledge in the field of construction and opportunities. The bearing capacity of the chosen option and the resistance to the effects of a humid environment traditional for bathrooms are also important.
In the construction of homemade frames are used:
- Lumber. Basically a wooden block with face sizes from 40 to 60 mm. Sawing and joining the beam into the supporting structure is quick, fastening and the formation of nodes does not cause difficulties even for an inexperienced master.
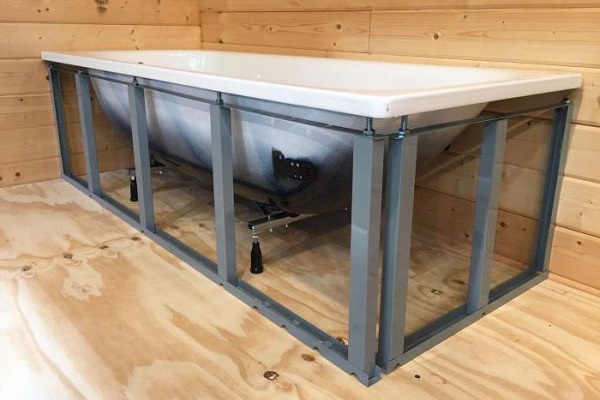
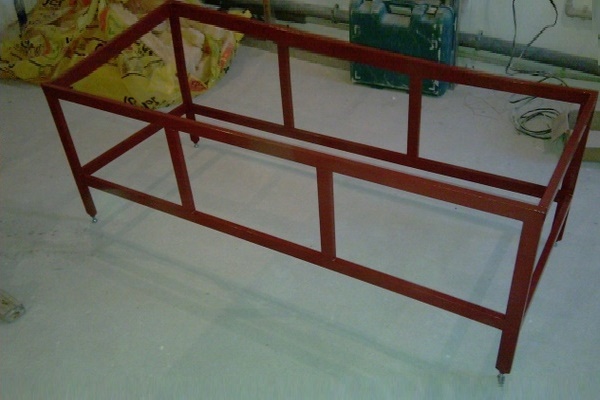
- Profiled pipes. Strength and bearing capacity of rolled metal of square or rectangular cross-section can significantly reduce the dimensions of the supporting structure, it is elegant and "neater" wooden. However, the manufacture of metal structures is available to the contractor with the skills of a welder.
- Metal profile for GVL. It is used mainly not for reinforcing frames, but to create the basis for a decorative screen. To work with the profile, you need the usual tools that each owner has, experience in such work is optional.
Lumber is the least suitable for use in the bathroom, but the frame is assembled from them without problems.
Errors and shortcomings are easier to redo than flaws in metal structures, and it’s not so painful to hit the pocket if it is necessary to purchase material for alteration.
It is important to initially remember the characteristic vagaries of wood, before starting work, treat the bar with antiseptic impregnation. In the assembly, it is desirable to use galvanized hardware and angles, if there is no experience in the construction of connecting nodes with cuts.
Profiled metal is also not very resistant to moisture. For the device of the frame, it is better to buy it in galvanized form or galvanize after purchase.
If the metal structure is arranged without sheathing with decorative panels, it is better to cover profiled pipes with powder paint. The result looks decent, and protects from rust.

The aluminum profile or its analogue from galvanized steel tape is not “afraid” of water at all. A gypsum-plated frame made of such material will last for decades.
True, you should not rely especially on the fact that he will be able to compensate for the swaying of the acrylic bath, although it will be hindered by them carefully, but as far as possible.
The profile is simple and easy to use, without any problems it is cut and connected. The gypsum board attached to an aluminum or steel frame is perfectly glued with ceramic tiles, mosaics, plastic panels. If preference is given to steel products, then for installation in the bathroom you need to buy a profile with galvanization.
It happens that in the frame device two or three materials are used in combination. For example, the strapping is performed from a bar, and the racks from a metal pipe. If necessary, raise the bath above the floor under the bowl put brick supports, foam blocks or a large beam.

Dependence of the complexity of the structure on the form
It is clear that the more complex the shape of the bowl in terms of, the more work the independent master will have.
According to the degree of complexity, the arrangement methods can be conditionally divided into the following options:
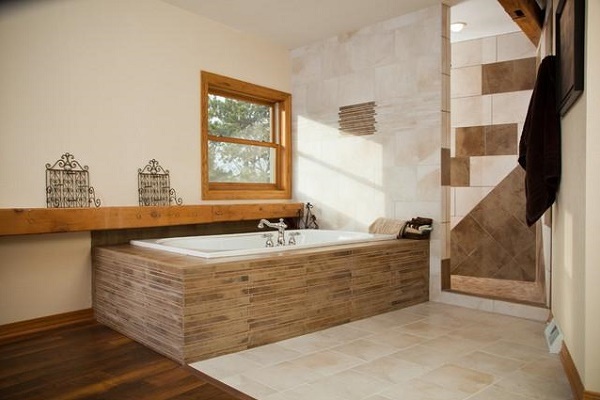
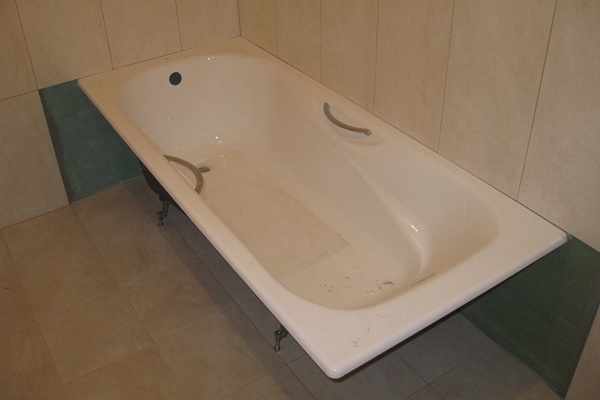
- Plain rectangle. Its construction will not cause difficulties, especially if the frame is installed in a niche or in a corner formed by two adjacent walls.
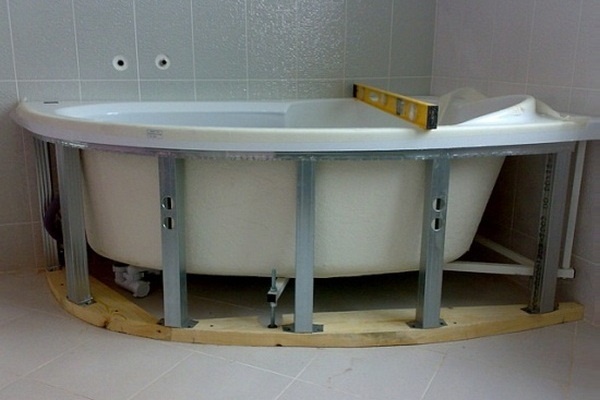
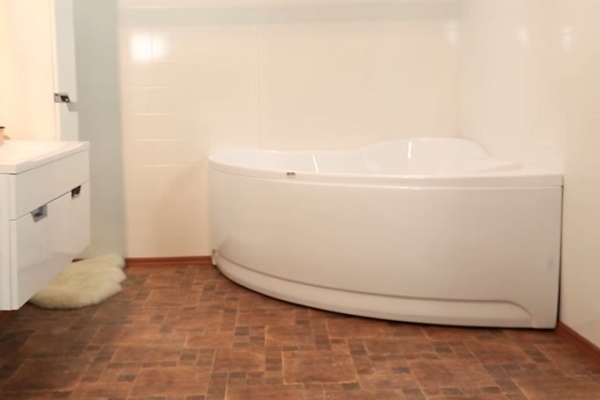
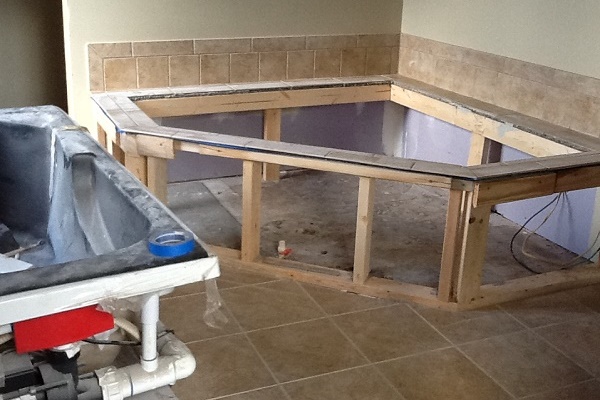
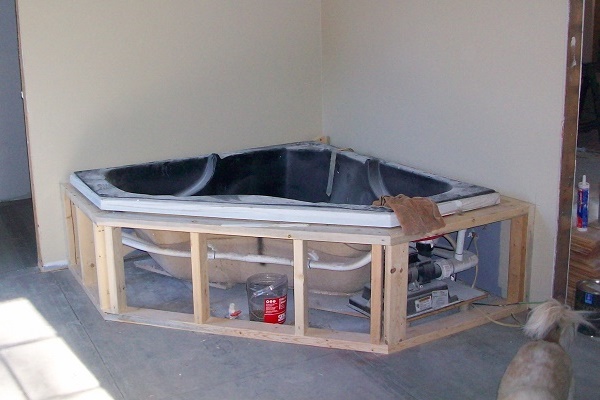
- Triangle with curly outer side. Similar designs suit for corner baths. The sides converging at right angles are usually located in the corner of the room, the frame is built on the outside, it includes several frames connected to each other.
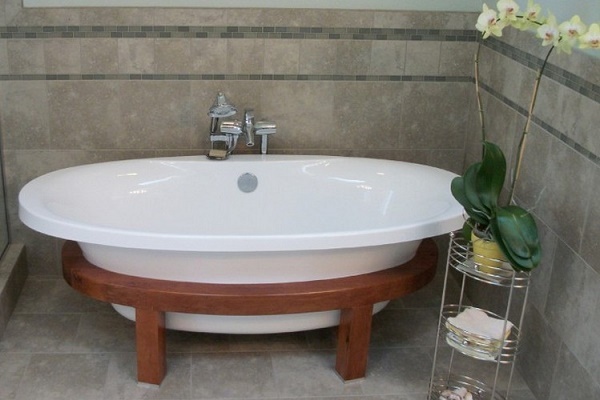
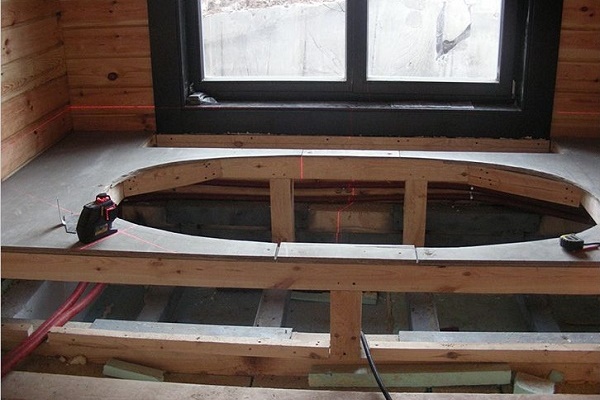
- Oval. It is equipped along the contour by installing a large number of frames or broken strapping. Although there is a simpler method.
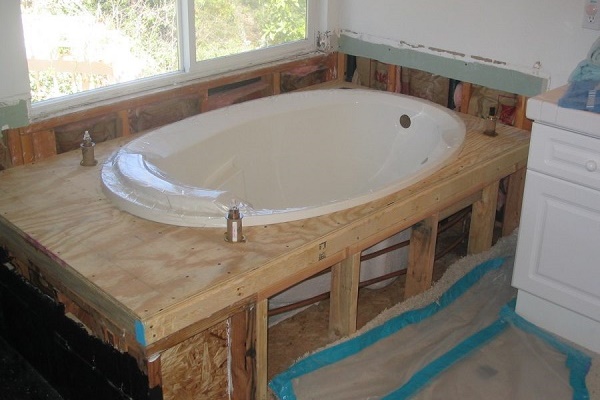
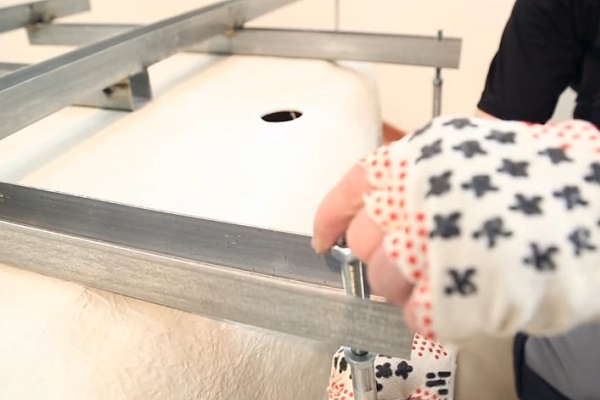
To facilitate efforts in the construction of oval and fantasy-shaped bathtubs, a rectangular structure is constructed with a GVL lining.
In the horizontally laid upper panel of the casing, a hole is cut out under the bowl so that its sides completely rest on the frame.
Most homemade products do not involve repeated assembly / disassembly. They are arranged in a non-separable form, although sometimes the possibility of dismantling with the subsequent construction in a new place would be very useful for lovers of frequent moving.
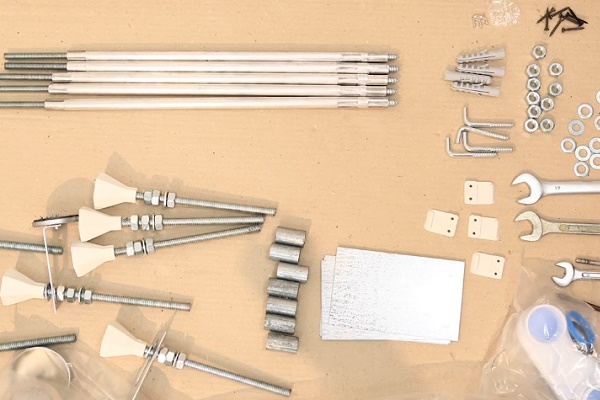
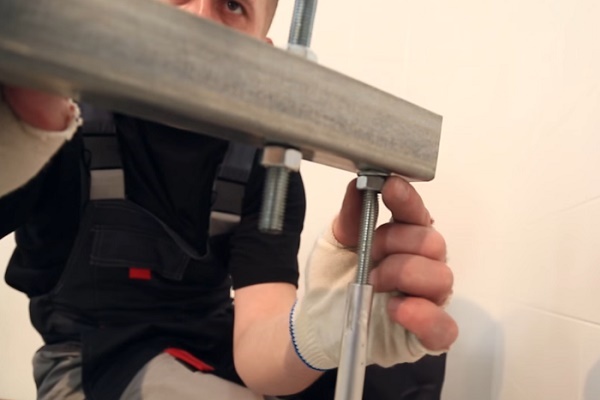
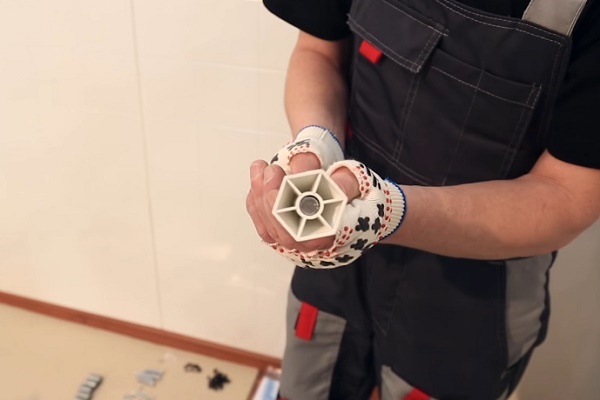
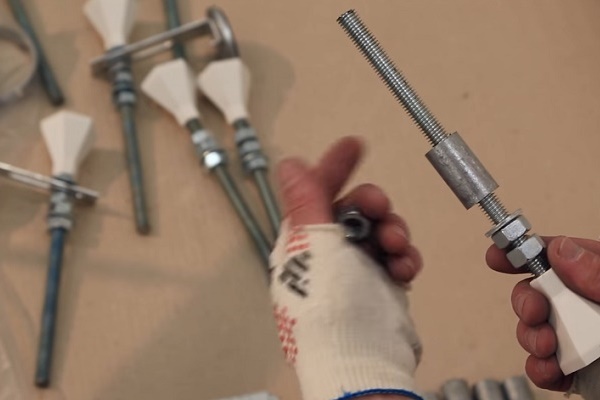
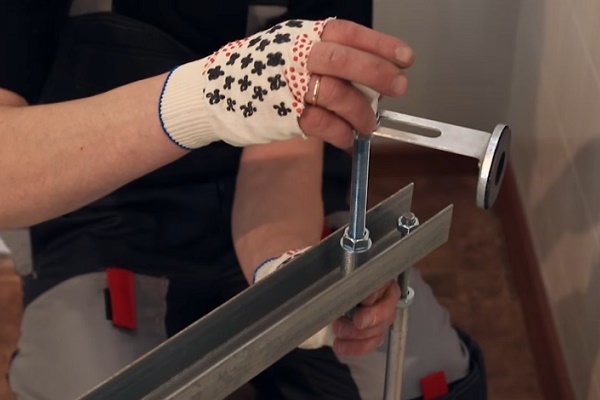
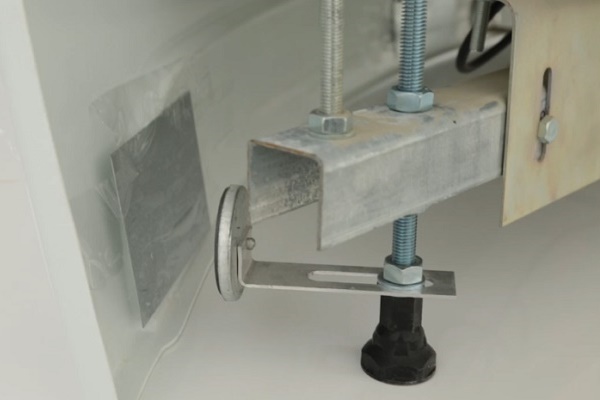
Easily disassembled and assembled many times the frames supplied in the package to acrylic bathtubs. They include, as standard, a welded frame and adjustable supports in the form of steel threaded rods with plastic nozzles. Attached are fasteners and instructions with a detailed step-by-step description of the actions.
Methods of building supporting structures
Any work should be preceded by a project, whether it is a large-scale plan with the most accurate calculations or a diagram with dimensions and rough drafts. It’s worthwhile to think over a design variant and methods of its assembly, take the exact dimensions and draw a plan at least by hand.
It should be remembered that regardless of the stage of repair, the sections of walls and floor that the stationary frame will close must be repaired, the surfaces are leveled and treated with waterproofing.

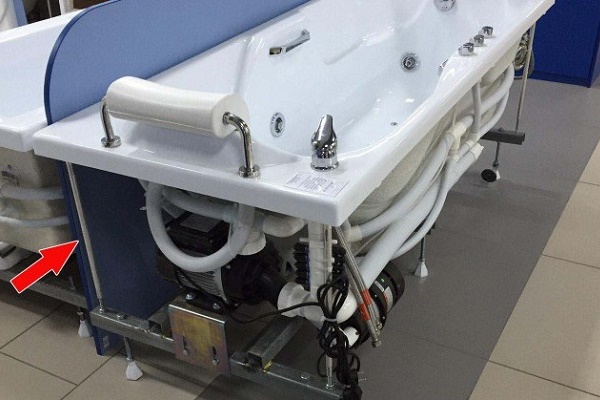
Immediately it is worth considering where they will be located inspection hatches to control technical systems and components. It should be possible to extract equipment and fittings for repair or replacement.
If you are to build a frame around the already installed old plumbing, you need to check the connection points to the sewer and water supply. If possible, it is necessary to repair the floor under the bowl, replace the doubtful sections of pipes and fittings.
Assembly of the finished support kit
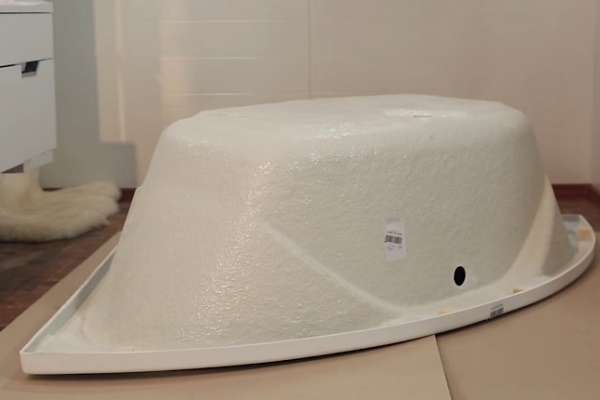
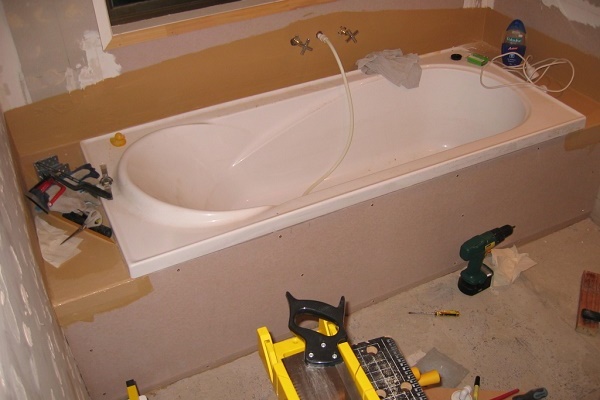
Let's deal with the method first acrylic bath installations on the prefabricated assembly. Work is carried out in a strictly defined sequence.
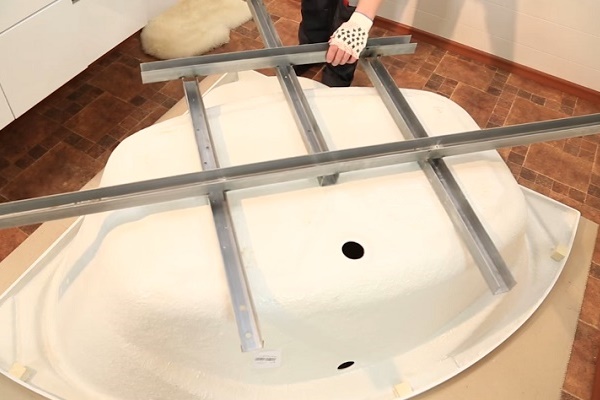
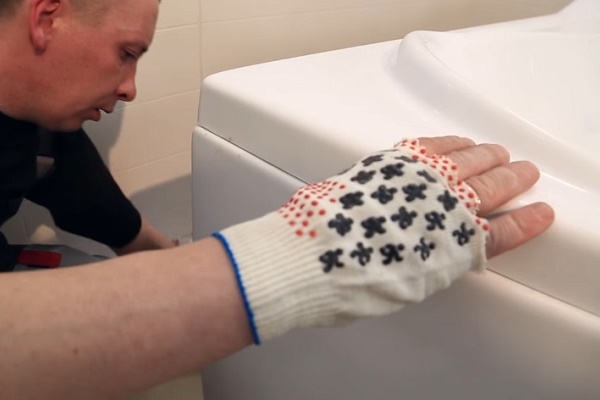
First, a frame is attached to the bowl turned upside down, then they are turned over together, put in place, leveled and fixed.
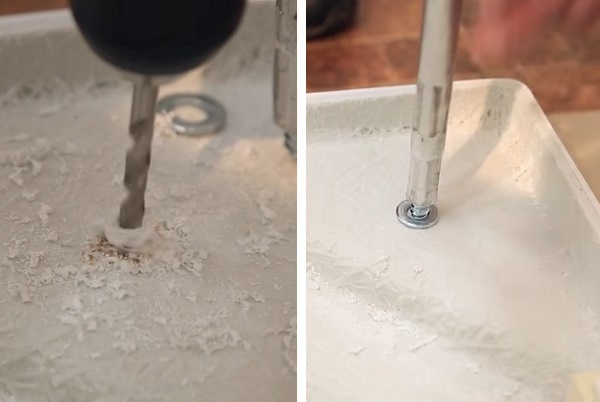
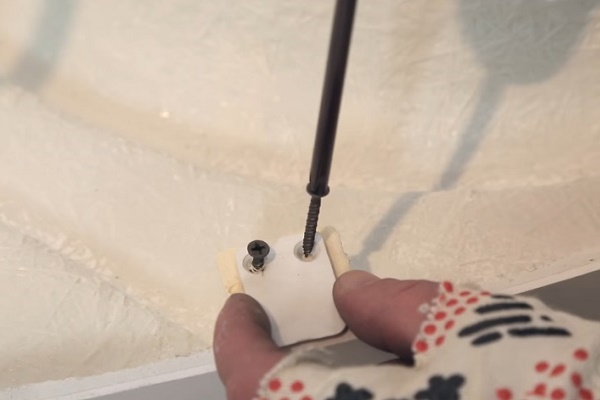
After a successful preparatory stage, we proceed to the assembly of the frame, clearly following the instructions of the plumbing manufacturer.
Depending on the brand and configuration of the product, there may be some deviations in the production steps.
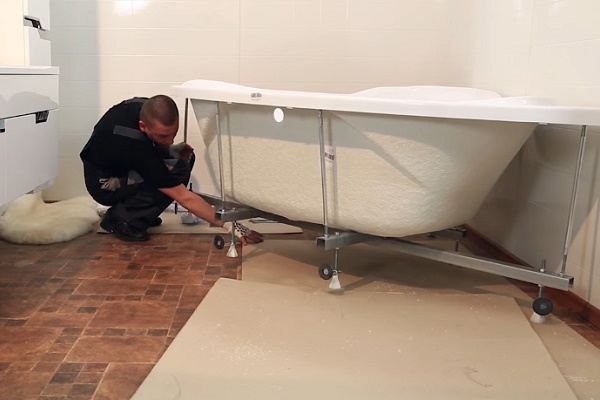
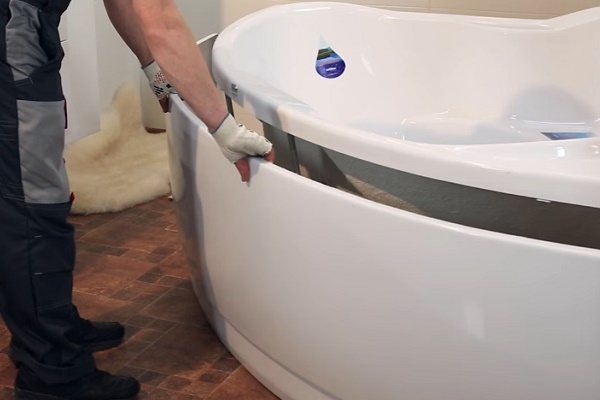
The frame is assembled and fixed together with a bowl resting on it. It remains only to connect the bath to the communications, install siphon and hang the screen.
If there is no intention to arrange an additional supporting structure, then the actions are performed in the following order.
If a decision is made to make an additional reinforcing frame, a frame made of a bar or profile is arranged around the bowl around the perimeter.
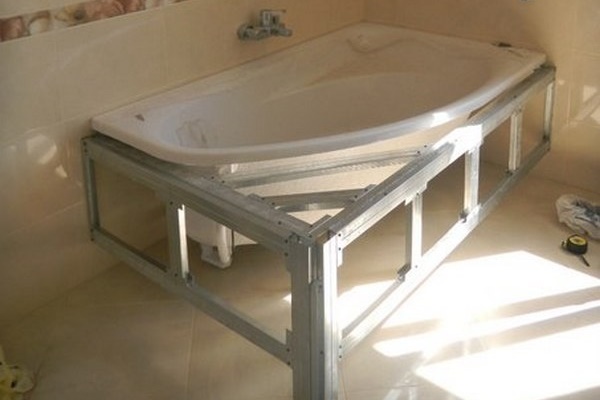
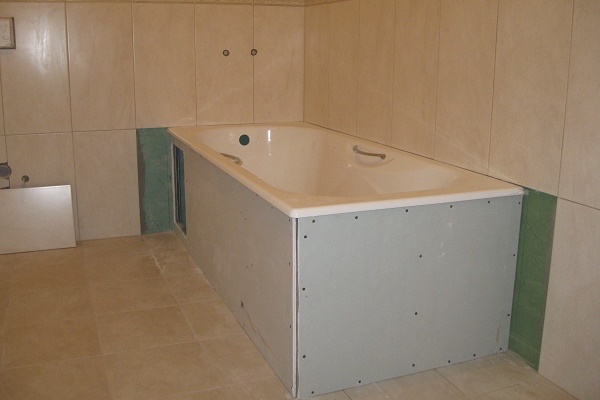
The device design of the profile
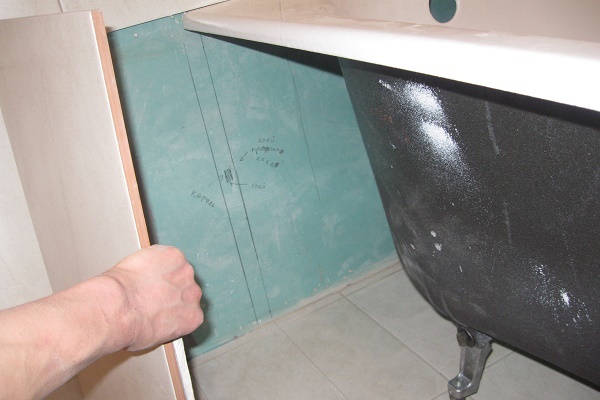
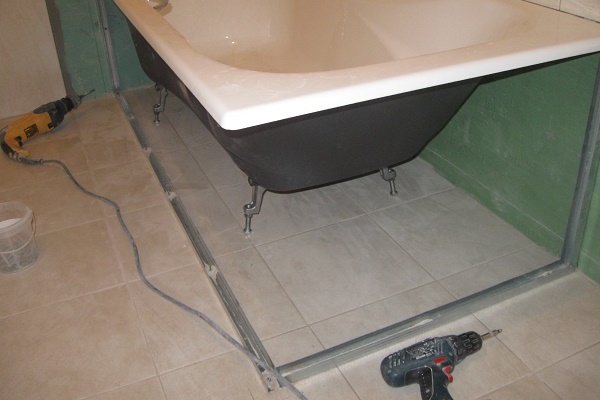
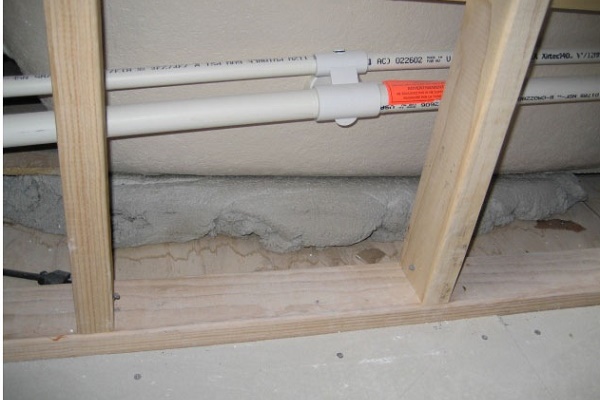
Let us examine an example of the construction of a frame for a cast-iron bathtub, the two sides of which are adjacent to adjacent walls. In order for the water spraying from the shower head to not pour on the floor during the procedures, fill the gap between the sides and walls with mounting foam or process plumbing sealant.
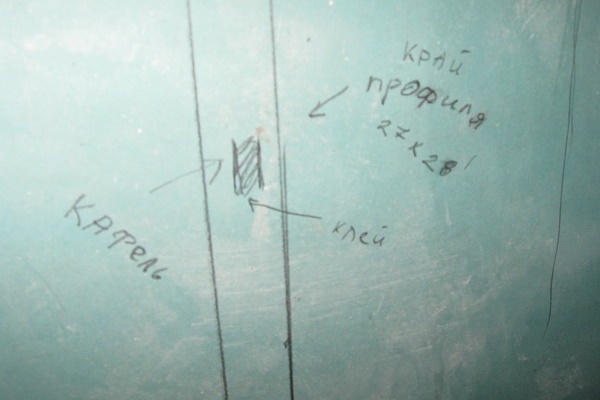
For convenience, we note the projection of the bowl on the floor and on the walls, taking into account the thickness of the finish, in this case the ceramic tile and the glue necessary for fixing it.
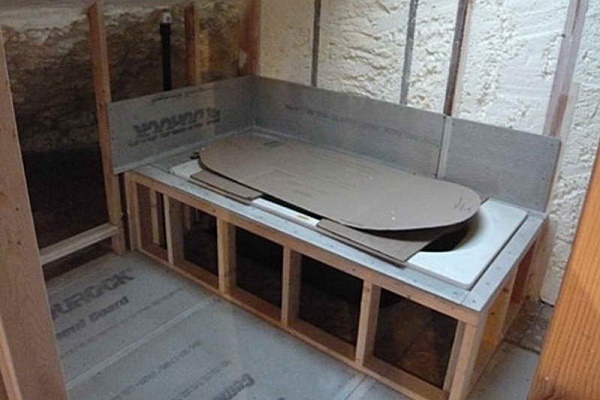
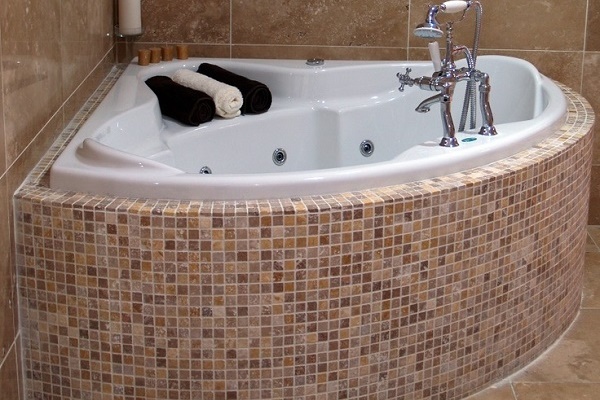
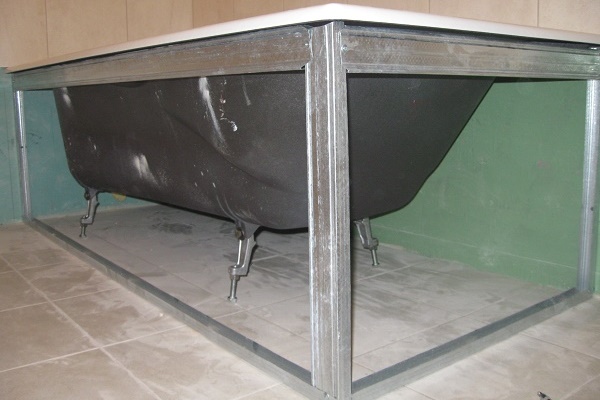
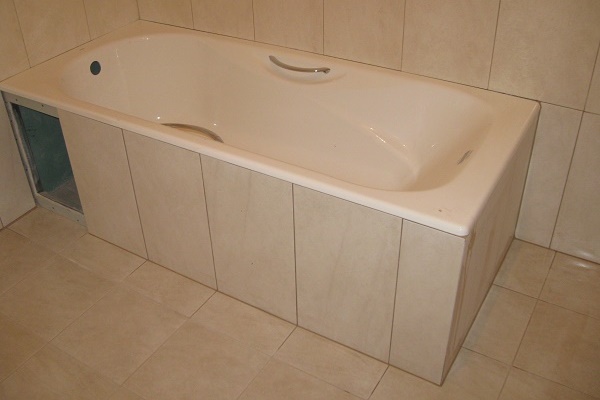
As a result, we got a box mounted on a metal frame, which remains to be glued with tiles, clinker bricks, porcelain stoneware, plastic panels or mosaics. At the place where the plumbers connected to the communications, they organized a hatch, which is required for monitoring and repair.
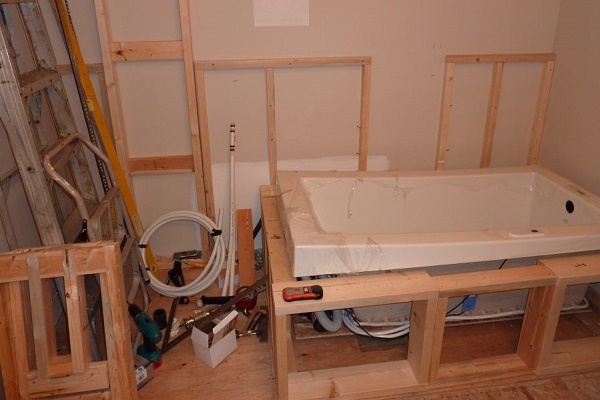
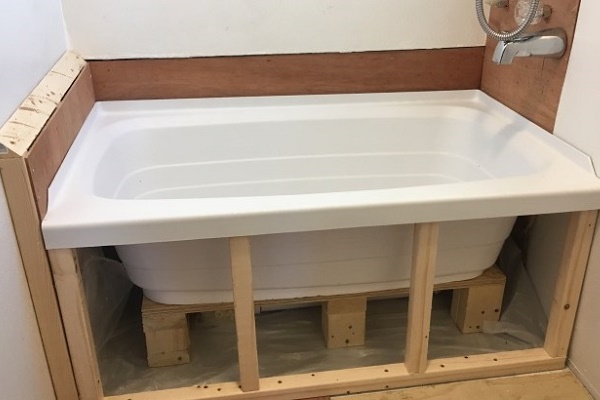
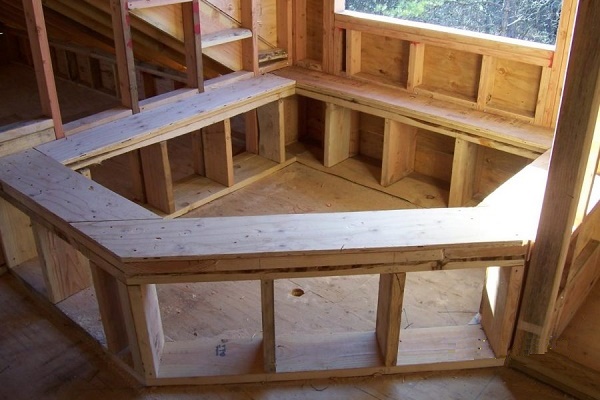
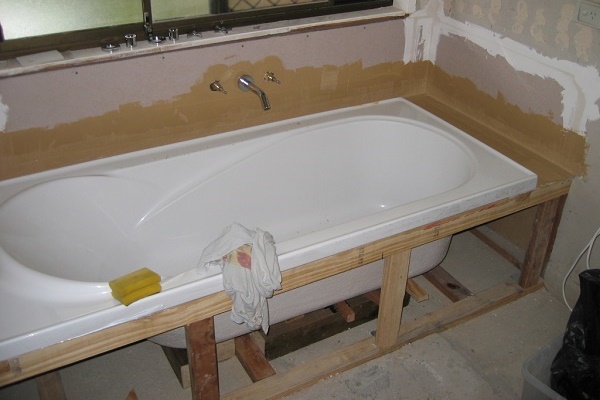
Timber frame construction
The algorithm for constructing a frame from a beam is not much different from the above method.
Work is carried out in the following order:
- Markup. It is carried out using a building level and a plumb line. The lines of the future frame are marked taking into account the finish.
- Bottom harness. According to the outlined perimeter, we saw and connect the beam, the inner edge of which "2–3 cm" goes "under the sides of the bowl. Do not forget that the bath should be based on the design.
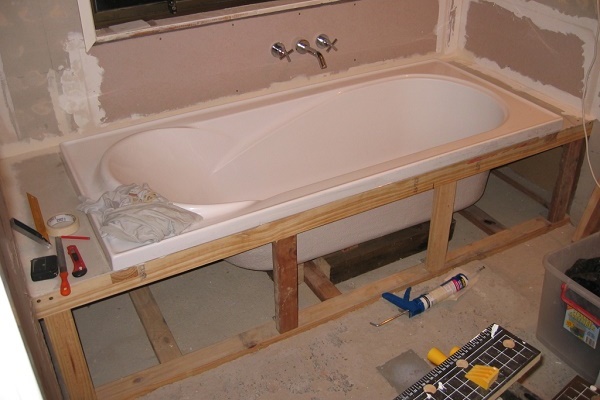
- Fixing the lower harness to the floor. It is produced by fasteners corresponding to the floor material.
- Top Harness Assembly. The dimensions of this part of the structure must exactly repeat the dimensions of the lower trim.
- Installation of twin angular supports. In the corners we install a support for each of the adjacent walls of the frame. We connect them with the lower and upper binding corners.
- Installation of ordinary supports. It is made after about 50 cm, but in general the step of arrangement of ordinary racks depends on the upcoming load and the location of the hatches.
- Installing trim sheets. Drywall or plywood panels are installed before installation so that between them there remains a gap of 3 mm, necessary for linear expansion. Used fasteners that match the type of skin material.
The order of work we have given may have all sorts of variations. Optional execution and the assembly order of the frame. For bowls with different heights, the horizontal strands can be three or more.
It is important that the do-it-yourself design reliably holds the weight of the bath with its owner, does not swing and is firmly attached to the base or to the walls.
Conclusions and useful video on the topic
A video demonstrating the assembly process of an acrylic bath:
Features of the manufacture of welded metal structures:
Video guide to installing the bathtub and assembling the frame from a metal profile:
The casing device options we have given as an example will help to build a reliable structure with your own hands. The frame made according to the rules will last a long time. The result of personal efforts can boast to friends and neighbors.
Have experience building a bathtub frame? Please tell readers about your method of assembling the support structure. Comment on the publication, participate in discussions and add photos of your homemade products. The feedback block is located below.
 How to install a steel bath with your own hands: step by step instructions
  DIY acrylic bathtub installation: detailed step-by-step installation instructions
 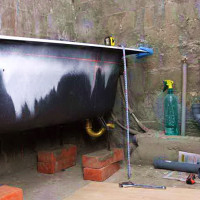 How to install a bath on bricks: step-by-step instruction on how to install
 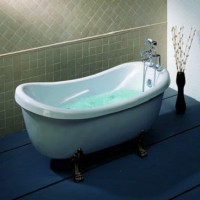 The height of the bath from the floor: standards, norms and permissible deviations during installation
 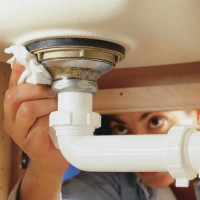 How to install a bath yourself: a step-by-step installation guide
 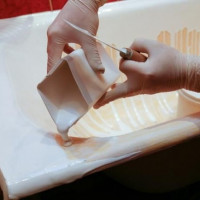 DIY enamel bath: how to treat the bath with liquid acrylic at home
  How much does it cost to connect gas to a private house: the price of organizing gas supply
  The best washing machines with dryer: model rating and customer tips
  What is the color temperature of light and the nuances of choosing the temperature of the lamps to suit your needs
  Replacement of a geyser in an apartment: replacement paperwork + basic norms and requirements
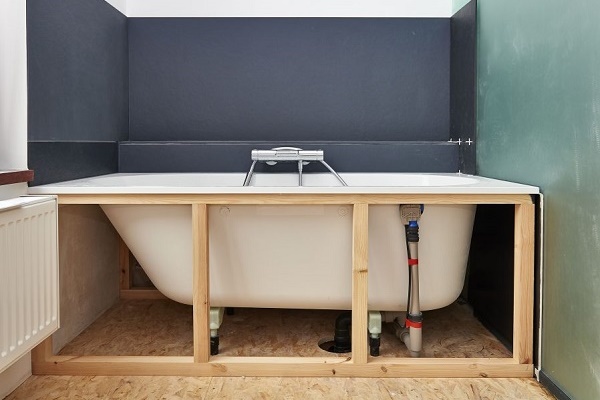
Following the information provided, we were able to assemble a frame for an acrylic bath in the house. It turned out to install everything correctly. The instructions are quite detailed, so we did not have problems with assembly and installation) the three of us managed in a week, not particularly straining. But now with a new bathroom, the bathroom looks very cool! They did not use lumber, the metal frame made more arrangements, although it is more expensive.
Even if you make the frame with a decorative purpose (for the screen), it is still worth choosing materials that are as moisture resistant as possible. He made a frame of bars, so from the humidity in the bathroom they “led” them a month later so that the screen began to protrude forward. I had to disassemble everything and do it already from an aluminum profile. I don’t even know which option I would choose if I also needed to make the frame as a backup. A tree is not, except perhaps an iron corner, but then it needs to be painted with something like automobile enamel.