Installation of a hanging toilet: we analyze the nuances of installation technology

Floor toilets have long been out of competition, but everything is changing. Owners of modern apartments are increasingly choosing suspended models. Pleasure is not cheap, but it is practically the only drawback of such a solution. But among the advantages of the design is its magnificent design and ease of maintenance.
It is important that the installation of the wall-hung toilet is done in accordance with all the rules. We will tell you how and in what sequence the work is carried out, what devices will be required to mount the bowl. Based on our recommendations, you can do everything yourself or control the actions of plumbers.
The content of the article:
How is the suspension structure arranged?
A home master can easily cope with the installation of a wall model if he understands the distinguishing features of its design.
The visible element of such a plumbing fixture is the toilet bowl itself. Its installation on the wall is carried out in two ways: using the installation and on the concrete base. In our article we will consider both options.

The strengths and weaknesses of hanging plumbing are listed in article, which describes in detail the varieties and design specifics, provides guidelines for choosing the optimal model for you personally.
The design of the wall-mounted plumbing device can be conditionally divided into three main elements, which will be discussed later.
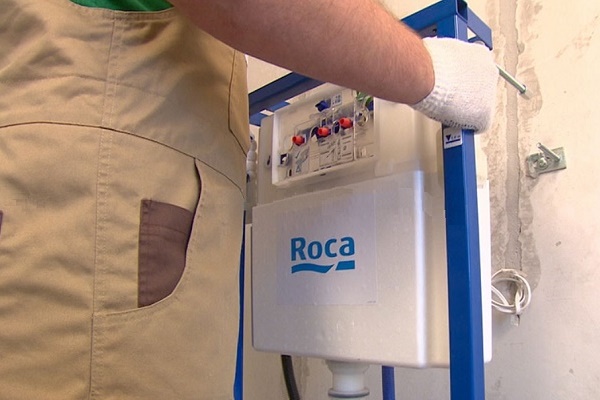
Robust steel frame (module)
The frame is the main element of the whole structure, which is attached to the floor and to the wall of the bathroom.That frame is the support for the drain tank and bowl. The quality of the subsequent operation of the product depends on its reliability. After putting the toilet into operation, the design will have to have a sufficient margin of safety to support the weight of an adult.
To secure the frame, you must have a solid base. Plasterboard walls in this capacity cannot be considered. The frame is equipped with a mechanism that allows you to vary the height of the toilet bowl in the range of 40-43 cm. For reliable fixing of the bowl, manufacturers recommend using strong pins made of steel.

The best models of support frames for hanging sanitary ware are listed in articlewhich we recommend that you familiarize yourself with.
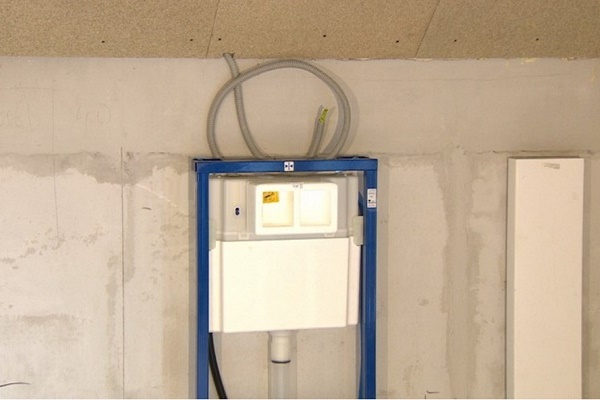
Hidden drain tank
The hidden fastening of this element, according to the adherents of the wall model, is considered one of the advantages of the design. The material for its manufacture is a very durable plastic. To prevent condensation from accumulating on the surface, the plastic is treated with styrene.
The tank has a flat shape, characterized by a technological cutout on one side. This cutout is required for the drain key device. This hole has one more purpose: it allows you to remove the fittings of the drain tank during repair work.
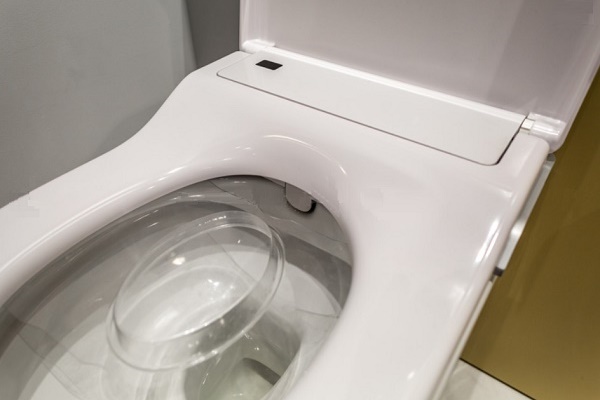
Another feature of the overhead drain tanks is the economical drain system that this model can be equipped with. Depending on the need, the dose may be 3 or 6 liters.
Bowl - a visible structural element
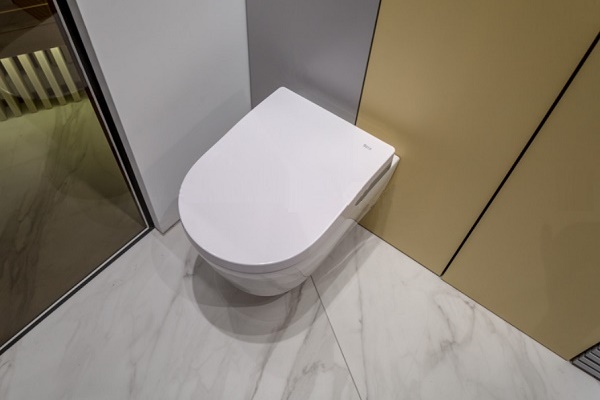
The bowl is chosen, as a rule, based on the personal preferences of users. It is visible and should correspond to the general interior of the room. Besides, selected wall hung toilet should be easy to use.

Most buyers prefer an oval-shaped product. Although on sale there are round, rectangular and even square models.
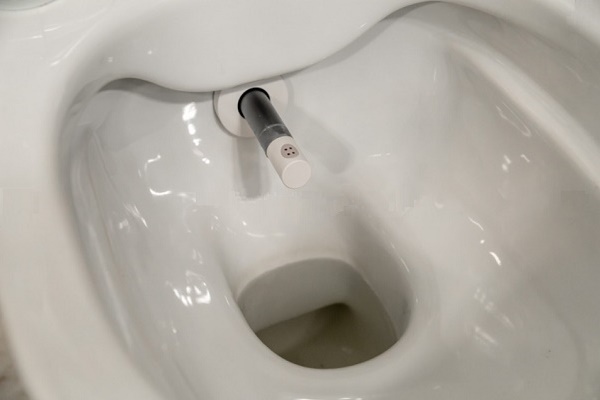
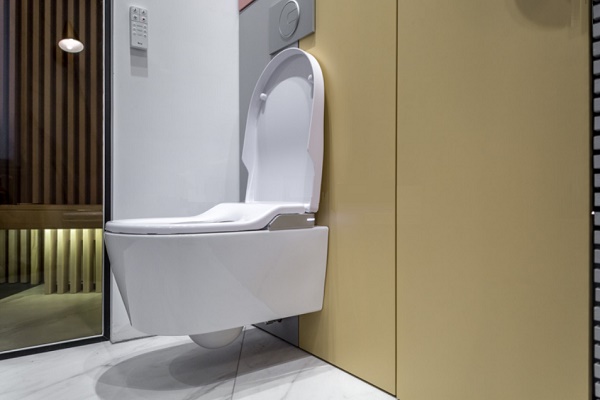
Fasteners are part of the selected model and are part of its configuration. In addition, you do not need to buy fasteners for a hanging toilet. In addition, among the mounted models there are smart plumbing devices electronically controlled and numerous hygienic functions.
Intelligent types of plumbing with retractable nozzles for washing and draining, deodorizing and other actions need to be connected to the power supply. Their installation is complicated by connecting the power line and tuning the system:
A thorough assessment of the pros and cons
When choosing a more modern model, you need to think carefully whether it makes sense to unconditionally give preference to such a solution or whether you still prefer the traditional option.
What attracts users to the suspended model and what makes it doubtful?
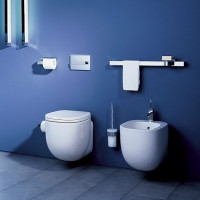
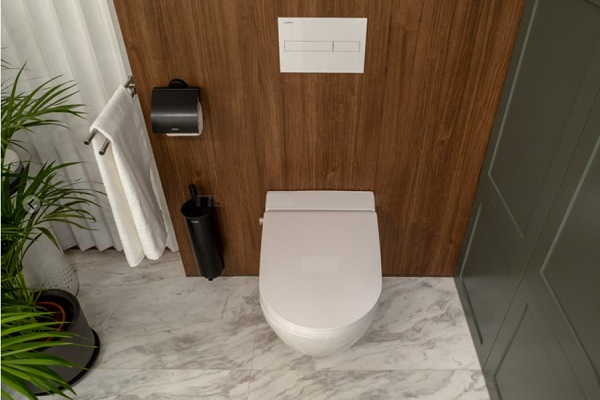
- Design. The concise look of the product is a definite plus. An elegant bowl that does not touch the floor looks more aesthetically pleasing than the one that is mounted in it. The panel covering the installation site looks attractive. A suitable flush key option can also be selected.
- Compact placement. This statement, by the way, causes controversy among specialists. If we talk about the real, and not about the visual effect, then it is small. To install the installation in a niche, you need about 15 cm. Add the thickness of the false wall to this value and make sure that the gain is not as large as we would like.
- Ease of maintenance. The absence of legs makes it easy to wash the space under the toilet. There is no hole in the floor that causes cleaning problems and could disrupt the overall pattern of the flooring.
- Repair work. Closed communications are good only when they are working properly. In the event of a breakdown, access to them can be very difficult, and restoration of the interior can be expensive. Difficulties may arise with the repair of the tank, if it is still needed.
- The psychological aspect of exploitation. The frame of the device is reliable enough to withstand loads of up to 400 kg. But overweight people may experience psychological difficulties during the operation of this plumbing fixture: fear that the bowl may come off and break. Relaxing in such a situation is very difficult.
- Features of mounting a hanging toilet. Of course, installing a wall model is more difficult than a floor model. To successfully complete the plan, you must either spend additional funds by inviting specialists, or time and energy if you decide to do the work yourself.
- Price. The wall model will cost you more than the floor. Such a difference in price can be attributed to the cost of steel installation, so the most budgetary option is the option of mounting on a concrete base.
In fact, in addition to its attractive appearance, the popular and fashionable model does not have special advantages. Rather, it is a matter of taste for the owners. Therefore, if you are limited in funds, think again: is the result of the estimated costs.

Preparing for installation work
As always, we advise you to get everything you need to complete the work in advance and have it at hand.
So, in order to install a hanging toilet with installation, you need to have:
- steel frame module complete with a plastic tank (capacity);
- toilet bowl;
- flush key;
- steel studs for mounting work;
- set of connecting pipes.
Usually, not only a plastic container, but also a flush key, nozzles, adapters and fasteners are sold with the installation. As a rule, a special material is included in the kit to protect the entire structure from condensation, which will be located in the bathroom wall. The same material lowers the noise level during the period of draining and filling the tank with water.
When you buy plumbing in a store, be sure to check the equipment and purchase those items that you need, but are not included in the basic set. Note that the bowl is usually purchased separately. The frame itself and all mounting elements are standardized, so choose the option that you like.

Most buyers prefer a double flush key: it allows you to meter the flow of water. To complete the installation and decoration will need a moisture-proof drywall.
Do not forget about the tools. You will need:
- hammer drill;
- concrete drills;
- roulette;
- marking pencil;
- ring spanners;
- building level;
- drywall knife.
Prepare a place for work: remove all unnecessary. You can proceed.
Installation work with installation
So that you can imagine how you will install a suspended toilet, we list the main stages of work.
You have to:
- equip a niche in the bathroom wall with the appropriate parameters;
- bring the sewer pipe to the installation point;
- fix the frame module;
- to bring pipes of cold water supply;
- connect a plastic tank;
- install a false wall and perform finishing work;
- fix the bowl by connecting it to the sewer inlet and the flushing tank.
At the end of installation manipulations, the flush key should be correctly connected.

It is necessary to approach each of the listed steps as responsibly as possible so that mistakes and negligence do not multiply the cost of your efforts, time and money.

What should be the installation niche?
There are several important requirements for organizing a niche. Firstly, the walls with which you will have to work must have a certain bearing capacity. We already talked about drywall walls above: they are not suitable for our purpose.
Ideally, the frame should withstand loads of up to 400 kg. This load is distributed between the walls and the floor, so the walls must be strong and reliable.
It is necessary to hollow a recess in the wall with a height of 1000 mm, a width of 600 mm and a depth of 150-200 mm. If everything is clear with the height and width, then the desired depth may not be there. Then you should hollow out as much as you can, and mask the lack of depth with a finish.
As a disguise, you can suggest between the wall and the formed ledge to build a closet for all sorts of details that are appropriate for the bathroom, and household chemicals. Or even make open shelves.
Some apartment owners, in order to reduce the amount of work, decide to install the frame close to the wall, and then sheathe it with drywall. It is in this case that the model’s advantage in terms of saving the bathroom space almost completely disappears.
For those who do not live on the upper floors of apartment buildings, it may come up with the idea to adapt the niche of the riser for the purposes of mounting the frame. Part of the fan riser in this case is cut off, and an air valve is placed in the attic at the place of its release. It is better not to do such work without coordination with the management company and without specialists yourself.

If your bathroom has a finished niche, which is provided for by the building design, consider yourself lucky. It can be used. But only sewer pipes and cold water supply sometimes have to be adjusted.
How to bring sewage?
Sewer pipe must be connected to the installation site of the toilet bowl of the suspension system. To do this, choose one with a diameter of 100 mm. The pipe is installed as close to the floor as possible, observing the desired slope.
To determine the place of connection to the sewage system, 250 mm should be measured from the center of the niche. It's here. Now you need to install an oblique bend on the horizontal part of the pipe, the angle of which is 45 degrees. That's it, go to the next step.
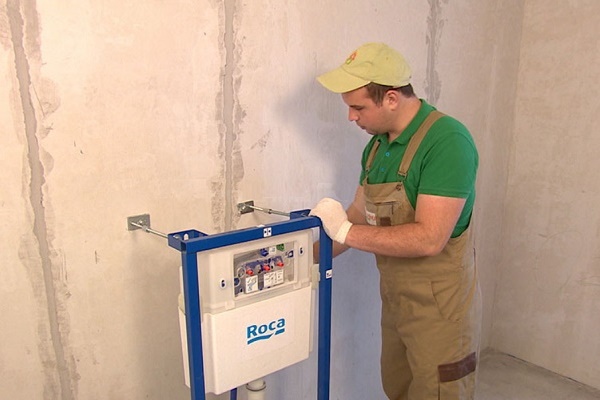
How to fix the frame with the tank?
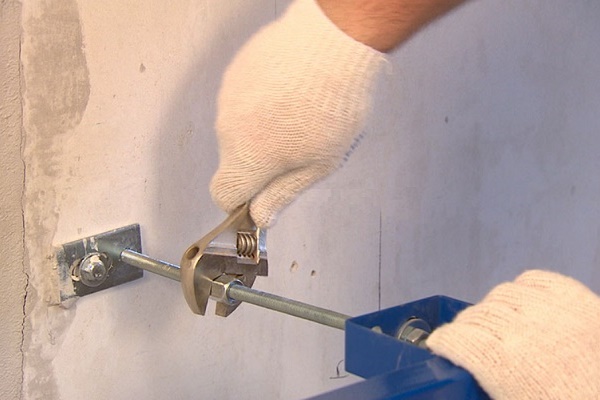
The frame should be fixed at four points, two of which are legs that attach to the floor. At two more points, the frame is attached to the wall by means of brackets. Installable design It should be perfectly aligned both horizontally and vertically. Do not forget to check the quality of installation with a building level.
To adjust the vertical position of the module, use the legs of the product. Correct horizontal placement is achieved by changing the length of the wall mounts.
The installation is screwed to the wall only after its position has been well checked. For additional fixation of the module, you can cement its legs. The optimum screed depth is 20 cm. This precaution is not necessary.

The slightest distortion of the structure will inevitably lead to early breakdowns and, as a result, to serious financial losses of the owner.
Pay attention to the bottom of the installation. At a distance of about 300-400 mm from the floor, there are several holes in the frame for subsequent installation of the toilet bowl.
For these holes there are special studs that you need to insert into them, equipping with the appropriate nuts and attaching to the wall. With the help of these pins and made hanging bowl mount.

Connect the necessary communications
First of all, we connect the sewer. For this connection, a black outlet is used, which, as a rule, is included in the installation package. At one end, this branch is fitted to the sewer pipe, and its other end is attached to the frame with special clips.
Water pipes should be located to the right or left of the module. Connect the pipe to the structure using the threaded connection already in it. To connect the water supply, it is better to use copper or polypropylene pipes, and make the connection detachable.
Cold water can also be supplied to the tank using flexible hoses. Such hoses are more profitable in terms of price, but their fragility should be taken into account.And when replacing failed hoses, you will have to carry out expensive repairs, so the pipe option is still preferable.
Remember to check how securely the drain tank is connected to the water system. For this purpose, open the water tap. It is located inside the drain tank. After filling the tank, all possible leaks are eliminated. This can be done without draining the water.

The connection to the sewer should also be checked. To do this, put a toilet bowl on the studs and perform a test drain without final fixing of the structure. After that, the bowl is again removed and all identified leaks, if any, are eliminated.
Finishing work
At the next stage, you have to sew up a niche using a moisture-resistant sheet of drywall, and then perform finishing work. Pay attention to the fact that we need a moisture-proof drywall, because ordinary drywall will quickly deteriorate under the influence of condensate.

For cutting drywall, you need to use a template that should be included in the installation package. It will allow you to correctly cut all the necessary mounting holes without damaging the material.
After installing a moisture-resistant sheet on its surface, you can fix the finishing material. For finishing the bathroom, ceramic tiles are most often used.
Final installation steps
The installation of the visible part of the wall-mounted toilet can only be started after the tile adhesive has completely dried out.
The order of installation of the toilet bowl:
- the drain pipe should protrude 50 mm beyond the wall surface: it must be adjusted to this size;
- do the same with the pipe, which leads to the drain of the sewer;
- both nozzles are installed in their intended place;
- on the studs that were fixed in advance, as well as on the nozzles, put on a large gasket, similar in shape to a truncated pyramid;
- put the bowl on the studs and attach pipes to it;
- put in place rubber gaskets and inserts made of plastic;
- put on and tighten the fastener nuts;
- protruding parts of the rubber gasket are carefully trimmed.
Now you can drain the water from the tank, thereby checking the operation of the sewer. The height of the installation of the hanging toilet bowl relative to the floor can be adjusted by changing the position of the studs and pull-out pins, which are used to secure this element. It should match the growth of visitors to the toilet.

The standard height is 40 cm, measured from the surface of the floor to the upper edge of the bowl.
Flush Key Attachment
The installation process is completed by installing the drain key. It is included in the basic package and can be mechanical or pneumatic. Usually this procedure does not cause any problems, since all the provided connections should already be brought to the surface of the wall.
Special pins are provided for the mechanical key, and tubules for the pneumatic key. It remains only to establish this element in its intended place and adjust its position. Everything: the toilet can be operated.
Concrete base suspended model
Steel frame is an expensive pleasure. In principle, you can do without it, having built a pedestal of concrete with your own hands, which will serve as a reliable basis for a suspended toilet.This option is considered the most economical.

With this installation method, the drain tank can either be mounted on the wall, while the drain key is brought out, or placed above the bowl of the plumbing fixture.
Installation Preparation Procedure
Consider the option that is considered the least expensive. We will prepare everything necessary for work:
- M200 concrete - approximately 40 liters;
- boards for the manufacture of formwork;
- threaded rods (length 50-80 cm, thickness 2 cm) - 2 pieces;
- washers, nuts, woodworking screws;
- a pipe made of plastic (diameter 11 cm, length 8 cm);
- drain coupling;
- Styrofoam;
- silicone sealant.
I think it’s worth repeating that the wall with which we have to work must be capital.
Step-by-step installation process
We fix rods in the main wall, on the outlets of which the toilet bowl will then be mounted. Recall that we should have a stable and reliable design that can withstand a weight of 400 kg.
The next step is to install the drain coupling. At this stage, it is necessary to determine the height of the toilet seat in order to cut the sleeve to the appropriate length.
Now we need to install the formwork. In order to mark the attachment points on the formwork, the distance between the holes intended for fasteners should be determined.
To calculate the length of the rods, you need to add the depth of the recess, which is about 15 cm, and the distance from the wall to the toilet bowl. To fix the rods in the wall, glue for concrete is used - a chemical anchor.

When the formwork is installed, and the installation of the pins is completed, you should install the bowl in its intended place. Make sure that the mounting holes coincide with the exits, and the outlet corresponds to the discharge of the coupling.

The next step is concreting. It must be done by installing the foam in the place where the drain hole will be. Remember that finally concrete will harden only after 28 days.
After that, you can remove the formwork and make sure that in front of us is a monolithic concrete block with pins coming out of it and an open fixed coupling. A toilet bowl is mounted to the front of the unit, and a tank is mounted on the base itself.

The procedure for installing the bowl on a concrete base is no different from installing a floor toilet. It is necessary to install the bowl on the pins, tighten the nuts, connect and seal the drain. Lastly, a drain tank is placed on a concrete base.
As you can see, this method of installing a suspended model is much cheaper and easier than working with the installation. But, to be honest, the result is not much different from a floor toilet.
Conclusions and useful video on the topic
The information you just read will be perceived much better if you supplement it with a video series. We suggest you to watch the installation with the mounting of a hanging toilet bowl with installation, filmed on video.
The range of plumbing fixtures is expanding: the toilets are being improved, updated, and become more and more attractive. But modern models, as a rule, are more expensive than traditional ones.
We recommend not to save on the quality and design of the product, but to save on installation by doing it yourself. This will help you buy what you like without significant damage to your family budget.
Tell us about how to install a hanging toilet in your house / apartment. It is possible that you are aware of the technological nuances that will be useful to site visitors. Please write comments, post photos, share impressions and ask questions in the block below.
 Installation of a toilet bowl installation: detailed installation instructions for a wall mounted toilet bowl
  Hygienic shower for the toilet: a comparative overview of the designs and the nuances of the installation
 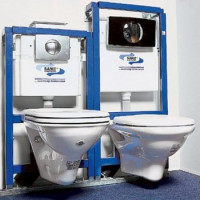 Securing the toilet for installation: step-by-step installation instruction
 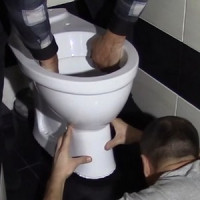 Do-it-yourself toilet installation: features of mounting toilet bowls of various designs
 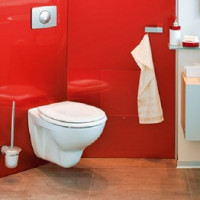 Corner installation for a toilet: selection tips and installation rules
 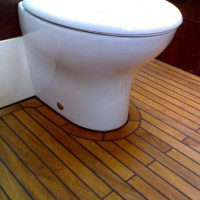 Installing a toilet on a wooden floor: step-by-step instruction and analysis of installation features
  How much does it cost to connect gas to a private house: the price of organizing gas supply
  The best washing machines with dryer: model rating and customer tips
  What is the color temperature of light and the nuances of choosing the temperature of the lamps to suit your needs
  Replacement of a geyser in an apartment: replacement paperwork + basic norms and requirements
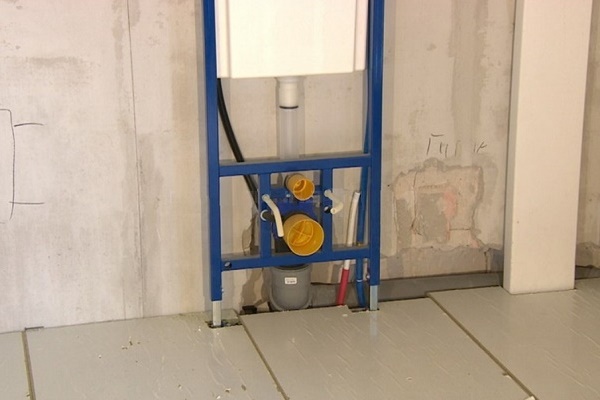
The wall-hung toilet really looks better, with this I completely agree. It is much more convenient to wash, dust does not accumulate on the leg. Yes, that's just installing it is much more difficult than floor. I set myself up with the installation, but fiddled for a long time, I won’t do it myself anymore. He took the bowl square, unusual, but, as it turned out, very convenient. The truth is now I'm afraid that nothing will break, in the toilet flaps - a weak spot.
It may look better, but that's just what all the benefits end with. That it is easier to wash - you do not wash a public toilet with 10 toilets, so this is a controversial advantage. So maybe you should not chase fashion and overpay?
No need to be so critical of such decisions. It is clear that from a practical point of view, a conventional toilet with a floor type of installation is the optimal solution.
But design innovations are also in demand, if one person chooses simplicity and practicality, then the other - original design. In that regard, wall hung toilets have proven their worth.
If people want a hanging toilet, then you don’t need to run away from them and judge for yourself. The article contains informative material, highlights the pros and cons. The only thing I want to add is recommendations on access to communications. Actual for the installation of the toilet with the installation of a hidden type, you need to make an inconspicuous masked hatch with access to communications.