Installation of a toilet bowl installation: detailed installation instructions for a wall mounted toilet bowl
When equipping a bathroom in a house or apartment, owners often encounter the problem of how to “hide” unaesthetic nodes for connecting to communications. In addition, they are interested in the question of how to rationally dispose of useful space. There is an excellent option - installation of a toilet installation that solves both problems.
The design for mounting the hanging toilet makes it possible to hide all communications and functional parts, including the drain tank. Using the installation visually increases the volume of the room. We will tell how it is installed, how decorative masking is performed, and how the plumbing bowl is then hung.
We described in detail the process of installing support frames for hanging toilets and fixing them to walls and floors. Outlined walkthroughs for installing different types of installation. The information submitted for consideration was supplemented by visual schemes, photo collections, video instructions.
The content of the article:
- Types of installation systems
- Mounting tools
- Determine the place to install the system
- How to carry out preliminary marking?
- Block installation for hanging toilets
- Convenient solution for a floor toilet
- Features of installing a frame installation
- System Health Check
- Tips and tricks from professionals
- Conclusions and useful video on the topic
Types of installation systems
The modern market for construction and related equipment offers two types of installation systems. Both options are convenient and practical, and the choice depends on which walls the structure will be attached to and which parts will bear the main operational load.
Block installation - The most simple, budget option, however, for its installation requires certain conditions. You can use the design only on the main wall, having previously prepared a niche in it for placing the tank and places for connecting to the sewer with water supply.
The second option involves bricking the system, masking with drywall or other sheet materials, followed by decorative cladding.These actions are performed only at the end of all installation activities.
Strong anchors are required for fastening. They account for the main operational load. The main advantages of the model include a reasonable price and the ability to use the installation not only complete with hanging, but also with stationary floor toilets.
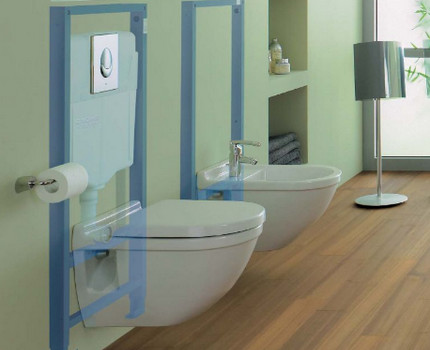
Framework installation belongs to a more complex type of design, but makes it possible to fix the toilet on thin hollow partitions or drywall walls. It is considered a very reliable system and has all the characteristics in order to hold both the plumbing module and itself.
Placed on the floor or foundation. It allows several mounting options: with special elements to four points on the wall, to two points on the floor and two on the wall, or only to the base of the floor with stable paws. The main load goes to the bottom of the base.
The main advantage of the frame installation is the adjustable legs. They are put up at any desired and convenient height. The design is suitable for installation in rooms of a non-standard shape, easily fits into the most unexpected design and can even be located in the corner without hiding the useful space of the bathroom.
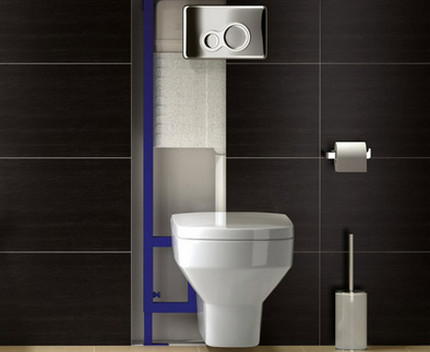
Dimensions of block systems are always standard. Their width is 50 centimeters, the depth varies from 10 to 15 cm, and the height does not exceed 1 meter. Frame installations have a base base width of 50 to 60 cm, a depth of 15 to 30 cm, and a height (due to adjustable legs) of 80 cm to 1.4 meters.
For wooden houses or non-capital buildings, experts recommend buying as wide and low systems as possible. This makes it possible to reduce the load on the walls and ensures the normal functioning of the module for a long time.
On the pros and cons of using installations and wall hung toilets, as well as about the features of choosing the best option in detail tells the article, which we recommend for review.
Comparison of block and frame structures
Like any other technical constructions, block and frame installations have their own advantages and disadvantages.
Among the main advantages are such parameters as:
- an opportunity to hide from eyes unaesthetic connecting elements and communication pipes;
- saving space and efficient use of the useful space of the sanitary unit (most relevant for small bathrooms and rooms with a complex, non-standard layout);
- impeccable sound insulation, thanks to which even in the smallest apartment you can not hear the sounds of a merging and filling tank;
- increasing the level of hygiene and providing easy cleaning under the toilet itself and in the area around it;
- high-quality mounting hardware, allowing you to position the plumbing module at the most convenient and personally comfortable height.
Among the shortcomings are the rather high cost of the entire structure, some difficulties in installation and the obligatory dismantling of the external interior decoration in the event of a malfunction or breakdown. However, these points are much less significant and do not become a stumbling block when purchasing an installation.
The following gallery will introduce the specifics of mounting installations using metal rails:
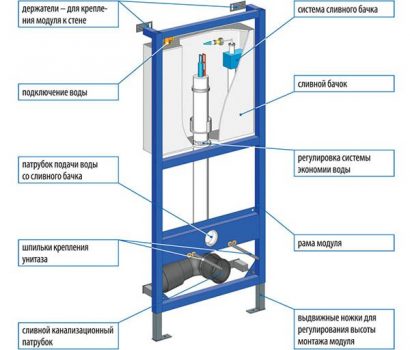
What is included in the system?
Before you install the toilet with installation, you need to understand the set of parts. The installation system consists of several separate components. The base is a solid steel frame.
Retractable brackets allow you to adjust the height of the structure and provide the ability to mount the device on the floor or on a special foundation.
The main operating device is the flush button, presented in the form of a plastic panel. In addition to its main function, it plays the role of a revision hatch. A single key is responsible for standard water discharge, a double key allows you to adjust the water supply and makes it possible to spend it more economically.
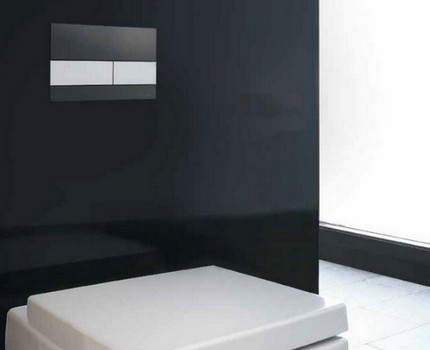
The most advanced control panels have a few additional useful features:
- double drain option - economical and ordinary;
- stop flush - when a second press stops the flow of water.
Some well-known brands also produce more modern contactless control consoles. They are equipped with sensitive infrared sensors that respond to movement and the occurrence of obstacles. Such a system is completely independent and practically does not require human participation in management.
How to choose the right installation?
The purchase of a supporting frame for the toilet is a responsible and serious matter. To approach installation choice need balanced and rational. Indeed, if during operation something breaks down or fails, a lot of work will have to be done to detect problems and even dismantle part of the exterior decoration.
Therefore, it is best to purchase a high quality system with a mandatory guarantee from the manufacturer.
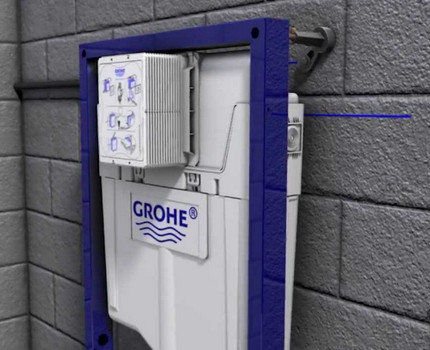
Self-respecting brands usually give a 10-year service life for their products, not only for the construction itself, but also for all components, seals, gaskets, connecting pipes and a tank.
In branded reputable stores, related parts are available even after the company discontinued the model. In addition, large brands contain authorized service centers where qualified employees will always answer customer questions and carry out warranty repairs in the shortest possible time.
Mounting tools
Installation of a block or frame installation is carried out strictly before the start of all finishing activities in the bathroom. The process is quite simple and does not require specific knowledge or extensive plumbing experience.
It is enough to carefully study the instructions that came with the system, watch video master classes and study the installation description in detail.
There is no need to buy specific equipment or expensive tools. All the necessary items can be found in the home arsenal of each owner.
For the correct arrangement of the installation for the toilet with your own hands you will need:
- a simple pencil;
- measuring tape;
- level;
- hammer drill;
- drills for concrete of different sizes;
- adhesive sealant;
- fum tape.
Do not forget about the open-end wrenches of various configurations.

Using these tools, materials and devices to correctly install the installation system is not difficult.
Determine the place to install the system
First of all, it is necessary to decide where the installation structure and the toilet will be located. If the home bathroom has small dimensions, it is worthwhile to allocate a place in the corner of the room or place the system so that it does not interfere with the natural passage.
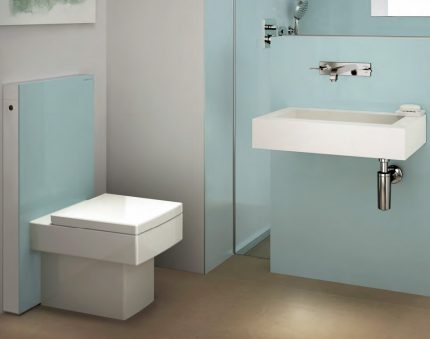
Experts say that it is most reasonable to install the complex where the old toilet was. Sewer and water pipelines have already been installed there, which greatly simplifies and speeds up the installation process.
If in a small bathroom there is not enough space for a conventional model of a supporting frame for hanging sanitary ware, an excellent choice is corner installation. The article introduces the rules of its selection and installation features.
How to carry out preliminary marking?
To do the marking, take a simple pencil or marker, tape measure and the construction level. All measurements are made taking into account the dimensions of the installation itself. To ensure that the subsequent installation is correct, first determine the location of the central axis of the structure and mark it with a straight line.
Then tape measure the distance from the conditional edge of the installation to the wall - it should not be less than 13.5 mm. They mark the area on the wall where the drain tank is supposed to be and mark the places on the floor and walls for the fastening mechanisms of the equipment.
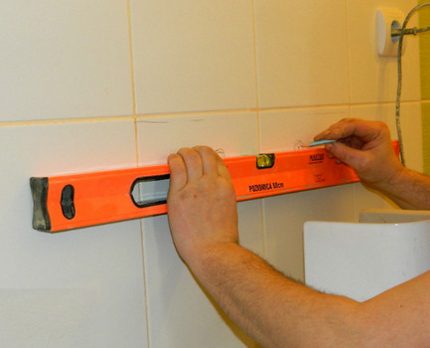
Correctly made markup makes it possible install installation exactly where it will not clutter up the space and interfere with the entrance and exit to the bathroom.
Block installation for hanging toilets
Installation of a block installation for wall-mounted toilet bowls is carried out only on a main, bearing wall. Having chosen a suitable place for the location of the structure in the bathroom, preliminary marking is made, the central axis is marked with a marker and only then they begin to work directly.
Step-by-step installation instructions:
- Measure the total height for the system (usually this parameter directly depends on the design features of the installation, but, as a rule, does not exceed 1 meter). Identify the location of the dowels to which the equipment will then be attached. Make sure that they are equidistant from the central axis, then punch holes with a puncher and hammer the dowels.
- Insert anchors into the prepared dowels and attach the main fragments of the structure with screws and nuts. It is imperative to align the system vertically and horizontally by means of height adjusters, clips and plugs.
- Attach a drain tank to the base and secure it with special connecting elements included in the installation kit.
- Connect the system to communications. Attach the water pipe to the tank, and attach the sewer outlet to the installation with a plastic clamp. For greater reliability, the butt joints on the pipes should be treated with silicone sealant.
- Screw the pins included in the toilet bowl into the pre-drilled holes. Equip the studs with couplings, adjust all nozzles to size, lay a silicone or rubber gasket for cushioning, install a toilet bowl and carefully check for leaks at the joints.
Lastly, secure the drain hose with clamps if required by the design.
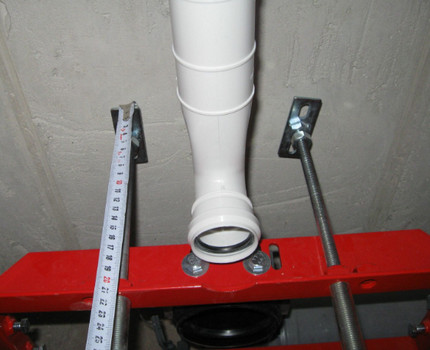
At the end of all work, check the system for leaks and engage in decorative decoration of the false wall, behind which all unaesthetic structural elements will hide.
Those who wish to independently install and fix the block structure will help the following visual instruction:
Having successfully completed the preparatory phase, we proceed to the basic work of fixing the support frame for the hanging toilet:
Convenient solution for a floor toilet
Block installation for a floor toilet can be done with your own hands. This does not require too much time and specific knowledge in the field of plumbing.
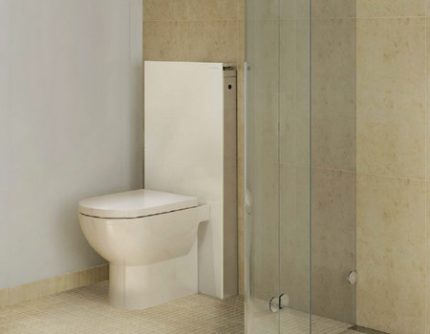
The finished design will reliably hide all communication nodes from the eyes, visually expand the useful space of the room and give it a more stylish, neat and modern look.
Installing a block system in stages:
- The base position of the knee is clearly fixed with metal fasteners. Process ointment with a technical ointment, and then move the plumbing to a future location. Carefully circle the outline with a simple pencil or marker and mark the mounting holes.
- Remove and place the toilet bowl according to the marking instructions. Return the plumbing fixture to its place, and push the drain outlet into the fan pipe.
- Carefully read the manufacturer’s instructions for installing the toilet installation and, following its instructions, install the drain tank. Secure the toilet outlet with the connecting collar, tighten the bolts tightly and close the caps with decorative caps.
- Make a technological hole and bring the drain button into it. Be sure to check the complex for leaks and try to identify possible problems and leaks.
If the system passes the test normally and does not show malfunctions, firmly fix the base of the toilet bowl and close the installation with a decorative panel.
Those wishing to read step-by-step instructions on fixing the wall-hung toilet to the installation We invite you to familiarize yourself with the information of our article.
Features of installing a frame installation
Before fixing the hanging toilet to the frame installation, you need to choose a suitable place and carry out preliminary marking.
This system is convenient in that it allows you to attach plumbing not only to capital, but also to hollow walls, plasterboard partitions and light, thin structures. In addition, the frame complex is suitable for placement in corners and under windows.
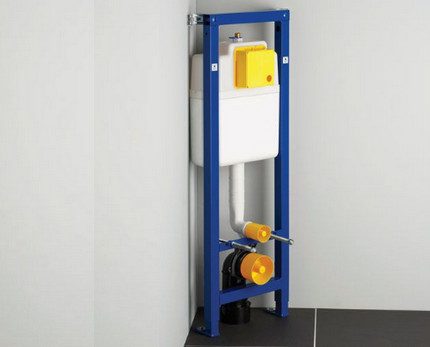
Description of the installation process step by step:
- Mark the location of the frame and outline the attachment points: two to the floor and wall or partition. To level the installation use the level and plumb line.
- Punch holes at the designated key points with a rotary hammer or an electric drill. Place dowels in them and fix the frame of the frame for greater reliability with anchor bolts.
- Inspect the drain tank and locate the outlet. It can be located below or from the side. Depending on its location, connect the element to the water supply system using a plastic pipe. Flexible hoses should not be used. They serve a limited amount of time, and to replace it will have to do a tremendous job and dismantle part of the external decor.
- Using a pipe or corrugation, connect the installation to the sewer, temporarily connect the toilet bowl and test the system for leaks and correct operation. Check how smoothly the shutter release button works.
- If no malfunctions and leaks are found, clearly fix the position of the toilet bowl and proceed with the decorative covering of the structure. To prevent construction debris and dust from getting inside, close the hole for the drain button with a special cuff.
To equip the external raised panel around the perimeter of the entire installation structure, attach a metal profile. It will then be convenient to mount on it any finishing material, for example, fiberboard or drywall.
The following selection of images will present the process of installing a frame installation with plasterboard stitching:
System Health Check
When all installation activities are completed and the installation elements are connected to the main communications, you need to make sure that there are no malfunctions in the system. To do this, first turn the valve of the water tap and monitor the flow of water into the tank.
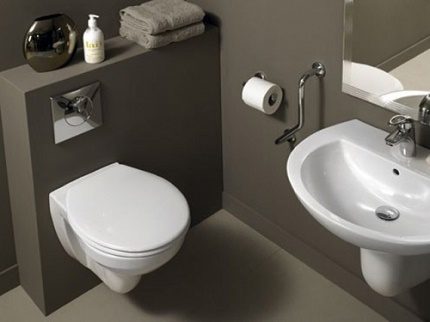
If the design works correctly, and water does not ooze from the pipes and connecting parts, proceed to the decorative finish. Detected dampness or water droplets clearly indicate the presence of a problem that needs to be addressed before starting the facing work.
The most common causes of problems are:
- Water leaking from the tank - it is possible that the gaskets were not installed clearly or were displaced during installation. It is necessary to shut off the water supply, unscrew the connecting bolts, check the location of the gaskets and correct them or replace if necessary.
- Toilet bowl staggers - you need to look at the fasteners of the toilet itself and the connecting elements of the installation, and then gently pull them up so that the position of the plumbing is clearly fixed. It is advisable to act very carefully, otherwise there is a risk of breaking the threads of the reinforcing fasteners or even breaking the ceramics.
- Water stagnates in the toilet - clear evidence of improperly positioned drain pipe. To solve the issue, the plumber will have to be dismantled, the drain set strictly at 45 degrees, and only then return the toilet back.
- Moisture on the floor and around the base of the toilet - most often this phenomenon is associated with poor sealing of the connecting corrugation. To eliminate leakage, it is enough to cover the butt joints with another layer of sealant and allow it to dry well.
All these problems are not very difficult and are easily fixed with your own hands at home. If the owner does not have the desire and time to repair, you can call a professional plumber, and he will quickly fix the problems.
Tips and tricks from professionals
Simple tips will help you take into account the specific nuances of installation:
- Scheduled maintenance of the tank and potential repairs will be much easier and calmer if you make a technological hatch under the drain button for quick access to the system.
- It is desirable that the wall thickness covering the installation system does not exceed 7 centimeters.
- The installation of a more modern and progressive drain button will significantly reduce water consumption and, as a result, save well on utility bills.
- It is recommended to place the drain control button in the center of the tile or in the seam area between two tiles.
- When installing the toilet, it must be taken into account that its upper edge should not be lower than 40 cm and not higher than 45 cm from the floor. It is very important to observe these parameters so that the water does not stagnate and leaves in a timely manner into the sewer opening.
The mounting holes should be at a standard distance from each other: 18 cm for compact toilets and 23 cm for larger models.
Conclusions and useful video on the topic
To avoid common mistakes during the installation of a toilet bowl with an installation, we suggest watching the following videos.
Video # 1. Professional video instruction:
Video # 2. Mounting Model Installation Instructions:
Following these simple tips and referring to the instructions attached to the installation, installing the structure with your own hands will not be difficult. If you have any doubts about your own strengths, you should turn to professionals, and they will quickly perform the work at the highest level.
Do you have useful information on installing a support frame for a hanging toilet? Want to share valuable information or ask a question? Please write comments in the block below the text of the article.

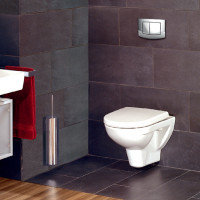
 Securing the toilet for installation: step-by-step installation instruction
  Repair of the installation for the toilet: possible malfunctions and methods for their elimination
 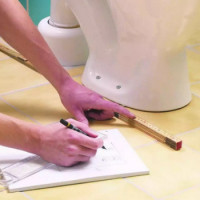 Fixing the toilet to the floor: an overview of possible methods and step-by-step instructions
 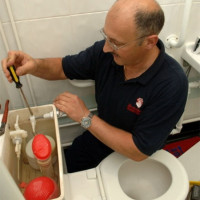 Do-it-yourself toilet drain tank repair: instructions for fixing typical breakdowns
 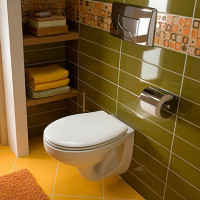 Installation of a hanging toilet: we analyze the nuances of installation technology
  Installing a toilet on a wooden floor: step-by-step instruction and analysis of installation features
  How much does it cost to connect gas to a private house: the price of organizing gas supply
  The best washing machines with dryer: model rating and customer tips
  What is the color temperature of light and the nuances of choosing the temperature of the lamps to suit your needs
  Replacement of a geyser in an apartment: replacement paperwork + basic norms and requirements
Well, do not tell. The question is what to do with the tiles, if a leak appears? And moreover, how to detect a leak, if everything is hidden from my eyes, is completely incomprehensible to me. There was already a case: he installed the installation, and when the neighbors came running screaming that their whole ceiling was wet, I had to break the tile. With a conventional toilet, such troubles are excluded. I don’t risk it anymore.
I understand your concern, because when you install a toilet installation, many sacrifice practicality in favor of design. But this can be avoided by laying the installation of a hidden door into the project, through which you can access the communications, if a leak occurs.
If you install such an installation in a narrow toilet, then positioning the door giving access to the pipes is not quite simple.
If the combined bathroom and the area allows, then you can implement such a door with direct access to communications. Such a door is faced with a stove or other material. Thanks to this, its presence is generally difficult to guess for an outsider.