Repair of the installation for the toilet: possible malfunctions and methods for their elimination

Installation of a suspended toilet has a lot of undeniable advantages. However, compelling practical and aesthetic priorities are occasionally overshadowed by breakdowns that need to be rectified. Agree, you should not even try to restore plumbing if you do not know how to repair the installation of the toilet.
We are ready to help you deal with the problem. In our article, we described all the ways to eliminate minor problems and serious violations in the work of suspended plumbing. Valuable recommendations are given on the operation of equipment and the prevention of negative situations.
For you, we have collected and meticulously systematized all the options for damage, thoroughly examined the methods of dealing with them with examples. The information is confirmed by a photo and video guide.
The content of the article:
The principle of operation and design of the toilet
The installation system has a similar principle of operation compared to the usual tanks. When you press the water release lever or button, the valve rises in the lower opening of the tank, after which the bowl is washed with water. When the tank becomes empty and the button is released, the valve returns to its original position under its own weight.
Then the automatic filling mechanism of the tank comes into operation. It consists of shutoff valvewhich is connected to a water supply source. The shut-off valve operates synchronously with the float.
When the tank is empty, the float drops down and opens the valve to fill the tank. Water enters the tank and the float floats up in parallel. When it reaches a certain high point, the water supply stops and the shutoff valve closes.

Today you can often find tanks with an economical drain, where there are two buttons, one of which allows you to use any part of the tank volume.
Types of problems with wall hung toilets
All breakdowns can be divided into several categories, each of which is tied to a specific node of this type of plumbing:
- violation of the integrity of the drain tank;
- a lot of water flows out (the bottom valve does not cope due to wear or clogging);
- malfunctions in the drain mechanism (the tank does not fill or is filled continuously);
- leakage when supplying water to the tank (the joints of flexible hoses / fittings are not sufficiently sealed).
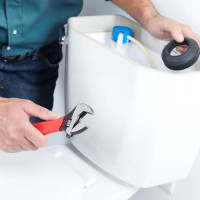
Direct repair of the installation for the toilet may concern already smaller elements in the structure. The main complexity of the work is associated with the replacement of components or the whole mechanism in the drain system.

Malfunctions can also be caused by a violation of the shape of the frame on which the installation system is located. This applies to low-cost models from dubious manufacturers or fakes. In such products, the frame is made of thin profiles, which can simply bend under the influence of the mass of the tank with water.
Instructions for Home Masters
Most of of problems in systems with installation or traditional models is associated with the appearance of malfunctions in the tank mechanism. The reason for this may be poor water quality, which over time causes corrosion of metal elements, and also contributes to the deposition of sediment.
If you find that the water has stopped collecting and draining correctly, you will probably have to perform several actions.
# 1: Water in the tank slowly draws
We clean the strainer at the entrance to the tank (if any). You need to disassemble the unit and remove the filter for washing and cleaning with a soft toothbrush. The fractions carried by the water could clog the mesh cells.

If there is little water entering the tank, it is necessary to adjust the position of the valve and the float. This can be done by folding the metal lever, making sure that the float takes the correct position when filling the tank.
We make repair of the float valve. In some cases, it could just be skewed and need to be aligned. In other cases, you need to check the lever that connects the float and valve. In case of communication failure, the valve will constantly block the flow of water even when the float is lowered. Also flush the inlet valve.
# 2: Exhaust valve clogged
After flushing, the tank starts to fill up, but after the float reaches its upper position, water still continues to flow into the tank.Most likely, the valve is clogged due to the fact that there are many inclusions in the water and they are deposited on surfaces.

There is no need to completely dismantle the valve - just loosen the fasteners a little to remove the rubber gasket.
Rinse it under high pressure and rinse the valve cover. After that, you can assemble.
# 3: The drain button does not work
When you click on the drain button, nothing happens. Flushing problems are related to malfunctions in drain fittings, in particular, with a violation of the connection between the valve and the button. In this case, it is best to replace the drain valve.
If you still want to pick up spare parts and make repairs yourself, we recommend that you contact your equipment supplier. Repair kit of another brand will not work.

# 4: Water leaks regularly
Water in a thin stream constantly flows into the bowl. To eliminate the additional costs of water, it is necessary to replace the rubber gasket, which serves to seal the drain hole. A gap formed or a decrease in tightness can serve cause leakage.
Sometimes the exhaust valve may become deformed after prolonged use. In this case, replacing the rubber gasket will not help and you will have to change the whole mechanism.
Another reason water leakage An emergency tube can be lowered into the bowl, which serves to remove excess water. This happens as follows: if the inlet valve and float system breaks down, a continuous stream of water will flow directly into the toilet, preventing the bathroom or the bathroom from flooding.

There are two ways to solve this problem. The first is to raise the emergency tube higher. If there is simply nowhere to raise the tube, then the second method is suitable - lower the float below by doing this with the screws. This will slightly reduce the amount of water in the tank and help eliminate leakage.
We make repairs float valve. In some cases, it could just be skewed and need to be aligned. In other cases, you need to check the lever that connects the float and valve. In case of communication failure, the valve will constantly block the flow of water even when the float is lowered.
Replacing the rubber gasket should solve most of the problems associated with poor water closure. Many modern models are devoid of the usual polymer gasket, having a one-piece plastic inlet valve. In this case, you will have to completely change the valve.
# 5: Installation replacement required
The degree of dismantling depends on the design. Some manufacturers produce models with a revision window through which you can repair the drain tank. For models of popular manufacturers, the drain button is simply dismantled, after which the master gets full access to the mechanism.

Unfortunately, not every model has such conveniences, so often you have to dismantle a partition or tile. The possibility of revision must be laid at the stage of installation of the system with installation.
After gaining access to the tank, it is necessary to do the following operations:
- Remove flush key. As a rule, it just needs to be squeezed out from the back so that it falls out of the cordon.
- Remove frame. We unscrew the screws that serve to fix the frame, and then remove the pusher latches. Now the frame can be removed.
- Dismantle the partition. Tighten the tabs and remove the partition.
- Block the water and press the drain button. Repair must not be allowed to turn into a flood.
- Get wet inside the tank with a rag, as working with wet parts is inconvenient.
- Remove reinforcement block and dismantle the inlet valve.
- Remove the drain valve retainer.
Now you can replace any components by assembling in the reverse order. Before changing parts, it is necessary to completely clean the installation site from rust and sediment. For this, you can use the WD-40 and similar tools.
# 6: Fighting Bowl Defects
The toilet has to be repaired in the following cases:
- cracking / chipping;
- cuff wear, which is used to connect to the sewer;
- clogging.
Damage to the bowl could appear after draining the hot liquid, as well as due to mechanical stress. If a crack appears in the lower part of the toilet bowl, you will have to completely change the bowl.

If the damage is located at the top or in the place where the screws are fixed, the following set of consumables and tools will eliminate the crack:
- sandpaper;
- grinder;
- drill with small diameter drills;
- epoxy resin and solvent.
The edges of the crack need to be drilled to stop further cracking. Strip the crack along the entire length and degrease the surface. The space inside the crack must be filled with resin or glue similar in properties.
After that, you need to leave the toilet for a day until the adhesive is completely crystallized. The next day, grind the seam.
If a puddle began to appear under the toilet, then it's time to change the cuff. This seal is used to seal the connection of the sewer pipe with the drain of the toilet. Replacement begins with the dismantling of the worn gasket. Using a knife to clean the surface of the pipes from contamination. All should be well degreased.
Then the joint is treated with a sealant. A new cuff is inserted into the sewer hole and is worn on the toilet drain. On top, you can additionally take silicone sealant and apply on contact surfaces.

The toilet may become clogged after prolonged use. To clean hard-to-reach surfaces, you will need a plunger, plumbing cable and chemicals.
First you need clean the drain using a cable and plunger. Then fall asleep "chemistry" and wait a certain time. In the process of working with chemicals, you should use safety glasses, a mask and clothing that completely covers the skin. After chemical reactions, flush and re-treat the bowl with a plunger and a cable.
# 7: Lift broke on the lid
With ordinary covers, the owners do not “bother”, buying a new one after wear, as it is inexpensive, and the market offers models for every taste. Products with a microlift are much more expensive. The slow lowering mechanism could break due to forced closure.
To restore the lift, the lateral mounting screws often help. If this does not help, then you need to change the whole mechanism.

Proper operation of the installation system
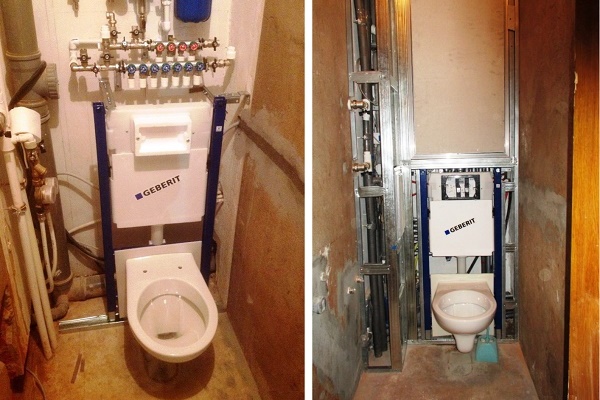
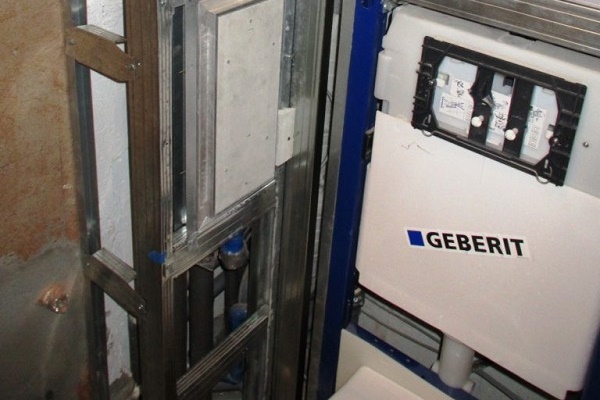
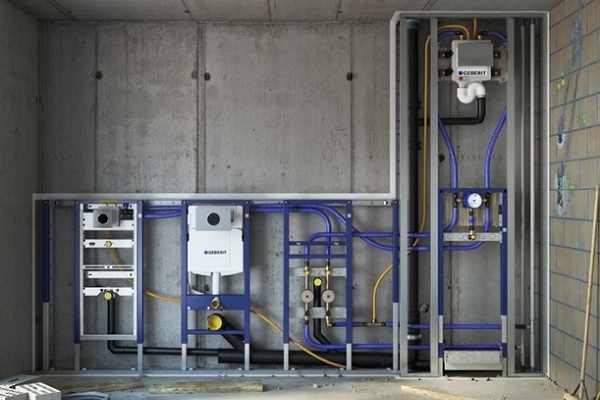
The room where it is made installation of a hinged toiletacquires a special charm. It is for the sake of improving the interior that many choose installation systems. This contributes to faster cleaning of the room, since all engineering parts are hidden behind the wall, including valves and pipe wiring.

When installing such a product, it is necessary to leave a place under the audit compartment, through which it will be possible to make an inspection and dismantle it.
The main enemy of any plumbing is water and those impurities that it carries in itself. Its aggressive composition can lead to clogging and rust during the year. Therefore, it is recommended to use filters at the entrance to the tank.
The presence of at least a coarse filter will significantly reduce the accumulation of dirt inside the tank, which will certainly increase its service life.
Do not forget to purchase a repair kit along with the purchase of the system. In the future, the search for compatible components may become more complicated, especially for foreign products that use non-standard and unique tank drain designs.
Conclusions and useful video on the topic
The video will help to avoid errors during installation and improve understanding of the repair process.
The advice of experienced engineers will allow you to quickly find the cause of the malfunction in your installation to the toilet and quickly fix it. Learn the principle of the drain system, and you yourself can find the cause of the breakdown.
And what kind of breakdowns have you encountered during the operation of the installation for the toilet? Talk about personal experiences and ask questions in the comments to the article.
 The toilet is leaking after flushing: possible causes of the malfunction and how to eliminate them
 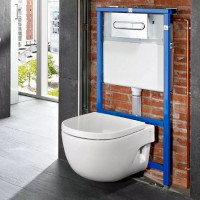 How to fix a toilet installation: popular breakdowns and how to fix them
 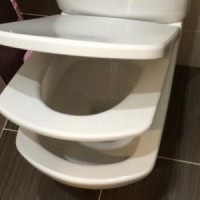 Repair of the toilet lid: frequent breakdowns and methods for their elimination
  Why the toilet bowl sweats: the causes of fogging and how to eliminate them
  What to do if the drain tank does not hold water: causes and methods for troubleshooting
 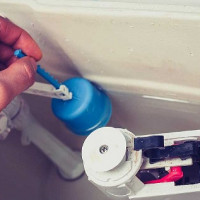 How to repair the toilet with your own hands: analysis of common breakdowns
  How much does it cost to connect gas to a private house: the price of organizing gas supply
  The best washing machines with dryer: model rating and customer tips
  What is the color temperature of light and the nuances of choosing the temperature of the lamps to suit your needs
  Replacement of a geyser in an apartment: replacement paperwork + basic norms and requirements
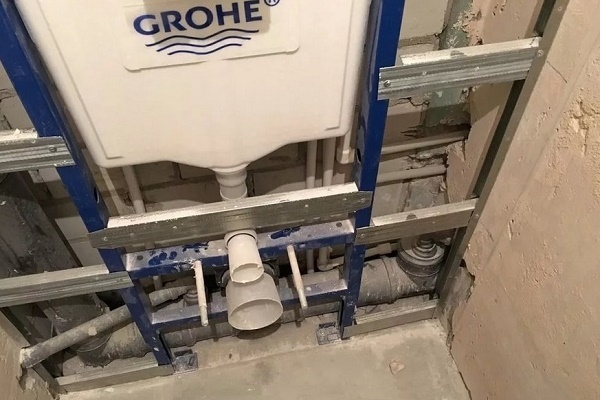
How on time I came across an article. Now I will solve the problem with the tank. At first the flush did not work. The valve did not seem to be clogged; it itself washed it. It's too early for wear, it has a one-year warranty. Now the water is constantly running, but the gasket was changed not so long ago. Most likely, you will have to completely change the system. I'm not sure I can handle it, although everything is spelled out step by step. I think it's better to entrust a specialist.
Repairing such a system cannot be difficult. The simplest thing is replacing parts with new ones, they are not so expensive. In our case, a simple valve adjustment helped, more precisely, adjusting the position of the float. We noticed something was wrong only by the appearance of rusty deposits in the toilet due to a constant, barely noticeable brook. There are probably reliable mechanisms made of hard materials, this is clearly not the case with us, once in a while there is a change in the correct position of the parts.
A few years ago (about 2 years), we installed a wall-mounted toilet with a flush barrel hidden in the wall from Geberit. We noticed the smell of humidity in the room - the smell of mold that is heavy for breathing. The smell came from a box with buttons to drain the water. They discovered and discovered drops of water that collect on the top of the drain barrel box.
I do not find any information on resolving the problem of condensation inside the tank. The tank is insulated with foam. We would be grateful to receive advice on resolving the problem.
I took out a valve with a length, and the gasket remained inside the drain barrel. How to get it? Oli system