Setting up the toilet fittings: how to properly adjust the spillway

The internal filling of the tank is not a very complicated device, but its breakdown can significantly reduce the comfortable feeling for the residents of the house. It happens that everything looks fine, but the work of the drain mechanism leaves much to be desired.
To fix the problems, you will need to properly configure the toilet fittings. This procedure must be performed when installing the plumbing, and later the draining work has to be periodically adjusted.
If you encounter such a problem, our material will help to quickly solve it, without even having to seek the help of specialists. We will tell you how to set up a toilet flush device. For clarity, the material contains thematic photos and videos.
The content of the article:
Types of fittings for flushing tanks
The principle of operation of a conventional tank is not complicated: it has a hole through which water enters, and a place for water to discharge into the toilet. The first is closed by a special valve, the second by a flap. When the lever or button is pressed, the flap rises, and water, in whole or in part, enters the toilet, and then into the sewer.
After that, the shutter returns to its place and closes the drain point. Immediately after that it triggers drain valve mechanismwhich opens a hole for water. The tank is filled to a certain level, after which the inlet is blocked. Water supply and shut-off are regulated by special valve.

Distinguish between separate and combined design of fittings, implementing a set of necessary for flushing the volume of water and draining it after activating the flushing device.
Separate and combined options
Separate option used for many decades. It is considered cheaper and easier to repair and configure. With this design, the inlet valve and the damper are installed separately, they are not connected to each other.

To control the flow and shutdown of water use float sensor, in the role of which even a piece of regular polystyrene is sometimes used. In addition to the mechanical damper, an air valve can be used for the drain hole.
A rope or chain can be used as a lever to raise the flap or open the valve. This is a typical option for models made in retro style, when the tank is placed quite high.
In compact toilet models, control is most often carried out using the button that you need to press. For people with special needs, a foot pedal can be installed, but this is a rare option.
In recent years, models with a double button are very popular, which allow you to empty the tank not only completely, but also by half, to save some of the water.
Separate option valves is convenient because it is possible to repair and configure individual parts of the system separately.
Combined fittings are used in high-class plumbing, here the drain and water intake are connected to a common system. This option is considered more reliable, convenient and expensive. If this mechanism breaks down, it will be necessary to completely dismantle the system for repair. Customization can also cause some difficulties.

Materials for the manufacture of devices
Most often toilet fittings made of polymeric materials. Usually, the more expensive such a system, the more reliable it is, but this method does not provide clear guarantees. There are fakes of well-known brands, as well as quite reliable and inexpensive domestic products. The average buyer can only try to find a good seller and hope for good luck.
Bronze and brass fittings alloys It is considered much more reliable, and to fake such devices is much more difficult. But the cost of these mechanisms will be significantly higher than that of plastic products.
Metal filling commonly used in plumbing elite class. With proper setup and installation, such a mechanism has been functioning smoothly for many years.

Water supply
An important point is the place where water enters the toilet. It can be carried out from the side or from the bottom. When water is poured from a side hole, it produces a certain amount of noise, not always pleasant to others.
If water comes from below, it happens almost silently. Bottom feed water in the tank is typical rather for new models released abroad.
But traditional tanks of domestic production usually have side feed water. The advantage of this option is its relatively low price. Installation also varies. Elements of the lower water supply can be installed in the tank even before it is installed. But the lateral feed is mounted only after the tank is installed on the toilet bowl.

Typical problems with the tank
Problems with the tank most often arise for three reasons:
- due to improper installation;
- after incorrect valve settings;
- as a result of wear or breakdown of individual components and elements.
If there is too much or not enough water in the tankFirst of all, it is recommended to check the condition of the float. If the lever is made of thick wire, it will be easy to set up.
It is enough to bend the metal slightly so that the float changes its position. If more water is needed, the float needs to be moved higher. To do this, the wire is bent with an arc down.
If there is too much water in the tank, the float should be lowered a little. For this, the wire holding this element is bent upward. But in the new models, all the elements are made of plastic that cannot be bent. Here, a special screw is provided for changing the position of the float. Rotating it, you can move the float to the desired level.
Sometimes lack of water in the tank It is connected not with the incorrect position of the float, but with the contamination of the flow openings through which water enters. In this case, you must remove the float from the mechanism, then remove the membrane covering the hole and flush the mechanism.
In order to adjust the level of the accumulating water in the tank with a simple float tap, you need to do a few simple steps:
Of course, before starting any manipulations with the tank, it is necessary to shut off the water in the riser.
If water enters the tank continuously, then you need to check the condition of the membrane or valve, which is equipped with a float valve, for this:
Prudent owners, even when installing the toilet, mount a shut-off valve directly in front of it. In this case, it is not necessary to block the entire riser, it is enough to disconnect only the tank proceed with repair and adjustment.

Sometimes the following unpleasant situation is observed: water constantly flows out of the tank, and the tank either is only partially filled, or even remains almost empty. Most likely, the locking mechanism that is installed incorrectly or worn is to blame.
We replace the water drainage mechanism as follows:
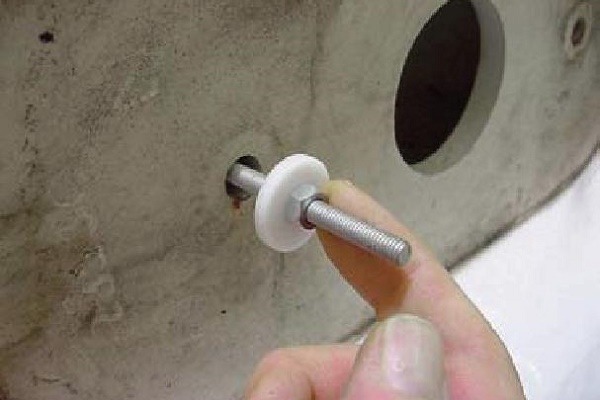
More often than not, it is simple enough to tighten the fixing bolts that fix the locking device in the correct position.
If this does not help, check the valve for wear and clogging. To do this, the valve is removed, disassembled and washed, if necessary, replace the worn membrane.

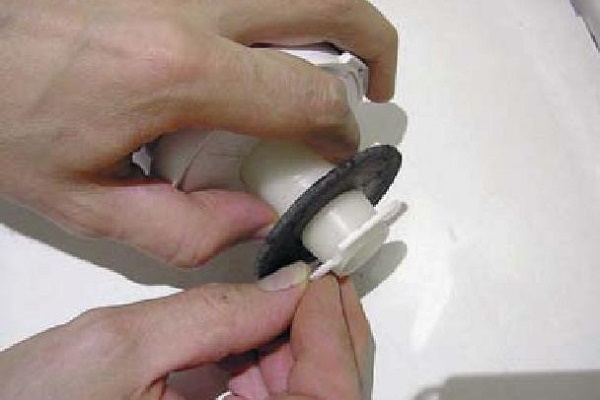
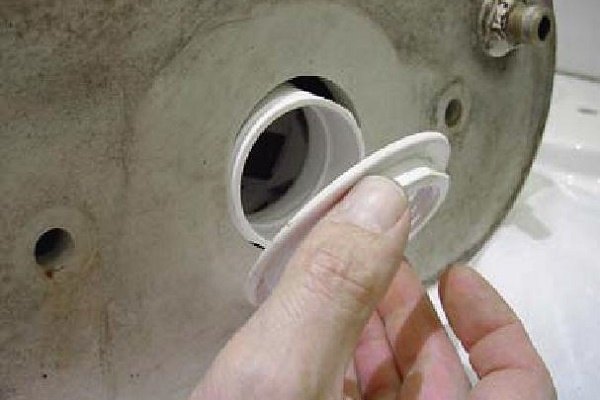
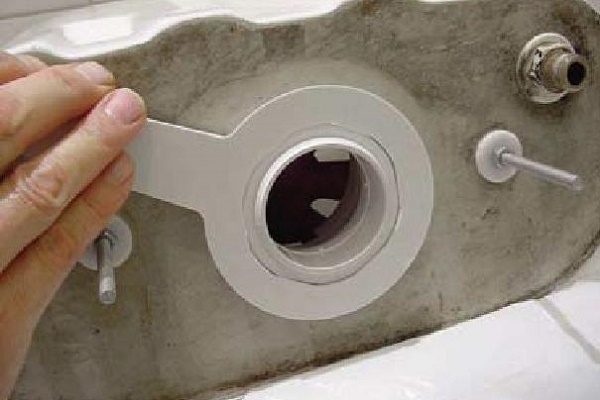
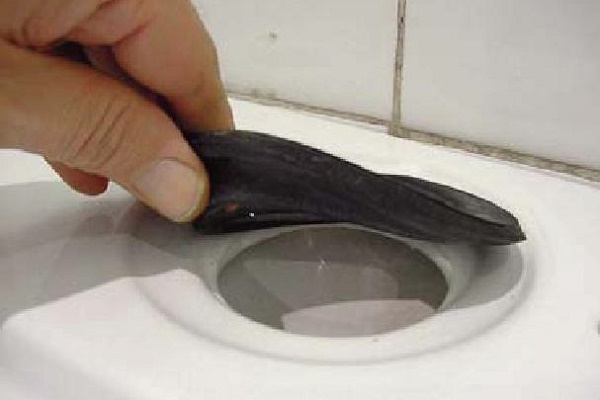
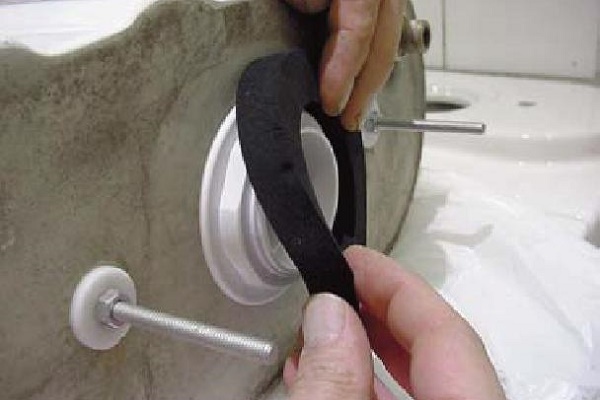
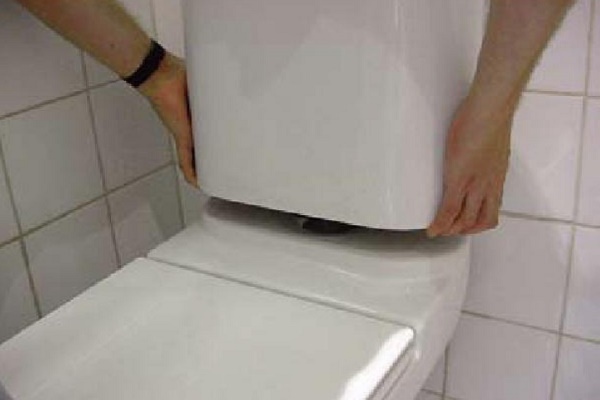
Sometimes rubber gasket breaks down, which is installed between the tank and the toilet. In this case, water will flow out of the tank and accumulate on the floor near the toilet.
To fix this problem, you will need to completely dismantle the tank, replace the leaky gasket and reinstall the tank.

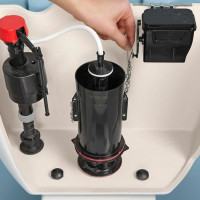
Compact device and adjustment
Compact toilet models have recently become widespread. It makes sense to consider their device in order to understand the main features of the adjustment and repair of the locking mechanism.
A compact toilet consists of the following elements:
- capacity of the drain tank with a lid;
- system of filling water into the tank;
- locking device or water drainage system;
- button or control lever;
- toilet bowl.
The tank in the compact is installed on a special shelf, which is located behind the cup. Usually, the fittings of such a toilet bowl are adjusted after the bowl of the tank is installed, but before the cover is mounted. Before starting work, it is recommended that you carefully read the manufacturer's instructions. Usually there is detailed information on the execution of work.

On the overflow pipe of the device, the water level is usually indicated, which is considered normal for this particular model. You need to find this designation, which is often made in the form of a strip or collar. Usually, if when filling the tank the maximum water level falls below this mark, a poor-quality flush of sewage is observed.
To change the situation, you need to rearrange the “glass” on the intake valve to a higher position. To do this, loosen the latches holding this element located under the float. After the required level is set, you need to check the result of work, i.e. fill the tank and drain the water.

When mounting the tank fittings, it should be remembered that all moving parts of the valves should be separated by a distance, at least a small one. If the valves are in contact during operation, this may interfere with the normal operation of the system, leading to its imbalance and breakdowns. Also, the contact of movable reinforcement elements with the walls of the tank is unacceptable.
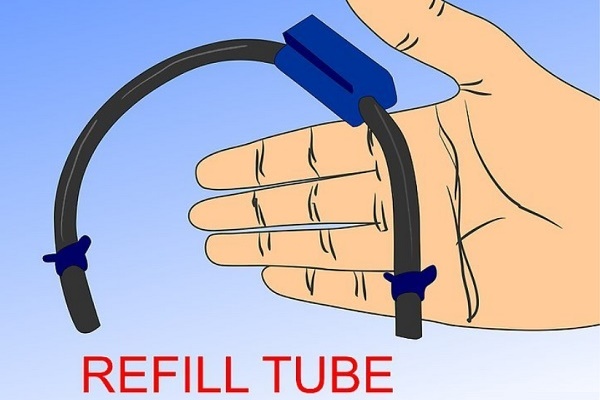
To prevent water splashing when typing it into the tank, you most often have to cut or change the filling tube:
An important stage of tank installation is the installation of a cover with a push-button regulator. Between the cover and this assembly, before it is screwed in, a distance of not more than seven millimeters and not less than three must remain. If these conditions are met, the lid will be fixed securely enough.
Before starting to screw the flush button, the instruction recommends making a couple of turns in the opposite direction, i.e. counterclock-wise.

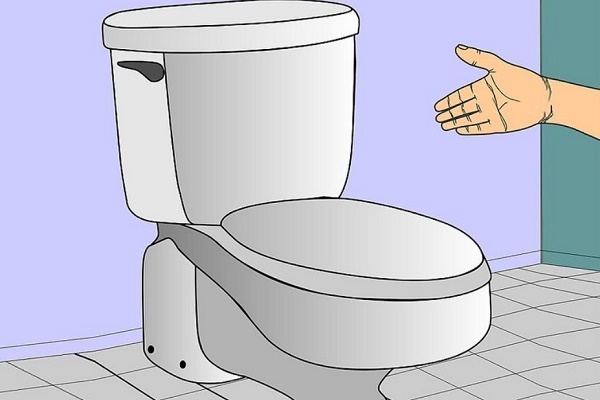
This will allow you to center the position of the thread. After that, screwing the button assembly is done clockwise. You need to rotate your hands all the way, additional tools are usually not needed. At the end of the installation, drain the water again to make sure that the button and all fittings are set up correctly and installed normally.
Compacts are produced both with a lower water supply, and with a side one. With valves designed for lower water supply, a problem of the type such as clogging of the filter installed on the water supply to the tank may occur. After flushing, i.e. In the process of filling the tank, a characteristic, rather loud and unpleasant whistle is heard.
This situation most often indicates that the filter is clogged and needs to be flushed. Debris accumulated inside reduces the clearance for water, which enters the tank with high pressure and accompanied by sound effects. In addition, due to this malfunction, the tank is filling up much more slowly than usual.

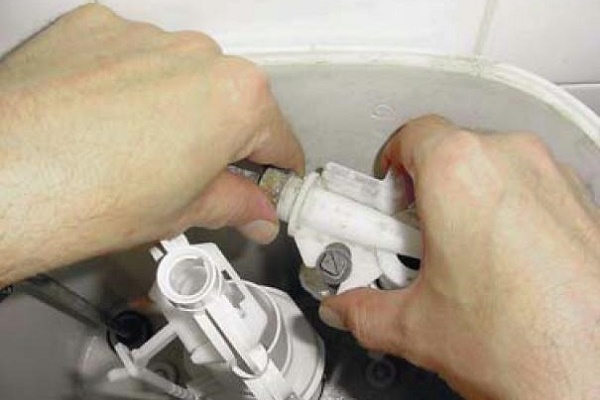
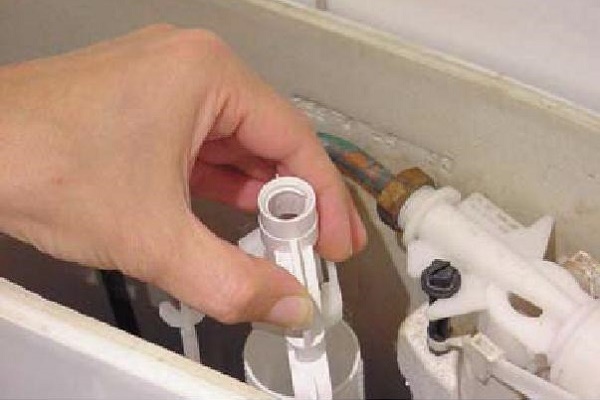
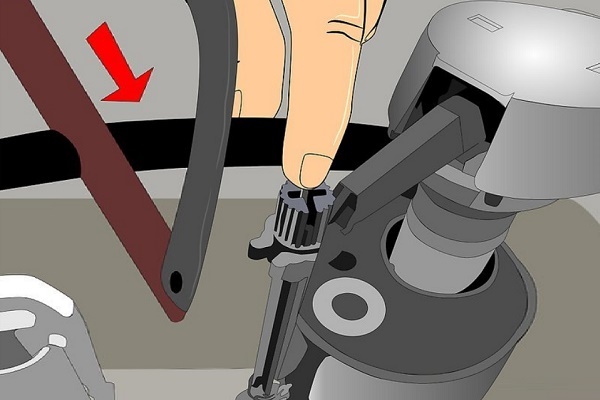
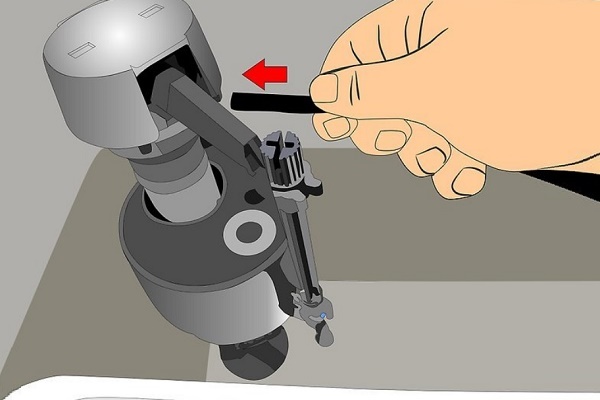
To fix this plumbing flaw, rinse this filter. To do this, shut off the water supply to the tank and press the flush button / lever. After that, remove the hose through which water enters to free access to the device. Now the filter just needs to be removed from the intake valve body, flushed and installed back. Then the system is assembled in reverse order.
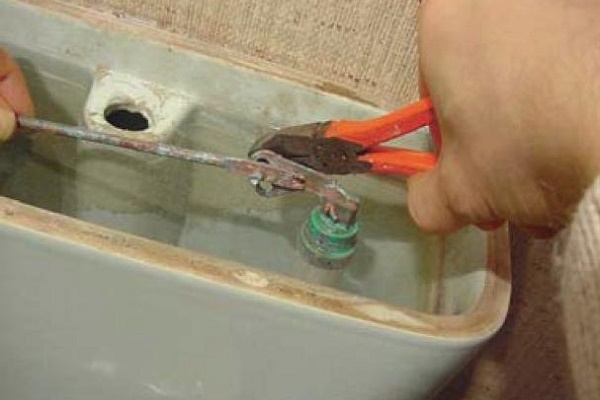
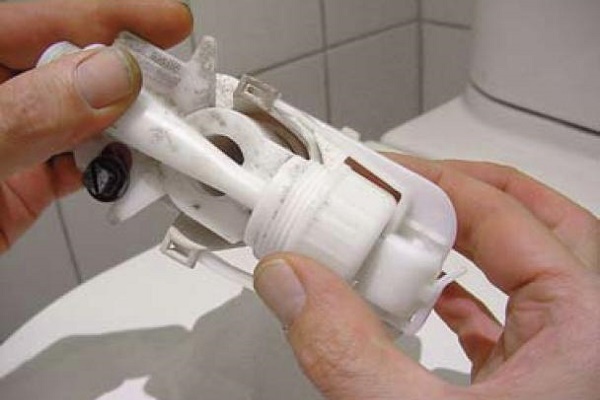
In theory, it looks simple, but in reality some difficulties may arise. For example, you need to unscrew the plastic nut securing the inlet valve. If this element has no edges, the task may seem difficult.
Do not use an adjustable wrench in this situation, since excessive force can damage the fasteners. It’s not always possible to just cope with your hands, especially if the plastic “burned” as a result of prolonged use.

Specialists recommend using other means, pliers with a large space between the “lips” may turn out to be an appropriate option. Pliers can also be useful when removing the filter from the housing, since it usually sits tightly, additional efforts will be required to dismantle it.
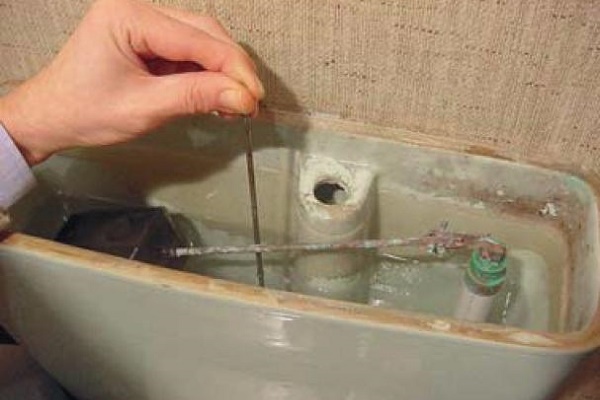
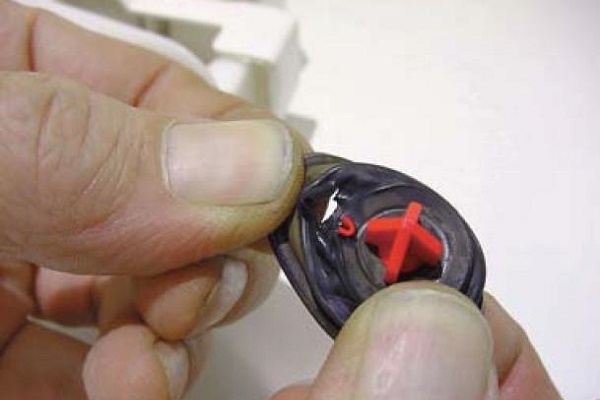
Where the quality of the tap water remains stably low (i.e. almost everywhere), not only the filter, but also other elements can become clogged. The membrane sleeve, as well as all openings through which water enters, is at risk.
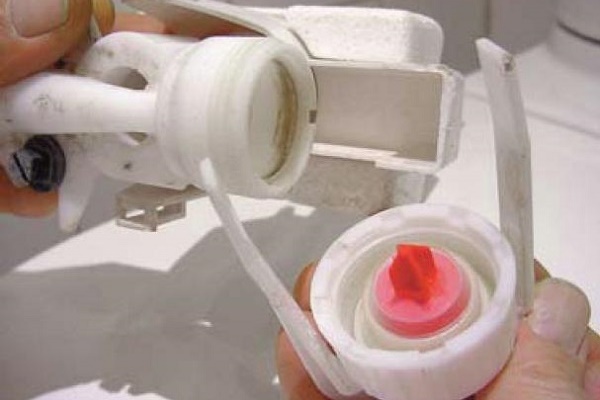
If flushing only the filter is not effective enough, it makes sense to flush the entire device and clean all ducts. In this case, the inlet valve will have to be completely dismantled to allow access to the holes.
Flushing the filter, and even the entire valve and ducts, unfortunately, does not always help. Poor quality intake valves can completely fail within a year and a half to two years after the start of operation. In this case, it is necessary to completely replace the valve with a new model. In this situation, it is recommended to choose a filter of a higher quality.

The additional costs will pay off, since there will be several times fewer problems with tuning, flushing and repair. Another way to extend the operation of the tank fittings and prevent problems: put an additional mechanical filter on the water pipe in front of the toilet bowl or even at the entrance of the system to the apartment.
If there are problems with the shut-off valve in the compact, i.e. water constantly flows into the toilet, then it’s easiest to fix the problem by completely replacing the device with a new one, exactly the same. To do this, shut off the water, and simply remove the valve from the tank.
A new one is installed in its place, fixing it in the holders of the receiving part. It is recommended that the valve length be adjusted in advance so that there are no problems installing the flush button.
Conclusions and useful video on the topic
The process of adjusting and repairing the stop valves of the toilet bowl can be viewed in detail here:
Setting the tank fittings is not difficult. It is important to study the instructions and understand the general principles of operation of the intake and locking mechanisms. Attention to detail and accuracy will help to do all the work correctly.
Have you already faced with setting up drain valves and were able to cope with this task yourself? Or maybe you know other ways to configure the drain? Please share your experience in the box below.
 Fittings for the toilet flush tank: how the spillway device works and works
 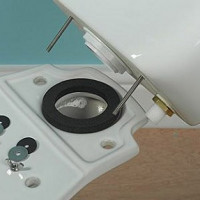 Replacing the toilet bowl: how to remove the old tank and put in a new one
  Toilet float: device, adjustment rules and replacement example
 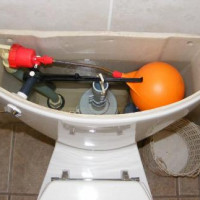 Flush mechanism for the toilet: device, principle of operation, an overview of various designs
 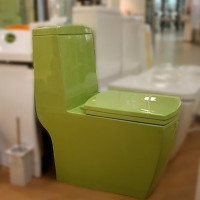 Monoblock toilet: device, pros and cons, how to choose
 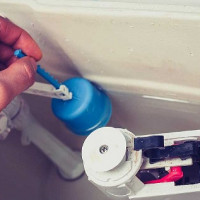 How to repair the toilet with your own hands: analysis of common breakdowns
  How much does it cost to connect gas to a private house: the price of organizing gas supply
  The best washing machines with dryer: model rating and customer tips
  What is the color temperature of light and the nuances of choosing the temperature of the lamps to suit your needs
  Replacement of a geyser in an apartment: replacement paperwork + basic norms and requirements
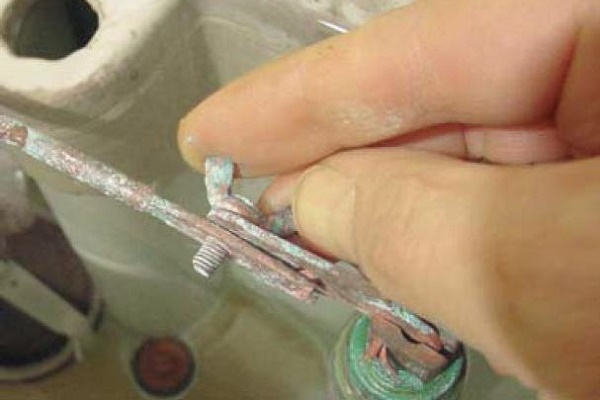
Just the topic to me this information. The tank began to behave strangely: it does not fill up. Each time it’s unprofitable to call a plumber, it’s better to learn how to fix it yourself. I read and realized that there was a problem with the float. It turns out that it is enough to bend the wire a little and everything will work out. If it does not help, I will clean the membrane. The main thing is all these are elementary actions that anyone can handle.
A case from my practice.A neighbor approached me with her problem, water constantly oozing from under the tank of her compact. Came, looked, touched the tank, a little staggering. Tightened the bottom of the nut, it seems to have stopped. A few days later (I was on duty for a day) comes and says that it is flowing. The reason was in the gasket, which between the tank and the toilet, looks like a whole, only a bottom scratch. With excessive compression, it somehow miraculously turned into a banal crack (modeled in a vice). Replaced and everything went. And the design of the shutoff valves is so transparent that the adjustment does not present any special difficulties.
For any repair, generally for any disassembly, it is better to replace all gaskets. They are inexpensive, but hedge against trouble.
It's not that! My compact is not here, I can’t catch and adjust it to work properly and correctly: either there is no pressure, then the lever slightly lifts the overflow pipe ...
Can I have a little specificity? What fittings do you have installed in the toilet flush? Here you can even attach photos so that you get a constructive answer to your question. If you cannot adjust the current fittings in the drain tank, then it must be replaced. It is possible that defects appeared in it that are not compatible with normal use.
If you have a crane with a float, then it will not be difficult for you to adjust and set the required water level. And if you have valves without a float, you need to set up a special adjustment screw (there is a lock nut), loosen it and move the regulator closer to the tank valve, this will reduce the water level in the tank.
Check for debris between the valve seat and gasket; this may cause the valve to malfunction.
Bullshit this blue fixture! I recently bought with 2 drain modes. Puffed for more than 3 hours to set 2 drain modes. But he could not (this is the first time). Maybe marriage !?
The difference between pressing the small and large drain buttons is small. Only 1 mode can be set. Either a small drain (then it is not fixed on the larger one) or a large drain (then from the small button it is fixed on a large drain). There is no limit to my indignation! what the ... i bought !?
The fittings on the santek tank will fill the tank with a 60% short solid overflow pipe, not adjustable in height, how is it? why?