Securing the toilet for installation: step-by-step installation instruction

The desire of designers to improve the appearance of toilets, the creation of stylish bathrooms contributed to the popularization of block and frame designs with a hinged bowl.
The installation itself is not cheap, and you will also have to pay extra for its installation. Therefore, many home craftsmen hone their plumbing skills and carry out installation work on their own. Agree, it would be nice to save money by attaching the toilet to the installation with your own hands?
We will help you in solving this issue. In the article we describe in detail the device, the principle of operation and types of structures, as well as provide step-by-step technology and photo instructions for installing the toilet.
The content of the article:
Design types of built-in toilets
If the appearance of the external elements of the installation depends only on the imagination of the designer, then the device of its internal structure can be divided into 2 options: frame and block.
Block view of installation
A distinctive feature of a block installation is its mounting exclusively on a load-bearing wall.The design does not provide a support frame, so it can simply be recessed into a niche.
The toilet bowl is mounted separately to the wall using metal rods.

A set of block plumbing installation has the form of a frame with a drain tank, front trigger. The device has two nozzles for supplying and discharging water, as well as a set of fasteners. The use of this design is justified if there is a special niche in the bathroom.
Toilet frame installation
The device for draining the frame structure is more universal, because it can be installed in the bathroom anywhere.

The standard equipment package includes:
- height-adjustable metal frame;
- clip for fixing the sewer pipe;
- cistern;
- fittings for water inlet and outlet;
- drain button;
- set of fasteners.
In budget versions of designs, there may be no drain button, which is purchased by the buyer additionally.

Depending on the installation location, frame installations are divided into 3 types:
- angular;
- parietal;
- outdoor.
The advantage of the frame structure is that it can be installed both on the base plate and on the drywall made of drywall. This is true for products with a double frame. The metal frame is fixed to the floor and wall at the same time. And the toilet bowl is fixed directly to the frame, which can withstand a load of up to 400 kg.
On our site there are several articles on the choice of installation for the toilet:
- The best installation for the toilet: rating of popular models + what to look at when buying
- How to choose a hanging toilet: which is better and why + manufacturers overview
- How to choose a toilet installation: overview of designs + tips before buying
- Wall-hung toilet with installation: selection rules, pros and cons of such a solution + installation steps
Device and installation work scheme
Self-installation of the toilet on the installation will become easier if you understand the design of its design and operating principles. Let's consider elements of a frame bathroom in more detail.
Supporting steel frame
The metal frame is the main supporting element of the installation, which accounts not only for the weight of the equipment, but also for the weight of the person sitting on the bowl.
The frame is fixed simultaneously to the supporting wall and floor, but there are also designs with a double frame for installation in the partitions of large bathrooms.

At the bottom of the frame is equipped with retractable tabs to adjust the installation height. The standard height of the upper edge of the toilet seat from the floor is 40-48 cm, it depends on the growth of the owners of the apartment. In front, steel pins are screwed into the frame, onto which the bowl is subsequently hung.
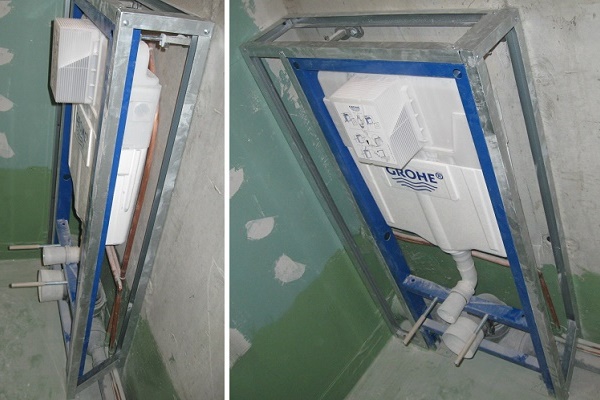
Plastic drain tank
The shape of the plastic tank for each manufacturer is different, because it is necessary to ensure good water capacity in the narrow framework of the metal frame. The surface of the plastic is coated with a heat insulator to prevent condensation.

On the front surface of the tank there is a small area on which manufacturers try to accommodate all the equipment: a pipe for connecting a water hose and a device for mounting the release button. It is to this limited installation rectangle that there will be access for repair after the final installation of the equipment.
Dispensing dosing has already become standard, therefore, each drain tank has a regulation of the volume of discharged water.
Types of toilet bowls
The bowl is the most beautiful installation element, on which designers work more than engineers. The traditional oval shape of the seat remains the best-selling, but rectangular, round and figured bowls are also in demand.

Small components of the installation (fasteners, fittings, drain button, etc.) vary depending on the manufacturer, so it is better to learn about the features of their installation in the installation instructions.
Myths about hanging plumbing
Although primitive blocks for flushing were used back in Soviet times, people are still afraid to install modern block sanitary structures in apartments. The following are misconceptions about installations and wall hung toilets.
Myth number 1. A hanging toilet may fall under the weight of a person.
Installation is usually fastened with 12 mm bolts. The frame structure and supporting rods are designed for a weight of 400-450 kg. The only reason for the toilet to fall may be the collapse of the wall to which it is attached.
Myth number 2. It is necessary to dismantle the decorative box when breakage of the drain tank.
The frame of the drain button is fixed on latches and can be easily removed. Under it there is an opening for the supply of a water hose with a compact tap. Within this "mounting" window on the front wall of the tank is located and float mechanism, which is twisted by hands from the tank and repaired without dismantling the box.
Myth number 3. A hanging toilet takes up a minimum of space.
Block and frame installations require an additional 20-25 cm of bathroom space. Therefore, these designs take up even more space than a floor toilet. The only way to reduce space is to place the installation in a wall niche.
Myth number 4. Spare parts for block installations are not available.
The sizes of components for most manufacturers are standardized, because repairable models have priority when buying. In plumbing stores, picking up a broken part is not difficult. Also execute installation repair You can do it yourself.
Step-by-step installation of installation and toilet
Installing a plumbing installation yourself is not difficult. The main danger is the leakage of the junction of the sewer pipe and the toilet pipe after final installation.
To avoid such problems, it is necessary to follow all the rules of step-by-step installation installation. Next, installation schemes for toilets with various designs will be considered.
Necessary tools
To carry out the installation of the installation and attach the toilet to it, the following tools and materials are needed:
- Screwdriver.
- Adjustable wrench.
- Hammer drill with drills.
- Pliers.
- Dowels and bolts.
- Hammer.
- Level.
- Roulette with a marker.
- Silicone
The minimum of tools and materials that are useful when installing the installation itself is listed. When installing the box, other devices are needed, but it is better to entrust this work to professionals.
Installing a Block Installation
There are two ways to install a block installation:
- In a specially prepared niche in the wall.
- On a concrete slab, which is then sewn up with drywall.
Regardless of the type of installation, the list of steps for assembling the installation remains the same.
Step one. Drawing a marking in a bathroom. In small narrow rooms, the toilet is installed along its axis, and in large rooms it is better to place the bowl along the drain axis.

First you need to draw a line with a marker or chalk from the corner to the corner of the room along the wall where the installation is planned. Then, along the axis of installation of the bowl, it is necessary to draw a line perpendicular to the first, using a building corner.
Second step. Formation of fasteners. In accordance with the intended axis of the installation of the bowl is the determination of the fixation points of the block structure. When the axis of the bowl and wall is skewed, wooden or plastic gaskets can be placed under the fasteners to achieve an angle of 90 degrees.

It is necessary to center the location of the dowels relative to the middle of the toilet drain. If the distance between the mounting points of the block is 60 cm, then each hole for the dowel must be drilled at a distance of 30 cm from the axis of the bowl.
After marking, it is necessary to drill holes with a drill and insert the fasteners included with the product into them.
Step three. Fixation block construction. The drain tank is screwed to the wall with screws or anchor bolts. After that, a water hose is supplied to the structure, and nozzles are attached that will dock with the toilet bowl.

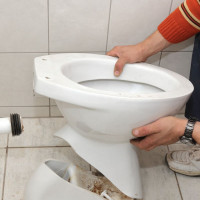
Fourth step. Screw in the support pins of the bowl. After fixing the block mechanism, a toilet bowl is attached to it. Metal rods are inserted into the holes for its fastening and the places of their fastening on the wall are determined so that the height of the toilet seat is 40-48 cm.

After that, the toilet bowl is removed, and holes are drilled in the concrete slab under the rods with a drill, which are then fixed in the wall with fasteners.
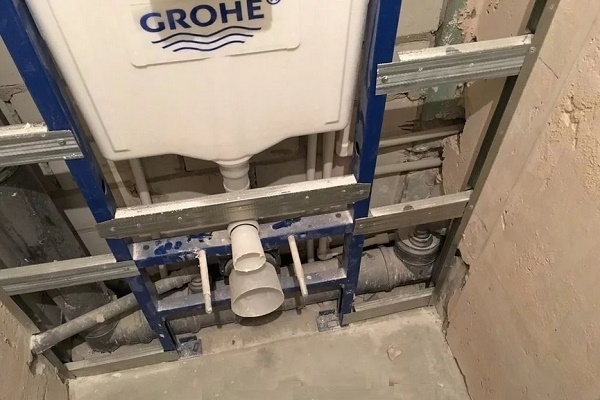
Fifth step. Installation of sewer drain. The toilet bowl is hung on the support pins and a pipe is inserted into it to drain the water from the tank. After that, the sewage scheme is determined and its installation is carried out with rigid fixation of the outlet 110-mm pipe.

Sixth step. Covering the block installation and installation of the toilet bowl. After installing the sewage system, the toilet bowl is removed and decorative cladding of the entire sanitary structure with tiles or moisture-proof drywall begins.

When the cladding work is completed, the drain button is mounted, and the bowl is mounted on the drain pipes and metal support pins. After that, the toilet takes root with nuts on the wall.
Instead of sheathing the drain hole of the block structure, support rods and sewage, their concrete is sometimes used.

For this, after the fifth step, a common wooden formwork is mounted around the indicated structures, and its internal volume is poured with concrete.5-7 days after pouring, the formwork is removed, and the toilet bowl is docked with the support pins, sewer pipes and the tank drain, which are rigidly fixed in concrete.
Installation of a toilet with a frame installation
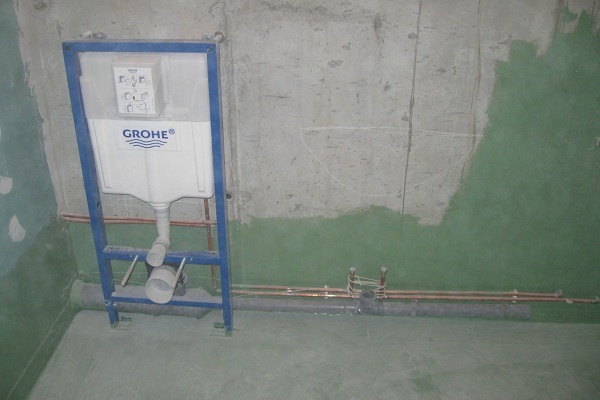
The installation of a frame installation with a toilet can be carried out in any place of the bathroom. Single-frame structures are attached simultaneously to the wall and floor, and dual-frame installations can be installed in the middle of the room in a special partition.
Installation of both design options differs only in the place of fastening of the metal frame and in the form of decorative casing, so their installation will be considered in one step-by-step instruction.
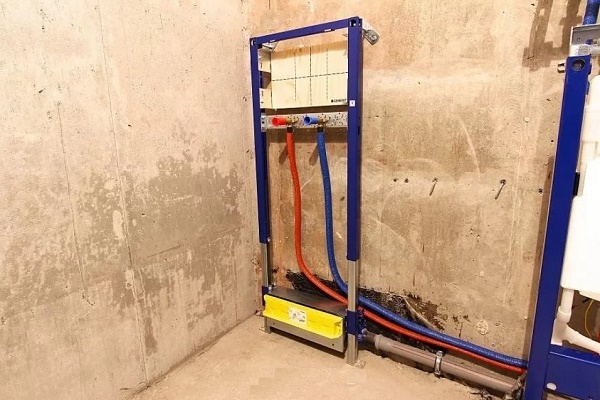
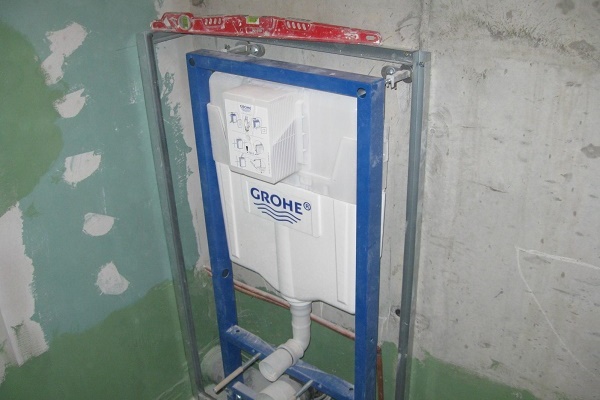
Step one. Assembly of the frame structure. Installation installation begins with the collection of a metal frame. To compensate for irregularities in the floor and walls in the frame design, retractable legs are provided. After adjusting the position of the frame by level, the legs are rigidly fixed in the desired position.

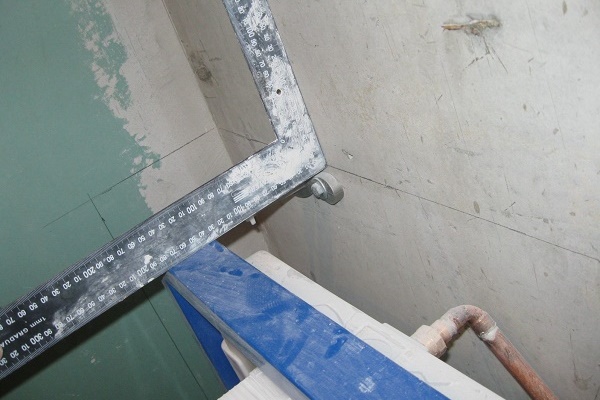
The installation is applied to the installation site, and the marker marks the places where it is necessary to drill holes for the dowels.
Second step. Installing the tank on a metal frame. The height of the water tank can also be adjusted, but not in all models of installations. Recommended height of the release button is 1 m from the floor surface.

Based on this parameter, the level of the location of the drain tank inside the metal frame is selected. Fittings for draining water are mounted together with the tank.
The frame structure often has a height-adjustable horizontal metal bar. It has holes or clips for fastening the supporting rods of the toilet bowl, pipes for draining water from the tank and sewer.
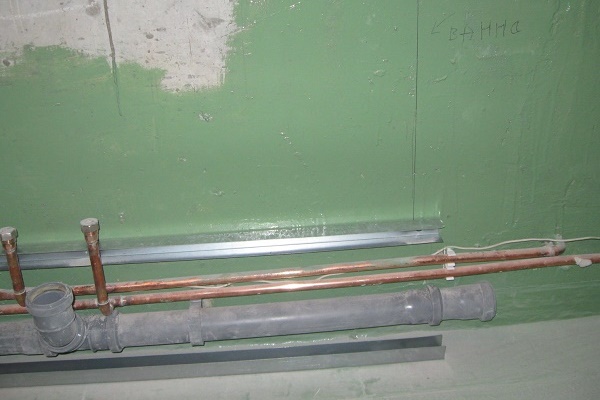
Step three. Sewerage installation. A 110 mm sewer pipe is laid to the frame.
Fourth step. Mounting frame structure. Drill holes for fastening the metal frame, and then it is screwed with screws or anchor bolts to the wall and floor at the designated points. The optimal distance from the frame to the wall is 140-195 mm.

The sewer pipe is fixed to the frame using the available fasteners.
After the frame installation is fully assembled, it is necessary to make sure that the support heights of the pins and nozzles are correctly adjusted. To do this, a toilet bowl is hung on the structure.
Fifth step. Leak test. A water pipe is connected to the drain tank and the tap opens. After filling the tank, a test drain is made. In the absence of leaks, the toilet bowl is removed and the casing of the installation begins.
Sixth step. Formation of a box around a frame installation.
There are two ways to close a metal frame:
- sew up with drywall;
- overlay with brick and tile.
Before isolating the installation, it is necessary to close its pipes with plugs or plastic bags. For cladding, it is necessary to use a moisture-resistant plasterboard sheet with a thickness of 12.5 mm. The box will be a decorative element that does not have a supporting load.

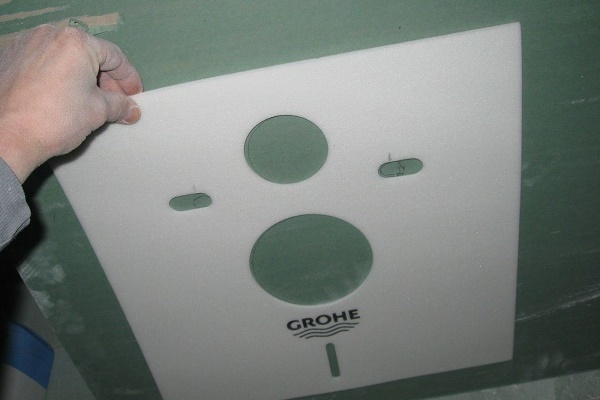
When lining, it is necessary to foresee the formation of holes for the nozzles and support pins of the toilet bowl.
Seventh step. Attaching the toilet to the installation frame.You can proceed with the installation of the toilet bowl immediately after plastering and painting the plasterboard box. If the metal frame was covered with brick and tile, then you should put the toilet on it 10 days after the end of the work.

Before pushing the toilet bowl onto the support pins, it is necessary to lubricate the rubber gaskets of the sewer pipes and the tank drain hole with silicone. Also, a layer of sealant is applied to the rear wall of the toilet at a distance of 5 mm from the edge around the entire perimeter of contact with the wall.
The bowl is fixed to the wall with two bolts that are screwed onto metal pins. After a day, you can make a test drain to verify the operation of the entire installation.
Attaching a floor toilet to the installation
Block and frame installations do not necessarily require the installation of a hinged toilet bowl. It can be installed classically on the floor. The installation scheme of the floor toilet differs from the above methods only in the location of the fasteners and the drain pipe.
When installing the toilet on the floor, it is fixed both on the supporting horizontal rods and screwed to the floor. Bowl manufacturers choose the type of fastening based on the shape of the product.
When fixing the toilet to the floor, it is necessary to outline and drill two holes for fixing in the floor tile. After sheathing the installation with the box, the toilet bowl is mounted on the sewer pipes and the tank is drained, and then screwed to the floor using the available fasteners.

To connect the sewer pipe and the toilet bowl, you can additionally use corrugated pipe.
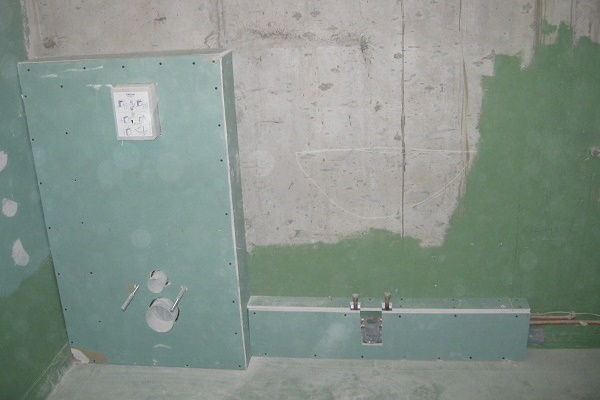
Drywall installation
To mask the not the most attractive side of the installation and connection of plumbing equipment, the plasterboard method is often used. Behind the box constructed from it, both the supporting system itself and the failed communications are perfectly hidden.
The following selection of photos will introduce the general principle of cladding:
Useful installation tips
At installation of the toilet with installation There are a number of important nuances:
- It is better to bring water to the drain tank opening with the help of plastic pipes, because the life of rubber hoses is limited to 3-5 years.
- Do not fix the support rods of the toilet bowl in old load-bearing walls. If the drill passes into the plate without encountering much resistance, it is better to additionally concrete the rods with the sewer pipe and the tank drain pipe.
- The frame must be bolted in at least 4 places.
- The water supply pipe must have a separate shut-off valve in a place convenient for access.
Following the proposed instructions will protect the apartment from flooding and prevent the need to dismantle the decorative box during the first years of operation of the toilet.
Conclusions and useful video on the topic
Videos in a few minutes will allow you to put in your head a complete puzzle of the assembly scheme for toilet installations. After viewing them, the above step-by-step instructions will become more understandable and conscious.
The process of assembling a frame installation:
Installing a block installation in a niche:
Attaching the toilet to the installation frame:
The proposed step-by-step installation instructions for the toilet with frame and block installations fit into several hours of work, if you do not take into account the time to create a decorative box.
The essence of the installation is reduced to a smooth and durable fastening of the frame, the connection of nozzles and the docking of the toilet bowl with the drain unit. Any economic person who knows how to handle the necessary tool can do this.
Do you have practical skills in attaching a toilet to an installation? Share your own editing experience or ask questions about the topic of the article. The block for comments is located below.
 How to replace the toilet: step-by-step instruction on how to replace the toilet with your own hands
 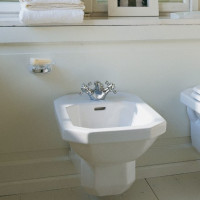 Installation for a bidet: typical installation schemes + step-by-step installation instructions
 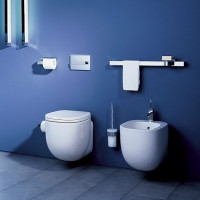 Installation of a toilet bowl installation: detailed installation instructions for a wall mounted toilet bowl
 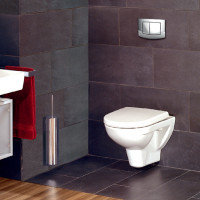 Repair of the installation for the toilet: possible malfunctions and methods for their elimination
 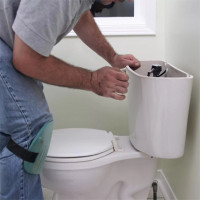 How to disassemble the toilet flush tank: instruction on working with various designs
 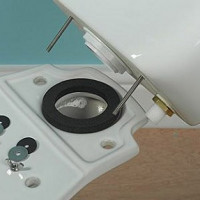 Replacing the toilet bowl: how to remove the old tank and put in a new one
  How much does it cost to connect gas to a private house: the price of organizing gas supply
  The best washing machines with dryer: model rating and customer tips
  What is the color temperature of light and the nuances of choosing the temperature of the lamps to suit your needs
  Replacement of a geyser in an apartment: replacement paperwork + basic norms and requirements
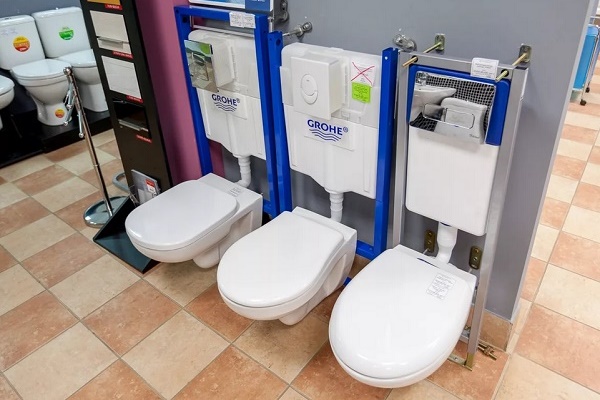
At first I wanted a block installation, because I thought it was easier to install. But when he penetrated, he realized that this did not suit me. This type of installation completely blocks the sewer pipes, then you will not get to them, I also have cranes at the bottom. Therefore, I chose the frame type. It is a little more complicated purely technically, fuss with it more, but access to pipes is free.
I have a framework installation, installed 9 years ago when I did the repair. I chose a large tank and drained the button into two positions.
The fact that the installation takes up less space than the toilet-compact is purely visual. If you measure with a tape measure, the removal of the toilet turns out the same or even more. But the look of a suspended toilet looks more weightless and less monumental, because it does not have a connection to the floor. And it’s much easier to clean, the space under it is free. And as for the reliability of the design, for all the time I did not even look inside.