How to replace the toilet: step-by-step instruction on how to replace the toilet with your own hands

Plumbing in the bathroom crashes quite often. There can be many reasons for this, but the outcome is always the same - the equipment must be replaced. This is where the main question arises: how to replace the toilet with our own hands qualitatively and without unnecessary movements?
Good preparation is the key to success. Get the necessary set of tools, related materials and detailed instructions for beginners. Following the recommendations set forth in the article, and taking into account possible errors, you will cope with replacing the toilet yourself.
The content of the article:
How to understand that it’s time to change the toilet?
At first glance, the wording may seem strange. Anyone understands that the toilet needs to be changed when it is out of order. But in fact, most of the problems associated with malfunctions of the sewer system and the toilet in particular, can be eliminated without replacing the plumbing.
Most often, the following malfunctions occur:
- flowing from a tank;
- flowing from under the bowl;
- cracks on ceramics;
- bad smell from the sewer.
If water constantly flows from your tank, this is a serious reason to think. Such uneconomical consumption of water is contrary to the current trend of protecting the environment and saving natural resources. If it drips from the tank onto the floor and you are tired of substituting basins, and all pipe connections are normal, most likely, the cause was a chip or a crack.
In this case, you can only temporarily solve the problem, but the toilet should be replaced as soon as possible. But if the water from the tank flows down the wall of the bowl into the sewer - good news, most likely there is no need to change the plumbing.
The cause of this malfunction is often a leaky valve. Fortunately, the entire interior of the drain tank is sold separately, it can simply be replaced.
Plumbing faience and porcelain are fragile materials, unstable to sudden changes in temperature.Enamel can be covered with a network of cracks, which not only spoil the aesthetic appearance, but also threaten the destruction of the entire product.

If cracks or chips appear on the toilet, try to replace as soon as possible. You never know at what moment ceramics can not stand and burst under the weight of a person, exposure to water or simply from internal stress.
Well, if at this moment someone is nearby and can quickly eliminate the consequences of the disaster, otherwise you can count on the upcoming repairs in the toilet at the neighbors below.

Unpleasant the smell of sewage in the toilet - Another bad sign. Often the reason for this is the incorrect location of the pipes when the drains are delayed in the sewer. But if you are convinced that everything is in order with the pipeline and you can be sure of the cleanliness of the faience, look for the reason for the destruction of the glossy ceramic coating.
If the enamel is corroded and the porous sanitary ware begins to come into contact with dirty drains, it will soon begin to absorb and absorb unpleasant odors. It will not work to remove them; such destruction is an irreversible process. Here, a complete replacement of plumbing is indispensable.

Another reason to change the toilet is repairing the toilet. Few people want to leave the old plumbing with a complete change in the design of the bathroom. This is certainly a good occasion.
New plumbing models appear regularly, and it is difficult to keep up with fashion. You choose a classic model or an unusual instance from the fashion catalog - the replacement will be carried out on the same principle.
What needs to be prepared in advance?
Before you change the old toilet bowl with your own hands, you need to prepare for work. Especially carefully you need to think through everything if the replacement is carried out in the toilet, which continues to be used. In this situation, plumbing needs to be replaced quickly, but without proper organization this is impossible.
Choose the right model, prepare all the necessary tools and supplies, and then you can get started.
Choosing the type of new toilet
The most important thing is to buy a new toilet. Then, depending on your choice, a set of tools and materials for replacement will be selected.
These types are distinguished:
- floor;
- outboard.
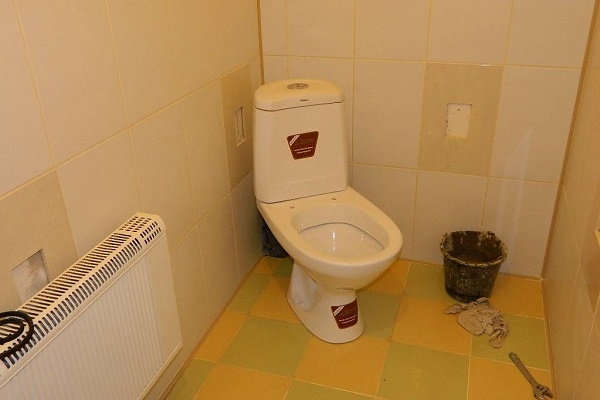
Floor models. Such bowls are more common and their choice is very wide. Replacing an old floor toilet with a new one is the most common story. There are floor monoblock models, "Compact", separate bowl and tank, as well as with a hidden drainage system.

Monoblock is a product that combines both a bowl and a tank. A compact toilet bowl is when the tank and bowl are supplied and connected during installation. This is the most popular option on our plumbing market.
The retro model, when the tank is located under the ceiling and is connected to the toilet by a pipe, and to drain it is necessary to "pull the rope" is less common. She looks good in the interior of the corresponding style.
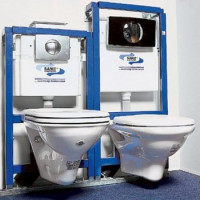
The modern option is hidden drainage system. To replace a conventional toilet with such a one, it will be necessary to build a false wall, behind which a tank with an installation system will be hidden. Outwardly, such models look very neat, there is only a drain button on the wall, and all communications are hidden.

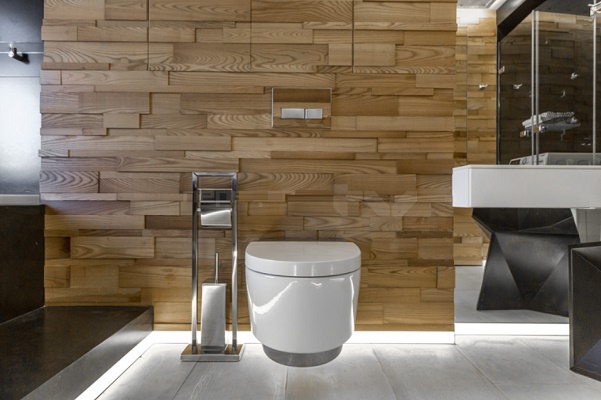
Hanging bowls. Such toilets are not installed on the floor, they are hung on special anchor bolts on the wall. Thus, under the bowl there is free space that can be used to good use.
And from a hygienic point of view, such a design wins. It’s easy to clean the floor under the wall-mounted toilet, and dirt often gathers around the floor.
Another detail that is important to consider when replacing a toilet bowl with your own hands is the direction of release.
There are 3 varieties:
- outlet at an angle;
- straight;
- vertical.
A popular option is direct horizontal release. The toilet is connected to the sewer pipe on the same level. Oblique issue was used in the Soviet multi-story building, but it still exists today.

But devices with vertical drain are installed more often in America and China. Convenience lies in the fact that the toilet can be installed anywhere, communications are made inside the floor. With us it is possible in private homes.
Practical tips for choosing a toilet are outlined in this article.
A set of necessary tools for work
A set of plumbing tools to replace the old toilet is standard. Depending on the condition of the old equipment that will have to be dismantled, and sewer pipes, as well as on the chosen method of fastening the new plumbing fixture, the set of necessary tools may vary slightly.
Prepare the following items:
- hammer drill;
- adjustable wrench;
- a screwdriver;
- hacksaw for metal or grinder;
- gun for sealant;
- hammer and chisel;
- rubber spatula;
- building level;
- personal protective equipment - glasses, gloves.
A puncher will be needed to knock out holes in concrete under the dowels, on which a new toilet bowl will be mounted. An adjustable wrench is used to connect the water supply. To tighten the screws, you need a flat or Phillips screwdriver, and to seal the joints, you need a gun for a cylinder with a sealant.

A hammer and chisel can come in handy if the equipment was connected to an old Soviet sewer riser made of cast iron. To ensure that the bowl is level, use the building level.
Material List
In addition to a set of tools for replacing a toilet bowl with your own hands, you need to purchase additional materials that will be needed during installation:
- sealant;
- corrugation to connect to the riser;
- pipe for connecting to the water supply;
- FUM tape;
- crane;
- mounting kit.
In any plumbing issue, the moment of sealing is the main thing. Any gap or loose connection may cause leakage.

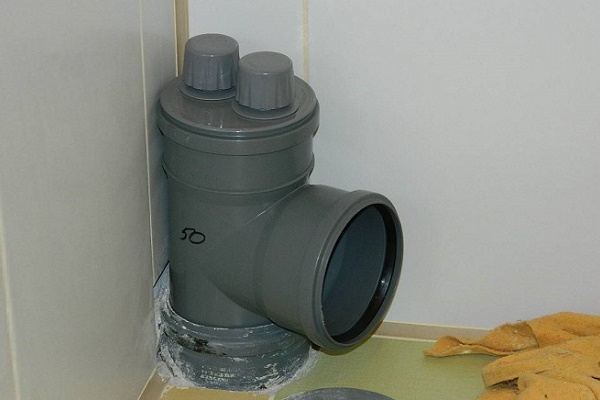
To connect a plumbing fixture to the sewer, you need to buy a special plastic corrugated pipe. This is convenient because the pipe is flexible and suitable in most cases. It can be bent to any position, stretched and squeezed.

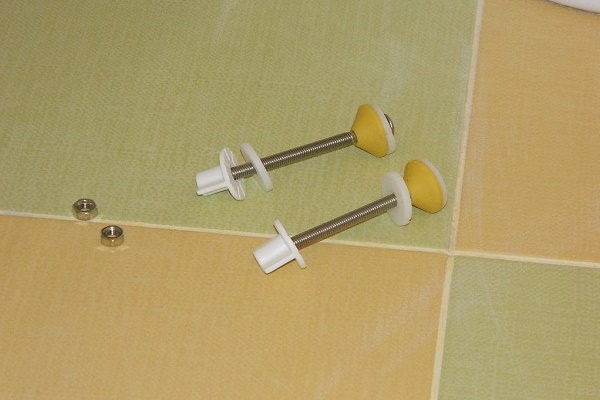
To seal the joints, use a sealing tape or tow - the old fashioned way. The fixing kit for replacing the toilet includes dowels, screws, bolts, washers, nuts, plugs for connecting all components and installation.Do not be alarmed if something is missing, all this can be bought separately.
Dismantling an old toilet
To replace the old toilet with a new one, you must first produce dismantling of equipment. If the plumbing is not too ancient, most likely there will be no problems with dismantling.
Another thing is if the plumbing is actually very old, and the Soviet-style cast-iron sewer pipes. Here you have to sweat. But first things first.

If everything is not so bad, and the toilet is not so ancient, replacing it will be easier:
- Turn off the water supply. Drain the water tank.
- Prepare a bucket and rags.
- Disconnect the reservoir by unscrewing the bolts from below.
- Remove the corrugation or plastic cam that connects the outlet of the bowl to the sewer.
- Remove the remaining water from the bowl with a regular sponge.
- Look at the mounts on the sides of the base. There should be 2 or 4. Unscrew them with a wrench.
- Remove the silicone sealant from the base with a knife.
- Remove the bowl from the tile.
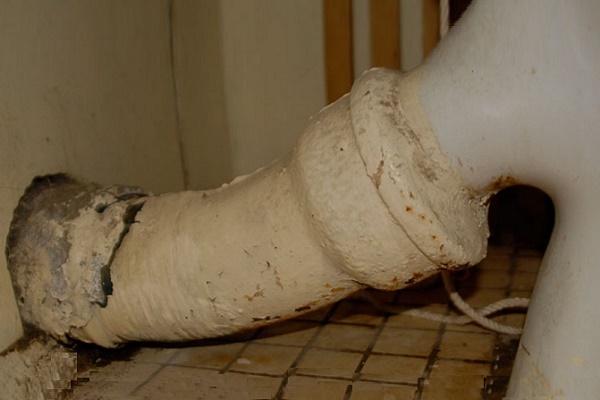
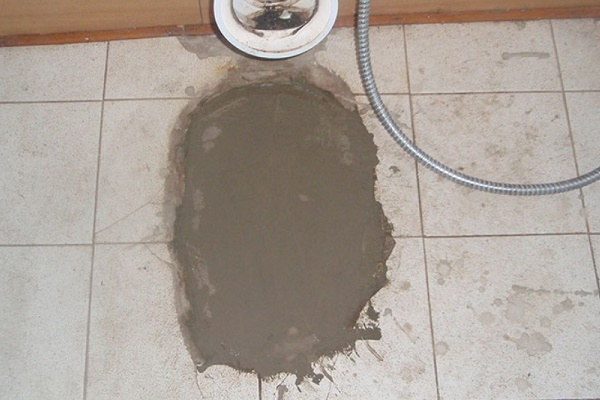
In the last century, they tried to make repairs "for centuries", thoroughly. And the installation of plumbing was no exception.
Often you can find in apartments flush toilets, put on mortar, embedded in a screed, rewound at the base with rags and covered with several layers of paint. In this case, the connection with the pipe is smeared with a thick layer of cement. Now it seems ridiculous, until you come across the replacement of such a rarity personally.

If you are not sorry for the ceramics, you can dismantle it in parts. A hammer and chisel are useful here. Knock at the junction of the bowl with the pipe, while swinging the mount.
If it does not give in, hit boldly on the neck of the toilet bowl, it will crack. Now it can be removed. Just do not hit the pig-iron pipe with a hammer, it is also very fragile and can crack.
Installing a new plumbing fixture: what needs to be considered?
When the old toilet is successfully dismantled, it is time to replace the plumbing with a new one. The installation process differs, depending on the type of model selected. The mounting of the bowl with the floor mount and the mounted model with a hidden tank is carried out by different methods.
Step-by-step installation instructions will help you do this task yourself.
Toilet bowl compact - a step-by-step installation master class
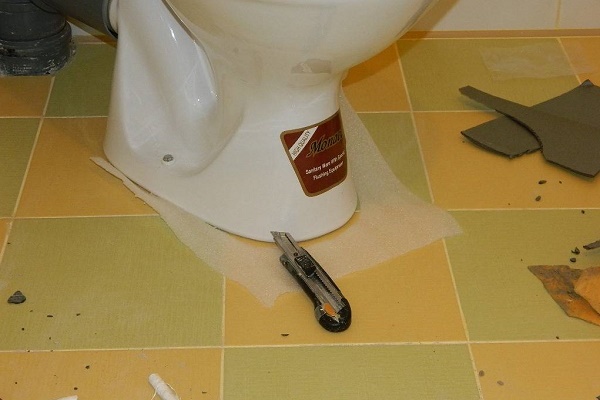
In order to replace the old toilet with a floor type “compact”, if the installation will be on a tiled floor, follow our recommendations:
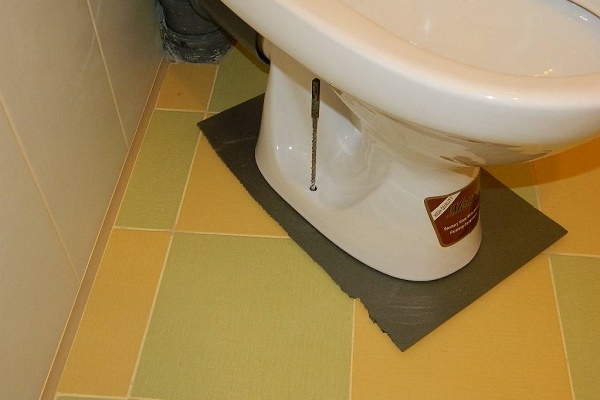
- Decide on the location of the new toilet. Put the bowl in the toilet without mounting, try to sit on it, try on several options.
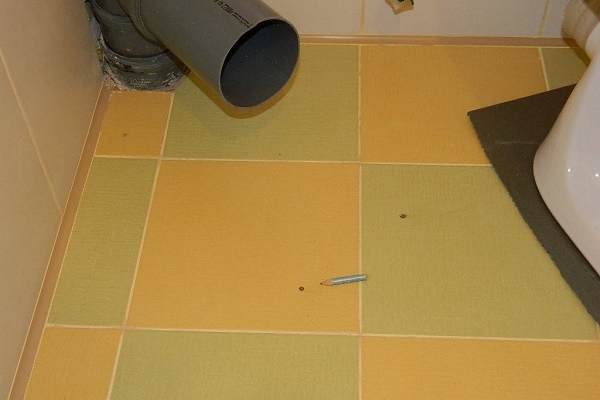
- When you have exactly decided on the place, circle the base with a washable marker. Mark with a marker the attachment points.
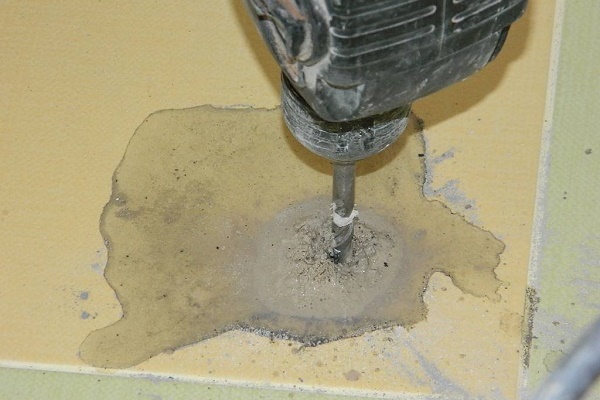
- Put the plumbing aside.All necessary marks remained on the floor. Take a drill with a 12th drill and drill holes in the tile. It is better to beat concrete with a perforator with a No. 12 drill. Insert the dowels into the holes.
- Take the corrugation or cuff with which you will connect the outlet to the sewer. Install it in place, having missed the joint with a sealant.
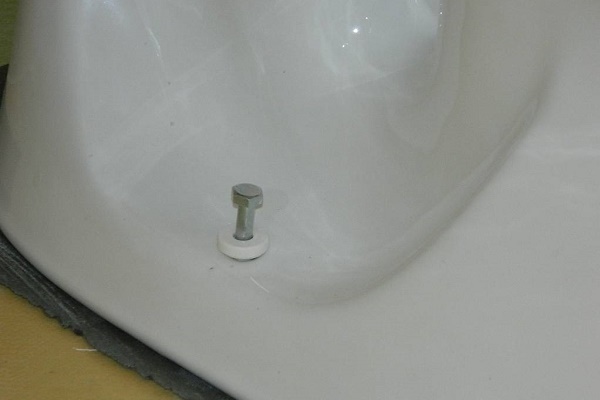
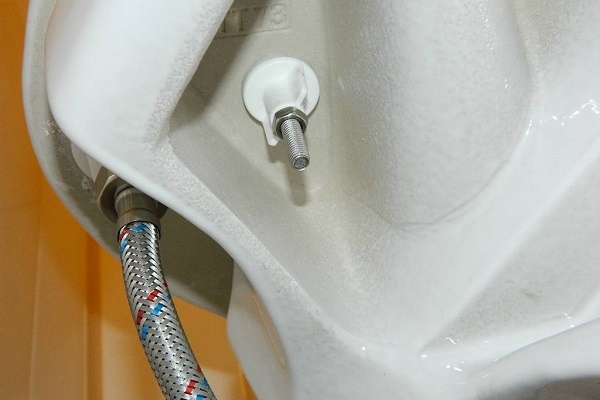
- Place the new flush toilet bowl in the correct position. Insert the bolts into the mounting ears and screw them in using the adjustable wrench. Do not overdo it, so as not to squeeze and crack ceramic.
- Attach the toilet to the sewer. Treat all joints with silicone.
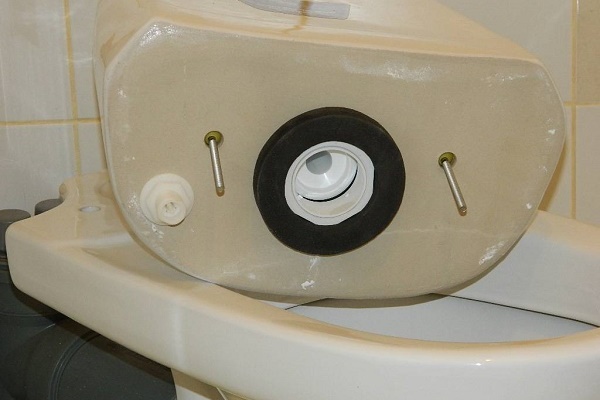
- Put the tank on the bowl. Connect the elements with bolts.
- You can connect the device to the water supply.
Check all joints and threaded connections for leaks. If everything is fine, you can start using plumbing.

Such a floor toilet is easier to replace than to describe the process in words. Modern models are designed so that the flooring is not damaged.
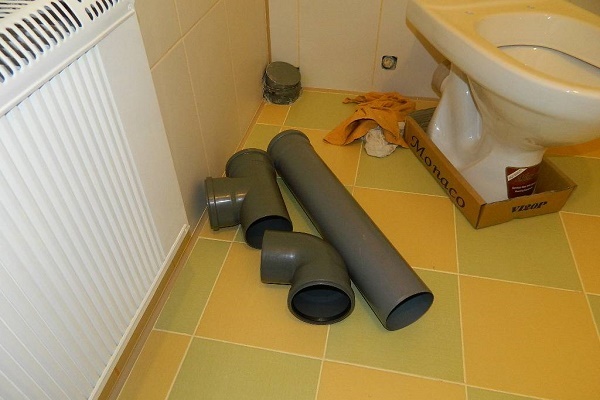
The steps in the installation process of a compact type toilet bowl will be presented by the following photo selection:
After the successful completion of the preparatory work, we proceed to fastening and connecting the plumbing that is important in everyday life:
Features of the installation of toilets with different types of release are described in these articles:
- How to install a toilet with an oblique outlet: detailed technical instructions
- Vertical release toilet: how it works and how, pros and cons, step-by-step installation instructions
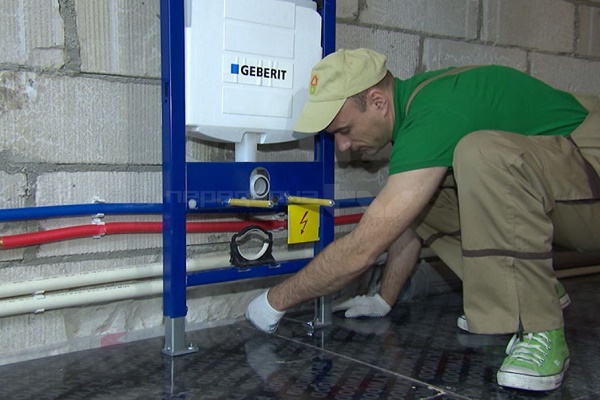
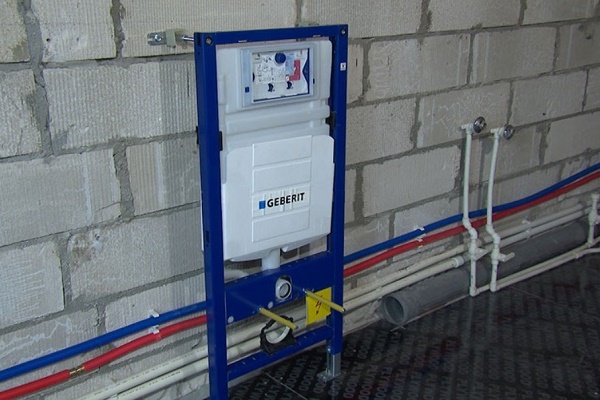
Installation: hinged bowl and hidden tank
Replacing a conventional toilet with a hanging toilet with a hidden drain tank is much more difficult than the previous version. Here, not only the replacement of equipment is carried out, but also the repair of the flooring, and the construction of a false wall with the subsequent decoration with tiles or other materials.

Detailed description of how to change a conventional toilet for a hinged structure:
- Mark the installation location. A 110 mm sewer pipe and water supply are brought to the selected site.
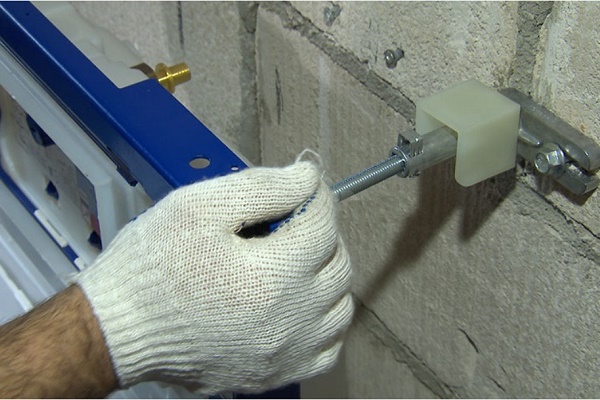
- Try on the purchased installation (rigid frame for installation). Decide on the height. The standard placement is 450 mm from the floor to the seat and 100 mm from the floor to the bottom of the bowl.
- Mark the points of attachment to the floor and wall with a marker so that they exactly coincide with the mounting holes.
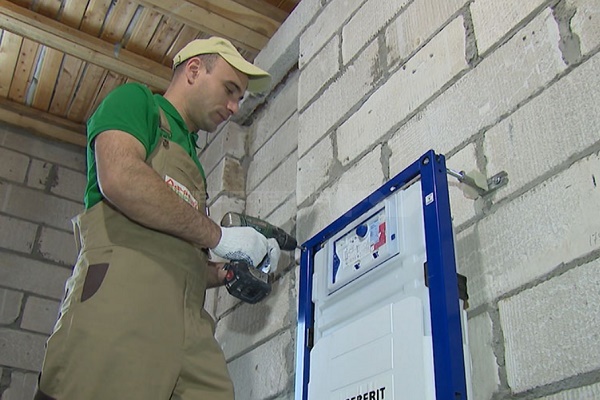
- Drill holes with a hammer drill and install the frame. Ensure proper installation with a level.
- Connect water to the drain tank.
- Included with the installation is a plan to cut a sheet of drywall to suture the installation site. Fix the drywall to the metal profile and directly to the installation. It is better to use moisture resistant materials.
- Finish as you wish.
- It's time to replace the toilet bowl itself. Connect it to the sewer corrugation to connect to the pipe. Do not forget about the sealant.
- Screw the bowl directly to the installation frame through tiles and drywall with studs.
- Connect the appliance to the sewer and the drain tank.
Despite the fact that replacing the toilet with a hinged toilet will take more time, it's worth it, because such plumbing looks expensive and stylish.
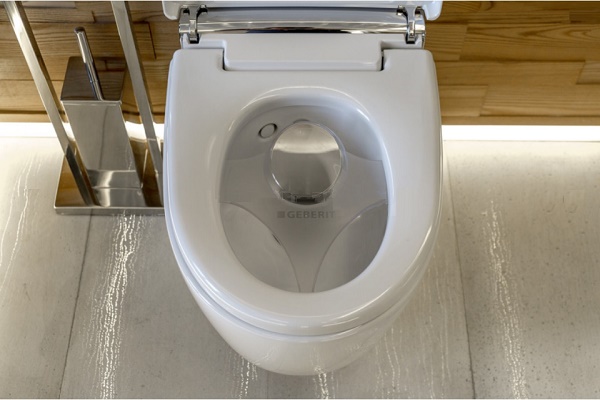
Installing an electronic toilet bowl, complemented by automatic hygiene functions, is similar to the process of attaching and connecting a simple plumbing fixture, but still has its own nuances:
How to avoid common mistakes?
Replacing the toilet in the toilet with your own hands and not making mistakes is difficult, especially when there is little or no experience with plumbing. We have collected a number of the most common plumbing errors that beginners make when replacing toilets.
This list will help you avoid unpleasant surprises during the installation process.
Rule number 1. So that the water in the sewer does not stagnate, it is imperative to observe the slope. The building codes say a 3-5% slope towards the riser. If you decide not just to replace the toilet, but also move it to a new place, do not forget about this rule.
When you rearrange the bowl 1 m further from the riser, you need to raise it 3-5 cm. And so on every meter. Then there will be no problems with drains.
Rule number 2. Some are in a hurry to change the toilet at the very beginning of the repair in the toilet. If possible, this should be avoided. The reason is that the faience sanitary ware is very fragile and with further construction work in the toilet there is too much chance of damage to it. Change ceramics last.

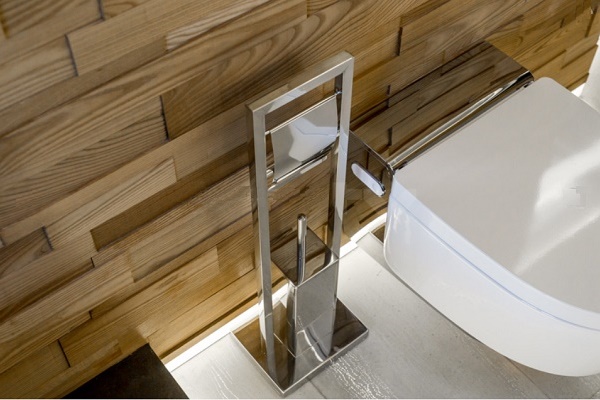
Rule number 3. If a bidet is installed in your bathroom, the wall-mounted toilet should be flush with its top edge. Then the plumbing looks harmonious and it is more convenient to use it.
Rule number 4. Replacement of sewer pipes must be accompanied by the installation of revisions. Access to inspection hatches the walls should always be free, since there are aesthetic doors on sale for this purpose.
It is impossible to neglect these rules, otherwise during the current repair or emergency you may find yourself in an extremely uncomfortable position.
Conclusions and useful video on the topic
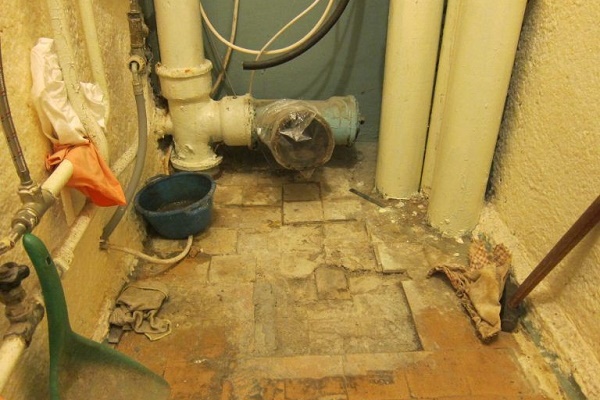
The video clearly shows how the toilet looks after dismantling the old toilet bowl with a hammer. The author of the video sets the new bowl in place of the old one and connects it to the cast-iron pipe.
Visual aid for installing the toilet on the installation:
Instructions for those who plan to replace their plumbing with a new floor type. An example of mounting on a tiled floor is shown:
Changing the toilet without the help of a professional is a rather risky undertaking. It is possible to spoil the tiles on the floor or, in the worst case, to break the pottery. But if you are one of those who are not afraid of difficulties and confident in their abilities, get down to work. The main thing is not to rush and strictly follow the instructions.
Do you have practical toilet replacement skills? Share your knowledge or ask questions about the selection, dismantling and installation of plumbing. The comment form is located below.
 Securing the toilet for installation: step-by-step installation instruction
 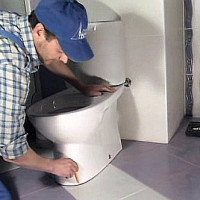 How to install a toilet on a tile with your own hands: step-by-step instruction + installation features
 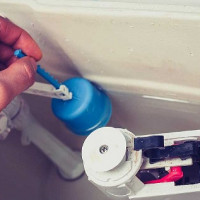 How to repair the toilet with your own hands: analysis of common breakdowns
 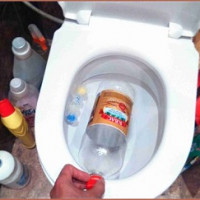 How to clean the toilet with a bottle: step-by-step installation + an overview of alternative methods
 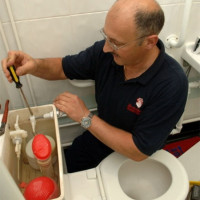 Do-it-yourself toilet drain tank repair: instructions for fixing typical breakdowns
 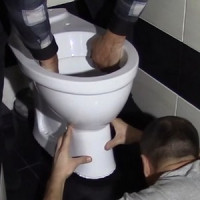 Do-it-yourself toilet installation: features of mounting toilet bowls of various designs
  How much does it cost to connect gas to a private house: the price of organizing gas supply
  The best washing machines with dryer: model rating and customer tips
  What is the color temperature of light and the nuances of choosing the temperature of the lamps to suit your needs
  Replacement of a geyser in an apartment: replacement paperwork + basic norms and requirements
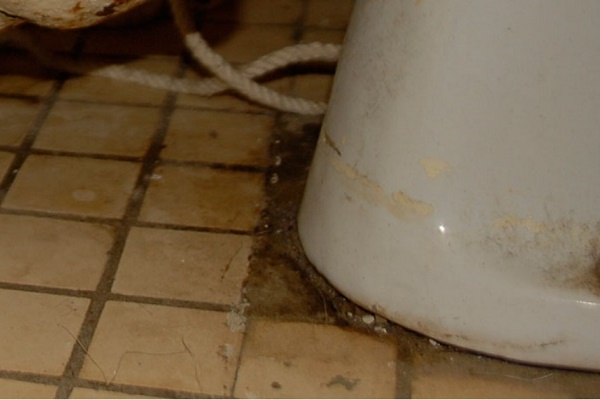
Changing the toilet yourself if you do not even have an idea about it is very, difficult, but possible. You just need to provide all the nuances and stock up on tools. And if you are not afraid to spoil the tile, then go for it. In general, there is nothing complicated: we dismantle the old toilet bowl, remember at what angle the corrugation was. Then, without rushing, thinking over each step, we establish a new bowl and we fasten (it is not necessary to wall in the floor). Well, then the drain tank, check the connection and connect the water.
To replace the toilet with minimal discomfort (a specific piece of plumbing, after all), be sure to consider how you will close the sewer pipe during the dismantling of the old and fixing the new toilet. Many people don’t even know what a great service they have in the foot of the toilet, in a scientific way - a water shutter. And only being without him, they begin to understand all its value)
In general, the rule “hurry - you make people laugh” also applies here, so I would still advise finding the time for a normal installation procedure. And do not try to do everything in a hurry. For example, if the toilet is placed on a cement mortar, then it can not be used for at least a day. And even a tank cannot be installed on it, so that the bowl does not deviate from its original position, set in level, and does not freeze like this.