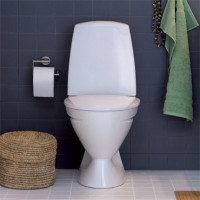
How to connect a toilet to the sewer: an overview of installation technologies for all types of toilets

The process of installing plumbing is the same in a house, apartment or bathhouse. Once you figured out how to connect the toilet to the sewer, you can do it in any necessary place. Agree, in the end it will turn out to be a good saving, especially if you have to install more than one sanitary unit.
We will help you sort out the issue. Below are the basic schemes and step-by-step instructions for connecting the toilet to the sewer, which it is advisable to study before purchasing plumbing.
Visual photo instructions and explanatory videos help to better understand the intricacies of the process and determine the sequence of actions in a given situation.
The content of the article:
Assembly tool kit
The process of connecting the toilet to the sewer requires a preliminary assessment of the necessary materials. The choice of plumbing and fittings depends on the type of supply of the sewer riser, the intended installation location of the toilet and its type.
In addition to the equipment itself, with toilet installation do it yourself may need:
- Sewer corrugation.
- Plastic corners and adapters.
- Eccentric cuff.
- Silicone
- Rubber seals and adapters.
- A saw for plastic pipes or an ordinary hacksaw for metal.
- Roulette, pencil, hammer.
- Tools for dismantling the elements of the old sewer and fixing the toilet to the floor.
To remove old cast-iron pipes, you may need a professional puncher and grinder, but in such neglected cases it is better to invite specialists with your tool for dismantling.
Options for toilet and sewer connections
The size of the toilet outlet is standardized, but it may not match the diameter of the sewer pipe. In addition, sewer inlets from other parts of the house of various sizes may additionally enter the connecting pipes. Therefore, it is important to know in advance what adapters, cuffs and fittings will be needed.
Varieties of toilet releases
The range of sanitary products in stores is represented by hundreds of different models, but they can only have three types of outlet designs:
- Vertical.
- Horizontal
- Slanting.
Depending on the design features, the outlet pipe is attached to the toilet bowl perpendicularly, parallel to or at an angle to the floor.

The vertical type of toilet is common in the EU and the USA. However, in our new buildings, they are increasingly using a vertical connection scheme, as less problematic.
Types of connecting pipes
If the design of the sewer system or the location of the toilet does not provide for direct connection of the pipes, it is necessary to provide for the purchase of such connecting parts as corrugated cuffs, eccentric joints, plastic corners and bends, fan pipes.
Corrugated Pipes. They are convenient to use when the coaxiality of the connected pipes is not observed, because the corrugation can be bent in any direction and at any angle.

Eccentric cuffs. Transitional rubber cam have the form of two branches, whose axes are shifted relative to each other by a certain distance.
Before going to the store, it is necessary to measure the displacement between the axes of the toilet outlet and the sewer hole to select a suitable eccentric model.

Plastic corners and bends. These parts are used in places where installation of a corrugation is impossible or undesirable.Their disadvantage is rigidity, which often leads to leakage in the presence of slight distortions.
Unlike fan pipes, plastic sewer pipes can be cut to fit lengths.

Fan pipes. Indispensable in places where there is a risk of breakdown. With insufficient throughput of the sewer riser, water from the siphon can be drawn into it. As a result, the water trap disappears and an unpleasant putrefactive smell appears from the toilet.
In such cases, a fan pipe with a valve is connected to the riser itself or to the pipe connecting it to the toilet, which opens when the water is drained and draws air from the room or street, preventing the valve from breaking down.

To enhance the reliability of sewer connections, it is advisable to use a layer of waterproof sealant everywhere, which will prevent leakage if the rubber seal is loosened.
Dismantling cast iron elements
To carry out the dismantling of cast-iron elements and cement left over from old plumbing, you will need a hammer, a mount and a flat screwdriver. The outlet of old toilets is often cemented into the cast-iron elbow.
Often the only way to dismantle is to break the ceramic pipe with a hammer.

After removing the toilet, it is required to tap the cast-iron pipe on all sides and proceed to remove cement and deposits from its internal surface. For this, a hammer and screwdriver are used, and large pieces are removed with a pry bar.

For the final cleaning of the pipe from rust and deposits, you can moisten them with a toilet cleaner, and then scrape them off with a metal brush.
Clean with a rag. It is necessary to do these manipulations in special protective gloves. It is important that the first 5 cm of the inner space of the cast-iron pipe is smooth, as they will ensure the tightness of the future joint.
Instructions for connecting the toilet corrugation
The main steps to connect the toilet to the sewer will be considered on a common version with using corrugated pipe. The installation of corrugations is the basic and most common type of connection of the toilet with the sewer.
When deciding to choose a corrugated pipe, it is necessary to recognize the positive and negative features of this design. Other mounting options are performed in the same way, but with some differences.
The positive properties of the corrugation include:
- Low cost.
- The ability to lengthen and bend.
- No problems with alignment of holes.
- Ability to use as a temporary connection.
Among the disadvantages of corrugated pipes are the following:
- Walls are easily damaged during installation.
- Periodic cleaning is required with a slight slope.
- Sagging during prolonged use.
- Difficulty cleaning the outside of dust.
The final decision on the installation of the corrugation is made after taking into account all the above features.
Corrugated joints are installed on the toilets with an oblique and horizontal descent. Before buying the product, you need to measure the approximate distance between the toilet and the sewer hole. The length of the corrugation should be at least 1/3 longer than this value.
Step one: fitting
At the beginning of the procedure for connecting the toilet to the sewer, it is necessary to try on the compatibility of the design. To do this, take the rubber seal and insert into the sewer hole, pre-lubricating the joint with a thick layer of silicone. Then drown the rubber tip of the corrugation into the sewer drain.

After inserting the corrugated pipe, at the subsequent stages of installation, it is undesirable to scroll it until the silicone completely dries.
The next step is to take the toilet and install on its planned permanent location. Sit on it, checking stability and lack of swing. If the toilet is unstable, you will need to level the floor or install expansion joints to eliminate tile unevenness.
If the toilet bowl is stable, then it is necessary to connect a corrugated pipe to its nozzle without lubricating it with silicone. After that, you need to pour three buckets of water into the toilet and, after waiting a minute, check both holes of the corrugation for leaks.

In the presence of leaks, it is necessary to remove the corrugation, check the correct location of the rubber seals and reconnect the parts along their axes.
If there are no leaks, then it is necessary to mark the places where the toilet bowl is attached to the floor with a marker.

After measurements, it is necessary to disconnect the corrugation from the toilet and fix it so that there is no skew at the junction with the sewer hole. Clean the toilet to the side.
Step two: fixing the toilet
In the designated places, we drill holes in the floor with a drill, insert dowels into them and put the toilet bowl in a constant place.

After installing the toiletfix it to the floor. Then you need to sit on the toilet and shift the center of gravity in different directions for a minute. After that, tighten the fixing screws again and put decorative caps on them.
Before installation, most installers advise to process the toilet joint with tiles with waterproof silicone. But they do not take into account the complexity of subsequent cleaning indoors. After several months of washing the floor, the silicone sealant will peel off from the joint and a gap will form.
Therefore, before installing the toilet in place, it is necessary to turn it over and lubricate the perimeter with silicone, which will be in contact with the tile. After that, you should put the toilet in and fasten it, and cover the gap between it and the floor with a sealant on a waterproof cement base, which will not be destroyed by wet cleaning of the bathroom.
About the features of installing a toilet on a wooden floor is written in this article.
Step Three: Connect Sewerage
After installing the toilet, it is necessary to lubricate the inner surface of the corrugation gum with silicone and pull it onto the toilet nozzle.

After installing the corrugation, you must wait 2 hours until the silicone hardens and only then proceed to the next step.
Step Four: Testing
After the sealant has dried, the toilet can be tested by sitting on it and making 2-3 complete drains. If after 5 minutes nothing has leaked, then you can screw the tank with a toilet seat and use the plumbing.
In the case of a small drop-like leakage, completely remove water from the toilet and remove corrugation from it.After that, re-grease the gum of the corrugated pipe with silicone and pull it onto the toilet pipe. It is also possible to additionally lubricate the joint with sealant from the outside.
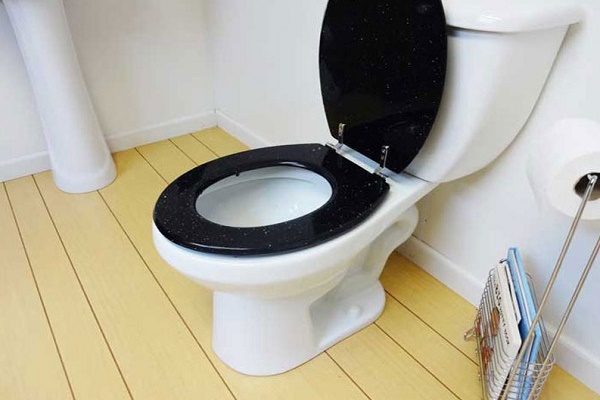
On this, the connection of the toilet to the sewer with the help of a corrugated pipe can be considered completed.
Attaching the toilet with plastic knees
Unlike corrugated pipes, plastic elbows do not have flexibility. But if sewer wiring was originally planned for a specific toilet model, then rigid taps are more preferable because of their durability and hassle-free.

The main steps of connecting the toilet to the sewer with plastic knees are similar to those during installation using corrugations.
Basic rules for using hard connectivity elements:
- All connecting pipes are lubricated with silicone before installation in openings.
- Excessively long pipes can be cut with a hacksaw for metal.
- It is necessary to exclude any distortions.
- It is required to avoid horizontal bends at an angle of 90 degrees due to the possibility of clogging.
The disadvantage of budget plastic taps is their gray color, which does not harmonize with a snow-white toilet at all. White models have a much higher cost, but their appearance is worth it.
Direct connection of the toilet to the sewer
If the toilet pipes fit perfectly to the sewer pipe, or it was mounted from scratch specifically for the existing plumbing, then there is no better option how to put the outlet pipe directly into the sewer riser.
# 1: upright toilets
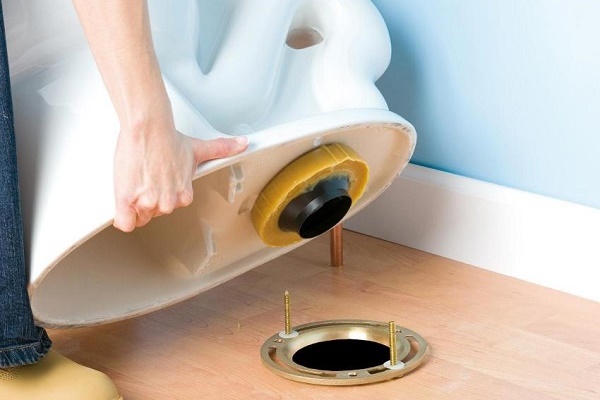
Toilets with a vertical pipe can be installed in your own home or in new buildings, in which sewer wiring passes under the floor, and not in closed niches. This design eliminates clogging and minimizes the likelihood of water leakage during discharge.

The installation of the toilet with a vertical outlet begins with the mounting of a special flange on the sewer pipe. To do this, he first tries on to the floor, holes for the dowels are marked and drilled. After that, the flange is mounted in place and screwed on.

The o-ring can be lubricated with silicone to prevent odor from entering the bathroom to the bathroom. Then a toilet bowl is placed on top of the flange and fixed with nuts, on which decorative caps are put on top. Installation is complete.
Process clearly vertical flush toilet demonstrated in the video:
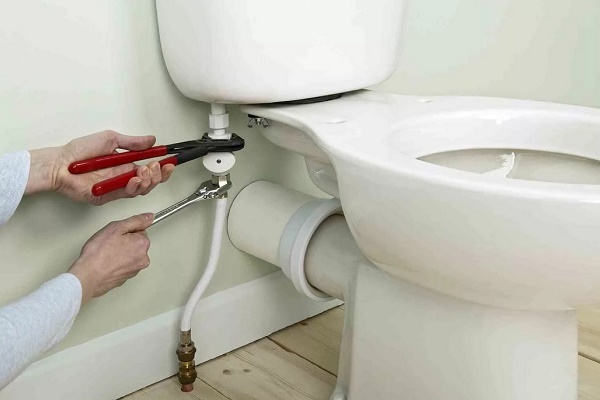
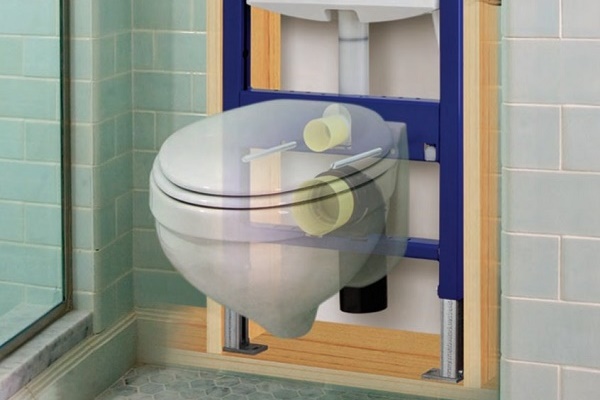
# 2: Connecting a toilet with a horizontal pipe
Mounting a toilet with a horizontal pipe is similar to that using a corrugation, and it can be installed almost right next to the wall.
The difference is that a rigid system is initially mounted that will connect the toilet with the sewer riser. Structural elements should not move when a toilet pipe is inserted into it.

Before installation, it is necessary to try on the toilet and outline the places for drilling holes for fasteners. After that, remove the plumbing, drill the holes, put in the dowels and put the toilet bowl back in place, putting the pipe into the silicone-lubricated sewer hole.
Before screwing the plumbing, you should make a test drain and check for leaks.

If at the last moment it was decided to slightly move the toilet to the side, then you can use an additional eccentric adapter, but its length will move the location of the toilet forward. Because of this, it may be necessary to re-drill the holes for the fasteners.
In domestic apartments, toilets with a horizontal outlet are most often connected to the sewer using a corrugated adapter, without using rigid structures.
A video guide to connecting a toilet with a horizontally located drain to the sewer will help home craftsmen in their work:
# 3: Installing a toilet with an oblique nozzle
Direct connection of the toilet with a straight pipe differs little from that with a horizontal pipe and corrugation. The main steps are described in more detail in the relevant chapters above.

The tapered outlet of the toilet provides a lesser likelihood of a joint flowing when draining the water, therefore it is more preferable than horizontal. A plumbing design with an oblique outlet is quite difficult to connect to the sewer using a corrugation due to the small distance between the floor and the outlet of the nozzle.
Instructions for installation of a toilet with an oblique drain with the help of the corrugation will acquaint with the sequence of actions:
Before installing the sewage system, it is necessary to try on the toilet, mark the places under the dowels for screwing on the device, and check that the axes of the connected holes are not skewed.

After installing the dowels in the floor, the toilet pipe is put on the sewer pipe pre-lubricated with silicone and fixed to the floor with screws.
In case of a small leak, you can lubricate the outer joint with silicone and leave to dry for several hours. After that, you can use the toilet.
Conclusions and useful video on the topic
For a better understanding of the above instructions, it is recommended that you familiarize yourself with the following video review:
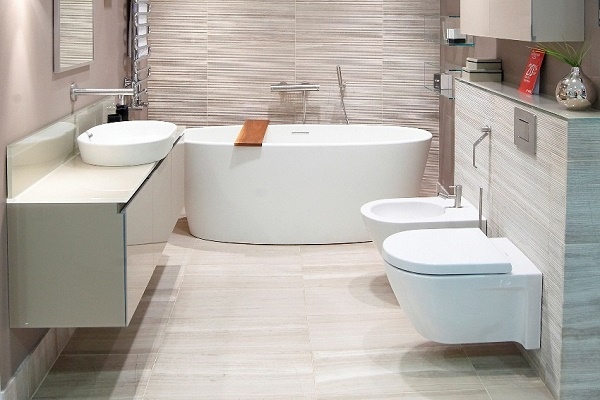
It’s easy to connect the toilet to the sewer system yourself. To do this, it is advisable to buy a model of equipment in advance that will most aesthetically fit into the interior of the bathroom.
With a minimum of tools, a sealant and correctly selected connecting parts, you can install the toilet using the above instructions in a few minutes.
Do you have practical skills in installing and connecting a toilet to a sewer? Please share knowledge, experience gained with our readers or ask questions. The comment form is posted below.
 How to fix the toilet to the floor: an overview of the technical details and the best installation methods
 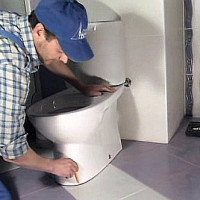 How to install a toilet on a tile with your own hands: step-by-step instruction + installation features
 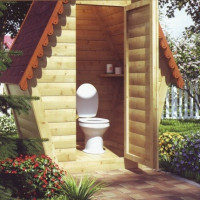 Country toilet: an overview of the types of garden models for a country toilet and the features of their installation
 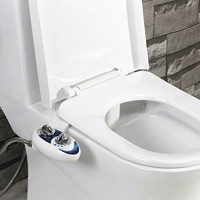 Bidet prefix for a toilet: an overview of the types of bidet consoles and methods for their installation
 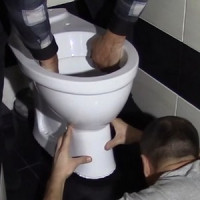 Do-it-yourself toilet installation: features of mounting toilet bowls of various designs
 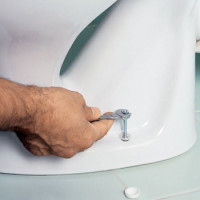 How to remove an old toilet: an overview of the technology for dismantling old plumbing
  How much does it cost to connect gas to a private house: the price of organizing gas supply
  The best washing machines with dryer: model rating and customer tips
  What is the color temperature of light and the nuances of choosing the temperature of the lamps to suit your needs
  Replacement of a geyser in an apartment: replacement paperwork + basic norms and requirements
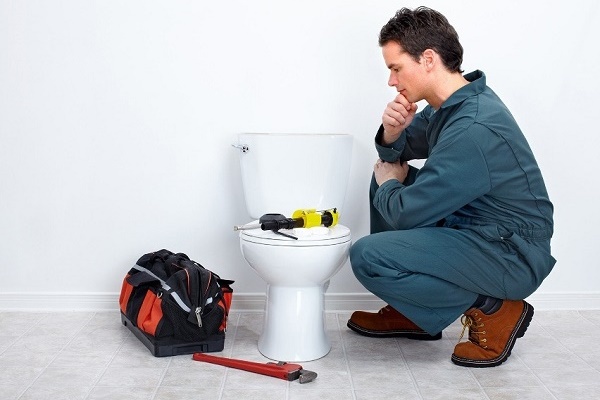
Everyone advises the sealant where not to spit! It is from this sealant that you get leaks - it peels off over time and starts to leak.The gum constantly in a compressed state reliably fixes.
Have you seen that the gum holds well? It gradually shrinks to the diameter of the pipe and cracks after a couple of years. In my bathroom and in the kitchen, the risers are clean with rubber bands, about 4 years have passed and they leak a little, wet smelly dirt climbed out.
Now there is simplification everywhere, with sealant everything is done easily and simply. Nobody thinks how it will affect the quality. However, while people do not particularly complain, it means they will do so.
Ignorance was the bitter experience of improper installation of the toilet. Set sloping slightly forward, and then laid the tiles. Then everything was really funny. You understand, nothing was going to be washed off, the bias interfered. They were tormented for a couple of months, then I had to carefully beat off the tile along the contour .. The conclusion for myself was that before that I had to measure 7 times, even with the toilet, and maybe especially with it. Your article is useful: there is a lot of necessary information in it for the owner. There is no need to contact someone when you can read and do it yourself. The main thing is not to rush!