How to insulate a loggia: options + instructions for installing a do-it-yourself warming system from the inside
A loggia is a few square meters that can serve a variety of purposes. To use this room all year round, you need to provide a comfortable temperature there. Turn it into a cozy, useful and well-equipped space for every home master.
You are going to do the arrangement of these additional square meters, but do not know how to insulate the loggia with your own hands and what materials will be needed for this? We will help you deal with all issues - our article provides recommendations for choosing a heater and describes step-by-step instructions for thermal insulation of the walls, ceiling and floor of the loggia.
The content of the article:
Where to start warming the loggia?
You should start, of course, with planning. It should be decided on the functional purpose of this small room. If you intend to use it as a warehouse for not too necessary things, then warming does not make much sense. But the loggia can be turned into an office, a small gym, a winter garden, etc.
There are limitations. For example, a loggia cannot be used as a kitchen room, that is, to install a stove, sink for washing dishes, etc. Conducting a central heating system on this area is also prohibited.
There are a number of restrictions that may be associated with the architectural features and fire safety of the building. This may be a ban on glazing above a certain floor, on changing the appearance of the building, the height of the fence, etc.
As practice shows, many manage to somehow circumvent these standards and arrange a loggia to their liking. Before starting work, it will not hurt to coordinate their plans with supervisory agencies or to prepare for problems at the end of the conversion.
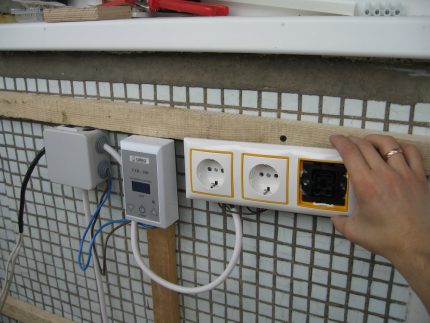
But under no circumstances can openings be made in the bearing wall; only openings provided for by the original design are permissible. Even a window-door block removed from a loggia can be dangerous.
To keep the loggia warm, you need high-quality glazing. It is better to order it in a reliable company. Double-glazed windows will perfectly cope with the task.
Part of the space will be “eaten” by a layer of insulation. These centimeters will have to be sacrificed to reliably protect the house from the cold. The loggias that are on the lower floors are most often insulated from the outside. About the best materials for external wall insulation we wrote here.
From the very beginning, you need to think about heating options for this space.
There are not so many of them, because only:
- electric TP;
- infrared TP;
- portable heater.
Given that the installation area is small, you can spend money on such convenience as TP. Cable systems are easy to install, all work can be done independently. It is more difficult to lay the infrared floor, it requires an almost perfectly even base, but the cost of electricity during operation will be moderate.
But the easiest solution would be to use heater, especially if the loggia is not used every day, but only from time to time. Installing a warm floor will require more cost and effort.
Recommendations for choosing a heater
The choice of materials and options for warming the loggia with your own hands is quite wide.
Among the most popular are worth noting:
- mineral wool;
- Styrofoam;
- polyurethane foam;
- polystyrene foam;
- penofol, etc.
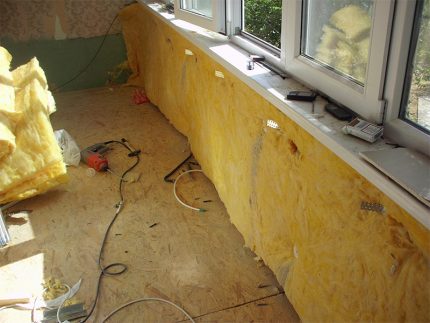
Mineral wool is not very expensive, but this is almost its only advantage. To lay such material, you will need to first arrange the crate. Mineral wool is sensitive to moisture, when wet it loses its useful properties, so it is not always suitable for a loggia.
Polyfoam is a light and durable material that tolerates moisture well and is considered a fairly moderate option.
Polyurethane foam is a sprayable seamless coating. Its thickness can be varied to save precious centimeters.
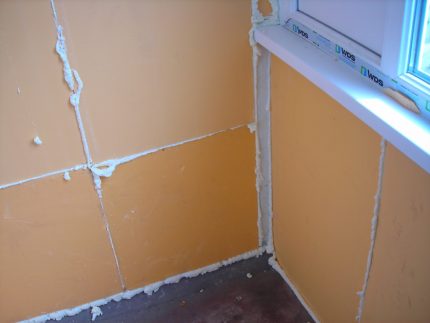
Such a heater as extruded polystyrene foam - these are light and comfortable plates. It is very durable, retains heat well, provides a high level of fire safety. It can be installed very quickly, but the cost of such insulation can be quite high.
Penofol is a relatively thin material, which is supplemented by other heaters for the loggia.
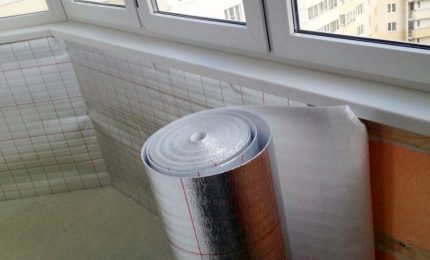
It consists of a layer of expanded polystyrene and a reflective foil coating. To reduce costs and provide the desired effect, materials can be combined.
For example, on the ceiling, you can use polystyrene covered with a layer of penofol, and on the balustrade and walls, use expanded polystyrene plates.
The main stages of warming the room
In order to properly conduct insulation, it is necessary to perform the following basic operations:
- Free up space from foreign objects.
- Remove the old coating from the ceiling, walls, floor.
- Inspect the base, identify cracks, chips, noticeable bumps.
- Thoroughly eliminate the deficiencies found.
- Remove old glazing if it needs to be modernized.
- Surface treatment antifungal and hydrophobic compounds.
- Seal joints.
- Perform glazing work.
- Lay the insulation on the ceiling, walls and floor.
- Carry out wiring installation.
- Install the TP system.
- Perform finishing work, install lighting, etc.
An important point is the assessment of the wear of the fasteners of the structure. After installing double-glazed windows and thermal insulation, the weight of the structure can significantly increase.
To carry out the necessary calculations and install reinforcing elements, you need to contact companies that have the necessary licenses. Amateur action in these matters can be fatal.
Stage # 1 - thorough preparation of the loggia
When warming and decorating the loggia, care should be taken to repair cracks and seal the seams. In such places, all crumbling material is carefully removed to a solid base.
Cracks in concrete structures are filled with repair compounds, strictly following the instructions. If part of the reinforcement was exposed in the process and there are traces of rust on it, the rod should be cleaned and treated with an anticorrosive agent.
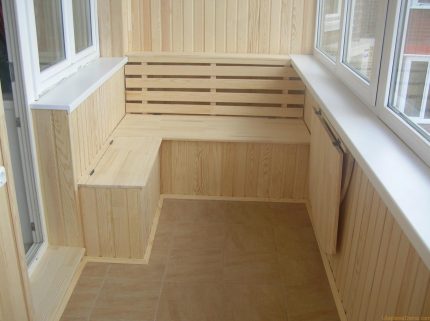
Vulnerability - filler around the window frame. The material with which this space is foamed already in a couple of years begins to lose its properties. Before installing new glazing, foam must be completely removed.
To warm the old frames, the worn out filler is cleaned from the grooves, and the resulting space is sealed with a more stable composition.
Stage # 2 - installation of foam and penofol on the ceiling
The insulation is mounted according to the “top to bottom” scheme, i.e. start from the ceiling. Most often, foam boards are installed here. They can be fixed with tile glue. The composition is smeared around the perimeter of the plate, and also make several strokes in the center.
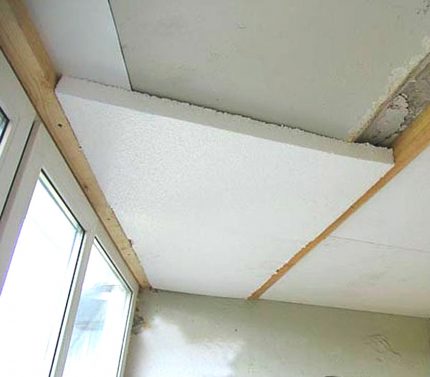
It is not necessary to completely cover the surface with glue. After that, the plate is pressed to the ceiling and wait a few minutes for the composition to seize. Then you can proceed to gluing the next element.
The frame method of mounting this material is also allowed, but it is considered more laborious.
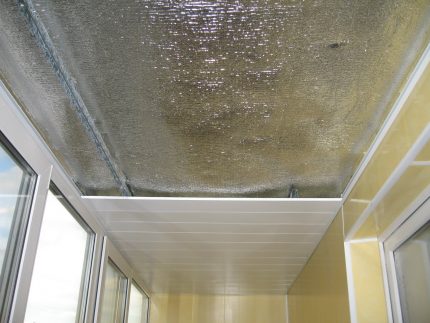
Before starting work on the insulation of the walls of the loggia, slabs are cut from the inside so that they have the appropriate dimensions. It is necessary to ensure that the joints on adjacent plates do not coincide. The surface of the foam ceiling is covered with penofol. The foil side should face the floor.
Stage # 3 - attaching polystyrene foam to the walls
Such boards can be glued to the walls using appropriate mounting foam or adhesive. Foam will be appropriate where the base on which expanded polystyrene is laid is fairly even, the installation time will be significantly reduced.
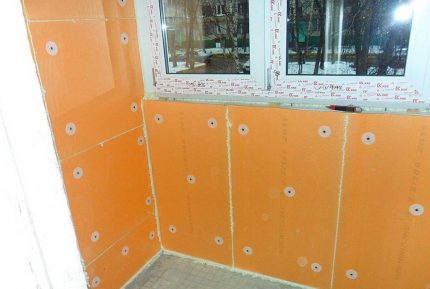
If there is a skew, it is more logical to use glue. You can vary the thickness of its application in order to fulfill the surface of the wall. After this, the plates are additionally fixed with plastic “fungi”.
When installing expanded polystyrene, it is also necessary to ensure that there are no coincidence of seams in adjacent elements. This will increase the overall level of thermal insulation and prevent the appearance of “cold bridges”.
A plastic mounting grid is glued on top of the plates to prepare the base for the finishing materials.Some inexperienced craftsmen press the net to the stove and then apply a layer of glue. This is an erroneous method, after drying or later, such a grid can simply fall off.
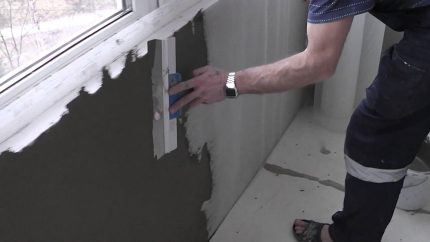
According to the technology, first you need to put a layer of glue on the surface of the plate, then put a grid on it, and again put glue on top of it. This is a longer and more expensive installation option, but it provides the necessary adhesion.
Some craftsmen before mounting the grid level the surface of the polystyrene foam with glue: apply a layer, level it with a rule and wait for it to dry. After that, put a fresh layer of glue, mesh and again glue.
The fact is that the protruding polystyrene can simply be cleaned with a suitable sandpaper, but the polystyrene foam has to be cut off. With small differences, it is easier to use a solution rather than a knife. The density of the facade mesh should be high enough, not less than 140 g / sq. m, although it is better to take a denser one, for example, 180 g / sq.m.
After its installation, the surface of the wall is putty to finally level it. Then you can finish: painting, wallpaper, etc. Of course, wiring should be done before installing the grid.
Stage # 4 - laying an electric floor heating
To pave electric wires, make recesses in the insulation layer. The wire is first inserted into the box, and then mounted on the wall, floor, ceiling, etc. In the future, this will facilitate the elimination of possible breakdowns.
Floor insulation is carried out with approximately the same materials as on the walls. Expanded clay is sometimes used, it is poured on a base covered with a layer of waterproofing. Then you can use polystyrene boards or other material, for example, mineral wool. It is laid between wooden lags.
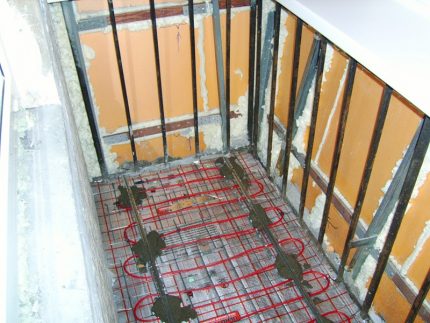
If you plan to install a warm floor system, you need to take care of an even base. Cable systems are laid in a layer of screed. The composition is selected in accordance with the manufacturer's recommendations.
The IR film floor is laid on the base, and you can immediately mount the flooring on top. In this case, the floor level will rise quite a bit.
We gave step-by-step instructions for laying cable and film underfloor heating in next article.
It is necessary to provide a place for installation thermostat. Typically, a niche of the appropriate size is made on the wall for these purposes. Among the turns of cable TP, a temperature sensor is placed in a corrugated tube. It will also need to be connected to the thermostat.
Conclusions and useful video on the topic
A detailed video tutorial on warming the loggia with your own hands:
Loggia floor insulation:
Modern materials and technologies make it possible to insulate the loggia really reliably and quickly. In any case, when performing installation work, the requirements of the technology and the recommendations of the manufacturer should be observed. Then the result will fully live up to expectations, and warming will remain effective for many years.
Are you planning to do your own warming of the loggia, but you still have questions after reading our material? Feel free to ask our experts for advice - write questions in the comments section.
Or maybe you want to share your personal experience with installing insulating materials and underfloor heating on the balcony? Write your recommendations, add original photos below under this article - many beginners will be grateful to you.

 Do-it-yourself warming the balcony: popular options and technologies for warming the balcony from the inside
  Do-it-yourself attic insulation from the inside: step-by-step instruction on insulation + tips for choosing materials
 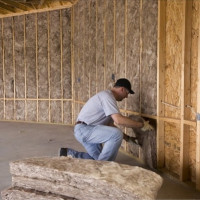 How to insulate a cold apartment from the inside: suitable materials + installation instructions
 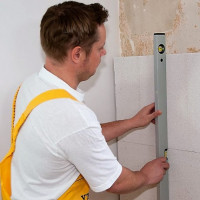 How to insulate the wall in the apartment from the inside: the best technology + workflow
 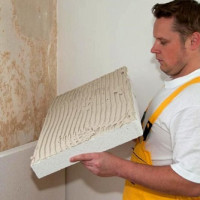 Types of insulation for the walls of the house from the inside: materials for insulation and their characteristics
 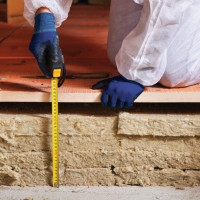 Warming of a wooden floor: popular insulation technologies + expert advice
  How much does it cost to connect gas to a private house: the price of organizing gas supply
  The best washing machines with dryer: model rating and customer tips
  What is the color temperature of light and the nuances of choosing the temperature of the lamps to suit your needs
  Replacement of a geyser in an apartment: replacement paperwork + basic norms and requirements
Few people use their balcony or loggia as an extra room. My husband equipped the room for a small study. Mostly, wooden lining was used, which was then coated with waterborne varnish. We decided to choose such materials because of environmental benefits and the absence of an unpleasant odor. I think that in general we did just fine.
To make the loggia part of the living room, you need to observe many restrictions and get permission, which costs a pretty penny and takes a lot of time. Therefore, I limited myself to putting the best double-glazed windows and covering the walls / floor with insulation. In cold weather it’s still cold, of course, but at a temperature near zero it is quite comfortable to be on the loggia.