How to make a warm floor on the balcony and loggia: the choice of heating system + installation instructions

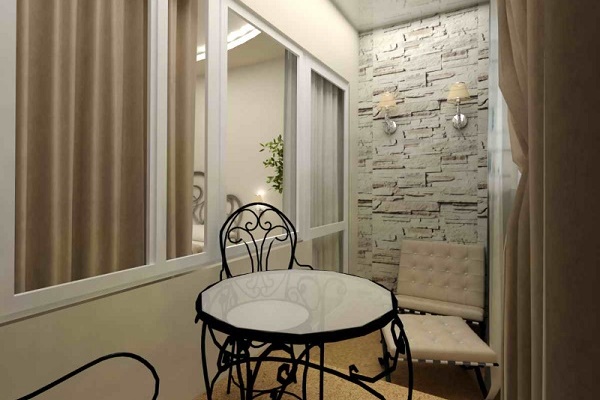
As a source of thermal energy for the loggia, various heating systems are used, mounted mainly in the floor. They allow you to maintain optimal temperature, to form the most favorable conditions.
There are several options for installing underfloor heating. To make the right choice, it is necessary to compare the pros and cons of each decision.
We will tell you which warm floor on the balcony is preferable in a particular situation, and also give step-by-step instructions for installing the heating system.
The content of the article:
Loggia heating systems
There are several types of floor heating systems that are used to warm the balcony and loggia.
All devices are related to electric underfloor heating::
- heating mats;
- two-core heating cables;
- infrared shielded film.
Consider the system in more detail.
Heating mats and their types
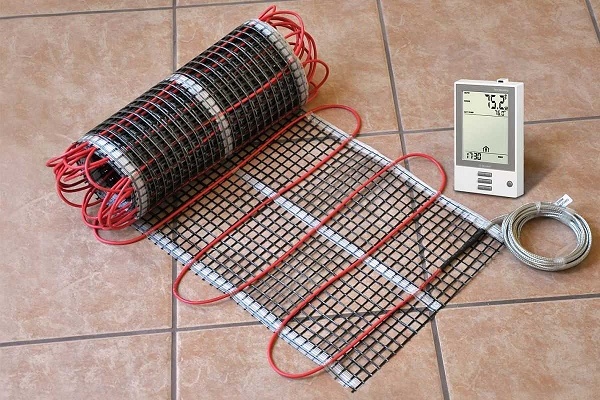
One of the most popular and budget systems are heating mats. By themselves, they represent a single heating cable, wave-wise attached to a special mesh of durable fiberglass. Devices belong to the class of systems with cable heating, their installation is carried out exclusively in the floor.

A single or two-wire cable acts as a heat source. Its diameter varies in the range of 2.5-4.5 mm. For the operation of the mats, a 220-230 W power supply is required.
The cable is protected by a special plastic screen. The length of the cold wire usually exceeds 2 m.
Industrial heating mats are divided into two groups.
They are divided by type of cable into:
- single core;
- two-core;
Single core systems. Their feature is that they must be laid so that the two ends are connected to the thermostat. This greatly complicates the installation, since cutting mats is required.
Also, a mat with a single-core cable emits an electromagnetic field, so it is not introduced into rooms where people are constantly located.

Two-core mat - Advanced single core modification. Here, in addition to the heating core, there is an electric cable. Its introduction into the design allows one end to be connected to the thermostat, and the other to be hidden in the coupling, which makes it possible to finish installation anywhere.
A two-core mat practically does not emit an electromagnetic field, therefore it is completely safe for humans. It can be introduced not only into the floor of the balcony, but also in any other room as a source of additional heat.
Heating mats also differ in power, can generate from 60 to 2300 watts of energy. About how to calculate the required mat power, you can read below.
Both single-core and two-core mats are reliable, able to serve impeccably for many years. Typically, single-core modifications are thinner than two-core ones, have greater power, therefore they are able to heat the floor surface faster.
Pros and cons of heating mats
Consider the features, advantages and disadvantages of heating mats.
- When using mats, the height of the room decreases by only a couple of centimeters, taking into account the height of the tile and the layer of glue.
- The system is economical, rationally consumes electricity. If there is furniture on the balcony, then the mats do not fit under it.
- Heating mats are easy to install. The only thing that can cause complexity is the connection of the system to the thermostat.
- Use mats for heating for a short time. They are not designed for permanent round-the-clock work.
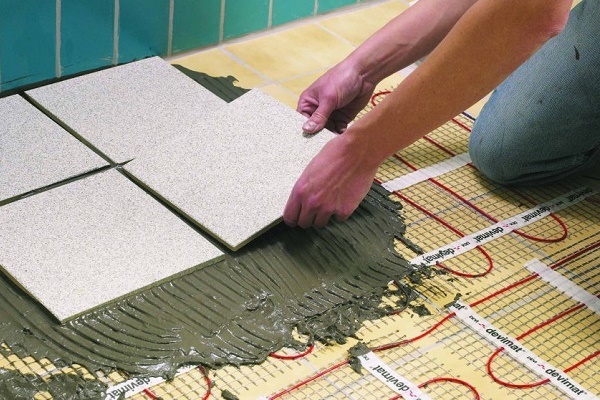
Tile adhesive can be applied on top of the mats and the tile itself can be laid. The choice of the device takes into account the area of the heating surface, the heat loss of the loggia. For mounting on a balcony, it is undesirable to take a long mat, since the device cannot be shortened.
Only the cold ends will be reduced, so for the balcony you need to choose a device that is most suitable for the floor area.
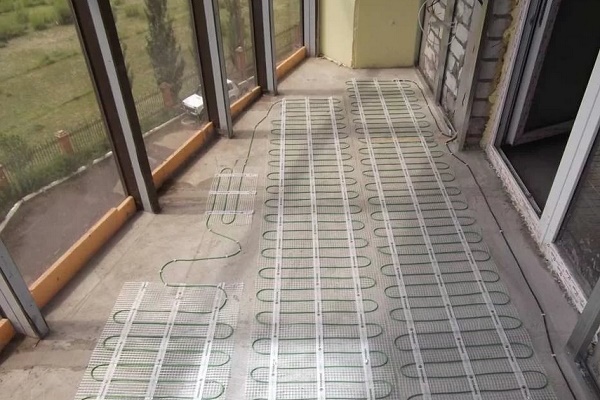
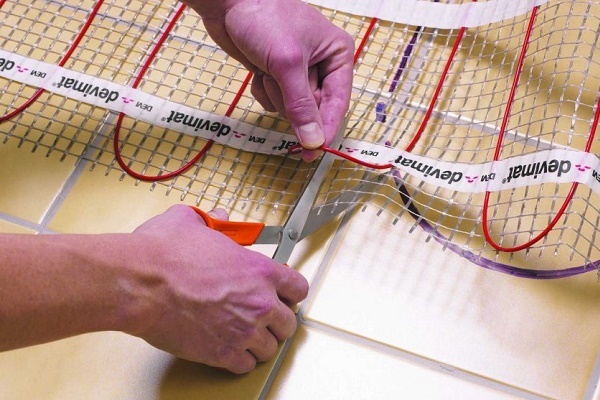
Installation of heating mats
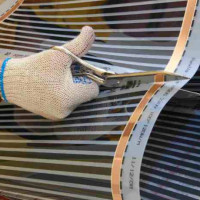
Installation of heating mats must be done with caution. It is important to protect the cable from mechanical damage. It is unacceptable to use cutting and sharp objects during installation, leave them unattended.
It is also important to try not to step on the cable. In order to eliminate the likelihood of this incident, it is advisable to install in shoes with soft soles or without shoes, and before installation, completely clean the floor surface from contamination.
Caution should be exercised during fixing the tiles, applying glue and cleaning the seams. During these operations, the cable may be accidentally damaged.
The device of a floor heating system using heating mats includes a number of traditional steps:
Consider options for laying mats on different types of surfaces.
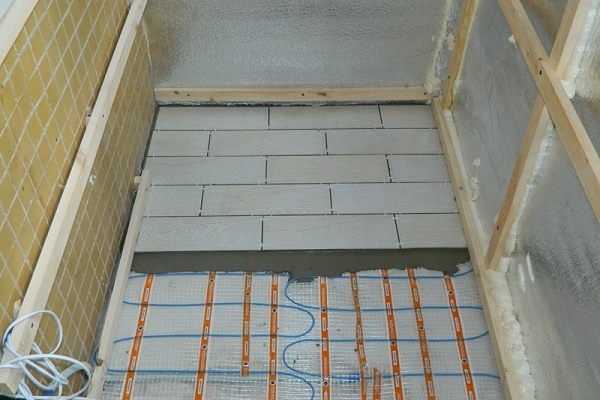
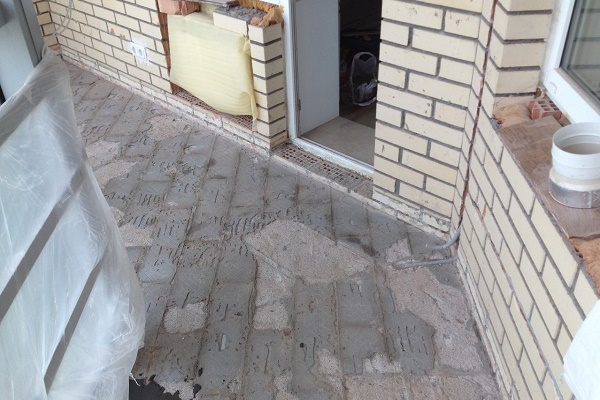
On the concrete floor of the loggia, first insulating material is installed, then the floor is leveled, a shock absorber is installed, which will prevent deformation when heated. Then a mat is placed on the shock absorber, after which it is covered with tiled glue, on which tiles are laid.
At the last stage, the protective tube for the temperature sensor, thermostat is installed, cold wires are connected.

If the floor is laid out of wood on the balcony, then the surface is first leveled with a concrete layer of 7-9 mm, then the heating mats are laid, hard foam is laid, and then the floor is covered with wood.
If the installation is done on an old tile floor, then a concrete screed is made, a heating element is installed, covered with tile adhesive, and then a new tile coating is created. If the floor tiles were in good condition, then the leveling screed can not be done.

Consider the features of installation in more detail.
Before introducing mats into the surface of the floor, a schematic installation plan should be made.
The project should display:
- contour of a heated surface;
- styling scheme;
- location of the temperature sensor, temperature controller, taking into account the location of the power wiring.
It is important to prepare the surface for laying mats before starting work. For this, cracks are putty on the floor. After it dries, the floor is cleaned of dust and dirt. If the surface is wooden, make sure that it is firmly fixed.
Before laying, you need to install the groove for the tube that comes with the temperature sensor. It is important that it is located at the top edge of the product at the same distance from the heating cables.
During work, you need to glue the tube on one side with electrical tape so that tile glue does not get into it. The second end is connected to the thermostat itself, which is located in the junction box.
Laying can be done in two ways - cable up or cable down. The first method is the simplest; it is most often used in practice.
The way in which laying is done with the cable up is that the mats are laid down with a net. Further, using glue, the device is pointwise attached to the floor surface.
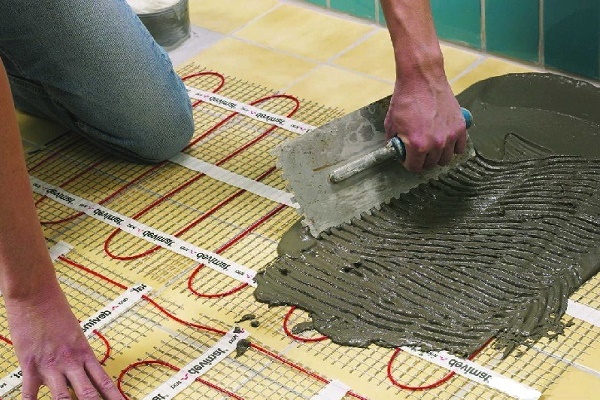
After - tile adhesive of the required thickness (usually 3-5 mm) is applied to the surface of the mat, after which they start laying the tiles.

The cable must be completely immersed in a heat-conducting medium (tile adhesive, etc.).
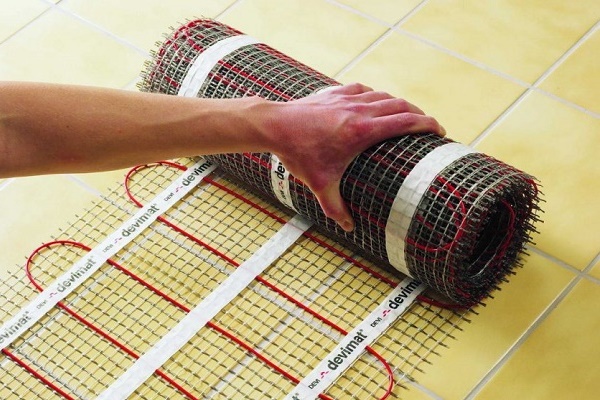
The method in which the cable is laid with the cable down (i.e., the net up) is more complicated in execution. Before laying tiles, a mat pattern is made. To do this, it is spread so that it completely covers the heated surface.
Next, cut the mat grid, then roll it into a roll. A 2-3 mm layer of glue is applied to the floor, after which the mat is unwrapped with the cable down and slightly pressed.
During installation, it is important to ensure that the distance between the cables is not less than 5 cm. A second layer of adhesive of 5-6 mm is applied with a notched trowel directly on the heating mat, after which the tile is laid.
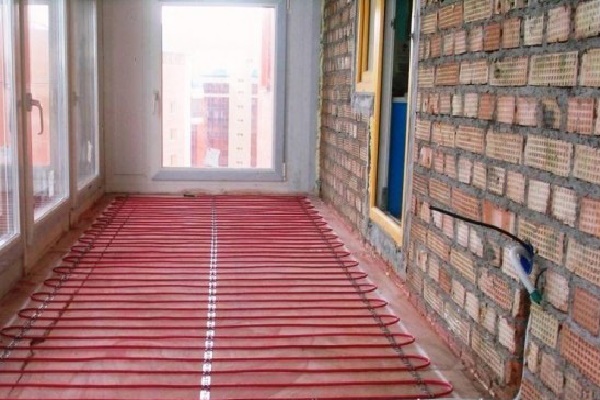
Heating electric cable
At the heart of any warm floor system is a heating electric cable. It acts as the main heating element. The control is carried out using electronic temperature controllers of various modifications.
For the functioning of the device, a voltage of 220 V.
The cable system includes a cable heating section, its main element is a two-core shielded cable, which is connected on one side by a supply conductor protected by a sleeve, and on the other, by a heating core.
The specific heat dissipation of the cable is approximately 18 W / m.

The advantages of the cable are as follows:
- the electromagnetic field created by the device is safe for humans;
- due to the use of small power in the heating core design, the cable wear resistance increases, its service life;
- ease of installation;
- shielding film provides electrical, fire safety of the product, protects it from mechanical damage.
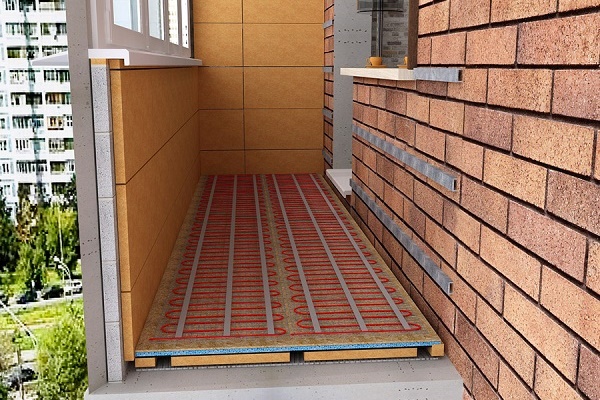
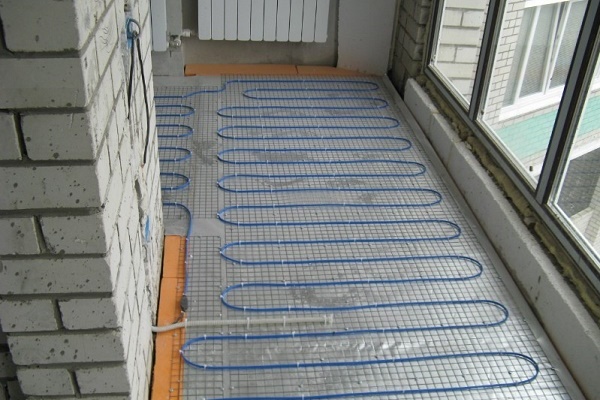
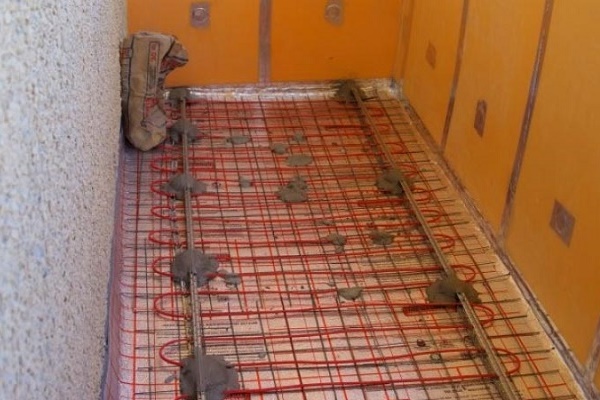
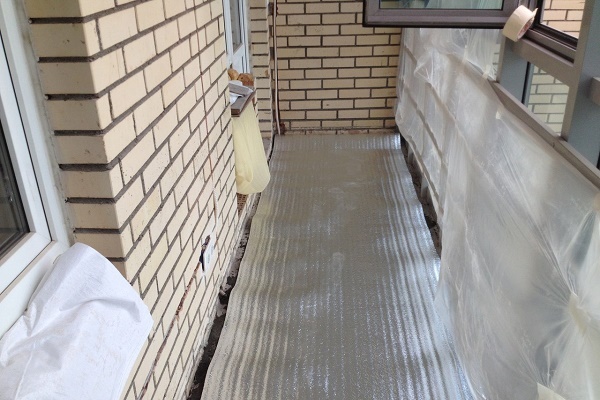
Installation on a concrete floor has a number of features. It is desirable to insulate extruded polystyrene foam 20-30 mm thick or any other heat-insulating material.
Next, you need to cover the insulation with a concrete screed of 10-15 mm. This will eliminate the contact of the insulation with the floor heating element, otherwise the device may overheat.
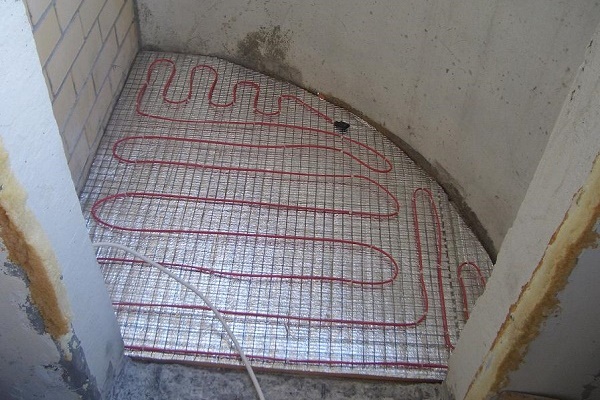
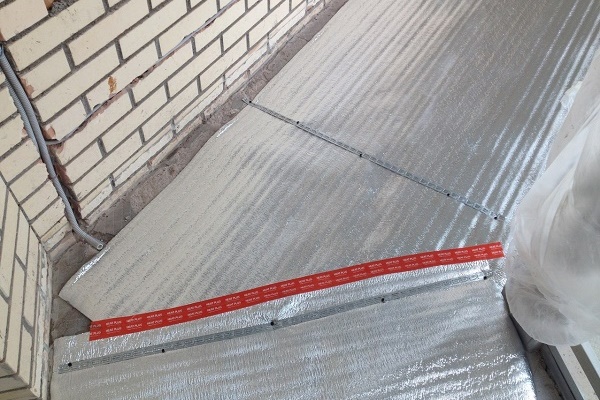
After the procedure, the mounting tape is laid on the floor and fixed. The cable is laid evenly undulating throughout the area. It is important that its nodes do not intersect. The bending radius must be equal to or more than 10 times the diameter of the cable. Fix the device with a mounting tape, securing it protruding parts.

After laying, check the compliance of the real resistance of the heating core with the information in the passport. You can connect the cable before installation to check its performance, and then carry out laying and screed.
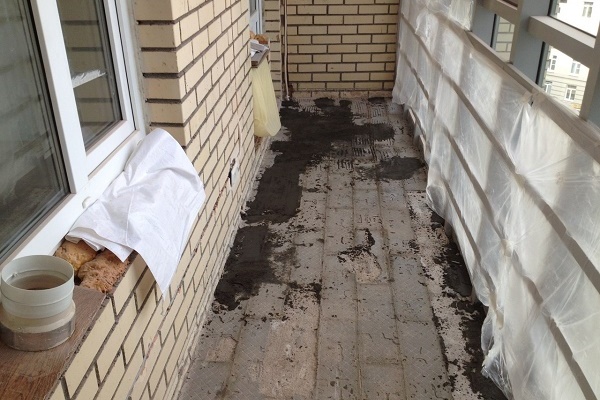
Couplings should be located in concrete screed. Before the device, the couplers make up the cable laying scheme, where they determine the places for the location of the couplings.
It is important to remember that the cement screed finally hardens after 28-30 days. Until this time, you can not turn on the system. It is also forbidden to start sections of the heating cable that are in a folded position. The laying step should be calculated according to the passport.
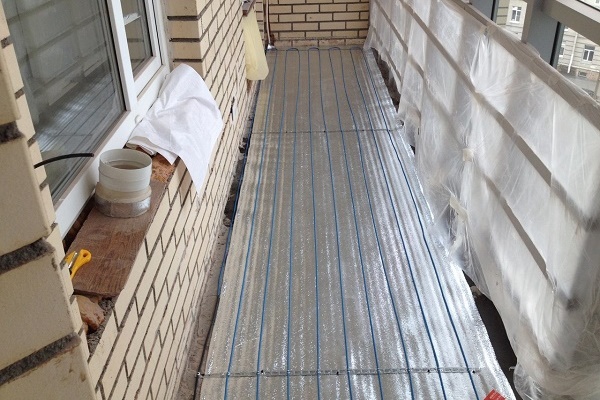
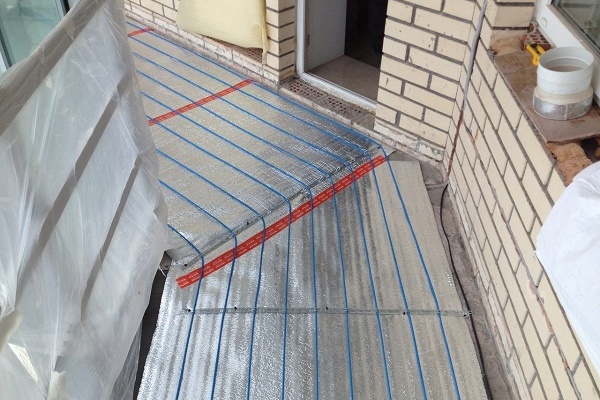
In detail, with the stages of laying the heating cable on the floor of the loggia, a brief photo instruction will familiarize you:
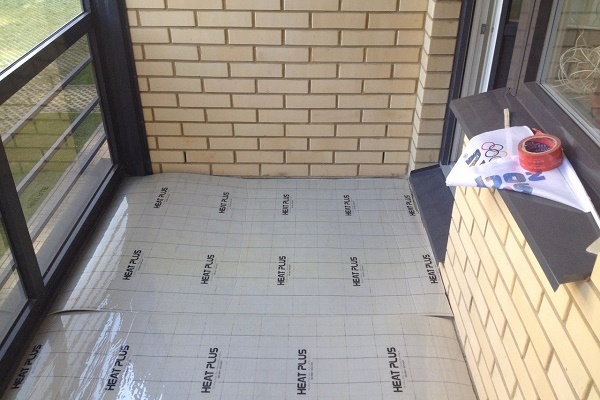
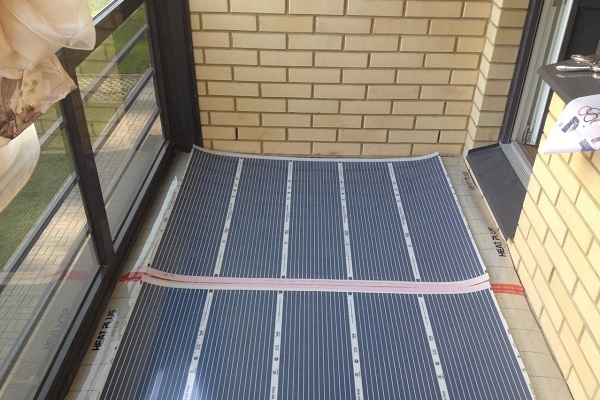
Infrared heating film
The principle of operation of the IR film is based on the generation of long-wave infrared rays. The device itself has the form of a canvas coated on both sides with a polyester film. It is flexible, making it easy to install on any part of the floor.
For implementation, pouring a cement screed or an adhesive base is not required, the film can be easily installed and dismantled.

The film is a kind of emitter of infrared rays, which a person interprets as heat. Its maximum heating temperature is 50 ° C.
Any IR film consists of:
- heating carbon element, which is a converter of electricity into heat;
- bimetal tiresby means of which energy is supplied to the heating elements;
- bilayer polymer filmperforming the functions of protection against mechanical damage.
The device works from an electric network of 220-230 V.

The current passing through the components of the system is converted into thermal energy, it is transferred to the environment, which then heats the air mass around it.
Types of infrared films
There is a wide variety of IR films that differ in specific technical parameters and appearance. Two main types can be distinguished - low and high temperature models. The films also differ in power, limiting heating temperature, thickness, width, and areas of application.
Installation of a continuous carbon film, used as the main heating system of the equipped loggia, is quite simple:
When choosing a film, the key parameter is the temperature of its heating. So, if it exceeds + 27 ° C, then the laminated coating should be discarded, since it is irreversibly deformed when exposed to high temperature.
Therefore, high temperature modifications should lay under ceramic tiles.

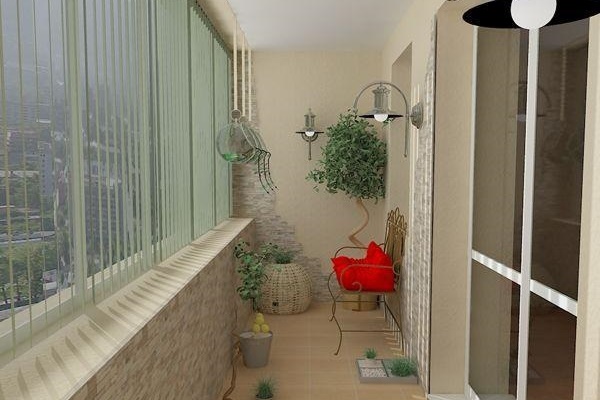
In the loggia, you can install a warm infrared film both on the floor and on the walls and ceiling. Additionally, the panels are mounted on both walls under the windows, opposite the windows. This heating method is called - heating system.
At choosing IR film It is important to focus on the area of its application.
Significant advantages of IR film
Experts highlight a number of advantages of IR film.
Among the main advantages include:
- environmental Safety - radiation is considered beneficial for health;
- maintaining air quality - during operation of the device, it is not air that is heated, but interior items, therefore, oxygen does not evaporate, the composition of the air does not change;
- lack of radiation electromagnetic type;
- ease of installation, extensive customization options.
IR film is durable, practically does not fail, and does not require repair.
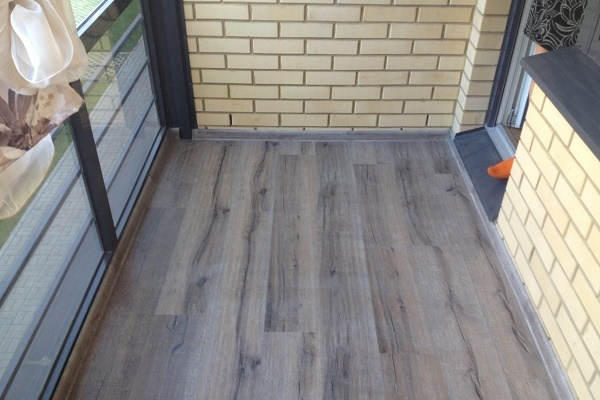
Infrared film systems are excellent outdoors. They are actively used in the arrangement of balconies and loggias. A significant advantage of IR floors is that this is the only option that allows you to effectively heat rooms without glazing.
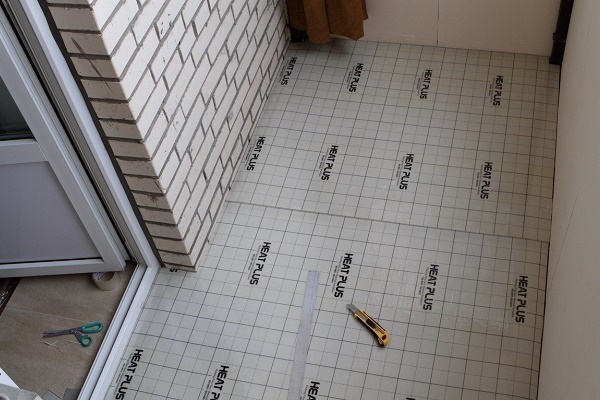
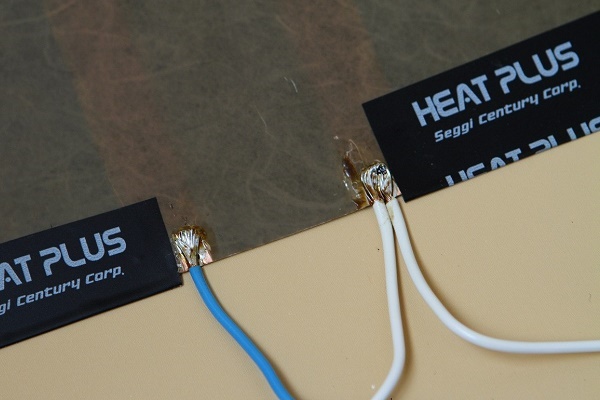
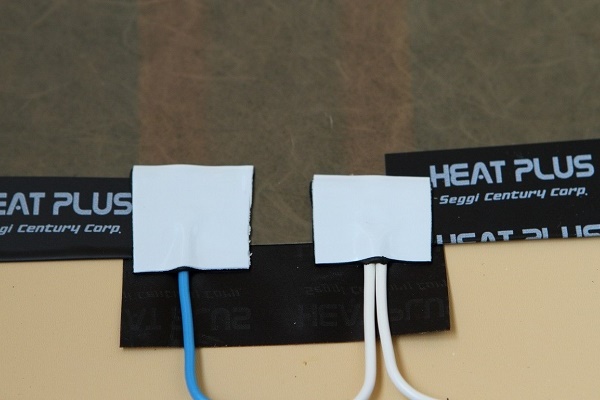
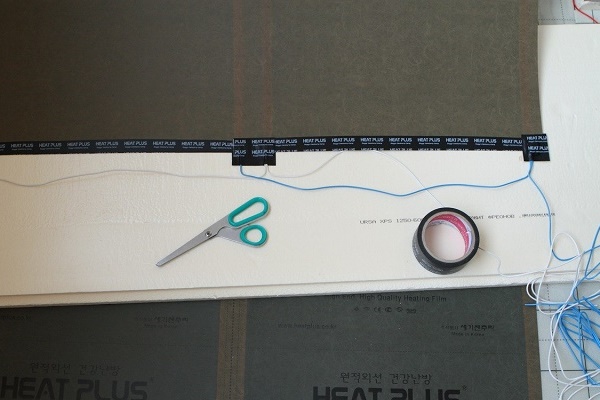
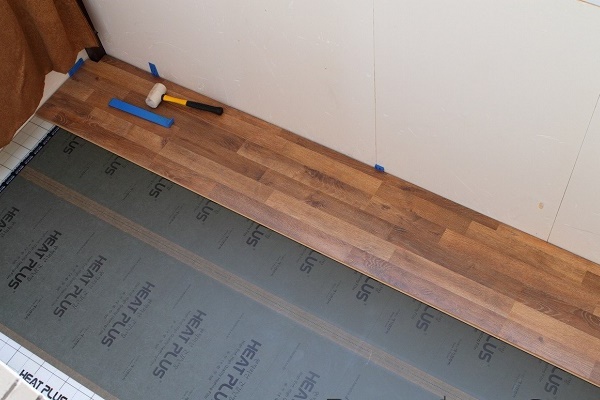
The process of installing an IR system on the balcony floor will be presented by the following gallery:
If you plan to choose an IR film for the balcony, we suggest that you familiarize yourself with the information on installing and connecting such a warm floor:
- Infrared carbon warm floor: operating principle and laying rules
- How to make an infrared warm floor with your own hands: installation and connection of a film floor
Mounting the temperature sensor
To provide the necessary microclimate in the room, use temperature controllers equipped with a temperature sensor. They effectively interact with cable systems, IR film.
The function of the thermostat is to maintain the set temperature, its adjustment, optimization of energy consumption. Depending on the modification, the functions of the device may be varied.
The principle of connecting the thermostat is the same for any system. We will consider the features of installing a temperature sensor for heating mats.

If the total power of the mats is greater, then for mounting the thermostat additional equipment is required in the form of an input automaton, an RCD, a power relay, a circuit breaker in directions, a special temperature regulator.
To install the controller, you must perform the work in the following order:
- create a special hole in the wall for mounting the box;
- drill a recess in the wall to install the power wire and create a hole for laying the connecting channel;
- install, configure according to the instructions;
- place the sensors in a corrugated plastic tube with a diameter of 16-20 mm.
The tube must be hermetically sealed at one end to protect the wires from getting into solutions, water. From the opposite end, the tube is placed in an installed box.

The permissible bending radius of the wiring is at least 5 cm. The tube with sensors is fixed to the floor.She must go between the loops at a distance of at least 20 cm.
It is important to remember that during installation it is impossible to shorten the heating cable, replace the supply wires, make adjustments to the design of the thermostat, carry out repair and installation work with the power supply turned on.
Principle of calculation of floor systems
Before choosing any floor system, it is important to calculate the power of the heater, determine its required length.
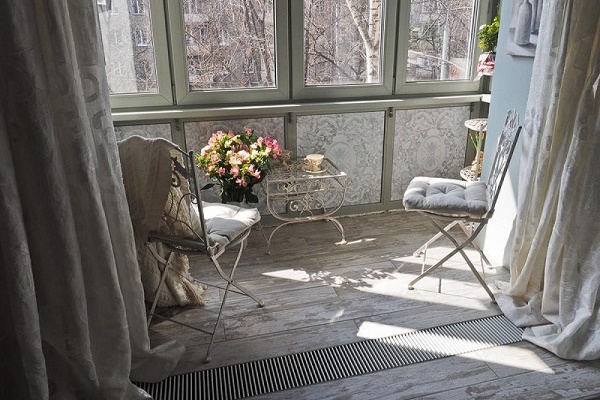
To do this, you need to calculate the heat loss of the loggia. A lot of thermal energy goes out through the window openings, so it is quite problematic to ensure a temperature of + 20- + 23 ° C, especially in the winter season. Therefore, it is recommended to install heating equipment in the heating mode.
You can calculate the heat loss of a balcony using the online calculator.

Recommended temperature of heating mats, cable or infrared film is + 26 ° С. This mode is suitable for insulating parquet floors. If a tile, marble or other heat-conducting coating is used as a coating, the recommended cable temperature is + 28- + 31 ° С.
Typically for loggias you need 160-180 watts per m2 for heating and 200-220 watts per m2 for heating mode. Given these recommendations, you can calculate the required cable length, installation step, system power.
For example, a loggia has an area of 2 m2. The flooring is a tile, screed is not planned. Take the heating mode, which requires 200 watts per m2. Next, we determine the heating area.
It is calculated by the formula:
Sgr= Stotal-Setc, Where
- Setc - the area occupied by cabinets and other furniture;
- Stotal - the total area of the room.
Let's say the area occupied by furniture is 0.5 m2. Then Sgr= 2-0.5 = 1.5. For the loggia, the heating mode is selected, so the required cable power is 200 W per m2.
Then the recommended system power is 1.5 * 200 = 300 W per m2.
If the screed is not planned, choose a thin cable system that can fully fit into the layer of tile adhesive.
You can select a system with the required characteristics from the tables describing the characteristics of the equipment.

Based on the table, we determine the mat power, its dimensions and length by area. In our example, the mat power is 0.25 kW, and the length is 17 m.
Next, we look for the installation step. We calculate it by the formula:
h = (Sgr* 100) / Lcabwhere
- h - laying step;
- Lcab - cable length in meters.
We substitute the values in the formula, and we get: h = 1.5 * 100 \ 17 = 8.8 cm.
When laying mats or cable, remember that the distance from the walls should be 10 cm.
Conclusions and useful video on the topic
The video tells about the features, general principles for installing heating mats:
From the video you can find out about the features of installing and connecting the thermostat:
You can learn about installing IR film from the video below:
Cable systems, IR film are of high quality, low cost, practicality and durability. You can install them yourself without the involvement of specialists.
It is only important to choose the right equipment, taking into account the area of the heated surface, type of coating and other factors.
Anyone interested in the matter of heating the balcony and using a warm floor to heat the loggia, we suggest leaving comments and asking questions. The contact form is located in the lower block.
 How to make a film underfloor heating under linoleum: instructions for laying an infrared heating system
  How to choose an electric floor heating: guidelines for choosing the optimal heating system
 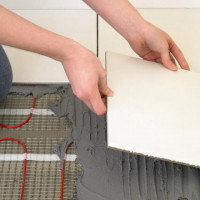 How to make a warm floor under the tile: laying rules + installation guide
 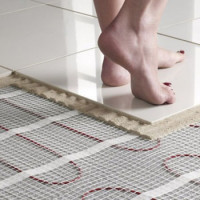 How to make a heated floor in the bathroom with your own hands: a step-by-step guide
 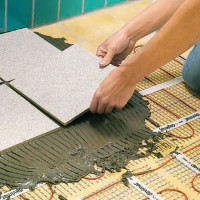 How to make an electric heated floor for tiles: film and cable option
 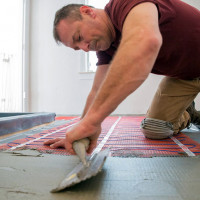 How to make a warm floor under linoleum on a concrete floor: detailed instructions
  How much does it cost to connect gas to a private house: the price of organizing gas supply
  The best washing machines with dryer: model rating and customer tips
  What is the color temperature of light and the nuances of choosing the temperature of the lamps to suit your needs
  Replacement of a geyser in an apartment: replacement paperwork + basic norms and requirements
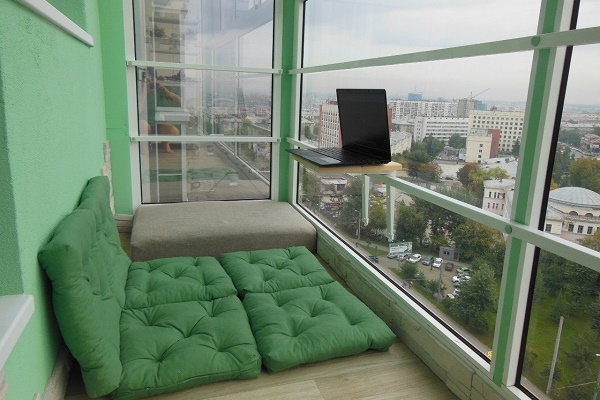
I don’t know about others, but we have a balcony, a favorite place for gatherings, especially our one-year-old child likes to spend time there. Perhaps that is why I had to think about warming the floor there, since it was constantly cold in the unfurnished balcony, and the baby is always played on the floor. Having studied all the methods of insulation, we chose the IR film, as it is completely safe and durable to use.
We only have floors with heating mats inside the house. There is infrared film in the hallway and on the balcony. Initially, there was a floor with heating mats, but one day the children forgot to leave and close the door from the street to the entrance hall. That the thieves did not climb well, but the floor was out of order due to a sharp change in temperature, and there was frost on the street. Then my husband and I decided that it was better to lay a film heater on the balcony and in the hallway. He, as time has shown, is not too moody.