How to make a fan heater with your own hands: a briefing on the manufacture of a homemade device

Fan heater - an extremely convenient device: mobile, easy to use, resistant to breakdowns, efficient. A living room using such a device can be heated in just a few minutes.
It is arranged so simply that you can make a fan heater yourself if you wish. Some of the materials necessary for the implementation of such a project can be found even among all the trash accumulated in the garage.
And how to do this and what exactly is needed - we will consider all this in our article. Here are 4 instructions for the manufacture of various fan heaters from improvised materials. For clarity, the material will be supplemented with photo collections and video instructions for assembling various versions of the device.
The content of the article:
The principle of operation of the device
Domestic fan heaters are compact devices that can be easily installed in almost any suitable place. For the device to work, you need electricity: both for the fan and for the heating element.
Such devices are often used in apartments and garages, and even for heating workshops, greenhouses and other premises. It all depends on the power of the device.
In any model of a fan heater, there are three components:
- fan;
- a heating element;
- body.
The fan drives the air flow through the case, the spiral heats this air, the flow of warm air spreads around the room.
If the device is supplemented with automatic control elements, it will be possible to set an acceptable air temperature. The device will turn on and off without human intervention, which will save energy.

When operating the fan heater, you must adhere to safety rules.Do not place objects or materials directly on the fan heater body or too close to the protective grill.
If the device is equipped with an overheat protection system, it will simply turn off. But if this module was not installed during assembly, the device may overheat, break down, or even catch fire.
A self-made fan heater can be of almost any suitable size and power. As a case, you can use a segment of an asbestos cement pipe, a metal pipe, a rolled sheet of metal, and even a case from an old system unit.
Usually, they first select a fan and make a heating coil, and then determine the type of device case depending on its filling.
The most important moment when creating this heating device is safety: fire and electric.
The heating coil in home-made devices is most often open type, it is simply twisted from a suitable wire. Direct contact with a heated coil can cause fires, burns, etc.

Therefore, the spiral must be correctly fixed inside the case, and the outside of the device must be closed with a reliable grill. Attention also requires the installation of the power supply of the device.
All contacts must be insulated, usually the bottom is made of materials that do not conduct current: rubber, plywood, etc.
Homemade Heating Element Options
Before proceeding with the manufacture of a homemade fan heater, it is important to choose the right heating element for your device. Let's look at what options are suitable for these purposes.
As such a heater, you can use:
- metal spiral;
- TEN;
- ceramic device.
A spiral rolled from a wire can be made independently without major problems. The advantages of metal spirals as heaters are limited to this. During prolonged use of the device, too little moisture and oxygen becomes in the surrounding air.
Therefore, the room will often have to be ventilated, well ventilated, and also take care of humidification.
The heater is a metal pipe containing sand inside, which accumulates heat well, and then gradually gives it to the air stream.
Heating elements do not dry the air and do not require oxygen, so they are much safer than spirals. The heater for the fan heater can be removed from an old household appliance, for example, from an electric stove.
For more information about the types of heating elements for heating and the features of choosing the right option, we recommend that you look at this article.

Ceramic heaters - elements are complex and expensive, but extremely safe and effective.They are a complex of plates with an uneven surface, similar to a honeycomb.
Such elements do not heat up too much, the effect of their influence is achieved due to the large area of contact between the heaters and the air.
The probability of getting burned on a ceramic heater is much lower than when using a metal spiral. But in home-made devices, spirals are most often used, since they are simple and affordable.
Fan Heater Assembly Instructions
Having understood the principles of the device of the fan heater and the features of choosing the appropriate type of heating element, you can create a device from the materials at hand, give it a suitable configuration.
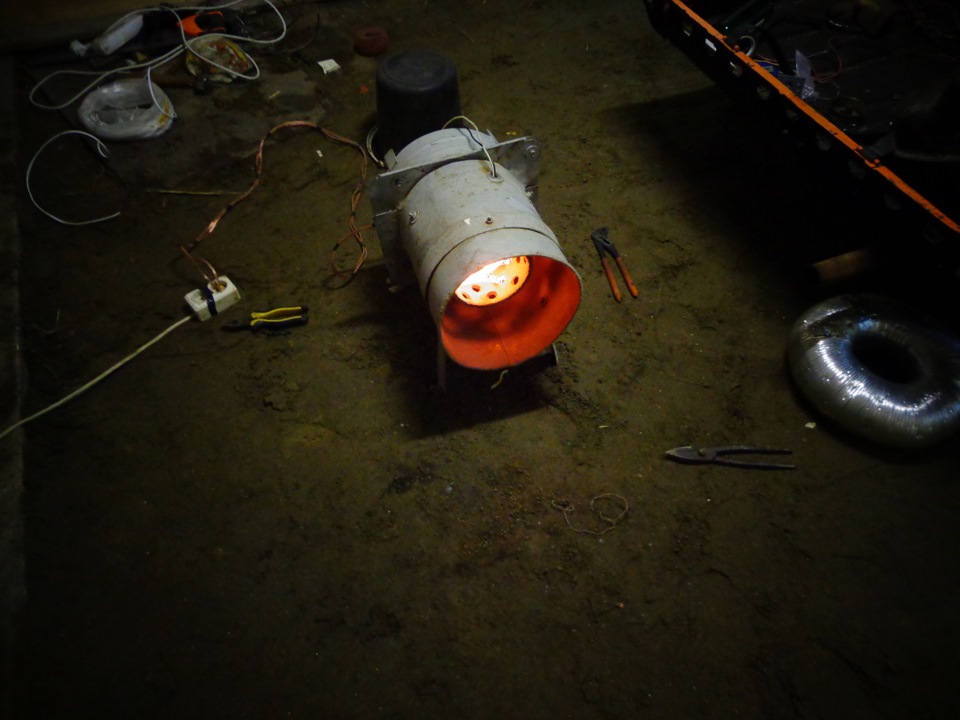
Option # 1 - fan heater from asbestos cement pipe
A piece of asbestos cement pipe is an excellent option for creating a fan heater. This material does not conduct current, which will make the device safer. A pipe with a diameter of about 15 cm and a wall thickness of 10 cm is suitable. The length of the body should be approximately half a meter.
A photo selection will introduce one of the options for constructing a fan heater based on an asbestos pipe:
To cut asbestos cement was easier, it is recommended to pre-wet the place where the cut will be made, for two hours. You can cut with an ordinary hacksaw, but a grinder with a diamond nozzle will do better.
The manufacturing process can be represented in the form of the following steps:
- Case manufacture.
- Making a heating spiral.
- The connection of the spiral with the electric wire, checking its operation, setting the characteristics.
- Fastening the spiral inside the case.
- Installation and connection of the fan.
- Mounting meconite film over the body.
- Fastening the handle, protective grill, control elements, etc.
For the manufacture of a spiral, about six meters of nichrome wire with a diameter of 0.5 mm of the brand X20H80 will be needed. This is a common material, it will not be difficult to find it. You can take a thicker wire, then the power of the device will be higher.
It is necessary to cut a piece of wire, the resistance of which is 30 ohms. The rated power should be 1.6 kW. This indicator can be changed by changing the length of the wire and / or its diameter.
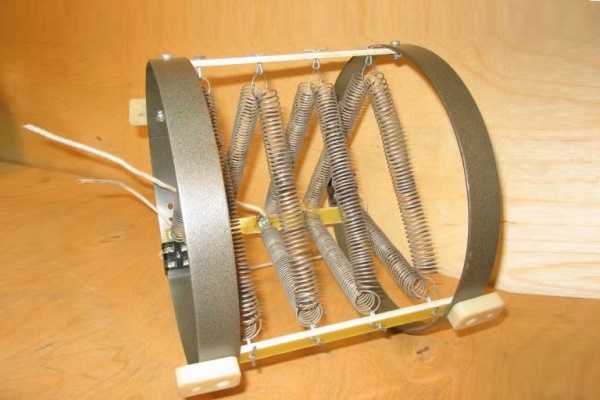
It is most convenient to twist a wire spiral with a vise and a collar located on top. Then this element is stretched so that the distance between the turns is approximately two times the diameter of the wire.
To check the operation of the spiral, its ends are connected to the electric cable using ceramic blocks. Now you need to turn on the heater in the network, check its operation.

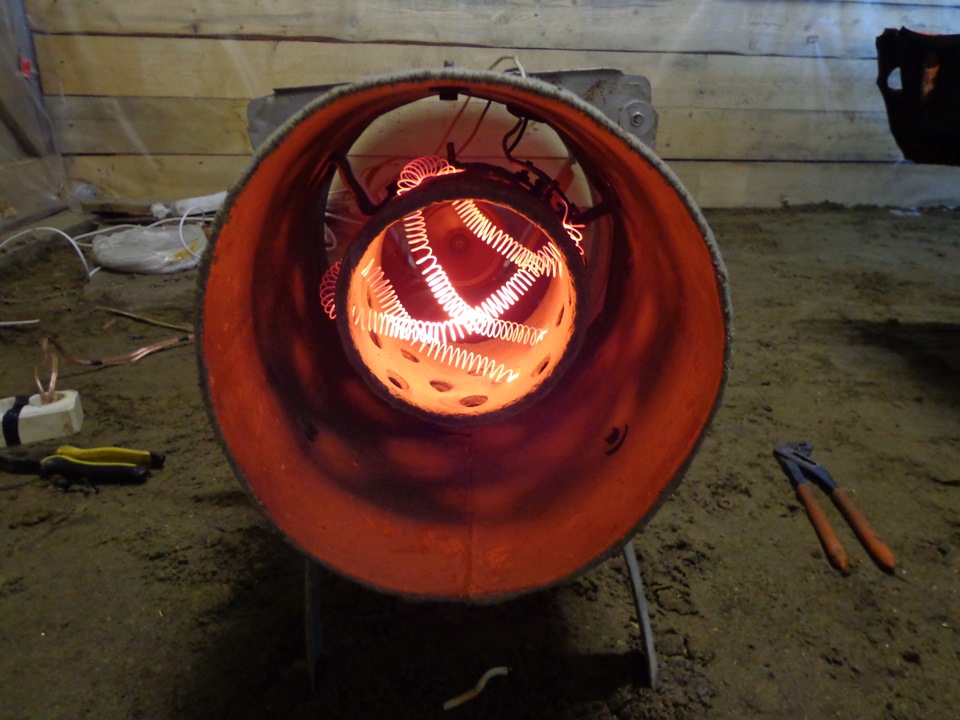
For this, a spiral is wound on a pipe and placed between two supports that do not conduct current. After that, the heater is switched on for only four seconds. During this time, the element will warm up.
Pay attention to the color of the spiral, it should be bright red. A yellow and white glow indicates a high probability of inter-turn closure. In such places, you need to check the state of the spiral, stretch it to increase the distance between the turns.
Now you need to fix the heater inside the fan heater housing. To do this, you can use either standard fasteners, for example, bolts and nuts, or cotter pins made from the remnants of a nichrome wire from which the spiral is made. For this, 2 mm holes are drilled at the mounting points of the heating element.
A piece of wire is bent in half, the spiral is suspended on this eyelet, and the ends of the cotter pin are brought out through the hole to the outside of the case and spread out in different directions.
The suspension scheme of the spiral does not matter much. It should be distributed evenly, avoiding sagging. It is also necessary to avoid the contact of the individual parts of the spiral with each other.
Now the ends of the spiral are again connected to the network cable. For this, ceramic pads-adapters are fixed on the case.
Now you need to install the fan. Appropriate in size and power devices are sold in specialized stores, there is no need to independently produce such a device.
The fan is fixed at the end of the pipe, opposite to where the heater is already standing. It is necessary to make sure that the air flow from the room is sucked in from the end of the case where the fan stands, and exits by the spiral, while heating up.
The device is powered by connecting the contacts to the same ceramic adapters to which the heating element is already connected.
If a constant voltage fan is used, then a special power supply unit will be needed to connect it. At this stage, you should also consider and implement the possibility of installing additional modules that will improve the operation of the device. For example, a filter that traps particles of dust may be useful.
The temperature controller and fuse will protect the device from breakdowns, overheating, etc. It makes sense to install a toggle switch, otherwise you will have to use the plug of the power cable to turn on / off the device. Now the housing must be insulated with meconite film.

It is simply wound on top and secured. The end of the housing, on which the spiral stands, is closed with a protective grill. To make it easier to carry the device, a handle is attached from above, for example, from an old door.
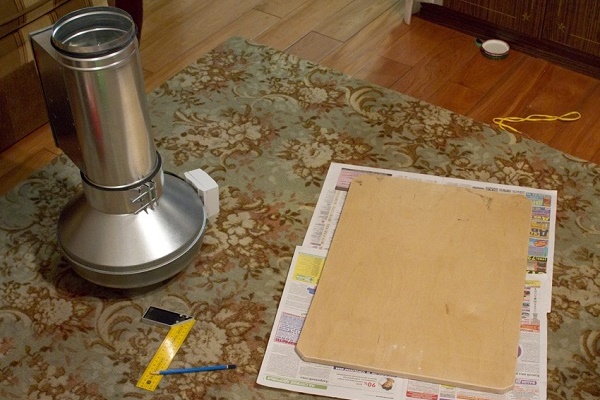
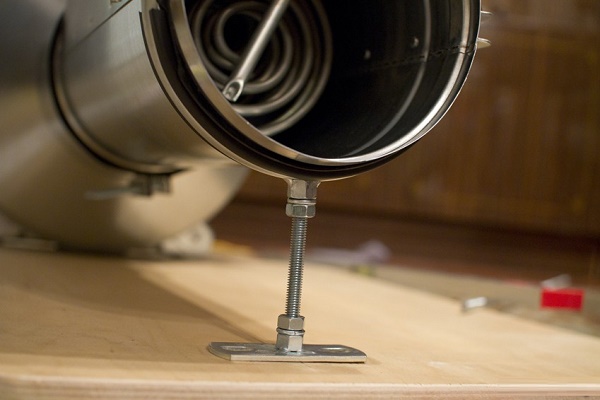
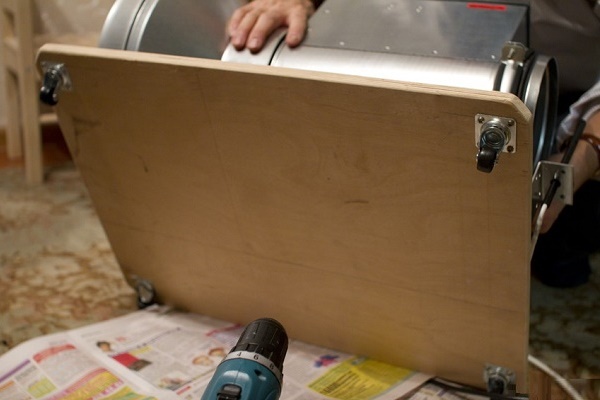
Option # 2 - heat gun for large rooms
Large models of fan heaters are often called heat guns. Such devices are often used to heat large rooms, such as a garage or warehouse.
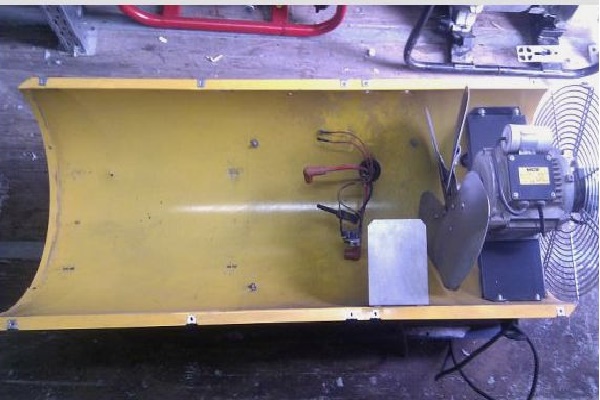
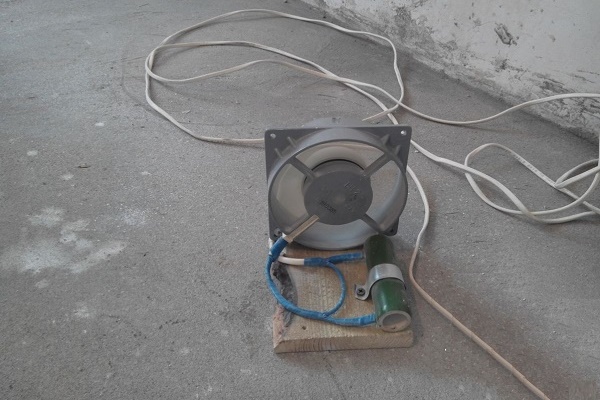
To make this variant of the fan heater, you first need to make a base of 16 mm plywood, the dimensions are approximately 50X70 cm. The base should be treated with sandpaper to eliminate sharp corners and irregularities.

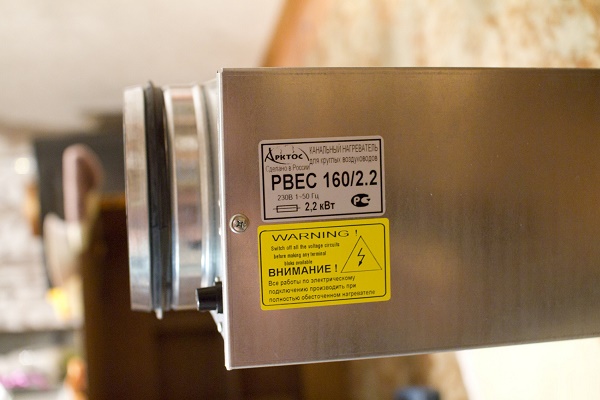
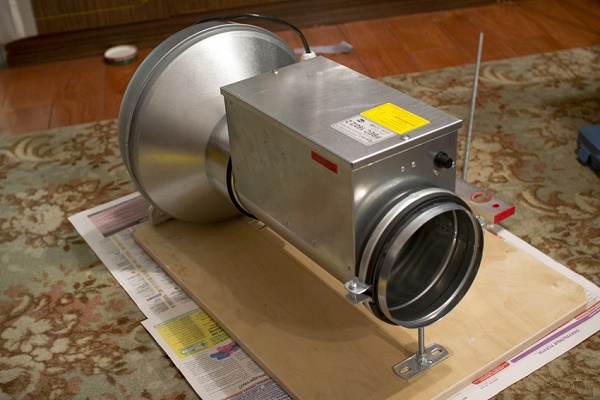
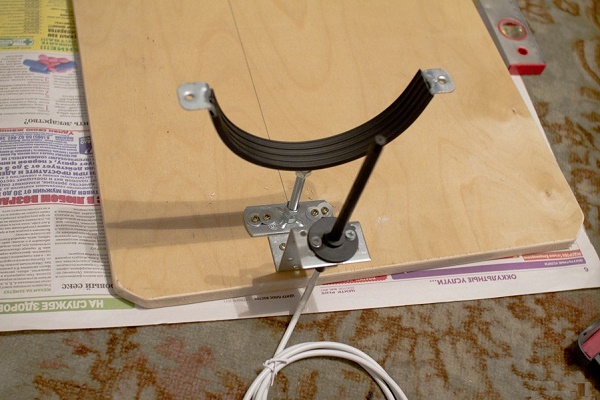
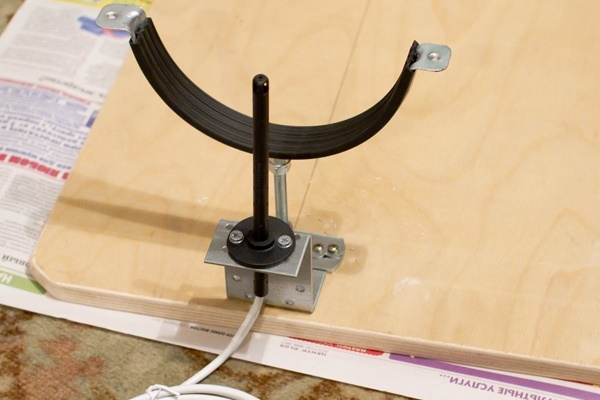
Then, a fan and a closed-type heating spiral are fixed on the base, it is already enclosed in a housing. Now it is necessary to connect these two elements with a sleeve, along which the air flow will move.
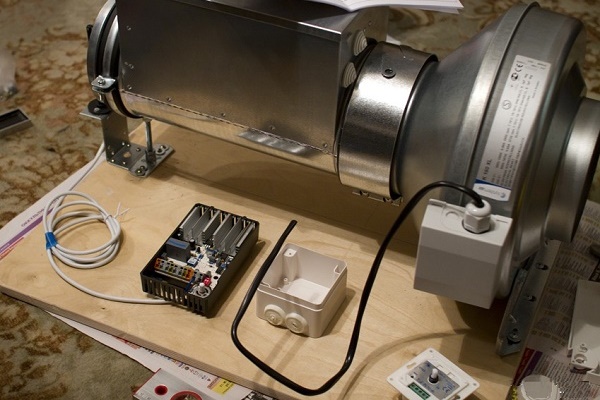
After that, the controls are fixed on the base: switch, temperature sensor, temperature controller, device for adjusting the fan speed.

All elements are connected in accordance with the scheme and connected to the power supply. All joints should be carefully insulated. To fix individual parts on a plywood base, 16 mm self-tapping screws can be used.
The device is not too compact. To make it easier to move it from place to place, four wheels are attached to the bottom of the base.
On our site there are instructions for the manufacture of other options for the heat gun - on various types of fuel. As well as useful recommendations for choosing a finished device in case you change your mind about self-assembly of the device.
The listed material is considered in the following articles:
- Do-it-yourself electric heat gun: the pros and cons of homemade + assembly instructions
- Do-it-yourself diesel heat gun: homemade manufacturing instructions
- DIY heat gun for used oil: step-by-step manufacturing instructions
- DIY heat gun: manufacturing options for different types of fuel
- Do-it-yourself heat gas gun: step-by-step assembly instructions
- Electric heat gun: types, how to choose, an overview of the best manufacturers
Option # 3 - fan heater from the system unit
If the house has an unusable system unit, it is quite suitable for creating a home-made fan heater, especially since the fan inside the device already exists.
The block body will be used for the new device, therefore, outwardly such a fan heater will have the shape of a parallelepiped. But the entrails will have to be removed completely, leaving only the cooler untouched.

If the fan is broken, it will have to be replaced with a new device. To make a heating device, you will need a hacksaw and a sheet of fiberglass. It is necessary to cut out a frame of a suitable size and configuration from it.
A nichrome wire is fixed on the frame so that it uniformly fills the space.

It is necessary to ensure that the turns of the spiral do not touch. The ends of the spiral are fixed on the case with ordinary bolts. Immediately install a safety device that will turn off the device when heated above 70 degrees.
The power cable, through which power will be supplied to the heating element, is attached to the bolts securing the edges of the spiral.
A computer cooler is a direct current device. To connect it to a 220 V network, you need a 12 V power supply. The front of the case is closed with a grill so that heated air moves freely around the room.
A rubber gasket, a piece of plywood or any other suitable material that does not conduct current is attached to the bottom of the case. Now the device can be turned on and check its functionality.
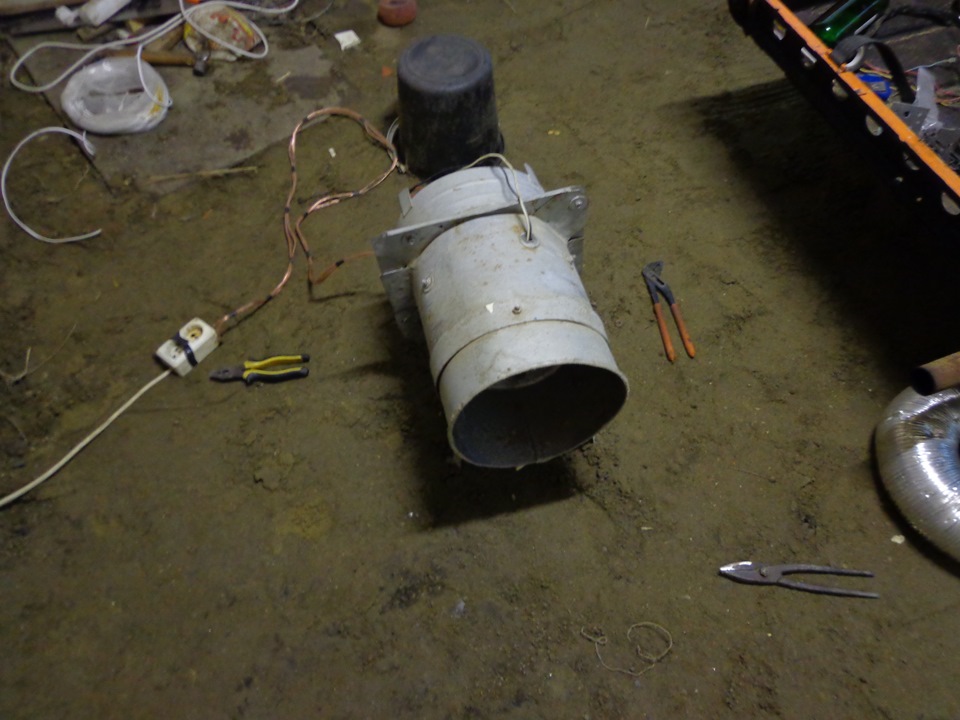
Option # 4 - water type device
An interesting version of devices of this type is the so-called water fan heater. Here, not a spiral is used as a heater, but a heat exchanger, through which water circulates from the heating system of a house or apartment.
Thus, a water heater can be considered as an addition to the heating system.

This device is not mobile, it is installed in a specific place. The idea is to drive air between the pipes of the heat exchanger and so improve the heating rate of the room and the efficiency of the house heating.
The place of installation of the fan heater is chosen so that it can be connected to the heating pipes without any problems, and also so that there are no obstacles in the way of the flow of warm air.
First, the size of the sheet metal fan is cut out and the device body is welded. To do this, cut off a strip of metal, the width of which corresponds to the width of the fan heater, and the length is equal to the perimeter of the fan plus a couple of centimeters for fasteners.
The strip of metal is bent, and its opposite sides are connected with bolts.
These are the walls of the device. For the front part, a sheet of suitable size is cut into which a plurality of air holes are drilled. This is the equivalent of a protective grill. Now you need to make a heat exchanger. To do this, use a copper tube, which is bent, giving it the shape of a coil.
At this time, it is recommended to fill the pipe with sand to prevent creasing. At the end of the work, sand is removed.
Two holes for the heat exchanger pipes must be drilled in the side walls of the water fan heater. If the connection to the heating circuit is carried out using a thread, it must be cut at the edges of the heat exchanger pipe.
It makes sense to install shut-off valves at the inlet and outlet, and at the upper point of the heat exchanger - a Mayevsky valve to vent the air entering the system. The heat exchanger is installed in the device body and fix its position with nuts.
After that, the fan heater is fixed in the selected place so that there is at least 10 cm space between the wall and the body. It remains to connect the heat exchanger pipes to the heating system, and the fan to the power supply.
We examined the most popular options for assembling a homemade fan heater among users. If they seem complicated to you or you don’t want to spend your time making a home-made device, you can always pick up a ready-made one in a home appliance store.
We recommend that you look at the article in which we examined how choose the best fan heater.
Conclusions and useful video on the topic
Here you can see an overview of a small fan heater, assembled from improvised means:
This video shows a homemade heat gun for a garage.As a heating element, spirals taken from an electric stove are used:
A variant of a fan heater made from a segment of an asbestos cement pipe is presented in this video:
The fan heater is a relatively simple device, and this is what makes it so convenient and reliable.
Obviously, making such a heating device yourself is not difficult. However, one should not forget about safety precautions so that a home-made device does not cause injury or fire..
Do you use a home-made fan heater for domestic purposes? Share your manufacturing experience and photos of a homemade appliance, leaving your comments under our article.
Or maybe you are just planning to assemble a fan heater and you still have unclear moments after studying our instructions? Ask your questions - we will try to help you.
 How to make a heater yourself: instructing on the manufacture of a homemade device
 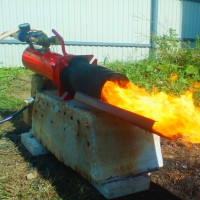 Waste oil heat guns: species analysis + DIY instruction
  Do-it-yourself diesel heat gun: homemade manufacturing instructions
  Homemade heater for the garage: how to make a device yourself
 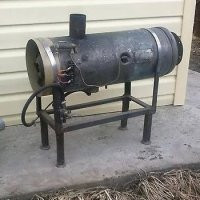 DIY heat gun for used oil: step-by-step manufacturing instructions
 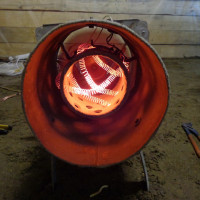 Do-it-yourself electric heat gun: the pros and cons of homemade + assembly instructions
  How much does it cost to connect gas to a private house: the price of organizing gas supply
  The best washing machines with dryer: model rating and customer tips
  What is the color temperature of light and the nuances of choosing the temperature of the lamps to suit your needs
  Replacement of a geyser in an apartment: replacement paperwork + basic norms and requirements
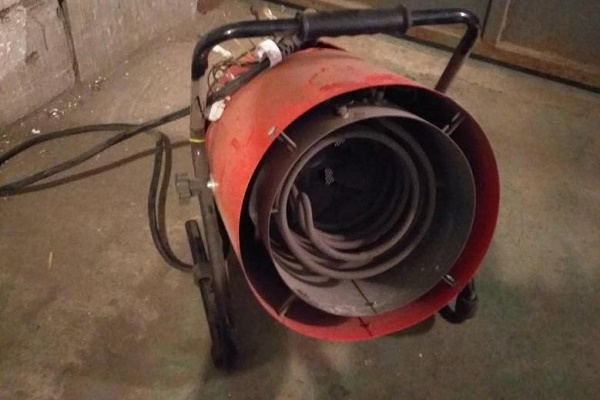
Everything can be done with your own hands, even a “gas gun”, which is considered the most economical option for heating a garage if you need to work in it in cold weather. I tried many options for heaters, including yours, there are a lot of old fans left. It is bad that the high cost of electricity in our garage cooperative eats up all the benefits from such devices.
I assembled something similar for my garage, unfortunately, in our garage society the heating is disgusting, so I have to somehow get out. Did according to the instructions on the Internet. I had to buy only the power supply from the computer, on Avito I found an inexpensive option. If at least you understand something in electronics, then there will be no issues with the assembly, it heats up well.
There are many options for heating a room using different devices. I seriously started looking for a simple way to heat my garage, because in winter you need to carefully monitor the condition of the car. I came across this information, the most suitable option was the fan heater from the system unit. Nothing complicated, of course, I had to spend the whole day assembling and installing, but now it’s warm in the room. If you approach the matter wisely, then with your own hands you can even make complex equipment.