How to build a Russian stove: do-it-yourself masonry, the best orders and schemes
The construction of a stove in a private house is a responsible and skill-demanding event, which is recommended to be carried out under the guidance of an experienced stove-maker. Only he knows how to build a Russian stove: choose the right masonry scheme, choose a brick, prepare a solution.
Even small miscalculations in the order can turn into a deplorable result, so you must follow the rules of work and regulatory requirements in construction.
The content of the article:
The device of the Russian stove
The size, shape and design features of Russian stoves may vary. According to one of the definitions, this is a heating and cooking facility with 2 fireboxes, which, in addition to heating functions, is also intended to cook typical dishes and bake bread.
The process of burning wood in the main firebox occurs as follows: the gases generated during the burning of logs enter the 1 section of the sub-chamber, then through special holes - undercoats enter the 2 section. After that, they move to the upper cooking chamber, from where to the collecting channel and to the pipe.

When burning wood in a small firebox, the combustion gases first enter the main firebox, from it into the pipe. Here you can use not only dry logs, but also bark, wood chips, branches and other waste.

The foundation for the construction is a foundation, usually 0.1 m larger than the bottom of the Russian stove. Here, below, is the underfill - free space for storing poker, grip, shoulder blades and other equipment.

For the masonry of the cooking chamber, and in particular for the arch, the most fire-resistant, selected bricks are selected. The thickness of the walls determines how long the heat will hold.
The thin walls of the cooking chamber heat up very quickly, but cool as quickly. Standard thickness is 1 or ¾ of brick. The front wall is thinner - ½ brick, as is the partition in front of the furnace.
At the bottom of the cooking chamber is located under, for which a durable smooth brick is suitable. Often it is laid dry, without the use of a solution, onto a bed of coarse sand, to which crushed stone, gravel or broken glass is added. The hearth flooring is made with a slope of 3-5 cm towards the mouth.
The arch shape affects the degree of heating and the complexity of the masonry.

Flat arches are more difficult to lay, for the load distribution it is necessary to use steel screeds. However, with this design, the under warms up more.
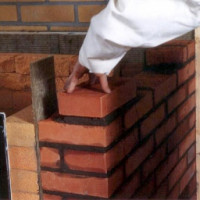
The masonry technology of the arch of the Russian stove may vary, but often observe the following rule: lay it out simultaneously from 2 sides and finish in the middle. A castle brick is laid in the center, for the coating of which a clay solution is used.

If they bake bread, then they clear it under - they dig out the ash, and sweep away its remains.
There is still a way to bake bread without baking sheets and forms, when it is placed on a special shovel, lightly sprinkled with flour, and then “put in the oven” - simply dumped with a sharp movement on the under.
Construction: preparation and laying
To protect yourself from all sorts of risks associated with fire, as well as from the claims of the fire inspection, we recommend that you use the rules and regulations set forth in the legal documentation when erecting a structure:
- SNiP 41-01-2003 - section on heating;
- SNiP 23-02-2003 - on thermal protection;
- SNiP 3-01-01-85 - general building codes.
Materials for the construction of the furnace must also comply with safety standards and fire regulations.
Choosing a place for masonry
Traditionally, a furnace arrangement is chosen so that the mouth faces the window and is well lit. The building can be located in the center of the room, and against the wall, in the corner.
If the walls are wooden, they must be protected with non-combustible material - for example, steel sheets or asbestos boards. In this case, the brickwork should be placed no closer than 0.2 m.

Sometimes the building is placed in a wall between two rooms. To protect the wall or partition, you can use brickwork with a thickness of about 0.2 m or lining with non-combustible material.

You can use this option, when a large firebox goes into the kitchen, a small one - into the next room. It used to be practiced in five-wall houses with a “summer” hut, in which the furnace of a large stove with a stove bench was not used for a warm season.
Preparation of tools and materials
Masonry appliances and tools are prepared in advance so as not to be distracted and rush to search for them at the most inopportune moment.
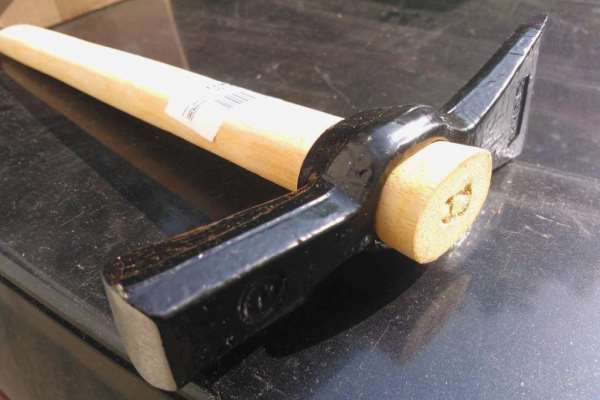
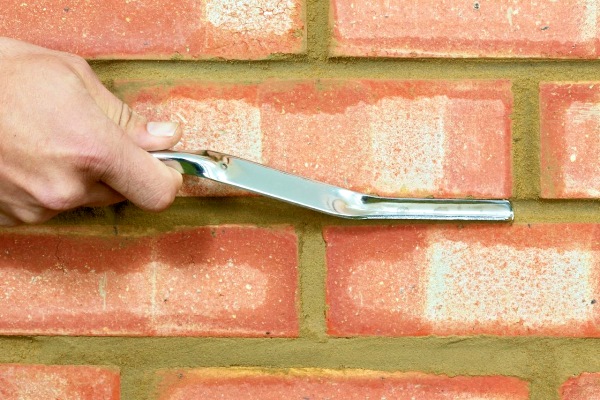
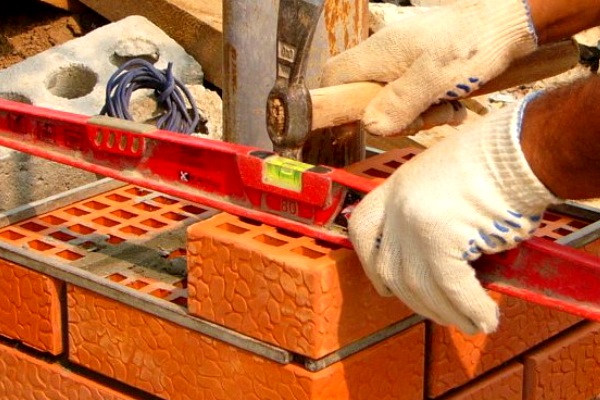
The main tool of the stoveman:
A plumb line and a building cord can also be useful - for accurate adjustment of the corners and walls of the structure vertically, the rule is for leveling the foundation, a folding steel meter for marking and leveling. For safety reasons, we recommend that you wear protective clothing, comfortable shoes and gloves before work.
The materials and their quantity depends on the chosen furnace model - with a heating panel, stove bench or hob.
The table of necessary materials may look like this:

The advantage of cast iron over steel is obvious: it does not rust, does not burn out, practically does not deform under the influence of high temperature, and keeps heat for a long time.
When buying doors and gate valves, make sure that the former close smoothly and tightly, while the latter slide easily in the canvas. Previously, the dimensions of the devices were subject to standards, for example, clean doors had dimensions 112 * 150 mm. Today you can find equipment of various shapes, lengths and widths.
How to prepare a solution?
According to the main material, solutions are divided into clay, cement, lime.

When designating, the binder component is in the first place, the aggregate in the second, for example, 1: 1 or 1: 2. Complex solutions are indicated in three parts, for example, 1: 2: 6, with two binders in the first place, the last placeholder. The brand of cement mortars depends on the brand of cement used.
The finished solution should have the following qualities:
- plasticity, convenient for drawing and distribution;
- thick enough to prevent spreadability;
- normal density, neither skinny nor fat.
Here the general rules apply: too thin solutions are considered weak and short-lived, and fatty ones crack after drying.

The most difficult part in preparing a clay solution is to find a suitable grade of clay. It must be oily, so that the composition turns out to be elastic, convenient for laying and creating neat, even seams. It sometimes takes years to select the right proportions - this is another reason to work under the guidance of an experienced craftsman.
Beginners choose the composition of the solution empirically. First, clay is cleaned of impurities before kneading, then soaked in water for 24 hours.
The same servings of clay are mixed with different servings of sand, form cakes and allow them to dry for 2-3 days. Subsequently, the proportions that give the least cracks are used to prepare the solution.
To give the clay mass a suitable texture and uniformity, it is soaked and then wiped through a mesh with a 5 mm mesh.
When installing a furnace, instead of sand, it is required to add fireclay powder 1: 3 or 1: 4 to the refractory clay. You can use a masonry compound prepared in the factory.
For laying chimneys and chimney rotors within the house, a lime-cement or lime-sand mixture is used. In the construction of the pipe above the roof, cement mortar or lime-cement composition is used.
Basic principles of ordinal masonry
For the device of the Russian furnace, it is recommended to use solid refractory bricks without cracks and chips. The thickness of the gaps between adjacent rows filled with a solution is from 0.5 to 0.8 cm.
Different sections of the furnace can be made by laying in a whole brick, placed on a rib or laid flat, as well as in ½ (equal to the width) or ¼ (equal to the edge) of the brick.

We suggest using the schemes and descriptions to get acquainted with the ordinal masonry of the Russian stove. The dimensions of the proposed option are 1.45 * 1.28 m (i.e. 6 bricks in a dyne and 5 - in width).

The foundation is laid in the soil, on which the construction of the structure depends. At a depth of 12 cm from the floor lay a two-layer waterproofing (for example, 2 pieces of roofing).

The first layer of the masonry of the furnace also consists of bricks laid flat.
1-4 rows lay out according to the diagrams below, while in the 4th row it will be necessary to fix steel strips and blower doors (3 pieces).

5 row differs by the installation of a grate, which is necessary to remove ash from the cooking furnace into the blower opening. Under should be laid out only from refractory bricks.
Scheme 5 rows and scheme 6-11 rows:

6-11 rows spread according to one scheme with some differences:
6 row - installation of the main door of the furnace,
10 row - installation of a blow door for a small firebox,
11 row - grate to remove ash from a small firebox.
12-17 rows - additional installation work:
12 row - door of a small firebox,
13 row - 2-burner hob made of cast iron (0.71 * 0.41 m), material - refractory brick and steel strips for reinforcement. After that, lay out the arched openings of the inner, and then the outer cooking chambers,
15 row - refractory bricks put in position on the edge, set the door for the cooking chamber (0.45 * 0.45 with a latch), the rest of the bricks are laid flat, alternating with steel strips.
17th row - lay out from laid flat bricks, then 5 rows - a pipe, while a sheet of asbestos is laid between the last row and the ceiling.
Row diagrams from 12 to 17 (3-3), from 17 to 22 (4-4), from 22 to 27 (5-5):

Above the main structure of the furnace passes a pipe lined with 5 bricks (flat position). For strength, it is connected to the dressing. Thus, 32 rows are obtained.
The furnace with a boiler and a stove bench
In addition to the simplest version with two fire chambers, complex Russian stoves are built with their own hands with a stove bench, a boiler for heating water, with a flooding or fireplace. Consider the order of popular solutions that can be used for self-construction.
The ordering greatly simplifies the masonry, as the graphic image and description of each row shows how exactly the previous row differs from the next, what elements are needed at all stages.
Let's consider schemes for construction Russian stove with boilercreated in a computer program.
1 row sets the location of the entire structure, it is made solid of refractory bricks laid flat.

2 row - beginning of the construction of compartments.

3 row - the design of two chambers, cleaning and blowing.

4 row - closing the hearth.

5 row - grate.

6 row - hot water tank.

7 row - reinforcement of the side wall.

8 and 9 row - output channels.

10 row - the union of the arches of the main and small fireboxes.

11 row - installation of the hob.

12-13 row - the design of the walls of the hob.

14 row - entrance to the pipe.

15 row - arch of the cooking chamber

16 row - reinforcement of the walls.

17 row - installation of metal parts.

18 row - the arch of the furnace.

19 row - reinforcement of the internal partition.

20 row - backfilling with sand.

21 row - the base of the couch.

22 row - installation of a metal part in the chimney.

23 row - chimney door.

24 row - installation of the shutter.

25-26 row - narrowing of the masonry.

27-29 row - connection of an annulus and a chimney.

The chimney is led out through the attic to the roof, an otter is arranged there and the adjacent zone is waterproofed so that there are no gaps between the pipe and the roofing material.
The main thing during construction is to observe the order of the Russian stove and monitor the quality of the materials used.
Operation recommendations
The efficiency of fuel combustion and the general condition of the furnace depend on the observance of operating rules, which should not be adhered to from time to time, but regularly.
Brick, like mortar, refers to "living" materials, which can become deformed with time from temperature extremes. Therefore, it will be necessary not only to clean, but also to cover the cracks so that condensation does not form and the heat capacity of the structure does not fall.
This is very simple, here is an example: over time, a gap of only 2 mm wide has formed around the valve. It turns out that in an hour it passes as much as 15 m³ of air heated to a temperature of 90-100 ° C, that is, about 10% of all the heat coming from the furnace.

Repair and cleaning of stoves is done once a year, before the heating season. But chimneys need cleaning more often - about 2-3 times per season. Before starting the furnace, ash is removed from the grate to ensure free air access for efficient combustion.
Fuel is prepared in advance, as the logs must dry. To do this, they are stacked in woodpiles under a canopy and left for at least a year. Raw firewood is not recommended for use, since evaporating moisture settles on the walls and mixes with soot.

Typically, the furnace process takes from 1.5 to 2 hours.
Firewood is stacked in a furnace chamber in rows or in a cage, with a small distance between the logs. It is important that they burn out at the same time, as the heat will be greater.
For a long time, it is not recommended to heat the furnace for increased heating. So you can provoke the appearance of cracks, as a result of which you will need first cosmetic, and then overhaul - laying again.

As soon as the firewood ignites, the furnace is closed, and the blower is opened. Draft is regulated by the position of the valve or view.
Some more useful recommendations:
- Bright red flames and black smoke indicate a lack of air - the flow must be increased.
- White flame and hum in the pipe - excess air, it is better to cover a little blowing.
- It is possible to stir logs only after they thoroughly burn out and form wastelands that let air through.
- The firebrands are pushed into the center of the hot coals so that they soon burn out.
- As soon as the coals cease to burn with a blue flame, they are distributed along the hearth, moving closer to the mouth.
- For insurance against carbon monoxide smoke, the pipe is not closed for another 10 minutes to prevent carbon monoxide from entering the room.
If the furnace is heated with coal, then it is recommended to melt it with firewood.
When finishing exterior walls, remember that beautiful cladding can partially reduce the flow of heat into the room.
Conclusions and useful video on the topic
Video layout of the Russian stove with the order:
The process of disassembling the old and building a new furnace:
One of the variants of the Russian stove with the order:
If you build the Russian stove correctly, you can immediately get almost an “eternal” heating device, and excellent kitchen equipment for cooking. However, for this, the device must fully comply with the order, and the technology for laying bricks and mixing the mortar must comply with generally accepted standards.
And before you make a draft Russian stove, it is better to consult with qualified stove-makers.
Please write comments in the block below. Tell us how you built a Russian stove in your country house or in a country house. Ask questions, share information useful for interested topic visitors to the site, post thematic photos.
 DIY masonry: a detailed guide + orders with diagrams and drawings
 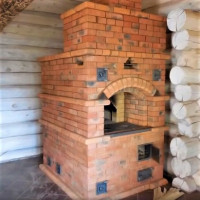 Do-it-yourself mini Russian stove: specifics and arrangements for the construction of a compact stove
 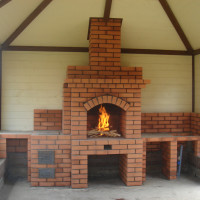 Brick stoves for giving on wood: the best orders and a step-by-step guide to the construction
  Do-it-yourself gas bath stove: manual for the installation and installation of a gas stove
  How to make a Buleryan oven with your own hands: step-by-step instructions on how to make
  DIY miracle oven for a garage in a diesel fuel: step-by-step instructions for the construction
  How much does it cost to connect gas to a private house: the price of organizing gas supply
  The best washing machines with dryer: model rating and customer tips
  What is the color temperature of light and the nuances of choosing the temperature of the lamps to suit your needs
  Replacement of a geyser in an apartment: replacement paperwork + basic norms and requirements
The most intelligible material on the masonry of the Russian stove, which I saw on the Internet. And at what price does it go approximately?
If you order the master, it will be released in 150-180 tr If you do it yourself, then 50-60 tr for materials. Although in different regions the price may vary.
Oleg, people throw out clay when they drain dig holes and don’t know how to get rid of it. Sand on the quarry can be typed, if you have available in the region.
The furnace is not quickly built, several rows a day, it’s quite possible to carry a little even on a passenger car. Again, a brick, if there is a heel laying, in the villages they break the ovens, in connection with gasification, you can agree, take a good one for a penny. No jokes, there is not so much fuss, and the savings come out substantial already on these details. By the way, we bought fittings, for example, in the same place, we were lucky - people broke an almost unused furnace.
And another life hack. At the scrap metal collection points, at the price of metal for delivery, you can also find reinforcement. In the store, this will be 50 times more expensive. People break the stove, rent. It may be a reluctance to bother like that, but in fact, there’s just a couple of hours on the Internet to sit and go to a couple of places to find out.
That's real, a stove-maker / fireplace maker, so he built 4 stoves and 3 fireplaces for people. About 9 years old they are already standing by people, they don’t complain. The main thing is to select material better.