Do-it-yourself sewerage for a bath: diagram and step-by-step instruction on the device

A comfortable bathhouse on your site is a dream that you can always turn into reality on your own. One of the key points of its construction is the solution of the problem of disposal of waste effluents.
We will consider in more detail how to install a sewer for a bathhouse with your own hands and what points to consider when designing and installing a system.
The content of the article:
Type of sewer system
Not only aesthetic standards, but current requirements aimed at maintaining environmental safety are pushing for a properly designed waste water disposal system.

There can be many constructive solutions for autonomous sewers erected during the arrangement of the bath.
According to the type of action, independent systems are divided into two types:
- Pressureless system - involves the movement of wastewater through it by gravity. This effect is achieved due to properly maintained pipeline angle.
- Pressure system - provides for the forced transportation of effluents using pumping equipment.
A sewer system for a bathhouse is built, regardless of whether the water supply system is connected or not. In any case, the very nature of the object implies abundant use of water, which must be disposed of.
When arranging a gravity system trunk angle determined by the diameter of the pipes.

The gravity flow system is non-volatile, but it is quite problematic to correctly design it in case of difficult terrain.
The pressure system is volatile and comes at a price more expensive than pressureless. But it easily solves problems with which gravity cannot cope. In order to be able to transport waste water over long distances, it is important to take care of the insulation of technical elements during the cold season when installing a pressure system.

The service life of a pressure head sewer system is estimated at more than one dozen years, and the costs of its installation more than pay off. The main thing is to use pumping equipment equipped with chopper, which grinds solid particles falling into the drain.
Connecting the pipeline to a centralized sewage system is a less time-consuming, but more troublesome way. Since only a few bath owners can apply it in practice, we will not study its features in detail.
Regardless of the type of sewerage scheme chosen for the bath, it is extremely important to observe the straightness of the mains. If turning points are provided for laying the pipeline, then observation wells will need to be built in the places of their arrangement.
Determination of terrain conditions and soil type
The first thing to do when installing the sewage system in the bathhouse is to determine the state of the soil on the site.
At this stage, it is important to identify:
- Groundwater level.
- Freezing point in winter.
The depth at which the pipes of the external sewage system and equip the septic tank directly depends on this.

You can get information about the depth of freezing of soil from building directories, for example, from Building Climatology, or by talking to neighbors who have already done similar work.
You can find out the type of soil by performing simple manipulations and comparing the indicators with the data in the table below. To do this, in the place where you plan to lay the pipeline, you need to dig a hole 25-30 cm deep below the freezing mark.
A test sample is taken from the bottom of a dug hole. The rock sample is first rubbed between the fingers, and then rolled into a ball.

When dealing with loam and sandy loam, which are classified as heaving soils, when laying an external sewer, the bottom of the trenches will have to be equipped with a sandy "pillow". Acting as a damper, sand will prevent damage to the pipeline during spring movements of the earth.
According to the type of sewage organization, bathing sewer systems are divided into organized and unorganized:
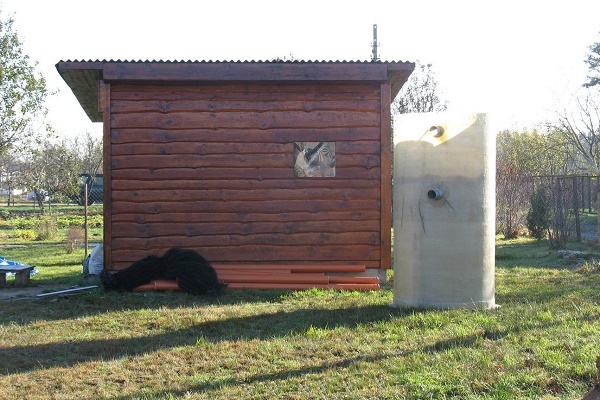
Choosing a place for a treatment plant
So that unpleasant odors do not annoy the owners and guests of the site, it is important to correctly calculate the location of the structure.

The distance of the outlet point should be:
- to the foundation of the bath - 4-7 m;
- to the water intake point - from 10 m;
- to green spaces - from 2 meters;
- to the road - 5 m.
AT SNiP 2.04.03-85 the minimum distance allowed to be maintained from the septic tank to the border with the neighboring section is also specified by points. It should leave at least 3 meters.
For the treatment of effluents transported from the bathhouse, various types of treatment plants are used:
Sewerage Design
Design and installation of an autonomous sewer system includes two mandatory parts:
- internal - includes communications laid indoors;
- outdoor - integrates communications beyond the boundaries of construction.
The project for laying a sewer system, if desired, can be completed on its own.

To simplify the calculations on the plan, you must specify:
- Places for mounting plumbing fixtures.
- The dimensions of the rooms and the distance from the drain points to the partitions.
- Place of withdrawal of the main highway.
- Installation of a fan pipe (if a toilet is provided).
On the drawn up plan, plumbing fixtures are connected to the main pipe in the shortest and most convenient way. The main task is to minimize the number of turns of the highway.
After this, the length of the communications is summarized, not forgetting to add an allowance to the thickness of the outer wall, and proceed to drawing up an external wiring drawing.
The main rules to consider when designing an external wiring:
- At the junction of the internal and external sewerage equip a viewing hatch.
- At the turning points of the highway and places where the side branches of the pipeline branch out, observation wells are constructed.
- The first revision well is placed no closer than 3 meters from the bath and no further than 12 meters.
According to the prescribed norms of SNiP, when laying external sewage pipes D 100-150 mm every 15-30 meters of the direct line, it is necessary to build inspection wells.

When dealing with a relatively flat area, when laying an external network along its entire length, to ensure the smooth operation of the system, you only need to withstand a tilt angle of 10-15 mm per meter.
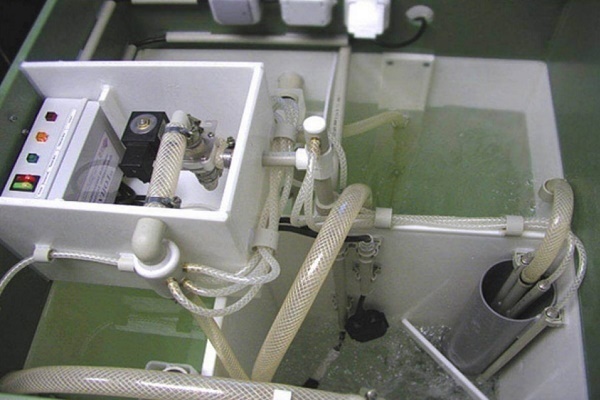
Options for installing a water seal
The spread of fetid odor where there is sewage is not a rare occurrence. The installation of a water seal helps to get rid of it. The design is an impromptu water plug, which is always located in the cavity of the pipe, even in those periods when the bath is temporarily not used.
The main purpose of the device is to separate two adjacent gas environments, cutting off unpleasant odors coming from the septic tank.

The design, simple in execution, has one drawback - during rare operation of the system, the liquid evaporates over time.
For such rarely used systems it is better to install a “dry” water trap.

This design is convenient in that when the fluid enters the system under the action of the generated pressure, the valve lowers, opening the path to the flow, and after it passes through, it returns to its original position.
For lack of the opportunity to purchase a finished product, you can build a similar design on your own.

For the manufacture of a water seal, the wide edge of the adapter is cut at an angle of 30 °. A circle of D 110 mm is cut out from the dense rubber and fixed to the cut point. The finished structure is placed at the outlet of the pipe from the septic tank.
Selection of required materials
Before making a reliable sewer for a bath, it is necessary to choose high-quality elements of the pipeline.
For the laying of internal and external networks, several types of pipes are presented on the modern market.
The main ones are:
- Cast iron – such pipes durable, but at the same time heavy, and therefore extremely inconvenient to install. The price for them is quite high.
- Asbestos cement - inexpensive products whose operational parameters are inferior to plastic and cast iron counterparts. Due to the fact that they have a rough inner surface that has many tiny recesses, they should not be used when arranging a pressure-free system.
- Plastic - A universal option suitable for arranging any type of sewer system.They are inexpensive in price, easy to install and durable in operation. In addition, the market has many options - it remains to choose the right one, and how to do it, read in this stuff.
When laying an autonomous sewage system in suburban areas, plastic pipes were most widely used.

They are available with and without bells. To simplify the installation of long products, fittings and other shaped elements are produced for them.
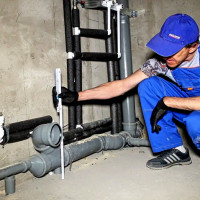
For laying a horizontal pipeline in the walls of the building, pipes of gray color D110 cm are chosen, for vertical layering when installing receivers - pipes D50 mm and D110cm.
When laying the external pipeline - PVC pipes of yellow-red color of the same size. Adapters are used to join elements of different diameters.
The device of the internal system
The most correct way to arrange the sewage system is at the construction stage of the bathhouse. But there are situations when it is necessary to equip ready-made operational buildings. The volume of work performed and their sequence in each case will be different.
Installation of the system at the construction stage
After the construction of the foundation, the connection points of the ladders, sinks and other plumbing elements are determined.

The depth of the pipe from the earth's surface to the upper point of the laid pipe should be:
- for southern regions - 70 cm;
- for the middle band - from 90 to 120 cm;
- for the northern regions - from 150 to 180 cm.
If the height of the cap reaches 30-40 cm, then the depth of the laid trenches should be about 80-100 cm relative to the upper point of the erected base.
Laying the pipeline in accordance with the sewage scheme should start with the installation of the main pipe, not forgetting to observe the slope. Large nodal elements and side branches will depart from it, made of their elements of the same or smaller diameter. In the final form, all the drains provided by the steam room design must be connected into a single pipeline.
Under the end of the outlet pipe, dig a hole to equip the water flow. To check the correctness of the slope of the pipes make a test drain. For this, small portions of water are poured alternately into all drain holes.
The bucket placed at the end of the outlet pipe should pour the same volume of liquid as it was poured into the holes.

The height of the vertical layering is done with a margin. After filling the floor and installing the traps, they will be easily cut. At the same stage, the ventilation riser is mounted.
If the sewerage device in the bath is performed on a site that is located in a region with a cold climate, it is worth taking care of pipe insulation.
For insulation you can use:
- polystyrene half cylinders;
- fibrous materials;
- rolls of foamed polyethylene.
We also recommend reading about how to choose a heater for sewer pipes. To reduce the volume of sounds created by a functioning system, the pipes can be additionally wrapped with sound-absorbing material.

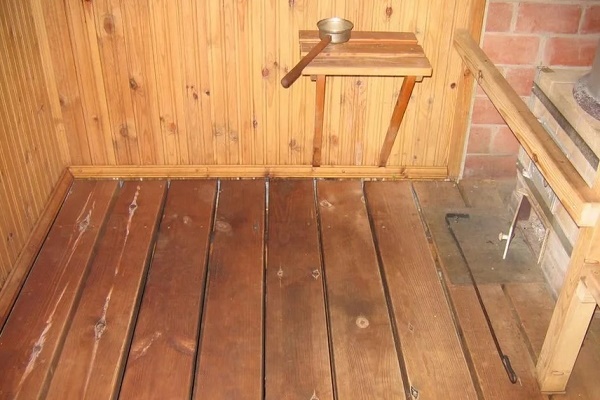
Flooring in the bath can be organized in two ways: by creating a leaking floor, which involves laying boards with a gap of 5 mm, or by creating an inclined surface.
When choosing the second method, it is important to ensure that when laying the topcoat, the slope towards the trap is maintained so that the used water does not accumulate, but immediately flows into the drain.
Sewerage in an already finished building
The dirty water drainage system can also be installed in rooms that have already been commissioned. For this, you also need to draw up a wiring diagram, indicating the connection points. In places of laying the pipeline will have to open the floor.

When installing the drains in the steam room and the washing room, it is important to observe three basic requirements:
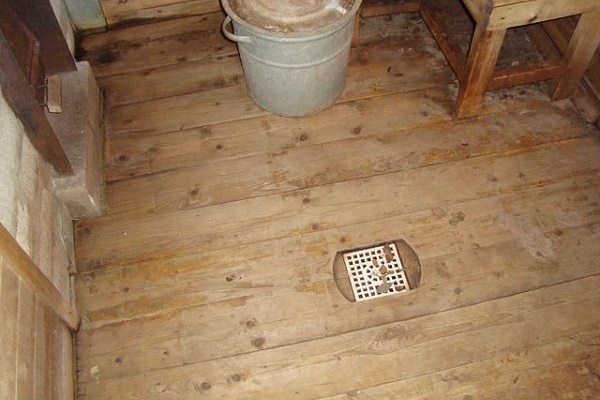
- Drainage ladders in the steam room and bath house are flush with the floor.
- The gaps of the system are treated with moisture resistant grouting compounds.
- Tiles are lined only after the installation of the ladder.
To connect the toilet and arrangement of ventilation, a tee is installed in the toilet.
To reduce the risk of deposits on the walls of the pipeline, which leads to clogging of the bore diameter and clogging of the drainage well, install a filter grate in the shower and drain hatches in the bath. She will pick up bath leaves and small debris.
Outdoor drainage
A key element of the external drainage system is a septic tank. It can be a construction in the form of a drainage well or two-chamber treatment design.
Sewer installation photo guide
If a wastewater treatment plant is selected for waste water treatment before disposal, in addition to connecting to the sewer system, an electrical wiring device will also be required.
The rest of the stages of the arrangement of all types of treatment facilities of autonomous sewer systems are carried out in the same manner.
The construction of a sewage treatment plant
If the bath is designed for a family of 2-3 people, when it is equipped, the toilet is not provided and it is not used as often as possible, you can limit yourself to the construction of a primitive conclusion. For this, having stood the distance indicated by the sanitary standards, they dig out drainage well.
But it can only be installed on soils characterized by a high level of moisture permeability. These include sandy, shallow and coarse soils.

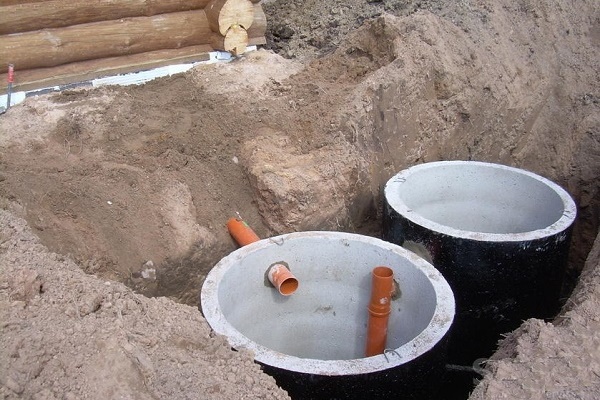
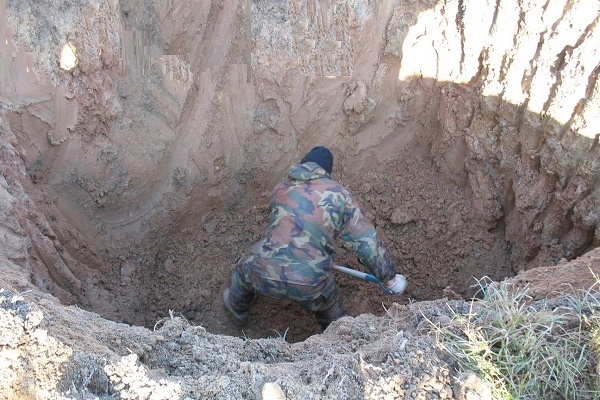
The construction of a treatment plant is performed in the following sequence:
- A pit is excavated in the marked area, the depth of which is 1-1.5 meters higher than the freezing mark of the soil.
- The bottom of the pit is laid out with a 10-centimeter layer of clay.
- Lined with claydite or crushed stone and sand filling, forming a layer with a height of 40-50 cm. It will also perform the function of drainage.
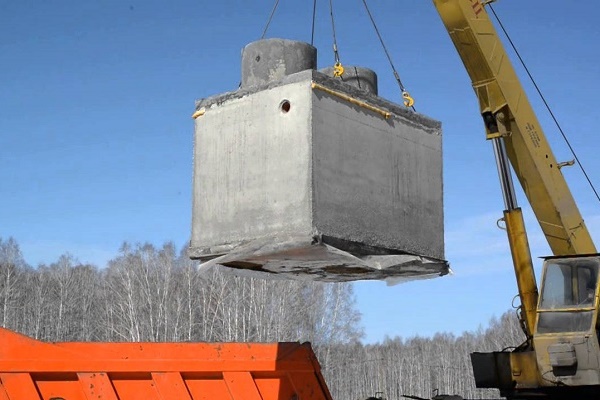
- To prevent shedding of the earthen walls of the pit, they are lined with brick, laying out rows in a checkerboard pattern, or with finished concrete rings.
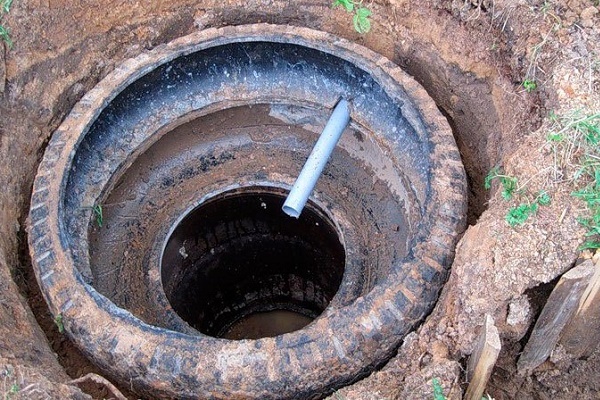
If desired, the walls of the drainage well can be laid out with tires. To do this, dig a pit, the diameter of which allows you to accommodate 4-5 spent tires laid on each other.

To prevent tire displacement after laying the first tier, it is advisable to drive four guide poles around the circumference. To increase the strength of the structure, the contact points of the tires can be treated with bitumen. When laying each tier to eliminate siltation and improve drainage, gravel and pieces of broken brick are poured on the sides of each tire.
In order to learn how to properly equip a septic tank from tires - go to the link.
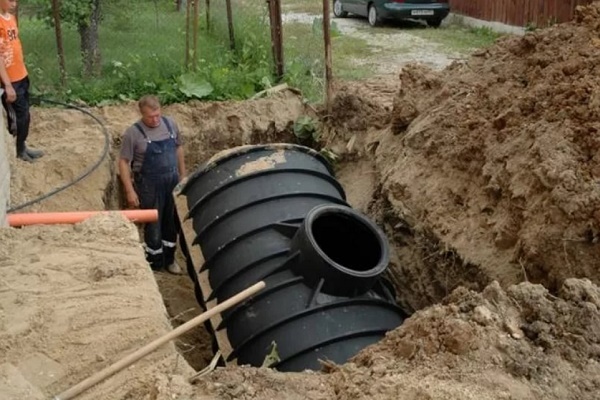
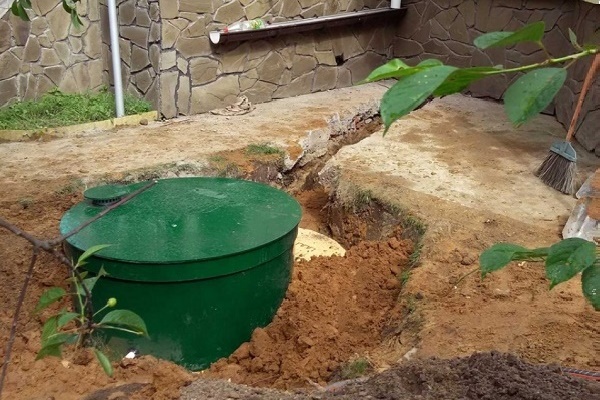
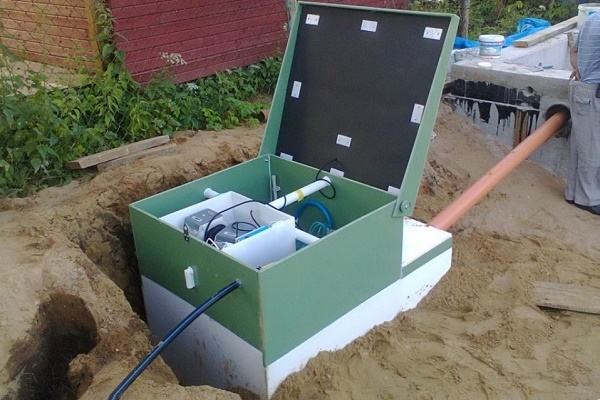
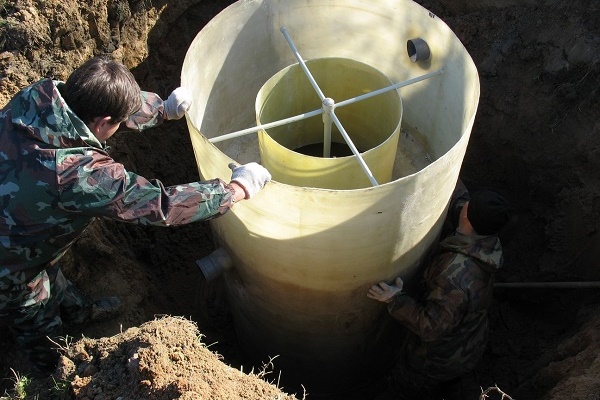
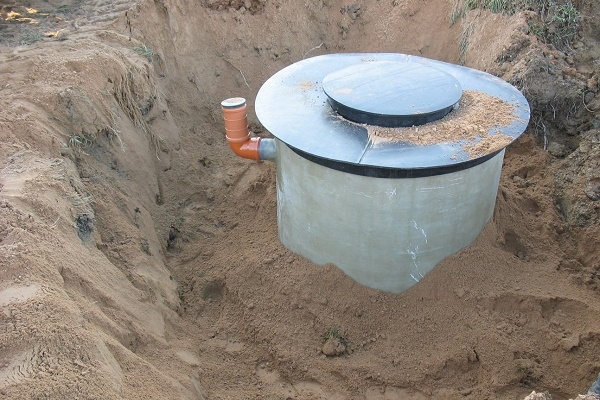
If the soil of the site where the bath is located does not allow water to pass through well, you should consider installing a finished polymer septic tank or acquiring a deep cleaning station.

The main advantage of such systems is environmental safety. Accumulated drains will not be able to seep beyond the walls of waterproof materials, and therefore they will certainly not harm rocks and groundwater.
Due to the vital activity of aerobic or anaerobic bacteria, solid waste decomposes into simple elements, due to which they decrease in volume by a factor of tens. As it accumulates, it is only necessary to periodically pump out the contents of the septic tank, resorting to the services of sewage pumps.
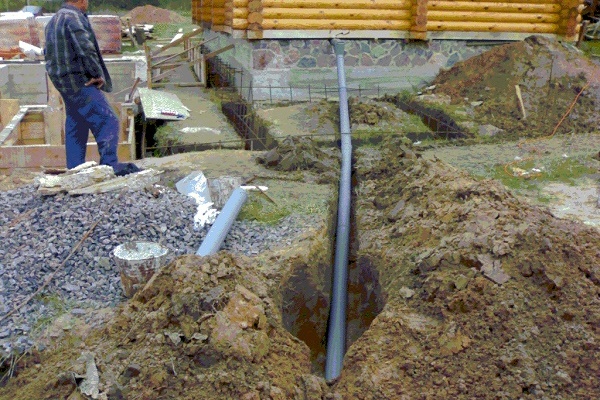
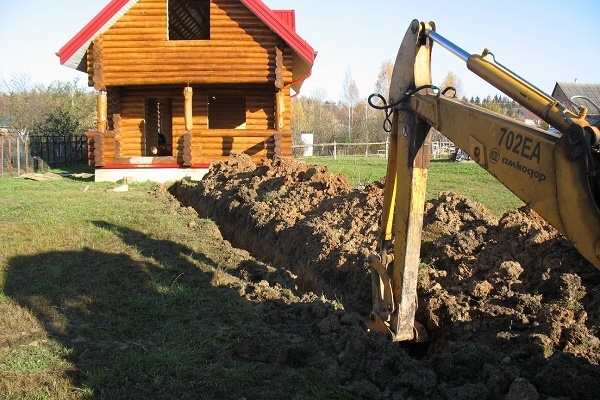
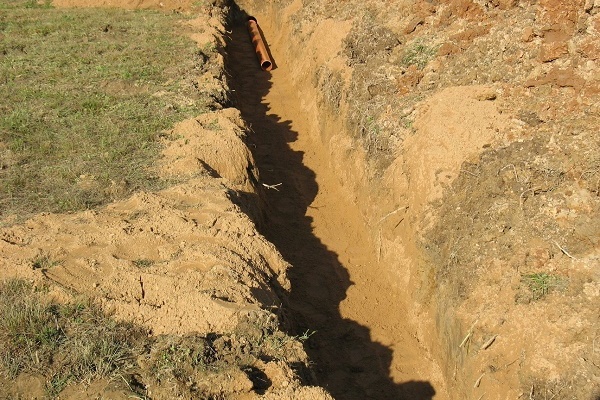
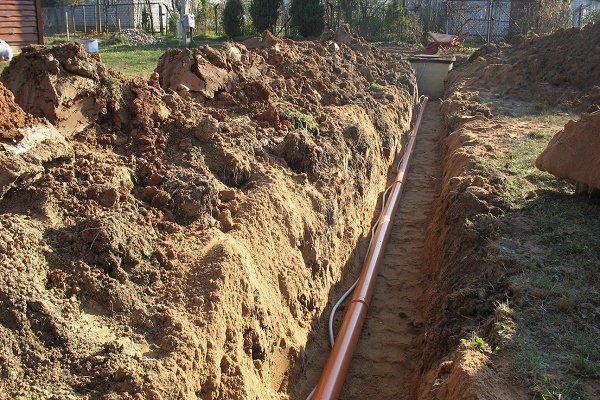
Digging a trench and laying a pipeline
For laying the trunk, they dig a trench, giving it a U-shape. Its depth should be below the freezing point of the soil. The bottom of the trench is thoroughly tamped and leveled, not forgetting to withstand the slope towards the drainage system.
On top of the rammed bottom, a crushed stone “pillow” is lined at the same angle and pipes are laid.
At the turning points of the highway, inspection wells are arranged - pits with a concreted bottom and fortified walls.

To enhance the effect, the inner walls of the manhole are lined with heat-insulating material, and the outer ones are covered with sawdust and earth.
The pipe is led to the drain pit at an angle, having previously made a hole under it in the wall. If the drainage well is made of tires, then the drain pipe is removed between the first and second tires or through a hole made in the upper tier.
The lid for the septic tank can be made of a wooden board or a cut sheet metal. To ensure the flow of oxygen in the lid, a hole is made for the installation of the pipe.
At the final stage, it remains only to make a test drain in order to verify the correctness of the slope of the sewer pipes and ram the area around the walls of the upper part of the treatment plant.
Conclusions and useful video on the topic
The material presented in the videos will help to put the theoretical foundations into practice and avoid mistakes during the installation of sewers.
How to lay sewer pipes:
How to build a septic tank from tires:
In the future, in order to ensure the stability of the sewage system for the bath, it is important to regularly clean the walls of the storage structure. This will reduce the risk of clogged soil filters with silt and silt deposits clogging the flow paths.
If you have personal experience in arranging a sewerage system for a bath, please share valuable tips or subtleties that you know with visitors to our site. You can do this in the block below. There you can ask questions of interest on the topic of the article.
 Do-it-yourself replacement of sewage in the apartment: detailed instructions for replacing the riser and pipes
 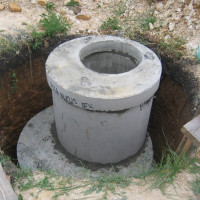 How to make a sewer well: do-it-yourself installation and installation
 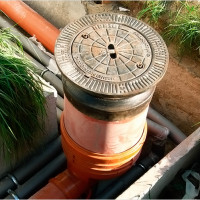 How to make a drainage well with your own hands and bring pipes to it
 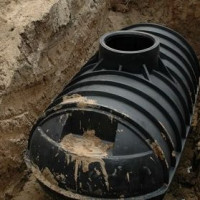 Sewerage in a private house: an overview of the options for arrangement + a step-by-step guide
 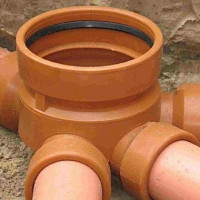 Sewer pipes PVC and HDPE for outdoor sewage: types, characteristics, advantages and disadvantages
 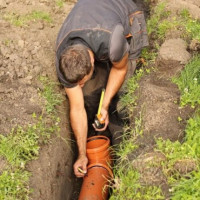 What should be the slope of the sewer pipe according to construction standards
  How much does it cost to connect gas to a private house: the price of organizing gas supply
  The best washing machines with dryer: model rating and customer tips
  What is the color temperature of light and the nuances of choosing the temperature of the lamps to suit your needs
  Replacement of a geyser in an apartment: replacement paperwork + basic norms and requirements
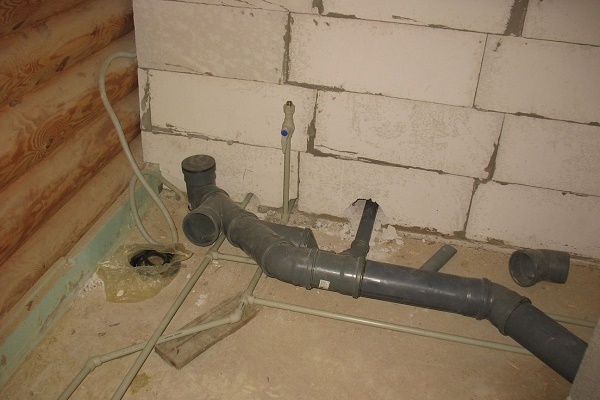
In my bathhouse, for several years, the waste water has been left by gravity. I achieved this due to correctly laid pipes under a slope. And here it is important not to make a mistake with the slope angle, you still need to consider the relief. The main thing is to calculate everything and do not make a cesspool near the foundation or near the well. Ideally, the pipes should be insulated, then not a single frost is terrible.
Igor, that’s why I haven’t read your comment before ?! They also made gravity sewers, but they installed a barrel for draining just a meter from the foundation so that they would not dig a long trench, which they later regretted. A barrel with holes, through it the water goes into the ground. Over the years, this water began to erode and grab land from under the foundation. As a result, the corner of the bath next to the barrel after 3 years began to sag. Do not repeat this mistake!