The design of the country toilet with shower: the choice of the scheme and instruction on the construction

At the dacha, you need a toilet and shower, because only thanks to these facilities can you spend time in your own area with relative comfort. Do you agree? And they should be built before the start of garden work.
If there is no centralized water supply and sewage systems (and this usually happens), you need to consider the design of a country toilet with a shower with a separate cesspool. The best option - combined buildings with a partition under one roof. We will tell you what a joint toilet and shower project should be like and what it will take to implement it.
The article provides useful recommendations from experienced professionals on how to properly design a project and build a joint building with your own hands. The material is accompanied by thematic videos that will help to put into practice the completed project, as well as enrich with new ideas.
The content of the article:
Features of combined design
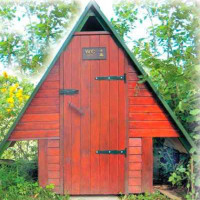
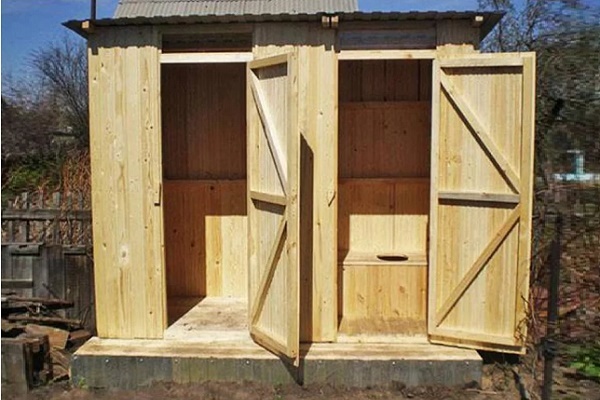
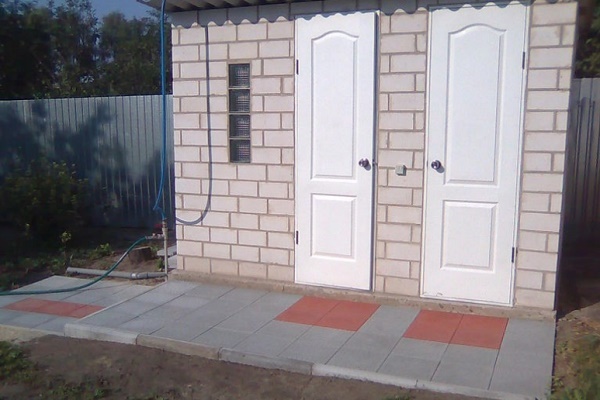
Combined shower and toilet are one building under a common roof. The rooms are separated only by a wall, and the entrance to each of them is separate. A tank is placed above the shower. It is installed on the roof and water is supplied through the pipes, a crane and a watering can are mounted.
If there is a washbasin in the toilet, then water should come into it from a common tank. In the same way, water is brought into the toilet if they decide to install a standard toilet with a drain.
However, in the country they rarely put such plumbing fixtures, they are much more likely to get by with a standard "hole in the floor" with a cesspool.

If a cesspool is used to accumulate drains from the toilet and shower, it should be located at least 20-25 m from the source of drinking water. In areas where it is not possible to comply with the standards, it is necessary to carefully concrete the bottom of the pit.
This is to avoid accidental contamination of drinking water with fecal bacteria.
A toilet with a shower is built at a distance of 10 m from residential buildings (both own and neighboring). Violation of sanitary standards in this case threatens to flood the foundations and basements if the pit is overfilled during spring floods and / or depressurized. The distance to the fence should be at least 1-3 m.
When planning the location of a toilet with a cesspool, one should take into account the distances not only to buildings, but also to communications:
- to asbestos-cement pipes - 5 m or more;
- up to cast-iron pipes with a diameter of less than 20 cm - 1.5 m;
- up to cast-iron pipes over 20 cm - 3 m;
- to gas - 5 m or more.
It happens that the site is too small or its location does not allow to withstand even the minimum distances between objects recommended by SNiP. In this case, it is worth consulting at BTI how this issue can be resolved.

Building a toilet and shower under one roof has several significant advantages:
- Compactness. Cottage is a place not only for relaxation, but also for growing vegetables, fruits, berries. Each square meter should be used with maximum efficiency. The construction of the combined structure solves the problem of lack of space.
- Saving building materials. Any construction is a cost, and the lower it is, the better. The foundation is especially expensive. If it is one in two rooms, this is already a reduction in costs. If you add more savings on roofing materials and load-bearing walls, the benefits are obvious.
- Time saving. The construction of two structures takes much more time than the construction of one. You get two vital constructions for almost the same period as one, because the most energy-intensive work (digging pits, pouring foundations) is done immediately for both structures.
- One drain pit. Arranging a drain pit requires effort, time and money. If she is alone, this is a significant savings. An additional plus is less unpleasant odors on the site, as The "aromatic" zone is also only one.
There is one serious drawback, but a big one: when bathing in the shower, the smell from the toilet may disturb, but this is a solved problem. If the vent pipe is led above the roof of the building, you can generally avoid unpleasant odors.
Below is a video in which the design of the odorless toilet ventilation is described in detail.

Before building a summer shower, you should carefully consider how water will be collected in the tank. The ideal option is a pump and a hose.
If there is no way to pump water from the source into the tank, it will have to be carried manually in buckets and raised to the roof of the building, which is quite difficult. To make work easier, you need to plan for wide, comfortable walkways.
What to consider when developing a project?
As for any other construction, a project is prepared first for a combined toilet with a summer shower.
When developing it, one should take into account such nuances:
- The layout should be comfortable. Separate entrances are provided for each room, so care must be taken that access to both doors is free. The toilet and outdoor shower should be convenient to use. If the family has children, elderly people or people with disabilities, their needs must be taken into account.
- The project takes into account the features of building materials, finishes. The loads on future designs and, accordingly, the choice of the type of foundation depend on this.
- The area and height of the premises are calculated based on the personal needs of family members. Most often, structures are built 2.75x2 m or 3x3 m. The height can be 2 or 2.5 m, depending on the growth of family members. Too low rooms are uncomfortable, and in excessively high rooms it can be difficult to get to a shower head.
The calculation of the area also depends on the number of plumbing fixtures and furniture. If you build spacious rooms of 1.3x2 m, then there is enough space for a shower, bench, shelves and washbasin. In addition, the rectangular shape facilitates the task of arranging furniture and plumbing.

The more carefully the project is developed, the more convenient and durable the design will turn out. You should not start construction before every little thing has been thought out, because it is much more difficult and expensive to complete and rebuild than once to provide all the necessary amenities.
Step # 1 - choosing materials for construction
The choice is small: usually it comes down to just two materials - wood and brick. For long-term construction, which will be used for decades, it is better to choose a brick. It is durable, well tolerates the effects of negative external factors.
The disadvantage is that you have to equip a reliable foundation. This involves considerable expenses.
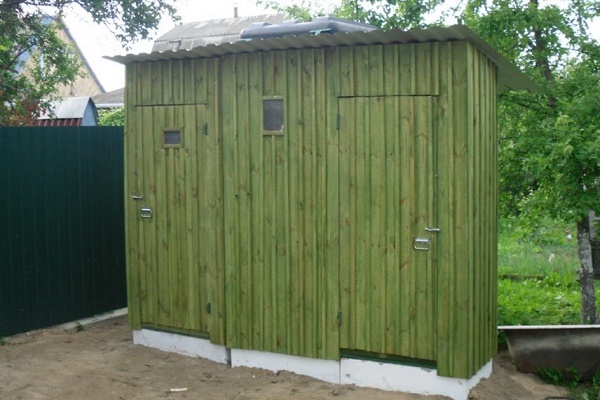
A wooden building is cheaper, it can be built faster, but this is not the most durable option. On the other hand, it is difficult to build capital structures on loose soils, and it is better to choose lighter wooden structures for them. If desired, they can be trimmed outside so that the tree spoils less.

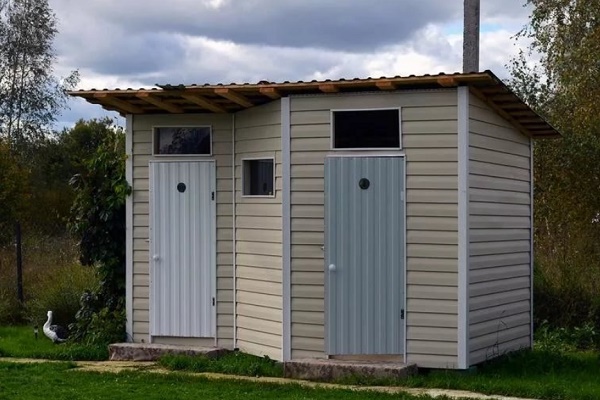
Sometimes they build metal combined toilets with a summer shower. This is a difficult task because need a welding machine.
The building itself may not live up to expectations and will quickly collapse due to corrosion, as there is constantly high humidity in the shower. Another option is slate, but it is fragile, and the walls of it are short-lived.
Step # 2 - arranging a cesspool
There are two main types of cesspools - with filter bottom and sealed. The first ones are simpler in construction and do not require special maintenance costs, and to clean the sealed pits you have to call the scavengers.
There is a caveat: although many summer residents are building filter pits, this is prohibited by sanitary standards, because may cause pollution of aquifers.
For the construction of a cesspool, a variety of materials and designs are chosen:
- brick;
- reinforced concrete rings;
- monolithic concrete;
- plastic containers or metal tanks;
- improvised materials.
It is easiest to build a capital sealed pit of brick. To do this, they dig a square foundation pit of the desired diameter, compact the soil, equip a sand cushion and fill the bottom of the pit with concrete.
When the material hardens, they build walls of brick (the structure should rise 10-20 cm above the ground), plaster and waterproof them with bitumen mastic. A detailed briefing on the construction of a brick drain pit we brought here.
Often, leaky brick pits are also built. In this case, a filter bottom is made, and the brick is laid in a checkerboard pattern, leaving gaps. Such designs do not waterproof, because water goes into the ground, and in the pit itself there is only sludge that needs to be removed occasionally.

A sealed pit is best built from monolithic concrete or reinforced concrete well rings. For waterproofing septic tank from rings use penetrating compounds or bitumen, bitumen-polymer mastics.
Combinations of different types of materials are possible to create a durable and reliable waterproofing layer.
As cesspools, volumetric barrels are installed with a bottom (for sealed) or without it (for filtering). To familiarize yourself with the scheme, calculations and rules for arranging a pit from a barrel, go to this link.
You can also build a construction from improvised materials, for example, from old used tires. A lot of options, especially if the drain from the shower will be equipped separately.
Arrangement of a toilet without a cesspool
Sometimes it is not possible to build a cesspool due to the close occurrence of an aquifer. Then you can take the drain pipe from the shower to a compost heap and put a dry closet or powder-closet. Dry closets are sold ready-made. They are suitable for installation both outdoors and indoors.
Powder closet is a structure with a small sealed pit in which sewage is sprinkled with peat. The pit is regularly cleaned, taking its contents to compost. If you do not live in the country during the entire summer season, this is a good option.
To make it easier to use powder-closet, make a toilet seat with a lid, and cover the waste container with a covering. It is best to provide a special door to remove the tank. Ventilation - required.

Relatively recently, an interesting modern variety of powder-closet has appeared - peat toilet. The principle of its operation is the same, but the peat tank is located directly inside the structure. When it is filled, it is removed and cleaned. After that, the toilet is ready for use again.
We recommend reading our article on the specifics and ways to clean the toilet peat and liquid type.
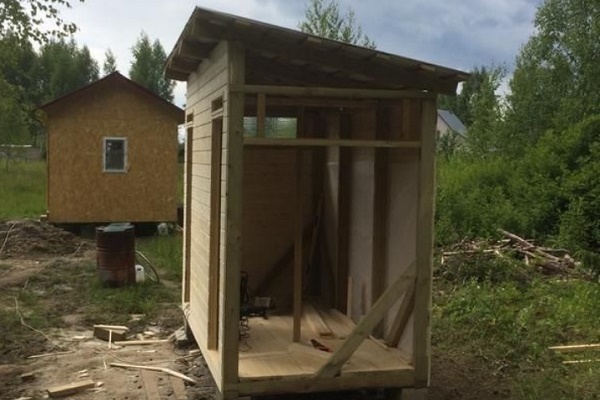
Let us examine an example of the construction of a complex from a shower room with a toilet for a summer cottage, located in a frame building 3 m long, 1.5 m wide:

An example of a hosblock building with a toilet without a cesspool will help to understand the intricacies of the process:
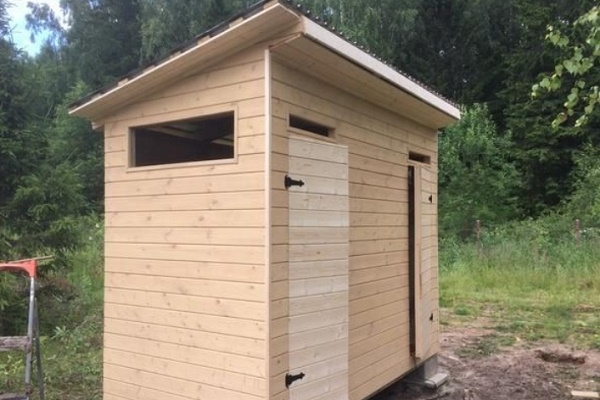
After finishing the cladding of the facade and the back wall, we proceed to the device of windows, installation of doors and arrangement of the internal space:
Self construction toilet with shower
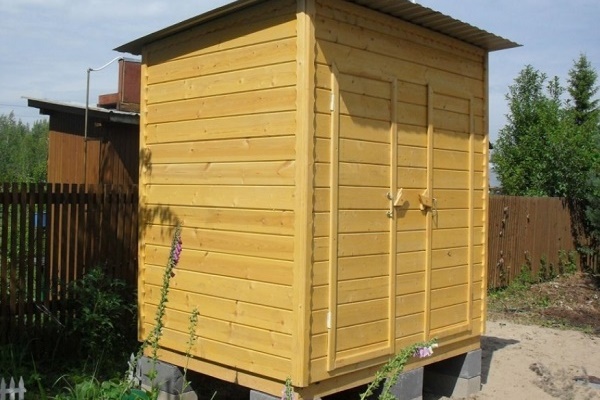
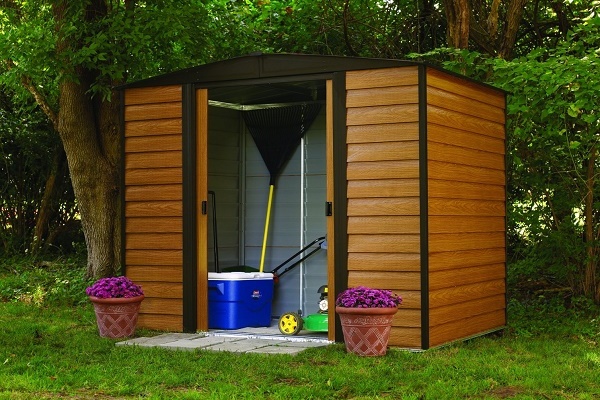
Consider the option of building a toilet with a summer shower made of wood with your own hands. The construction is relatively light, it can be installed on almost any soil. Under it, a columnar foundation is required.
The roof can be equipped with a gable roof and covered with metal tile or other suitable material.

Before starting construction, you need to purchase materials:
- bars (for the upper and lower harness, vertical supports, roof frame);
- edged boards (for lathing, rough floor);
- OSB sheets (for final floor, ceiling);
- pipes (for sewage and ventilation);
- plywood (for formwork);
- metal tile (for roof);
- bulk materials - gravel or crushed stone, sand;
- metal corners (for attaching the bars).
Sawn timber must be dry (permissible humidity is not higher than 22%). There should be no defects on the boards and bars: knots, cracks, signs of fungal damage.
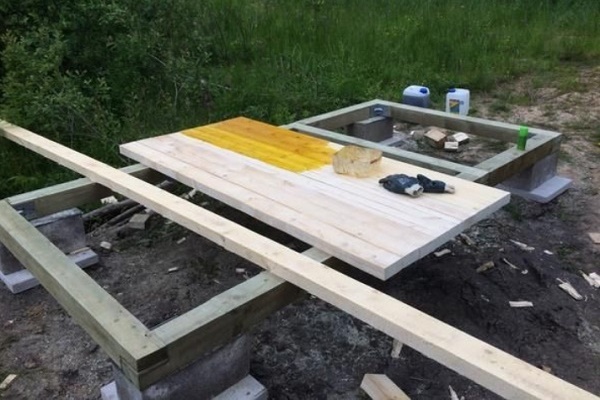
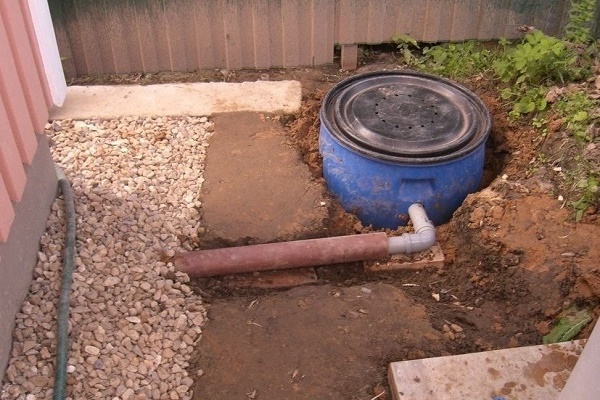
Stage # 1 - arrangement of a cesspool and foundation
To begin with, the site is marked out under the foundation and cesspool, after which they begin excavation. A pit is excavated under the pit with a perimeter of 1 x 1.5 m, depth from 1.5 to 2 m. The walls are reinforced either with concrete or brickwork, and the bottom is concreted.
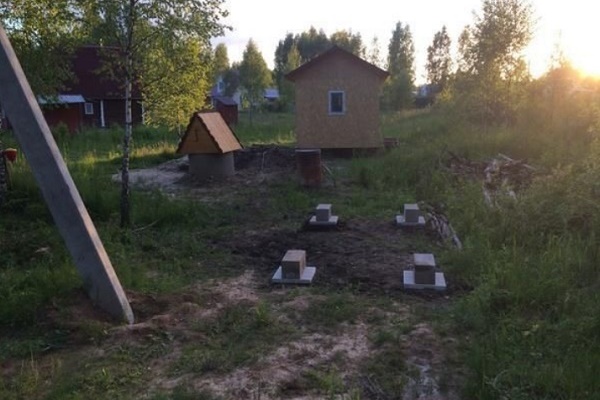
When the pit is ready, you can begin to build the foundation. Small holes (20 cm) with a depth of 0.8 m are made under it. A sand cushion (10 cm) is placed on the bottom of the holes and carefully packed.

In the finished holes, formwork, reinforcement are installed, concrete columns are poured and left for 2-3 days to solidify the material. After that, it is already possible to remove the formwork. If it is hot outside, it makes sense to cover the concrete for a drying period so that it does not crack due to the rapid evaporation of moisture.
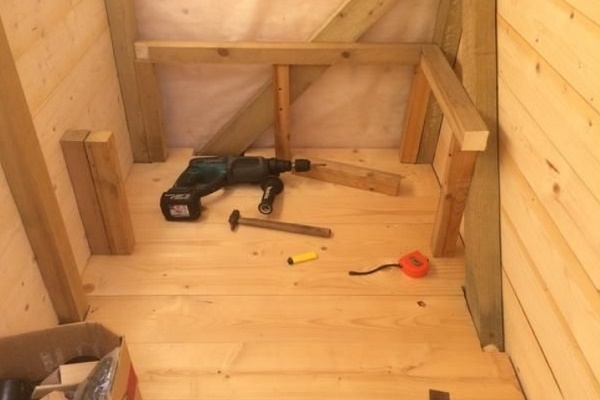
Stage # 2 - construction of the structure
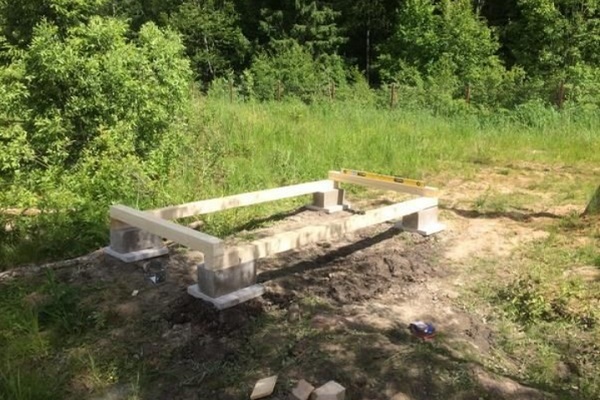
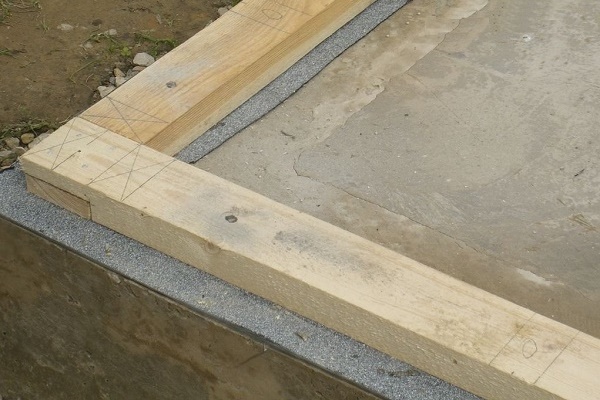
A drain pipe is installed under the shower so that moisture does not accumulate under the structure and does not destroy its lower part. After this, you can proceed with the construction of the lower harness.
The bars are connected with wooden elements, and fastened to concrete with metal studs. A metal frame is made of a channel above the pit.
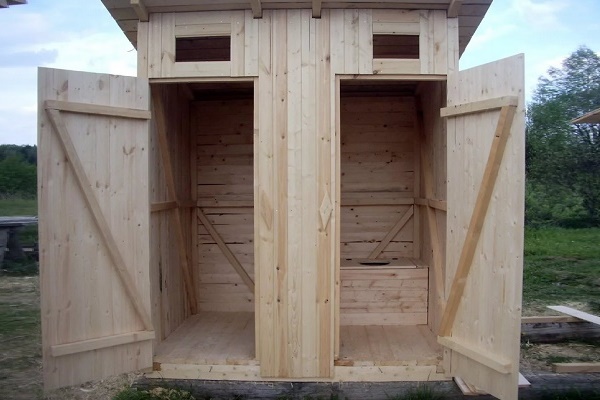
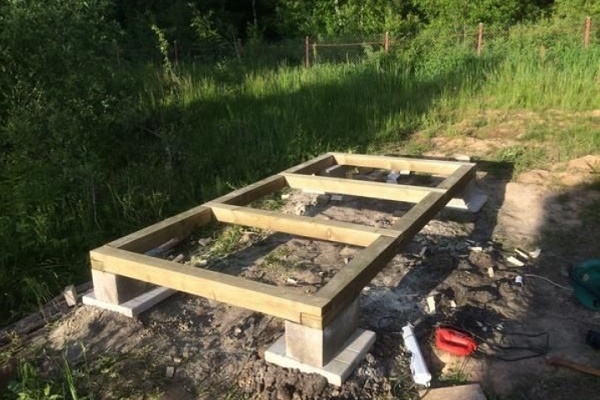
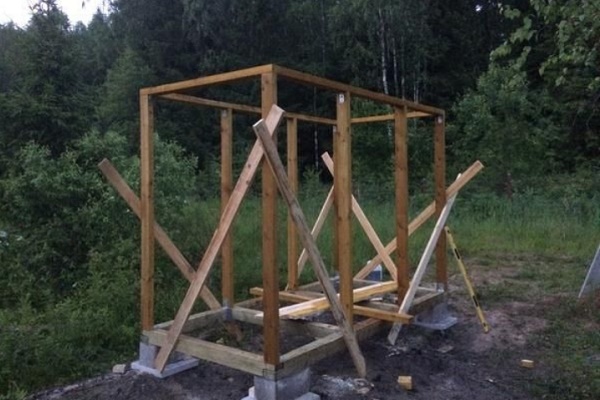
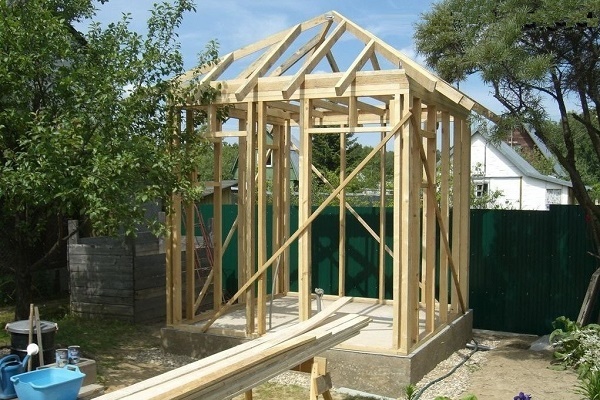
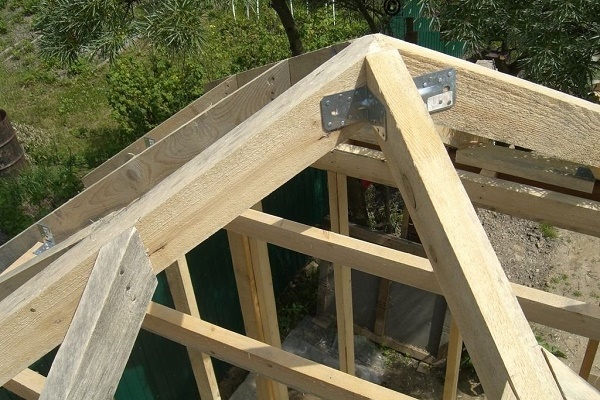
For the construction of walls at the corners, a frame of beams is installed, and in the place of the doorway two columns are placed at a distance of 77 cm from each other. If everything is installed correctly, you can proceed with the arrangement of the upper harness. It is mounted on self-tapping screws, metal corners and plates.
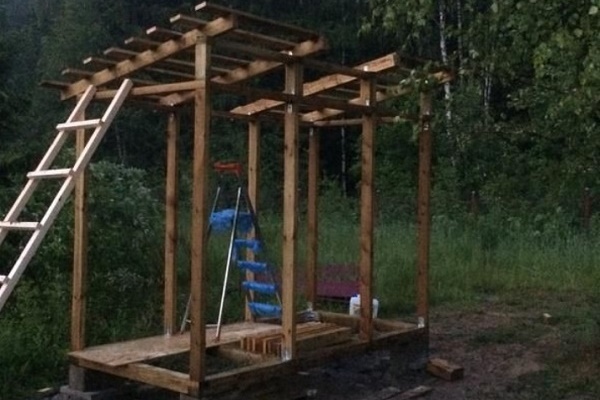
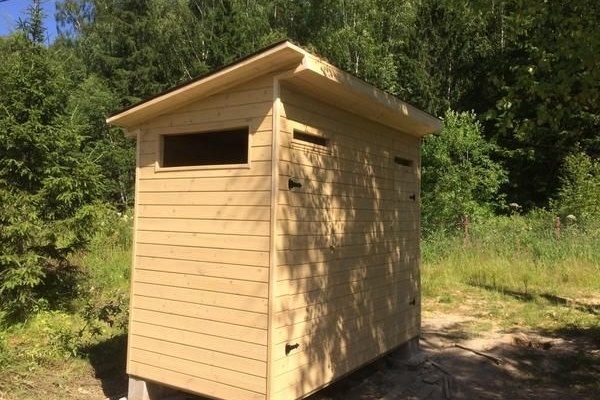
A skate board is attached to the upper harness. Rafters are made of boards with a pitch of 65 cm, after which the crate is installed. The boards should protrude 20 cm beyond the edges of the vertical structure. Later they will serve as a visor. Next, wind boards are fixed and the roof is covered with metal tiles.

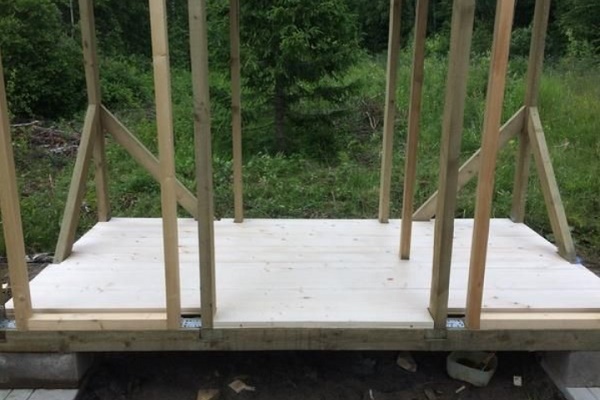
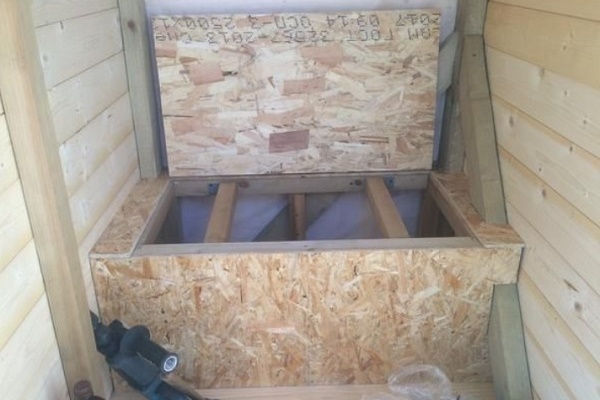
The floor is laid from boards with a thickness of at least 4 cm. They are fixed with screws to the lower harness. Immediately make the frame "steps" for future elevation and sheathe it with 2 cm thick boards.
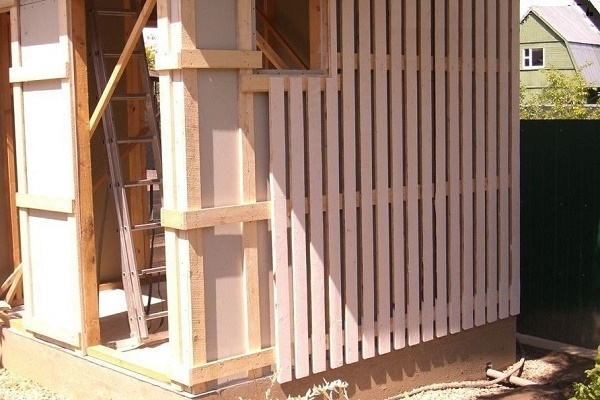
It remains to insulate the structure with foam and blow out the cracks with construction foam. The outer walls and ceiling are planked.
Stage # 3 - arranging a shower and toilet
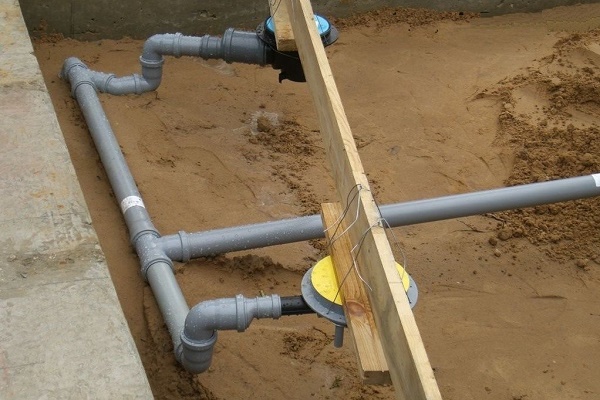
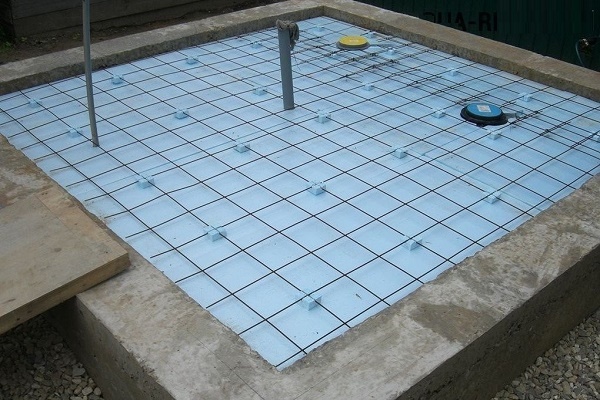
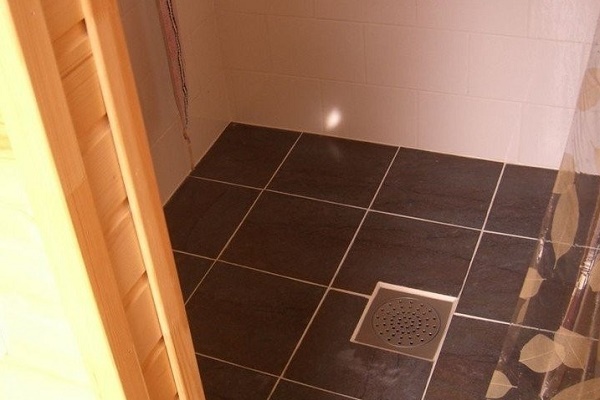
To equip the drainage system, a ditch is dug and a sewer pipe is laid, which is connected to the drain. Floors in the shower are covered with gravel, reducing the thickness of its layer near the drain hole.
Crushed stone is poured with concrete so that after solidification a floor is obtained with a uniform slope to the drain from all sides. The surface is waterproofed with bitumen mastic.
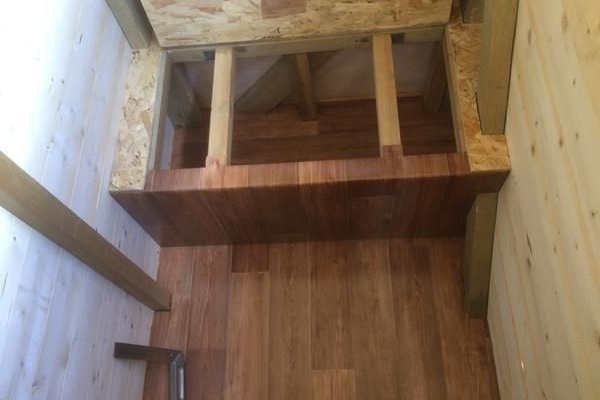
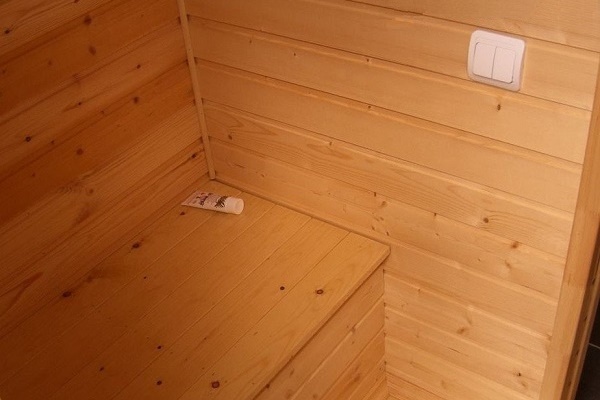
A wooden floor with a distance between the boards of 1.5-2 cm is laid on top of the concrete floor.The walls are lined with boards and treated with waterproofing agents, antiseptics.
After that, all surfaces are exposed with two layers of yacht varnish. Exterior sheathing is treated in the same way.

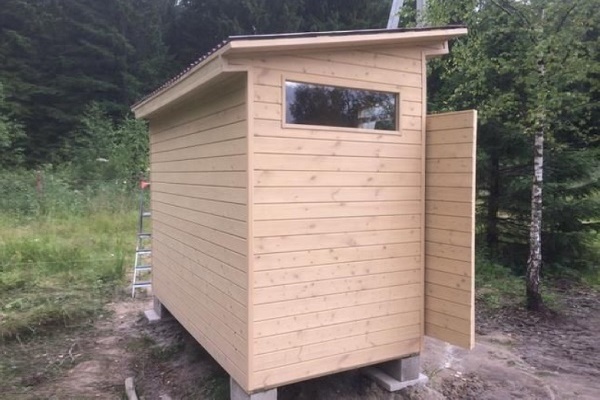
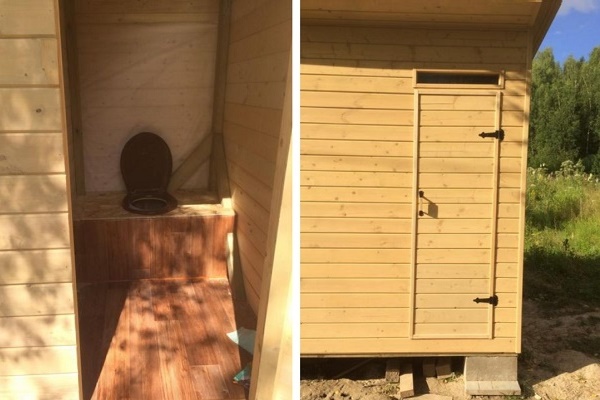
A tank is placed on the roof of the structure, drain pipes are removed, and ventilation is installed in the toilet. It only remains to install the doors, take care of connecting the electricity for the use of the premises in the evening, mount the shower head and equip the toilet seat.
Photo-instructions for home masters
A construction with a sewer system will require more funds, time and effort, but in operation such a hosblock will be much more convenient:

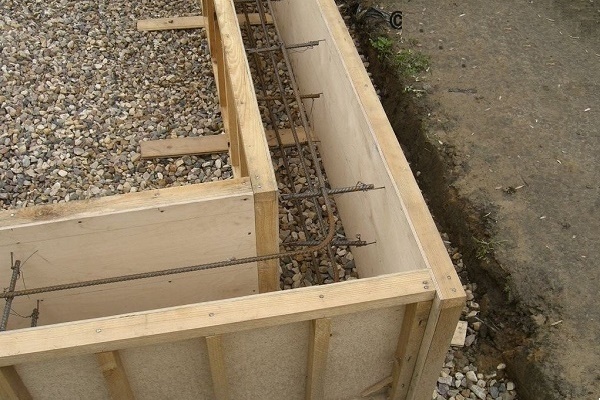
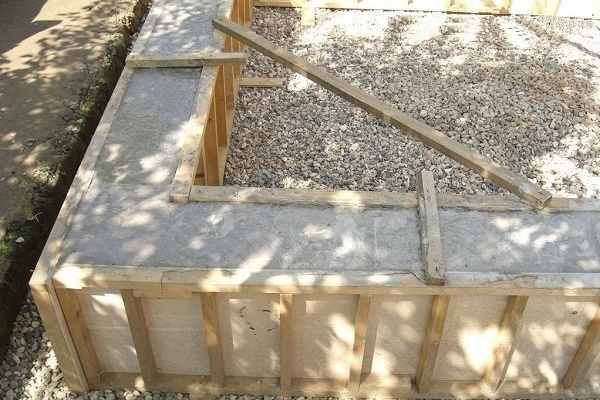
To create a shower-toilet complex with a drain pit from a shower box, you must first develop a shallow pit.
The sides of the pit are 4 m each, the depth is 0.3 - 0.5 m, then:
The building frame is ready, now we proceed to wall cladding and to the internal arrangement of the block:
Conclusions and useful video on the topic
When choosing a project and building a toilet and shower under one roof, it is easy to make a mistake. Sometimes even experienced craftsmen have difficulty, and for beginners it is even more difficult to understand the nuances.
We offer videos that can solve some issues and enrich with new ideas.
The video shows one of the successful options for interior and exterior decoration of the toilet with shower:
Step-by-step video tutorial on building a wooden structure covered with slate:
The video is devoted to the issue of arranging ventilation, which allows you to completely get rid of the smell in the toilet:
Actual information on the construction of a budget cesspool of tires:
There are many options for arranging the toilet and shower in the country, and they all have their own advantages and disadvantages. It is only the owner himself who can correctly assess the conditions on his site and choose the right project. The main thing is to take into account all the nuances and calculate your strength.
By building a comfortable toilet with shower, you and your family will be provided with quite comfortable living conditions at the cottage throughout the summer season.
You have chosen a suitable project for the construction of a comfortable country toilet, but you still have unexplained questions that we did not touch upon in this article? Ask them in the comment block - our engineer will try to help you.
Or maybe you have already completed the construction of a toilet with a shower? Share a photo of your building and tell how successful the chosen scheme turned out to be for you.
 Drawings of a country toilet like a hut: typical schemes and an overview of construction nuances
 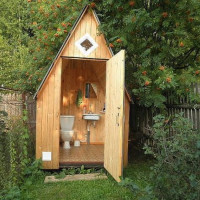 Drawing of a country toilet: popular building schemes for an independent project
 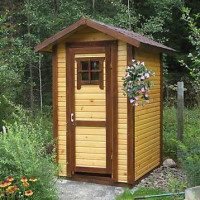 DIY toilet in the country: step-by-step instructions for building
  How to make a summer shower with your own hands: schemes of common designs
 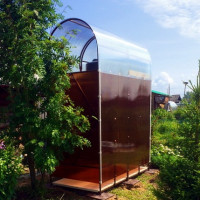 Polycarbonate summer shower: step-by-step construction instructions
 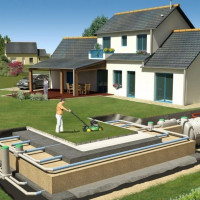 How to make a sewer of a country house with your own hands: the best schemes and options for arranging
  How much does it cost to connect gas to a private house: the price of organizing gas supply
  The best washing machines with dryer: model rating and customer tips
  What is the color temperature of light and the nuances of choosing the temperature of the lamps to suit your needs
  Replacement of a geyser in an apartment: replacement paperwork + basic norms and requirements
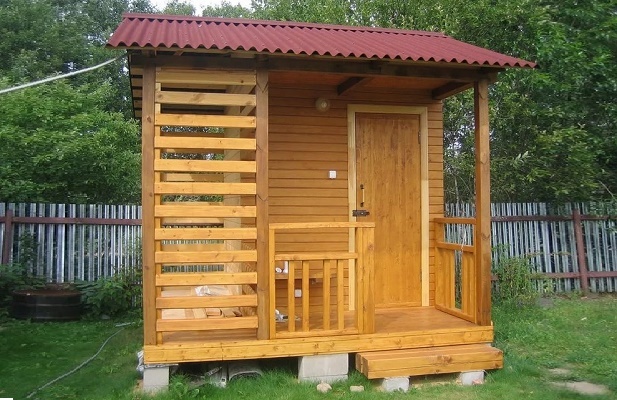
At the end of the garden, they also decided to put a country toilet, but they made us its body to order. They dug a hole themselves in a few days, reinforced the walls with bricks, and did not do anything with the bottom. For the shower, a drain was built in advance, the floor was tiled. After the cabin was brought in, everyone installed it, put the tank on the sunny side for water, for several hours it easily heats up. Everything turned out inexpensively, but it is very useful in the household.
A couple of years ago, too, they decided to make a toilet and an outdoor shower in the country. The house has all the amenities, but the plot is large, the toilet on the street would not hurt. And taking a summer shower is somehow much more pleasant for me. I thought I couldn’t do it myself, I already planned to hire workers. But in the end, I watched a lot of videos and went through a bunch of sites, it turns out there is nowhere to make it all with your own hands. If someone else thinks it's hard, read even the information that is listed here, everything is clearly and accessible shown.