DIY roof gutters: instructions for self-manufacturing a drainage system

Roof gutters are part of a full-fledged gutter engineering construction of buildings. The system is designed to ensure the collection and removal of precipitation products (rainwater, melt water), thereby fulfilling the function of protecting the facade, foundation and adjacent elements.
Typically, the device of such systems is the prerogative of professional builders. However, making roof gutters with your own hands is also quite possible. Let's figure out how to do it.
The content of the article:
Gutter system of residential buildings
To have an idea of how to make gutters for the roof of a house or a barn with your own hands, at least basic information about the system as a whole is needed.

The design, designed to protect the foundation of the building, to prevent erosion of the soil and flooding of the basement, consists of the following prefabricated parts:
- gutters;
- gutter mounting brackets;
- drainpipes;
- connecting elements of direct branch pipes (couplings);
- fixing collars of drainpipes;
- tees, contours, plums, plugs;
- funnels and grids of water collectors.
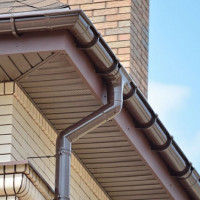
Bypass gutters - mounting elements assembled from separate trays, including corner ones.
The gutters are placed directly below the lower edge of the roofing and are fixed with brackets.
Thanks to the gutters, water is collected over the entire roof area and the collected fluid is redirected to the locations of the funnels of the drainpipes.

About pipes and fittings
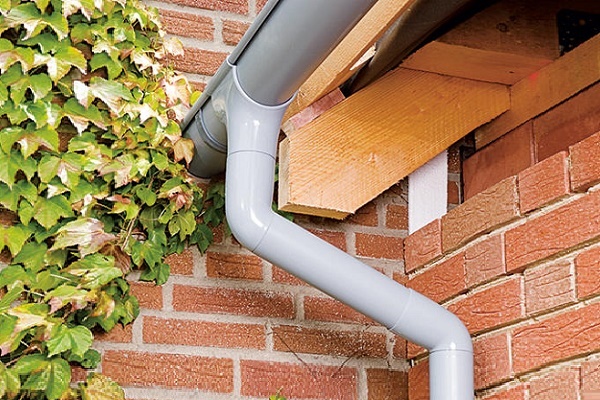
A constituent element of the system is drainpipes (metal or plastic, round or rectangular), designed to discharge water from the level of the uppermost floor of the building to ground level.
Drainpipes are assembled from several separate pipes connected to each other by connecting elements. The fully assembled pipe is fixed vertically with mounting clamps.
Additional elements of the drainage system are plugs for gutters, contours, tees, funnels, protective nets, gratings.

The gutter caps are installed at the ends of the gutter lines, have a variety of configurations and shapes (right-handed, left-handed, universal). Due to the contours, neat installation of pipes is carried out on complex architectural sites. Tees provide technical stains, and funnels, nets and grids contribute to the effective removal of water.
We also recommend reading our material on how to independently calculate the amount of materials needed for drainage system.
Self drainage system: instruction
With basic knowledge, it is already easier to solve the problem of how to make gutters from the roof of a private two-story house. But for a complete picture of possible projects, it is advisable to also get acquainted with the methods that are used to build such systems.
There are two ways (except for the so-called unorganized system):
- The device of the internal drain.
- The device of the external drain.
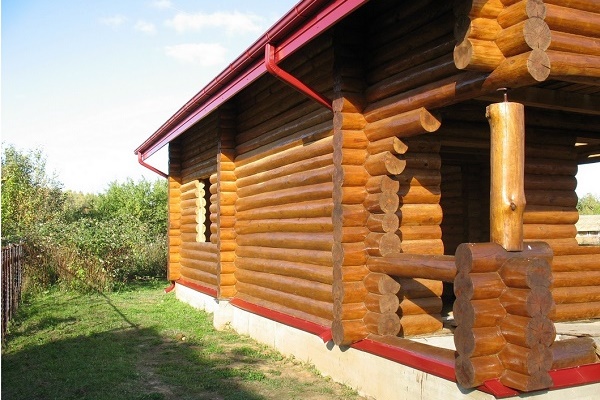
The first method is widely used on buildings of several floors (more than two). The peculiarity of the scheme is obvious - drainpipes are mounted inside the building with their placement in close proximity to the bearing walls.

The second method of outdoor installation of drainpipes is almost always used for private low-rise housing construction. It differs from the first method by the placement of gutters outside the building.
Quick photo guide
The steps for assembling and installing the gutter system are carried out in a standard manner. We will analyze the construction option produced after the installation of the roof. A wizard who wants to make a drain has to perform the following steps:
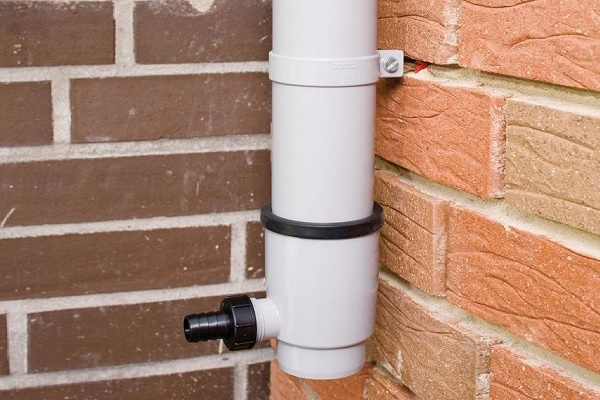
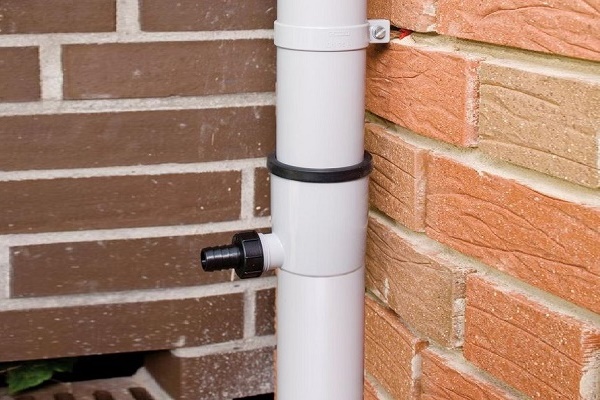
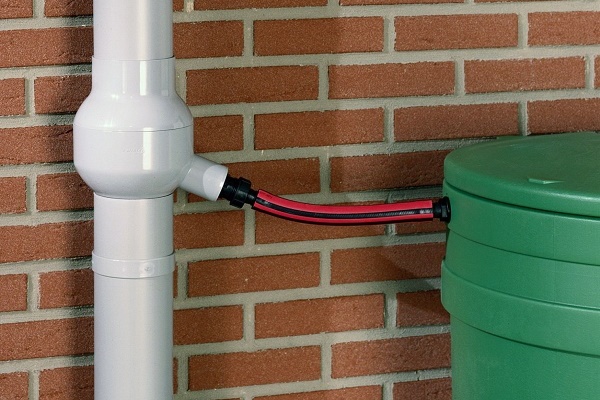
To collect and drain rainwater to the gutter, you need to attach a drainage funnel and a riser, through which water will drain either into a container for its collection or into a storm sewer:
Installation of a drainage system
As a rule, work on the installation of the drainage system begins to be carried out before the start of laying the roofing or at the final stage of laying the lower roofing sheets.
However, if the roof structure allows you to mount the gutter on the cornice (frontal) board, the drain can be made after laying the roofing carpet. But the work on the facade of the building should be finally completed in any case.
The sequence of actions is as follows:
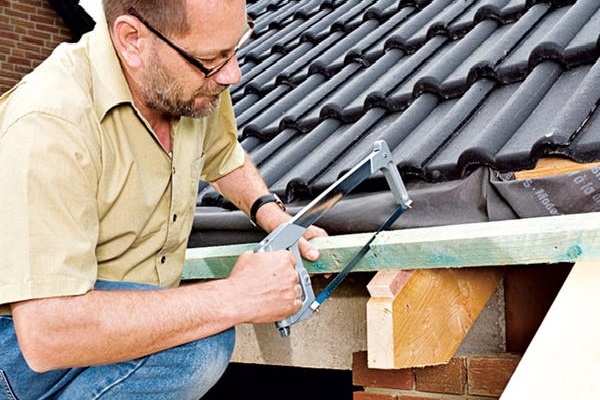
- Mounting gutter brackets.
- Assembly, installation, fastening of drainpipes.
- Drainage system.
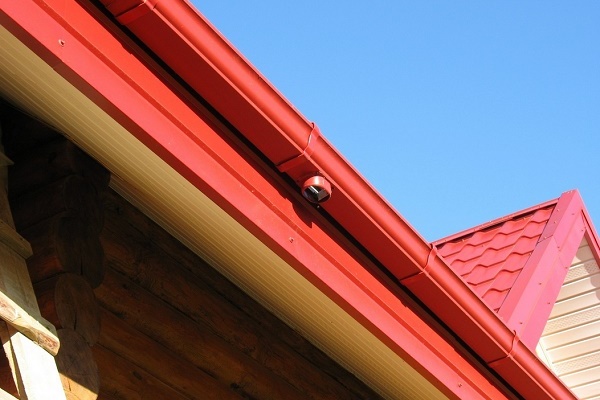
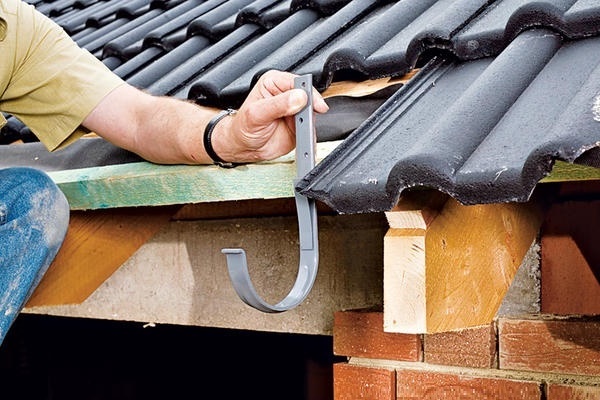
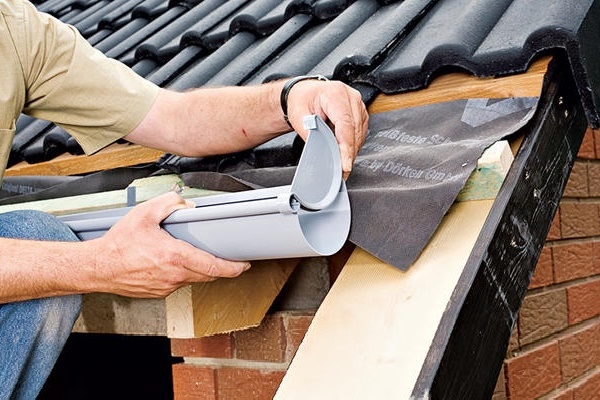
The brackets that will hold the gutters in a horizontal position are fixed on the bottom board of the crate, preferably at the point of its abutment on the rafter beam. Or fasten the brackets to the cornice frontal board. In any case, the frequency of mounting brackets relative to each other is not more than 600 mm.

The brackets should be mounted so that after mounting the gutters, their front edge is 20-30 mm below the line of the roof plane.
Bias and indentation control technique
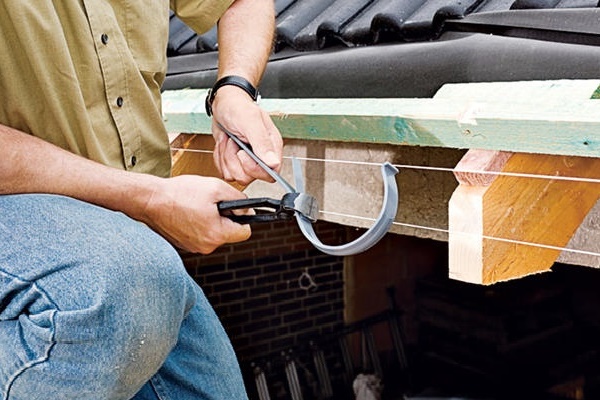
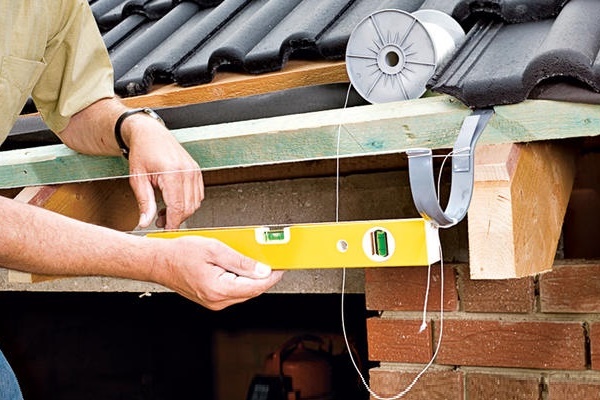
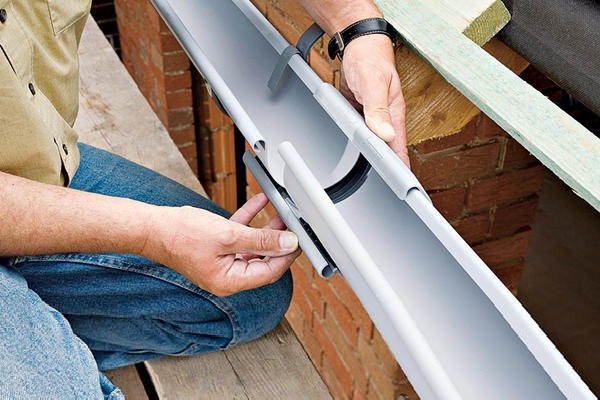
When creating a gallery of brackets, it is necessary to take into account the slope towards the prefabricated funnel of the drainpipe. To do this, taking into account the specified slope, the initial and final gutter holders are mounted and the control cord is pulled between them.
The permissible slope of the gutter is 2-3 mm per meter of length. Indentation from the extreme end lines of the roof to the first and last brackets is done at a distance of 50-100 mm.The same standards apply to the distance from the bracket to the receiving funnel of the drainpipe.
Using the control cord (the second thread stretched between the brackets), the “run-out” of the front edge of the fasteners relative to the conditional edge of the roofing is also controlled. Here, the distance from the conditional edge of the coating to the front edge of the gutter bracket should be equal to the maximum radius of the semicircle of the mounting bracket, at least 1/3 of the radius.

At the end of the installation, gutters are laid with their subsequent fixation with special protrusions of the brackets, installation of end caps and receiving funnels.
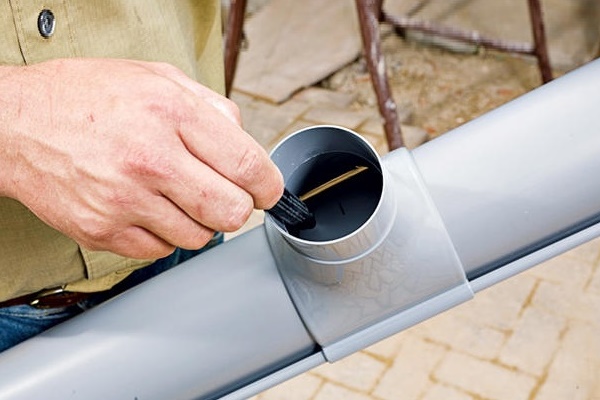
Production funnel
For the connection of the gutter with a drainpipe, the installation of a receiving funnel is necessary. Do-it-yourself installation of this part in the system is easy.
The process is as follows:
- Take the structural part - the receiving funnel.
- Attach the bottom to the wall of the gutter and outline the contour of the hole.
- Drill a hole in the wall of the gutter along the marked line.
- Strip the edges of the hole with sandpaper, coat with glue.
- “Fasten” the part to the gutter with locks, aligning the holes.
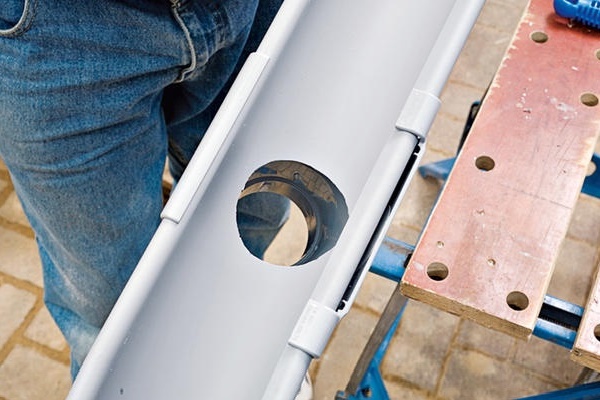
There are several options for receiving a funnel on the gutter. For example, instead of drilling a hole with a crown mounted on a drill, you can make a through hole with two counter-cuts using a conventional hacksaw for metal.

It should also be noted that in some cases of installation, the introduction of compensation (sensitive to thermal expansion) receiving funnels is required. Such parts are placed between two cornice trays and fastened in a standard way on special locks without the use of glue.
How to make drainpipes from the roof?
The calculation of the number of drainpipes is done according to the number of receiving funnel gutters and depending on the height of the building. According to standards, for 10 meters of the length of the gutter, one receiving funnel is enough.
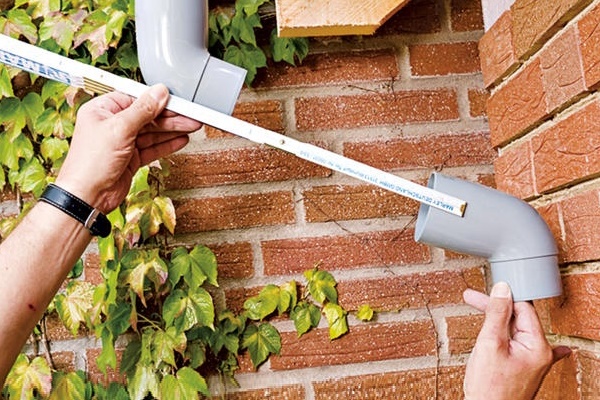
The length of the nozzles for industrial gutters is usually 3-4 m. When assembling, it is recommended that emphasis be placed on the minimum number of nozzle connections. That is, the optimal installation option is the use of nozzles with a length of 4 m.
Together with straight nozzles, two standard contours (angle 112º) and one drain for each unit of the drainpipe will be required (subject to the traditional design of a residential private house).
From the outlet of the receiving funnel, due to the connection of the two bypasses, the outlet under the water pipe is discharged closer to the wall of the building. If necessary (depending on the width of the cornice) the contours are supplemented by a pipe section.

Further actions:
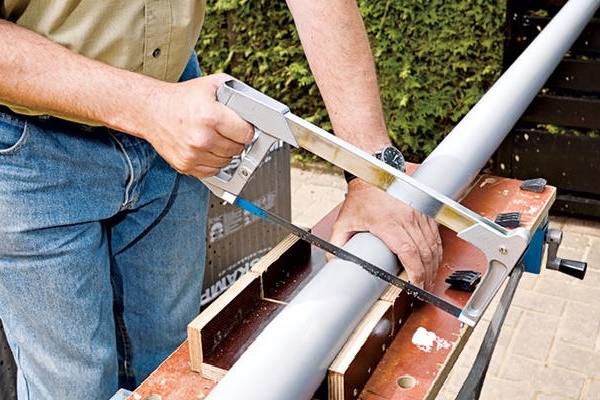
- The lower contour is supplemented by a connecting element (sleeve).
- The first straight pipe is inserted from below the coupling.
- A clamp is attached to the pipe under the coupling and secured to the wall.
- Before the next annular connection, mounting clamps are mounted every 1.8-2 meters in length.
- The next clutch is put and the process is repeated.
So, the drain is assembled to its lower edge at a distance of 30-35 mm from the wall of the building. The horizon of the lower edge of the drain according to standards is set at 250-400 mm above ground level.
You can read the detailed instructions for installing roof gutters here.
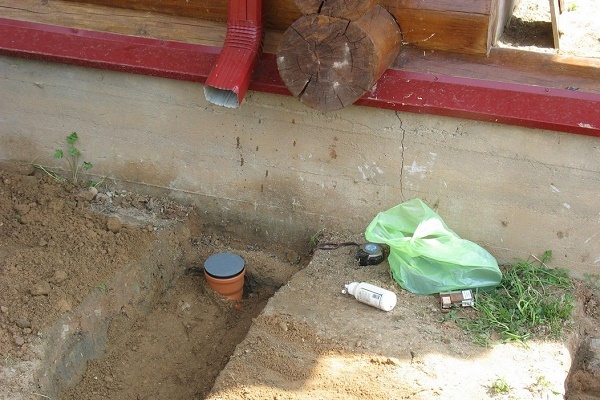
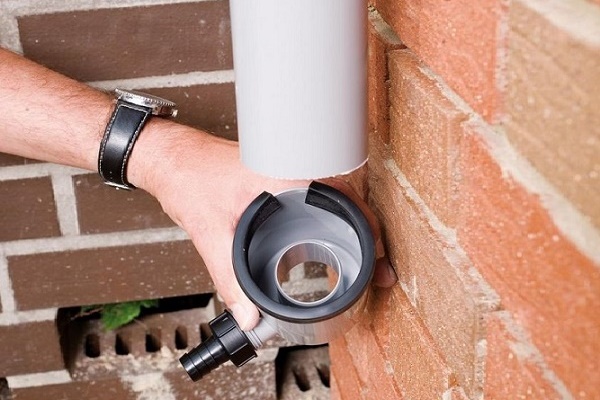
Connections by circuits and couplings usually include seals with rubber rings included in the kit of fittings. But instead of o-rings, the option of using glue (for plastic) is also acceptable. A drain is mounted on the lower edge of the drainpipe if there is no surface drainage system around the perimeter of the building.
To collect rainwater in a tank, a drainage pipe is installed selector:
Some features of polymer systems
Compared to metal gutter structures, polymer systems attract with their economical installation and simplified assembly.
Meanwhile, plastic has the properties of structural changes in conditions of fluctuations in ambient temperature. Therefore, for everyone who decides to make a gutter for the roof of a private house with their own hands, these properties of the material should be borne in mind and apply the installation technique with compensation for thermal expansion.
Compensation of thermal expansion / contraction is achieved, for example, by incomplete insertion of the smooth ends of the pipes into the socket parts. Also, a loose tightening of the rim of the mounting clamps unlocks the axial shift of the parts as a result of thermal expansion.
It is advisable to limit the use of glue when installing drainpipes, to apply it only on one of the parts of the joints. Installation of bell-shaped joints should be carried out in the upright direction of the bell.

Almost all manufacturers of modern drainage systems have taken into account the properties of plastic and produce shaped parts (expansion elements) adapted to temperature changes. The temperature scale is indicated on the case of such parts, according to which they are mounted in the system.
Due to temperature, plastic deformation is possible. Therefore, you must comply with the installation standards, the distance between the fasteners. Compliance with the rules is a guarantee of a quality roof drainage system.
AT this stuff You can get acquainted with all the advantages and disadvantages of plastic and metal gutters.
Conclusions and useful video on the topic
You can learn about how to properly design a drainage system from the following video:
Assembling the gutter system with one's own hand is a task to be solved. It is clear that independence is primarily aimed at saving. Meanwhile, when planning to make a gutter with your own hands, it is advisable to carry out calculations based on such parameters as the total roof area and the average intensity of precipitation in the area.
The calculation results will contribute to additional savings, since they can accurately determine the need for materials and parts for installation.
There were questions about how to independently equip a drain for the roof? Ask them in the block with comments, and we will try to promptly answer them. There you can share your experience or give valuable advice on the arrangement of the drainage system to visitors to our site.
 How to make spillways from the roof: general recommendations for arranging a drainage system with your own hands
 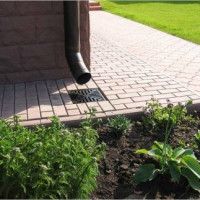 Do-it-yourself storm water drain: all about the installation of a storm shower for a summer house and a private house
  Which gutter is better - plastic or metal? Comparative review
 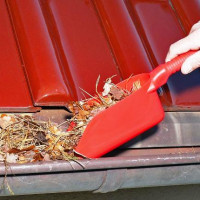 Storm sewer cleaning technology: an overview of popular ways
  Calculation of storm sewers: an analysis of important design features
  How much does it cost to connect gas to a private house: the price of organizing gas supply
  The best washing machines with dryer: model rating and customer tips
  What is the color temperature of light and the nuances of choosing the temperature of the lamps to suit your needs
  Replacement of a geyser in an apartment: replacement paperwork + basic norms and requirements
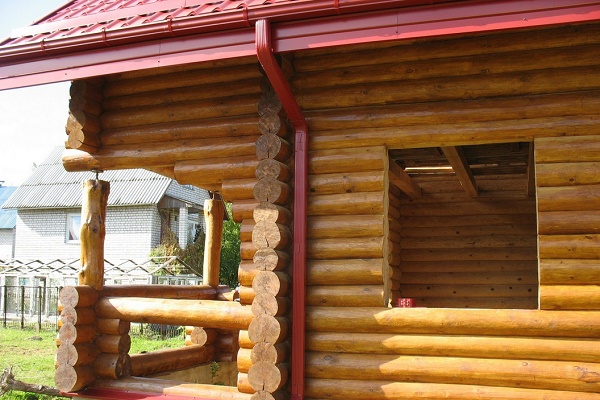
Last year, he helped a friend build a summer house. The bulk of the work was carried out by a team of builders, and the rest on their own. They did the drainage themselves. There is nothing complicated about it. The main thing is to follow the technology, calculate the required amount of materials and mount everything correctly. The house is one-story with a usual gable roof, so we made an external drain. Mounted brackets, assembled and secured pipes, gutters, brought out the drain. Everything turned out as it should.
We made the same system for an additional extension, we just thought that it was too expensive to buy a drainage system, so we made and assembled it from improvised materials. In general, everything turned out to be much easier than I thought, just need to imagine how it works, well, and, of course, have straight arms. The money came out cheaply, the main thing is that now the water does not fall from the roof to the ground and does not erode the soil.