Installation of a gutter system: the main stages of self-installation of gutters

One of the finishing stages of building a house or other structure is the installation of a drainage system.
A prefabricated structure made of plastic or metal elements protects the building from atmospheric precipitation, extends the life of the foundation, walls, roof. Knowing the design and installation rules of the gutters will help you install the system yourself, and we will tell you how to do it.
The content of the article:
Design features of drainage systems
The design of the drainage structures has not changed over the years - the main component parts still remain gutters and risers in the form of vertically arranged pipes.
However, there are many elements that simplify the installation of parts to the surfaces of the roof, facade and among themselves.
The production of products has been put on a grand scale, and today you can purchase ready-made elements for any, even the most complex systems, if only material possibilities allow.
After the necessary calculations, they acquire the necessary number of parts, then fold them according to the principle of the designer and mount them according to the instructions.

For a summer residence - a small house with a gable roof - you can build a structure yourself using galvanized steel sheets.
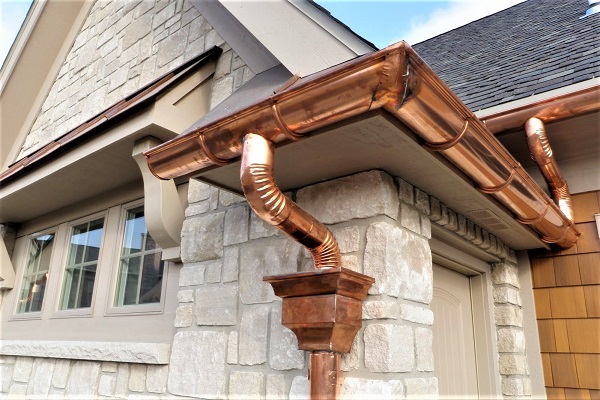
But for a large cottage with a beautifully decorated facade and roof, it is better to purchase a ready-made factory kit, which will be an additional decoration for the building.
Types of drains according to the material of manufacture
Before buying and installing gutters, you need to decide on the material of manufacture, since the installation method also depends on this. All systems can be divided into two large groups: plastic and metal.
Polymer element sets
Polymer products are made on the basis of vinyl with the addition of plasticizers, stabilizers and other components that increase the strength and wear resistance of elements. Plastic systems last 10 to 25 years.

Due to the large number of advantages, construction organizations and homeowners are increasingly inclined to install precisely plastic structures, which:
- much lighter than metal, therefore recommended for installation on old buildings and houses, where it is better not to load the rafter system and facade;
- do not lose operational properties at temperatures from -50 ° C to +75 ° C;
- they are not destroyed by corrosion, unlike metal analogues;
- resistant to aggressive substances that may be in the air or water;
- easy to install - do not require additional skills, suitable for self-installation;
- diverse in design, you can choose a system for the color of the roof or facade;
- have a moderate cost, which is lower than that of metal products.
However, plastic systems have their weak points. For example, they are more flexible than metal ones; therefore, brackets and clamps are installed with a small interval.

Under the influence of cold or heat, plastic shrinks / expands, so expansion joints and rubber seals are required elements for assembly.
Color, especially with inexpensive products, may change over time - fade, fade. And one more drawback - low resistance to loads and all kinds of mechanical damage. It is necessary to ensure that snow and ice do not accumulate in the gutters, and clean them in time.
Gutter systems made of metal
Metal systems are considered more durable, solid and durable. This is due to the technical characteristics of the material, which serves several times longer than the best plastic.
Various options are available on the market - from economical galvanized steel to expensive copper.
Consider the most popular solutions:
In addition to these materials, in the manufacture of drainage systems, alloys of zinc with titanium, aluminum with zinc are used.
The first option is expensive and durable, but is afraid of contact with copper and iron. The second is more economical, besides it has a good reflectivity, heat resistance and a beautiful silver tint.
The advantages of metal products relate to strength and durability - according to these indicators, they go far ahead of polymer analogues. However, there are drawbacks: high weight, thermal conductivity, noise. If the protective coating is damaged, the steel part will begin to rust.
When choosing a material, you need to consider both the aesthetic side and technical characteristics. It is also necessary to focus on the life of the roofing - it is much more convenient to carry out complex repairs.
A comparative description of plastic and metal gutters can be found in this stuff.
Drainage installation instructions
Work on the preparation and installation can be divided into three large stages:
- design - charting, selection of components, calculations;
- assembly of the water intake part of the system - mainly horizontal elements;
- installation of risersguiding precipitation in rainfall.
Assembly and installation are made from top to bottom, that is, the first elements are installed on the roof and under the roof, then on the facade towards the foundation and the blind area. All actions must be performed taking into account the characteristics of the system and the material from which the individual elements are made.
As a sample for installation, we take a plastic drainage system - the most suitable for independent work.
Stage # 1 - design and calculations
The nuances of the project directly depend on the type, shape and size of the roof, so it’s worth starting with measuring roof surfaces.
The length of the gutters is selected relative to the length of the ramps, the width and location - based on their area.

In order for precipitation to be discharged in full, the following points should be clarified:
- Number of Gutters. The gable roof has two of them, the four-gable roof has four connected in an inextricable circuit for a more efficient overflow device. If there are more slopes, then under each there is a gutter.
- Number of risers. Traditionally, drainpipes are positioned at the corners of the task - there may be 2.3 or 4. But if the length of the gutter is more than 12 m, an additional compensating funnel with a pipe is installed in the center.
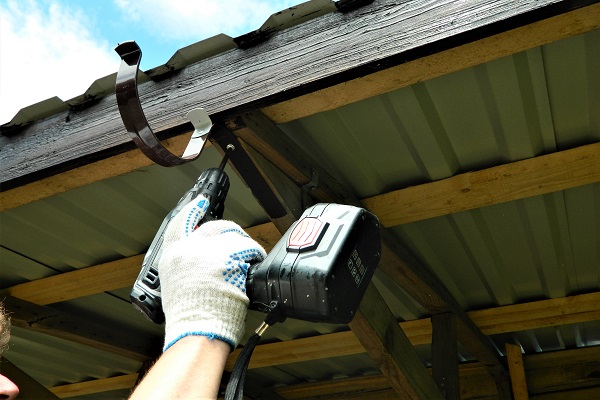
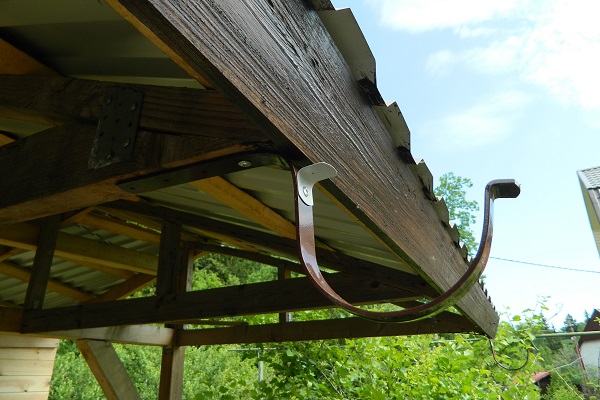
- Type of brackets. Usually, two types are used: long ones are mounted on the crate, even before laying the finish roofing, and short ones are fixed on the frontal board - they can be installed at any time, including after the construction is completed.
- Slope of horizontal elements. For unimpeded drainage, the gutters are placed at a slope of 2-4 mm per linear meter by adjusting the brackets - on the recommendation of the manufacturer. In the lower part, a drainage funnel is installed.
The location of the risers largely determines whether the system will cope with the removal of fluid from the roof. Traditionally, they are installed in the corners, but other options are possible - with placement in the center, in niches.

Do not forget about the aesthetic side and the comfort of use - drainpipes should not protrude far ahead from the facade, go out onto pedestrian walkways or the used house area.
Calculations are made individually; there are no universal offers.
However, there are rules that help count the number of elements to build the system:
- the length of the gutters is calculated by the length of the cornices, adding 2.5 mm for each linear extension of 12 mm;
- connecting elements for gutters are selected based on the standard length of one element - if you purchase 4-meter gutters for a 12-meter cornice, you will need 2 connectors;
- the number of funnels is determined as follows: one per trench up to 12 m, for longer ones - another funnel or compensator;
- the number of brackets depends on the total length of the gutters, taking into account the fact that installation is carried out with an interval of 0.5-0.6 m; do not forget about additional ones - for funnels;
- the length of the drainpipes is determined by the height of the walls minus the distance from the gutters to the cornice and from the branch to the surface of the earth;
- the number of brackets is also dictated by the height of the building: two are mounted near the branch and funnel, the rest with an interval of 1.2-1.5 from them.
Another couple of important sizes that must be taken into account are the width of the gutters and the diameter of the drainpipes.
There is a universal way to calculate the diameter of the pipes: for every square meter of the roof there is 1.5 cm² of pipe section.

If the slope area does not exceed 80 m², usually no calculations are made, and risers with a diameter of 100 mm are taken as the basis.
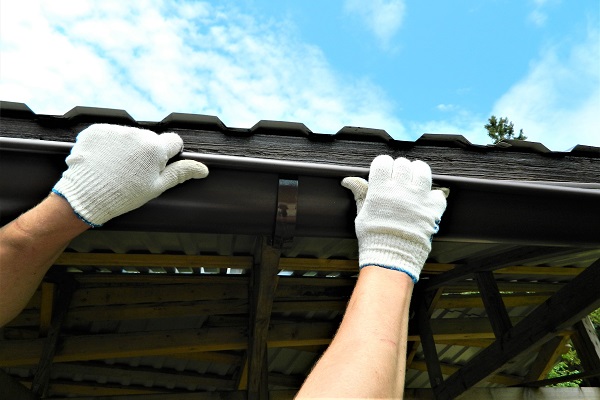
Stage # 2 - installation of water intake elements
To install the hook-shaped brackets, on which the gutters are usually located, you can remove the extreme row of tiles or other roofing - so that the crate opens.
If this option is not possible, instead of long brackets, short hooks are fixed to the front side of the cornice sheathing.

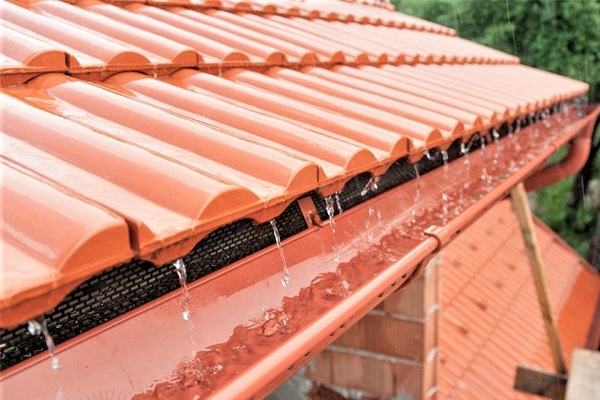
The optimal location of the gutters should prevent overflow of atmospheric runoff over the edge, as well as the accumulation of snow.
The brackets are mounted in the following order:
- preliminary fitting and selection of length / installation site;
- determination of the angle of inclination towards the drainage funnel;
- bending holders;
- installation of extreme brackets;
- installation of the remaining elements on a pre-tensioned cord.
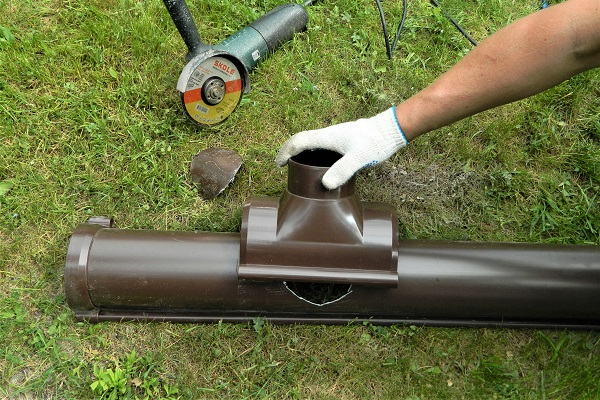
After mounting the brackets, prepare and install the funnel.
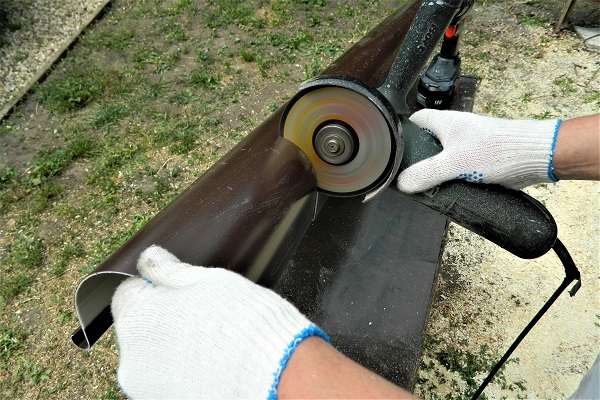
To do this, put it in the right place to the gutter, draw a contour, then remove and drill a hole with a drill with a suitable crown. We clean the edges and connect the funnel to the hole.

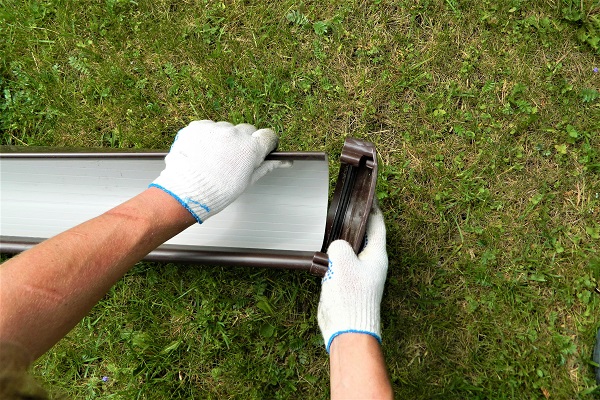
The installation of the gutter begins with an element with a funnel already fixed. Then the next one joins it, and so on to the highest point. Elements of the gutter are joined using connectors.

Short brackets are mounted differently.

If the brackets are installed correctly, the installation of water inlets does not take much time. As a result, the gutter should be placed with a small ledge behind the cornice, tilted towards the funnel.
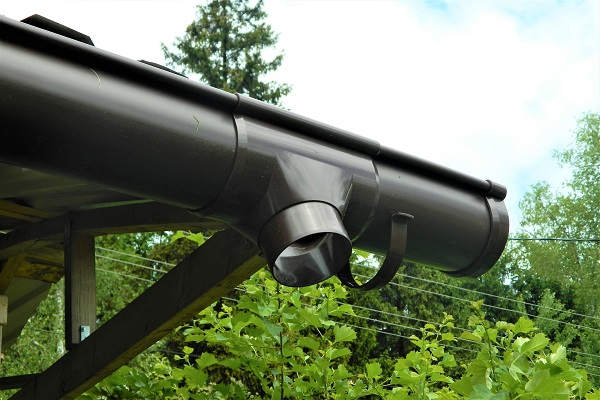
Stage # 3 - installation of drainpipes
The assembly of the riser begins from the top - the transition from the funnel to a vertically located pipe. If the cornice protrudes less than 0.25 m, then the transition element is assembled from a pair of knees.

Starting from the funnel and articulation of the knees, we continue the assembly in the downward direction. Between two adjacent vertical elements connected by a coupling, a gap of at least 20 mm in width should remain to compensate for linear expansion.

To prevent abrasion of the drain pipe and holders, the clamps of modern systems are equipped with a dense rubber seal on the inside.
We do not fully tighten the bolts to leave the possibility of dismantling or replacement.

To eliminate clogging of the drainpipe, a strainer is installed in the funnel. If it is not provided by the manufacturer, you can make it yourself from aluminum or copper wire.
The main thing is that the grid detains branches, foliage and other debris that enters the drains along with rainwater.
Tips for installation of gutters:
From time to time, the gutters, funnels and pipes should be cleaned, and then the drainage system will not clog, deform from excess weight, as a result of which it will last much longer.
In addition, in the cold season, homeowners are faced with the problem of ice formation in the drainage system. To avoid this, experts recommend organizing heating gutters.
Conclusions and useful video on the topic
Detailed instructions from the manufacturer:
Useful installation recommendations:
Amateur option:
Installing a gutter structure is a simple matter for anyone who participated in the construction of a house. However, a set of basic knowledge is still necessary. It relates mainly to calculations and the selection of suitable components.
If you are not confident in your abilities, we recommend contacting specialists who will draw up a draft and estimate for the installation of a drainage system in a short period of time.
When reading the information found defects or have recommendations for installation of a drainage system? Please leave comments, share your experience in the contact block located under the article.
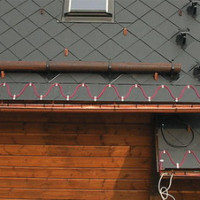 Gutter heating: do-it-yourself installation of a roof and gutter heating system
 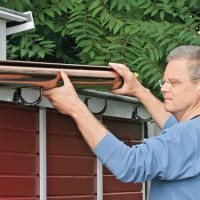 Installation of gutters: how to properly install the gutter and attach it to the roof
 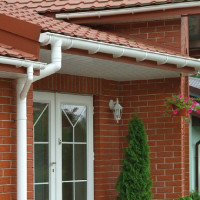 Roof spill systems: existing types of systems and their arrangement + calculation and installation steps
 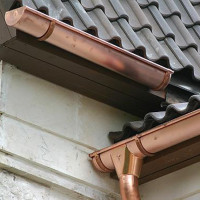 Do-it-yourself installation of metal gutters for the roof: technology analysis + installation example
  Wiring of sewers in a private house: drawing up a diagram and a project + stages of work
  Sewerage flushing: pipe cleaning methods + main causes of blockages
  How much does it cost to connect gas to a private house: the price of organizing gas supply
  The best washing machines with dryer: model rating and customer tips
  What is the color temperature of light and the nuances of choosing the temperature of the lamps to suit your needs
  Replacement of a geyser in an apartment: replacement paperwork + basic norms and requirements
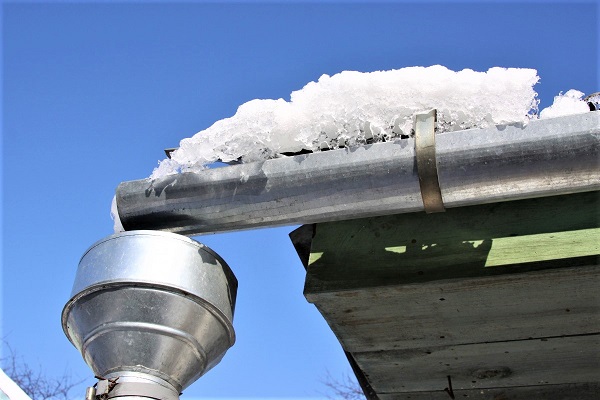
When I chose a drainage system for myself, I drew attention to all the nuances that my friends who had installed it before had encountered. So, based on experience, it is better to take a system of plastic components than metal. The system is going “with a bang”, there are no problems in docking (what you encounter when installing metal gutters), light weight (although objectively metal also weighs a little). Well, and most importantly: a sufficient slope is simply arranged for the drain - otherwise, in a light frost, the water freezes in a thin layer before it reaches the water intake funnel.
Very convenient installation. It is also very suitable that the materials used in products with high anti-corrosion properties. Thanks for the info.