Do-it-yourself installation of metal gutters for the roof: technology analysis + installation example

Metal gutters - traditional water drainage systems to protect the roofs of low-rise buildings. These simple designs have shown reliable, efficient operation over the centuries. Modern options, as a rule, are constructed from finished components of industrial production.
Meanwhile, in the old days, the installation of metal gutters for the roof with their own hands was considered commonplace. Moreover, the entire system, from brackets to pipes, was made in a makeshift (manual) way.
In this material we will talk about how to build and install a metal drain for the roof.
The content of the article:
Gutter Technologies
If we turn to existing technologies for the construction of metal drainage systems, two options are relevant for use:
- Based on round gutters and water pipes.
- Based on rectangular gutters and downspouts.
There is, of course, also a different (exclusive) performance technique, for example, based on wood, but such is rare and does not find wide application.

Regardless of the technology of the device gutters, always performed system calculation taking into account the area of the roof. According to the calculated data, the throughput of gutters, funnels, drainpipes is selected.
Based on the parameters of the throughput, the diameters, through holes, overall dimensions of the fittings are determined:
- corner transitions;
- sleeve couplings;
- prefabricated funnels;
- bypass bends;
- connectors;
- drain pipes.
Provided that the assembly is completely independent, the master will have to make all the shaped parts of the working kit with his own hands. But if there are no tinsmith skills and production desires, the entire marked set of parts can simply be bought.Naturally, in this case the complete independence of the manufacturing system is already seen as doubtful.
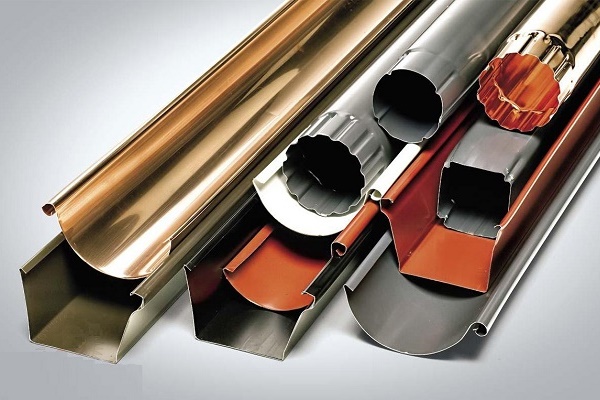
Which metal is preferable?
The choice of material for the metal gutter system is relatively small: galvanized steel, copper, an alloy of zinc with titanium. The first material is economical and the most popular of the whole group, but, from the point of view of durability, it is not suitable in any assortment.
For example, the thickness of the zinc coating of a metal sheet of class 2 is 5-10 microns. This protection will last no more than 10 years of operation.
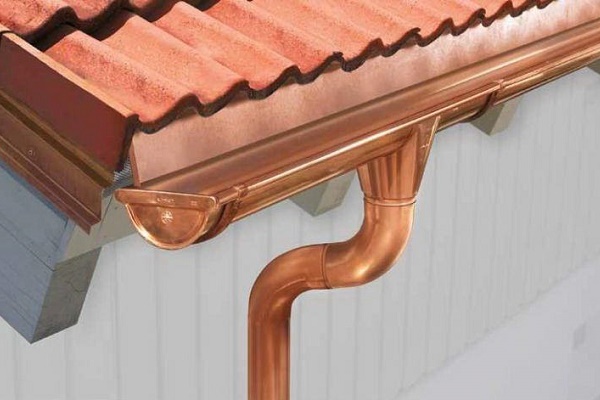
A completely different matter is galvanized steel with polymer coating. This material in terms of durability is not inferior to red copper. But to make parts of such sheets on their own without damage to the polymer layer is problematic.
Again, it remains only to buy finished products or choose a copper sheet as the material. And metal gutters made of copper, and even more so zinc-titanium, require substantial capital investments.
Homemade metal gutters
Making a gutter with your own hands from galvanized steel is simple. However, difficulties arise if you try to make a gutter of the same length as in factory production (3-4 meters).
For the manufacture of a four-meter part, appropriate technical equipment will be required, which is usually not available at home. Therefore, the standard length of makeshift gutters, as a rule, is no more than 1 meter.

Oval Trench Production Technology:
- A sheet of tin is taken 1 m long, 0.5 m wide.
- Place a piece of sheet on the bench.
- Take a metal pipe of suitable diameter.
- A section of the sheet on the pipe is bent by editing with a wooden hammer to a semicircle.
- An indent of 10 mm is measured along the leading long edge.
- Curve the edge line at an angle of 90º.
Then perform a second bend at the trailing edge, cutting off the excess sheet.

Approximately in the same way they make gutters of a rectangular shape. Only as an edit use an angular metal disc.

Rectangular gutters are even easier to make, as well as preparing shaped parts for them. Therefore, it makes sense when choosing a technology to stop precisely on rectangular drains.
Home-made tin drains
To make a straight branch pipe of a drain from tin, measure a piece of galvanization by the length and width dimensions and cut with scissors along the marked lines.
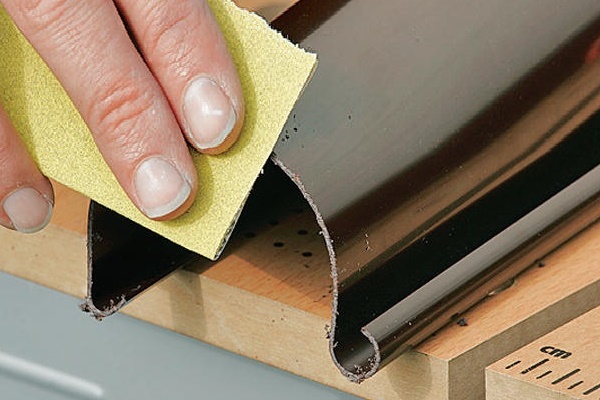
Using a file, the edges are thoroughly cleaned from burrs and treated to a smooth state. On the long side, both edges of the sheet are bent in one direction to a width of 10-15 mm.

On a rigidly fixed pipe of a suitable diameter, a galvanized sheet is tapped until it is round. Then impose previously bent edges one on top of the other.
Using a wooden mallet and a metal rectangular bar, the edges are wrapped in a lock. Thoroughly tap with a hammer along the seam until a securely pressed joint is obtained. Align the shape of the product on a blank pipe, trying to get a cylinder close to the perfect circle.

Having the skills to manufacture direct downpipes from galvanizing, it is easy to master the production technology of receiving funnels and other parts of the system. With the same success, self-taught masters make brackets for metal gutters and for fixing drainpipes.
Here, the production technique is very simple. To do this, you will need a bench vise, a hammer, a file, a drill, a tape measure, a pencil and a strip of mild steel with a section of 20x1.5 mm.

Manufacturing technology of steel (copper) bracket:
- Cut a piece of steel strip 300 mm long.
- File end parts.
- Step away from either end of 10 mm, bend at 90º.
- By sequentially moving the strip and fixing it in a vice, bend it with an arc to the size of the radius of the gutter.
- On the remaining straight part of the strip, drill holes for the retainer and fasteners.
Brackets for downpipes are made in the same way, but already in the form of a clamp, consisting of two oval-shaped strips, the curved end edges of which are supplemented by bolt holes for the screed.
On our site there are several articles with detailed instructions for the manufacture of roof gutters, we recommend that you read:
- DIY roof gutters: instructions for self-manufacturing a drainage system
- How to make spillways for the roof: do-it-yourself recommendations for installing a drainage system
Technology for installing gutter parts
Let's consider in more detail how to install parts of various shapes made by yourself. Each technology has its own characteristics.
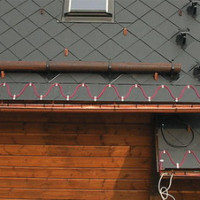
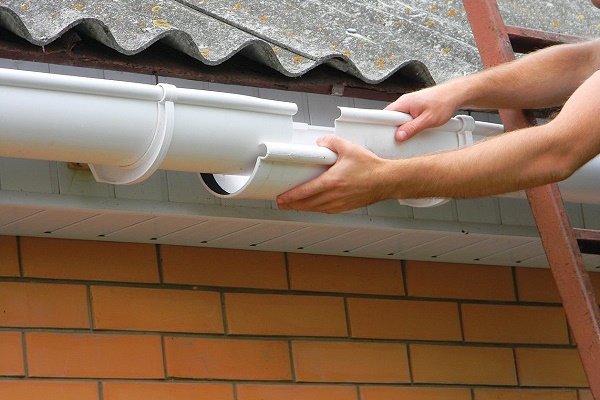
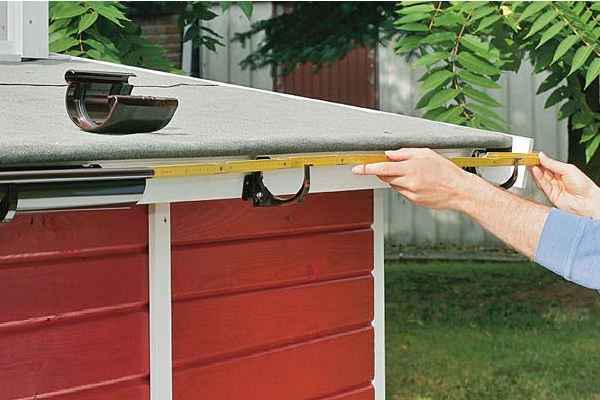
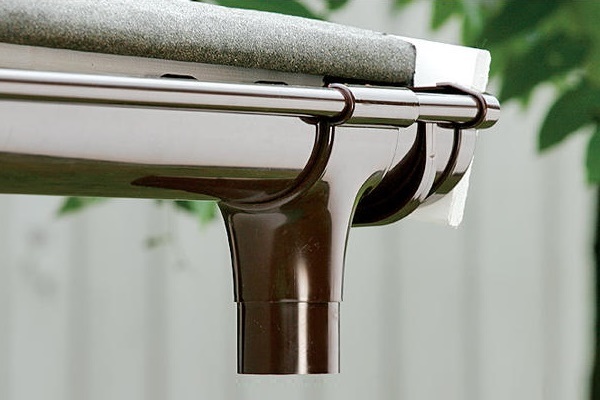
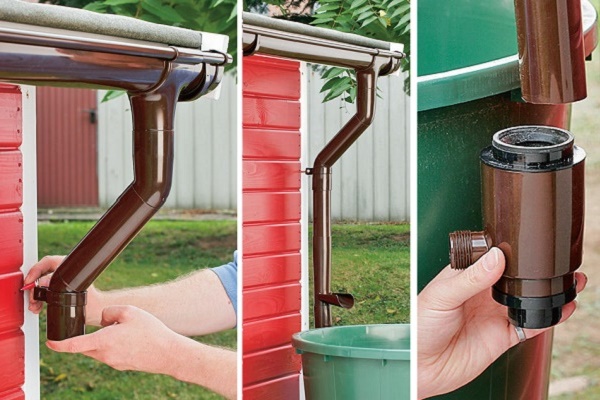
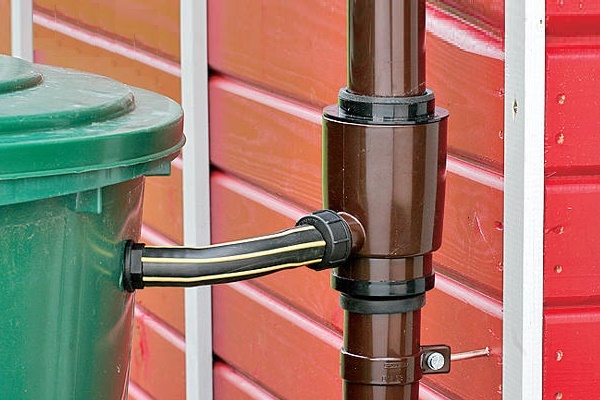
Detailed photo briefing
The following selection of photos will familiarize with the standard procedure for installing a gutter system on a pitched roof:
Installing a gutter is only part of the installation of a gutter system. Now you need to collect and fix the drainage funnel, connect a gutter to it and organize a container for receiving rainwater. Next, proceed as follows:
Self-assembly of oval gutters
The process of assembling do-it-yourself oval gutters begins as usual with the installation of the bracket-holders. Here it is worth noting an important nuance. If galvanized material is chosen for the gutter, steel brackets can be installed under it. Traditionally, do-it-yourself brackets with a shank (long) are used.

It is highly discouraged to place steel holders under copper parts, just as aluminum and plastic are undesirable. Copper always requires only copper to be paired, and a departure from these principles is at a loss. The costs, of course, are substantial, but they pay off with the longevity of a purely copper construction.
The same principle should be noted in relation to the zinc-titanium system. Do not save on fasteners, preferring expensive gutter structures.
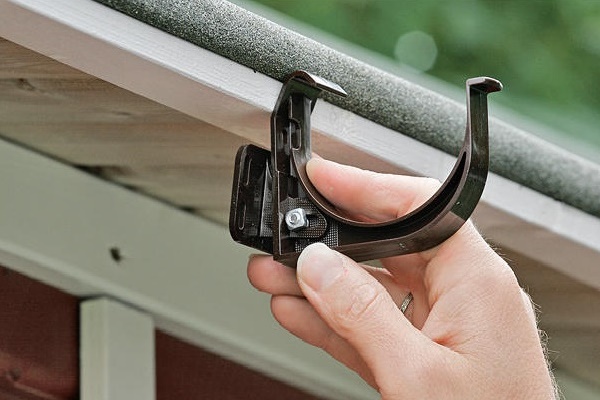
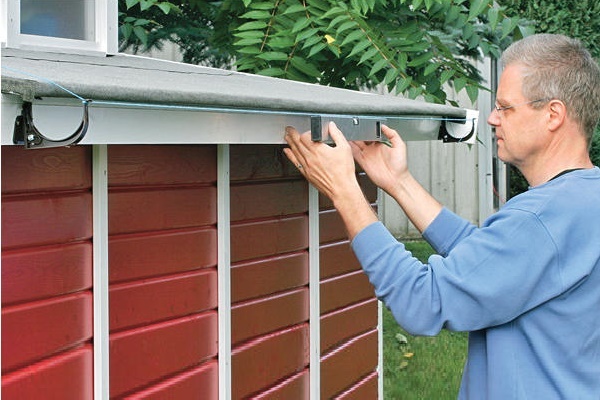
Reception of installing a long bracket
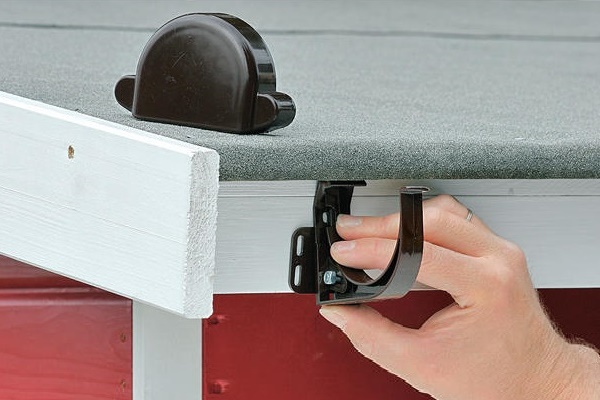
The shank of the first bracket is superimposed on the end part of the extreme rafters and secured with screws. Before fixing, it is necessary to push the bracket forward so far that the conditional vertical line running along the edge of the roof covering intersects the groove at the center point of its bottom.
The fulfillment of this rule is the key to the correct collection and discharge of water for the maximum possible calculated value of precipitation intensity. Another important point - the level of the front upper edge of the bracket rim should be 25-30 mm below the level of the ramp line.

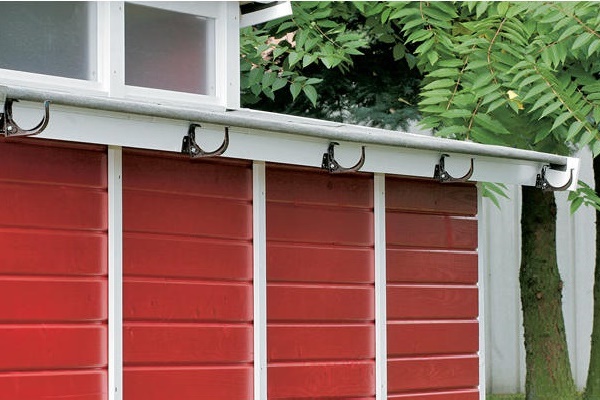
The average size of the length between the rafters of the roofs of private houses is 800 mm. Given the high degree of rigidity of the metal gutters (compared to plastic), it is permissible to place the brackets at intervals of up to 1 meter. That is, subsequent brackets are also fixed directly to the rafters.
If the building structure does not allow to observe the indicated frequency, it should be fixed to the surface of the outer boards of the crate.
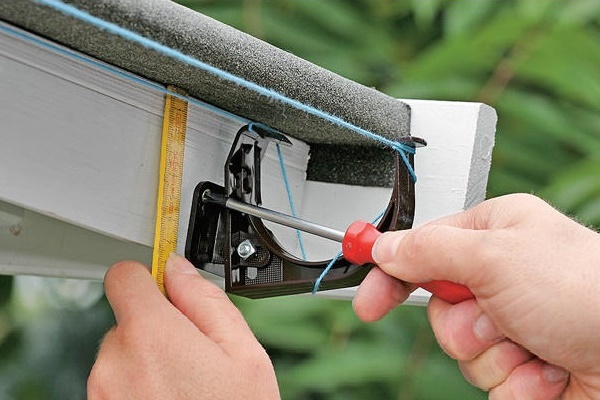
The installed brackets bring to the required level of slope, slightly bending or bending the rim of each. For marking to the required slope, a cord is pulled between the first and last fastening element, setting the desired slope values according to the construction level.
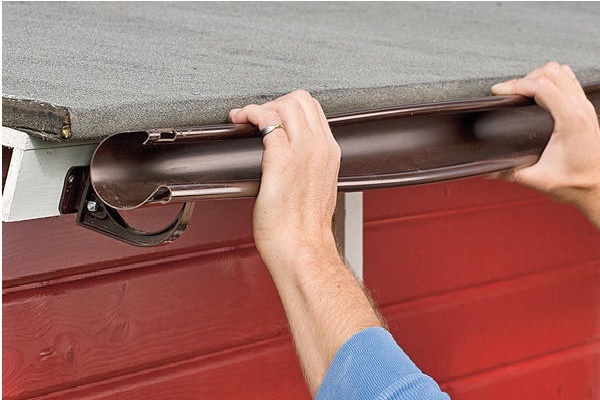
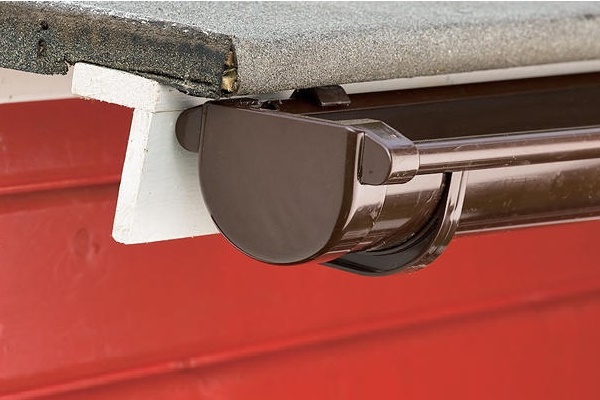
After completing the fitting in all respects, they are laid on the gutter brackets, resting them with the edges under the clamps. Next, it will remain to assemble prefabricated funnels and downspouts, after which the system is ready for operation.
How to install a rectangular gutter?
From a technical point of view, there are no special differences between the installation of rectangular gutters from oval gutters. The technology and installation requirements are similar. But there are still some nuances.
Laying of rectangular gutters on the bracket-holders begin in the direction from the receiving funnel to the first bracket. The elements are overlapped one by one, the joints are coated with sealant and then fastened with rivets. The shape of the support brackets is, of course, rectangular.

The methodology for fitting molded parts onto rivets through a sealant is used during the entire installation process. True, the installation of receiving funnels is often performed using self-tapping screws.
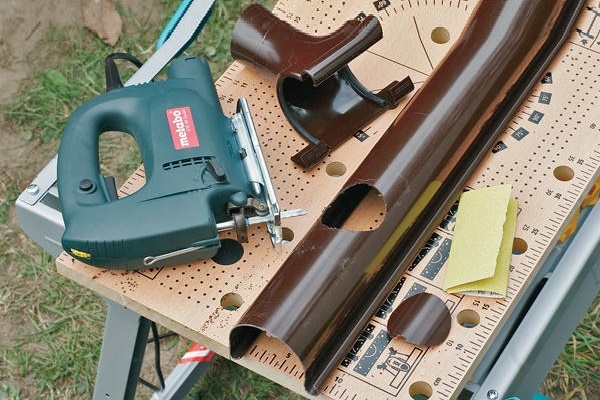
Act as follows:
- A rectangle of 80 x 60 mm is drawn on the outer lower side of the bottom, at a distance of 100-150 mm from the edge of the gutter.
- Two cuts are made along the diagonals of the rectangle from corner to corner.
- The resulting petals are bent downward at an angle of 90º.
- Sealant is applied to the funnel flange.
- The funnel body is attached to the hole and fixed with self-tapping screws.
Rectangular water pipes are mounted from the funnel from top to bottom. The connection of the pipes is done by inserting one into the other.
At the same time, at the inlet pipe, the corners along the end edge are crushed inside, inserted into another pipe, and then fasten both parts along the contact line with rivets.

Fastening the assembled drainpipes to the wall of the building is carried out in a standard way - with clamps.
Conclusions and useful video on the topic
Gutter manufacturers care about proper installation of their products, therefore, they are increasingly releasing videos that help to understand all the nuances of the installation:
If we compare the installation technology of gutters (round and rectangular), the arrangement of rectangular systems looks more complicated. Some details differ in size and configuration. For example, the thickness of the strip of brackets for a rectangular trough is usually taken no less than 3-4 mm.
However, from an operational point of view, rectangular systems are more preferable. With a savings of 10-15% relative to the installation of round gutters, they provide greater throughput.
Do you have personal experience installing metal roof gutters? Want to share your experience or ask a question about the topic of the article? Please leave comments in the block below.
 Gutter heating: do-it-yourself installation of a roof and gutter heating system
 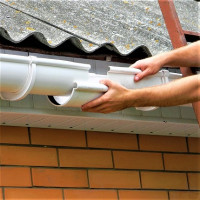 Installation of a gutter system: the main stages of self-installation of gutters
 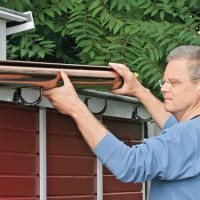 Installation of gutters: how to properly install the gutter and attach it to the roof
 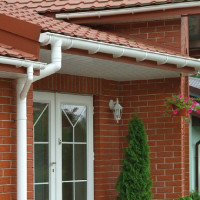 Roof spill systems: existing types of systems and their arrangement + calculation and installation steps
  How to make a blind area around the house with your own hands: rules and methods for arranging the ebb system
  Do-it-yourself sewerage in an apartment: rules for internal wiring and installation
  How much does it cost to connect gas to a private house: the price of organizing gas supply
  The best washing machines with dryer: model rating and customer tips
  What is the color temperature of light and the nuances of choosing the temperature of the lamps to suit your needs
  Replacement of a geyser in an apartment: replacement paperwork + basic norms and requirements
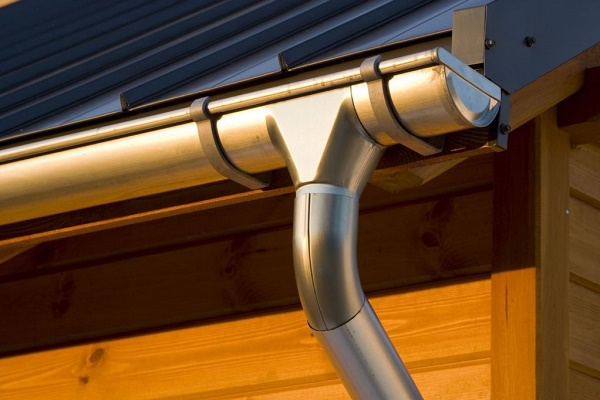
He mounted metal gutters in his house himself. I do not think that this is such a difficult job, which is worth paying for. By the way, after that a friend contacted me too, he also helped. Already almost a professional. I choose only galvanized steel with polymer coating, for it the best reviews, durable and resistant. After all, I do not want to redo my work in a couple of years due to poor-quality material.
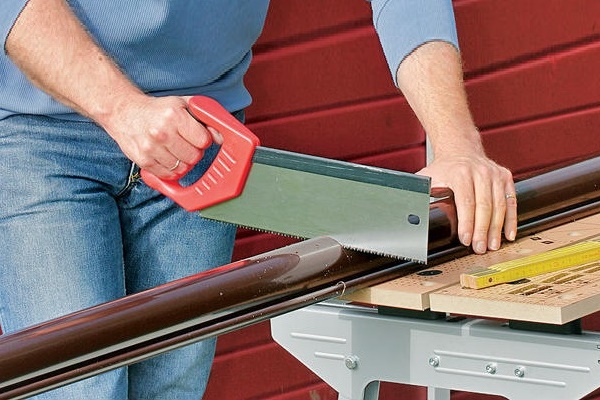
It is worth noting that the gutters and pipes with a polymer coating cannot be cut with an abrasive tool, since the paint is melted, and a section of up to 7 mm appears in the place of the cut, which will be susceptible to corrosion. We cut the elements with a hacksaw, or with special scissors for metal, treating the cut edge with a repair roofing paint in the same color of the coating.