Do-it-yourself sewerage in an apartment: rules for internal wiring and installation

The quality of a home sewer system should not be inferior in terms of reliability to a water supply system or electric network. If the sewage system in the apartment is assembled with high quality by itself, it will last for more than a dozen years, subject to the installation standards and the use of high-quality consumables.
You doubt your strength and are afraid to make mistakes? We will help you to correctly design and install a sewer system. The main thing is to take into account all the basic requirements, choose the right pipes and adhere to the installation technology described in the article.
The content of the article:
How to equip the sewer in the apartment?
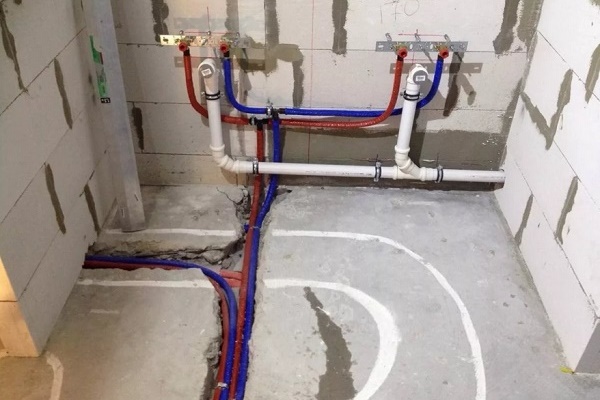
Before you pick up pipes and everything you need, before starting work, you need to understand the principles of the functioning of the sewer system, including observing the angle of inclination, so that the pressure in the riser is slightly higher than atmospheric.
Otherwise, atmospheric air will squeeze unpleasant sewer gases directly into the apartment. If the internal pressure is too high, the waste gases can emit siphon drains.
Let us consider more closely all the nuances of the sewage system in the apartment.
Slope pipes - an important condition for the functioning of the system
When laying the trunk, you must observe the horizontal angle, which must be within certain limits. Insufficient sewer slope will not allow drains to drain normally into a riser. If the slope is too large, the water will drain quickly, leaving contamination on the pipe walls.

The paradox is that with high "fluidity" the sewage system will become clogged.
The dependence of the slope of the laying of the pipeline on the cross section of the highway:
- 30 mm / m at 50 mm;
- 20 mm / m at 110 mm;
- 8 mm / m at 160 mm;
- 7 mm / m at 200 mm.
Thus, the maximum slope should be within 150 mm / m. Exceptions are bends up to 1.5 m long for some plumbing fixtures, such as a toilet.
Sewer pipes can be connected at right angles only in a vertical orientation according to the principle of a waterfall.
Friendship with neighbors is half the success
For the replacement of the internal sewage system in the apartment to be successful and with minimal hassle, good relations with neighbors from above are needed. They should refrain from using sewage during installation. To be more safe, it is better to turn off the cold and hot water riser in the basement.
Based on this, all work should be carried out expeditiously, preferably on a weekday during the daytime, when most of the tenants at home are at work.
Work Precautions
Sometimes a warning about the inadmissibility of the use of sewage by neighbors may be ignored by some residents.

You need to be prepared for an emergency situation and use the following protective measures:
- stick the walls and the floor with tape, fastening all joints with tape;
- prepare a bathroom - clean the room and dismantle the toilet;
- use protective equipment - raincoat, hard hat with glass, rubber boots.
A helmet is necessary, because you will have to work with a heavy cast-iron pipe hanging over your head.
Fixation of the main sewer
The lion's share of success in the reliable installation of sewerage is occupied by the reliably installed upper part of the riser. Do not rely on the remaining mounts, as over time, they become worthless.
The cast iron pipe may burst due to vibrations of the power tool. All this can cause a serious accident for which you will have to pay.

The sequence of actions when fixing the riser:
- mount on both sides of the riser under the ceiling itself two crutches with a diameter of at least 12 mm;
- fixation with a mortar or stud with a metal collet;
- the hairpin should protrude beyond the middle of the pipe by at least 40 mm;
- secure the riser with half clamps.
Under the half-clamps, you need to put tight rubber gaskets (you can from the car camera). Holes are drilled in the eyes of the half-clamps for the installation of studs. Each bracket is attached to the stud with a nut. They must be tightened alternately to prevent lateral forces on the pipe.

You can not attach the riser to the wall using one bracket or only one clamp.If the pipe fits snugly against the wall, then under it you need to hollow out a small groove in order to insert the clamp. Remember that cast iron is very fragile, so you need to be extremely careful.
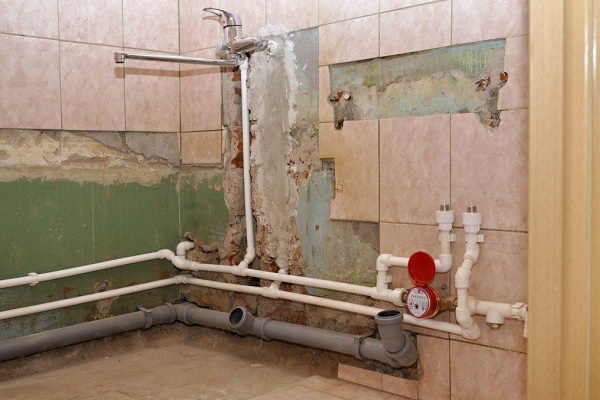
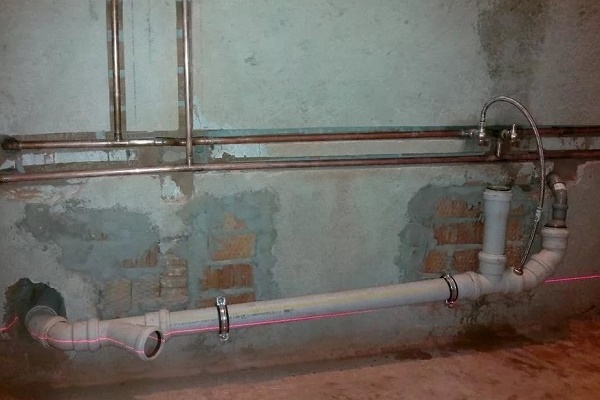
How to choose pipes?
No point talking about the benefits. plastic pipes over cast iron, but the former are different in both cost and composition.
Possible options:
- Propylene. Withstands up to + 130 ° C, allows cleaning with a plumbing cable, and the use of active chemicals with the exception of alkalis and acids, has a rough inner surface, which increases hydraulic resistance.
- PVC. An inexpensive option that has the smoothest surfaces. It allows the temperature of effluents to 80 degrees, inferior to propylene in strength and chemical resistance, but has less hydraulic resistance. Cleaning with a plunger or ultrasound is allowed.
- Polyethylene. Cheap and unreliable. It is deformed, poorly sealed and has low heat resistance.
We opt for PVC or propylene, taking into account their technical and operational qualities.
The characteristics of different types of sewer pipes are described in detail in the articles:
- Silent sewage: principles of arrangement + installation examples
- Pipes for sewage in the house: which pipes are better to use for the device of the internal sewer network
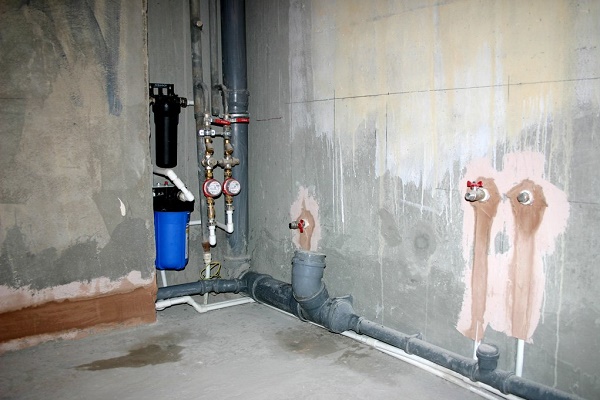
How to choose a pipe diameter?
The minimum diameter of 32 mm when laying the sewage system is used when the system has separate risers, and also when the common end point of the drain is at a distance of no more than 7 m from the riser. Under any other conditions, you need to choose pipes with a diameter of 40-50 mm.

Regarding the riser, its diameter should be at least 110 mm. In some cases, a pipe of 160 and 200 mm is used. According to the diameter, the corresponding fasteners to the wall are selected.
Example: if in the kitchen there is only one drain (sink), then you can lay a pipe of 35 mm to the bathroom. Already with a bath, the drain must have a diameter of at least 40 mm.
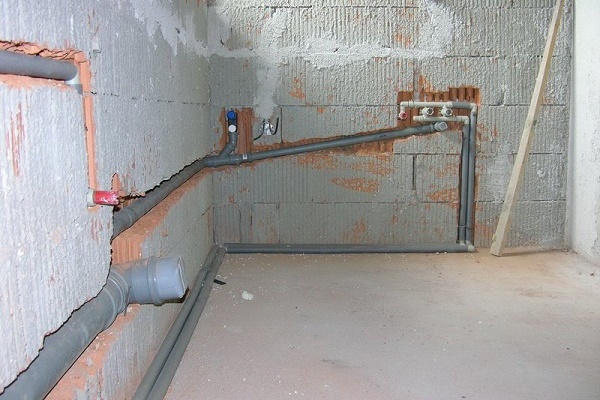
The procedure for the installation of sewage
To maximize labor productivity and efficiency, it is recommended to adhere to the following order:
- We determine the location of all plumbing fixtures if we plan to add new equipment or change the old scheme.
- We draw the entire scheme of sewer wiring using chalk or pencil. The diagram should indicate the pipe routes, length, diameters and slopes for each section.
- We dismantle the old wiring system.
- We calculate the number of pipes, consumables and fittings, sealant.
- We purchase all the elements, including adapter couplings from a cast-iron riser to a plastic.
- We mount the system in free space, trying on pipes.
- We carry out the dismantling of old equipment.
- We install the pipeline, customize it to the joints.
- We connect the pipes and seal the joints.
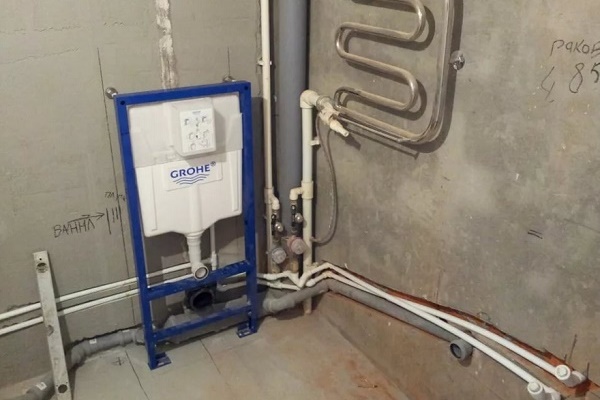
- We mount and connect plumbing.
- We connect the system to the riser.
- When the sealant hardens, we check the system for leaks.
Now, at the key stages of work, we will dwell more carefully, finding out some subtleties.
Sewer charting
If the installation of a new sewer comes down to replacing pipes in the toilet and a bathroom, then you do not need to come up with any new scheme. Everything is done exactly as it was. But if there were problems with the old sewer system and it is planned to add new plumbing, then it is necessary to accurately withstand all diameters and slopes.

To make sure that the drawn up sewage scheme in the apartment is correct, it is better to give it to specialists for verification. This is significantly cheaper than ordering a compilation from scratch.
The following elements should be indicated on the diagram:
- all rooms where the sewer will pass;
- the location of the elements for each room, indicating the distance from the wall, the length of each section, as well as the total length of the pipeline;
- a complete set of fittings, including revision and sewage bends;
- the place where the central riser is located.
The scheme should be as detailed as possible so as not to forget anything and not violate the technology.
Removing the old system
It is necessary to analyze the old wiring in order to select the appropriate dismantling method. If the plastic changes, then, as a rule, it is simply pulled out of the joints with simultaneous scrolling.
Sometimes cast-iron pipes can be dismantled in the same way, but at the same time you need to knock out the joints with a chisel.
In all other cases, of which the majority, it is necessary to file a cast-iron pipe with a diamond wheel from different sides. A wedge is inserted into the resulting hole, on which you need to hit several times with a kilogram hammer until the pipe is divided into two parts.
You should start by disconnecting the pipeline from the riser, and direct dismantling is carried out starting from the farthest section of the sewer. It is necessary to warn the neighbors, block the water in the riser and proceed to dismantle.

Disconnect the pipe that adjoins the riser. This is done through two cuts at a distance of 150 mm from each other. First, a fragment of the pipe breaks out from the side of the apartment with a wedge, and then a piece from the riser side.
Next, you need to hammer the old seal near the outlet of the riser with a hammer in order to remove the remaining fragment of the pipe. Holes need to be tightly plugged with rags. Now you can let your neighbors use the water supply while you dismantle the rest of the pipeline in the apartment.
Then again we introduce a ban on the use of sewage. Lastly, we cut off the old riser in order to proceed to its replacement.
Sewer riser replacement
This is an extremely responsible task, which is better to entrust to seasoned specialists, otherwise the price of an error may be too high.
If you are confident in your abilities, then you will need the following set of tools and supplies:
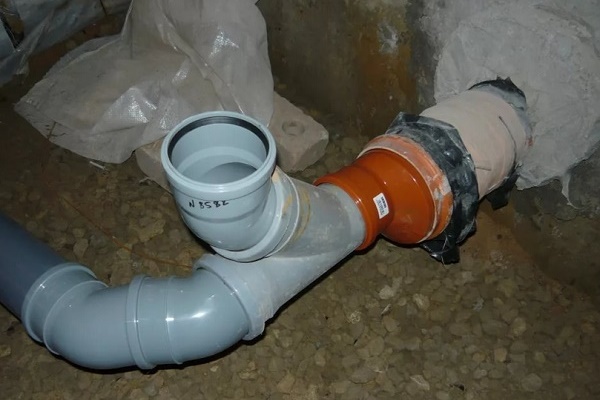
- two cuff adapters - plastic / cast iron and cast iron / plastic;
- two pipes of appropriate length and diameter;
- two plastic 45-degree turns;
- expansion joint for plastic pipes;
- metal clamps with studs for mounting;
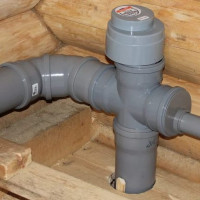
- plastic cross with a branch of 50 mm in the required direction;
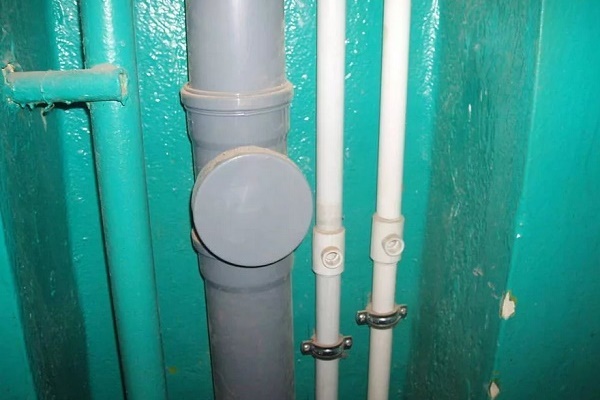
- plastic insert with revision hatch.
First you need to strengthen the old riser at the very top. Make two cuts in the middle of the cast-iron pipe in the middle at a distance of 150 mm from each other. In the lower cut, insert two wedges on both sides of the pipe at an angle of 45 ° to the horizontal.

By tapping it is necessary to achieve chipping of the pipe. This operation requires substantial experience, as if the wrong approach, the entire pipe string could collapse.
Insert the wedges into the upper cut and in the same way release another section of the pipe. At the same time, assistants must always hold the top of the pipe. Then use a chisel to remove the entire old seal at the top.
With small swings, you need to release the pipe from the joint. Now also repeat for the bottom joint, eliminating the termination and taking out the pipe with swaying.
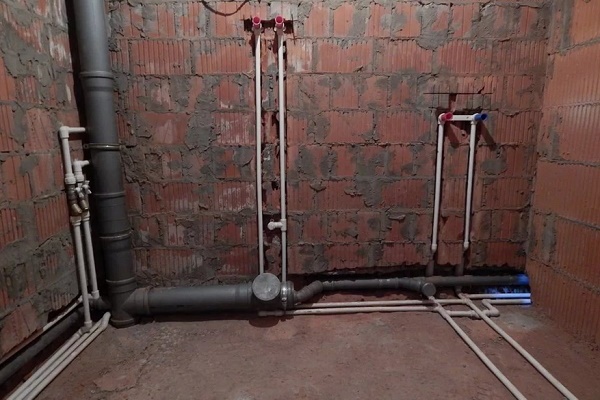
We collect a new riser according to the scheme, start from the top and end with the bottom:
- trumpet;
- adjusting branch;
- compensator;
- revision compartment;
- trumpet;
- crosspiece.
The lower and upper part must be connected to the cast-iron riser using cuffs.

We adjust the dimensions of the lower pipe during the rough assembly process. Then we carry out the final installation using sealant, connect the lower wiring and mount the toilet. We fix the riser with the help of crutches with studs at four points, including each adjustment branch, and also 1/3 of the length from the lower and upper edges.
Material calculation and fitting
It is necessary to calculate the amount of materials so that in the process of work it is necessary to cut pipes as little as possible, because these are all additional costs. Pay attention to the length of the sections. In an ideal situation, trimming will have to be done for only one pipe.
After everything you need is on hand, you need to find out a few points with the help of fitting.
Firstly, you need to understand how the couplings will be placed, whether pipe tails will hang on the walls, whether there is enough space for installing the couplings. It is still necessary to note the location of crutches and determine their number.
Secondly, it is necessary to identify difficult places where installation can be complicated and think through its sequence.
Rough installation of the pipeline
The preliminary connection of pipes is carried out without sealing. The ends of the pipeline are interconnected only by complete nozzles. Next, we cut the pipes from the side of the free end.
It is impossible to cut from the pipe side, as this will violate the design and tightness of the connection in the future.

Cutting is performed with a hacksaw for metal strictly at right angles. All burrs must be removed with a knife, including bevels. If this is not done, then the remaining fibers will serve as a clogging site. All rotary splitters must be immediately turned to the operating position.
Fine installation and sealing
Starting with the removal of the riser, we connect the entire system in sections. Special attention must be paid to the reliability of sealing - for this use pipe sealant.
The composition should be neutral - it is better to use polyurethane or silicone. Sealant must be applied to each plastic gasket. Rubber seals do not need to be applied.
It is necessary to lubricate the outer part of the pipe, which will contact when connecting, as well as the inner part of the pipe. We connect each section individually. After the sealant hardens, you need to check the entire system for leaks, letting water into the drain from all plumbing, including the bathroom. In this case, not a drop of water should be on the floor.
Conclusions and useful video on the topic
Installation of sewage in an apartment is a laborious process, but knowledge of the subtleties will help to make a competent installation. Use the video tips to expand your knowledge and observe the work of professionals.
Now you know how to plan and carry out sewage in the apartment. The process of dismantling and installing equipment is accompanied by many professional nuances, so if necessary, it is better to contact specialists.
Have experience in solving such problems? Or there were questions about the arrangement of sewage in the apartment? Please share your opinion and leave comments. The communication unit is located below.
 Internal sewerage: device options in an apartment and a private house
  How to make a blind area around the house with your own hands: rules and methods for arranging the ebb system
 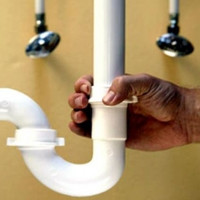 Water lock for sewerage: classification of water locks and the rules for its installation
 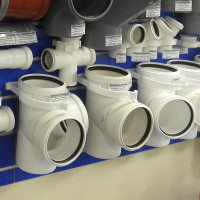 Silent sewage: principles of arrangement and installation examples
  Internal water supply and sewerage of buildings: standards, norms and requirements
  How much does it cost to connect gas to a private house: the price of organizing gas supply
  The best washing machines with dryer: model rating and customer tips
  What is the color temperature of light and the nuances of choosing the temperature of the lamps to suit your needs
  Replacement of a geyser in an apartment: replacement paperwork + basic norms and requirements
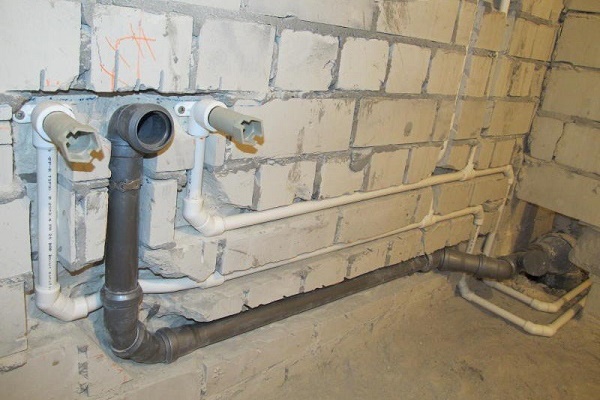
Still, for the installation of sewage in the apartment, I would advise you to use not PVC pipes, but noiseless polypropylene pipes. Now quite a lot of firms produce them. And accordingly, special silent clamps. Or, if you still use PVC pipes, isolate them using pipe insulation, which is also a great choice now. Well, or hide in a special box. I would also pay attention to the passage of pipes through supporting structures - walls or partitions. The transition must be mandatory through the sleeves and not rigidly minted, for example, with mastic. And the mandatory availability of revision on the riser.
I absolutely disagree with you! PVC pipes practically do not go polypropylene, but at a cost of 2 times cheaper. And their roughness inside is really a plus for sewers, they will clog twice as fast! And isolation for what in the sewerage? Especially if it is sewn into the wall? And the box with the audit - they also absolutely have no need to put them in the apartment! This, of course, is my personal opinion!
When comparing PVC and PP pipes, it is worth considering not only the price issue, but also such indicators as the ability to withstand external factors of influence, as well as interaction with the biological environment, indicators of tightness and wear resistance. The lifetime itself, which is incorporated in the products, is also very important.
First of all, it should be noted that PP pipes are designed for a longer service life than PVC. In addition, due to the smooth surface of the PP, pipes pass substances much better, which means that the probability of blockages is several times less.
Also, PP pipes relative to PVC can be characterized as neutral regarding the effects of biological factors. Also PP pipes have a molecular structure that allows them to restore their original shape after a slight deformation.
Given all these points, you can overpay for PP pipes. Revision on the riser will not be superfluous, in which case you can break through the blockage immediately, and not do it through the neighbors.
“Propylene allows cleaning with a plumbing cable, as well as the use of active chemicals with the exception of alkalis and acids.”
What is it like? Can I purge with pure oxygen? A mole is kind of like an alkali.What then can be cleaned with distillate?