Wall drainage of the foundation: the specifics of the arrangement of the water drainage system

Suburban areas with ideal hydrogeological conditions are extremely rare. Basically, they get it with natural flaws that can and should be fought. So, to combat groundwater and flood water, a wall drainage of the foundation is built. For its effective work, you need to know the specifics of the device. Do you agree?
We suggest that you familiarize yourself with the proven practice of building wall drainage. Reliable information is useful to owners who want to make a water drainage system with their own hands. An article will also be useful to those who order work in a specialized company in order to control their quality.
We have laid out in detail the step-by-step technology for constructing a system that drains the soil near the base of the house. The article provides recommendations for the operation of drainage. In the analysis of a difficult topic, photo and video applications will effectively help.
The content of the article:
Purpose of wall drainage
A fairly simple, but designed according to a precisely calculated design, the drainage system performs several important functions.
For example, it effectively protects the ground floor (if any) or basement from flooding, which is usually equipped with both cottages and small country houses of temporary residence.
The decision on the need for construction activities should be made based on two “signals”: the location of water horizons less than half a meter from the bottom of the foundation or the likelihood of a water tower in a dangerous proximity to the building.
Another reason for the installation of wall drainage of the foundation is the aggressive composition of groundwater. Substances dissolved in a liquid medium negatively affect the foundation material, destroying it over time.In this case, the feasibility of double protection should be considered - drainage and reliable waterproofing.

In case of violation blind areas or permanent water leaks in the foundation zone (for example, with improper installation of drainage equipment), motions of heaving soils saturated with excess moisture occur. To prevent deformation of concrete or brick structures, drainage is also necessary.
Sometimes in the process of building a building it is necessary to carry out activities that provoke a change in the location of groundwater. Accordingly, in these cases it is also necessary to take care of the functional drainage system.
Here is a list of some unwanted design decisions:
- a device near the construction of enclosed areas without proper pumping of liquid;
- insufficiently thought-out system of drains and elements of storm sewers;
- equipment near the house of a pool, pond or other body of water with a disturbed filtration system and emergency discharge;
- violation of building construction technologies (backfill filtration coefficient not thought out);
- retaining walls are installed in the soil, preventing the outflow of water.
Each of these factors at any moment can cause flooding of the foundation, which in the future will be difficult to cope with.

Measures for the installation of drainage structures are carried out based on the provisions of SNiP 3.07.03-85 (specifically on drainage) and SNiP 3.05.05-84 (on pipelines).
The principle of the drainage system
The action of drainage is fully consistent with its main purpose - to remove excess moisture to a safe distance. It would be a mistake to assume that one pipe laid along the perimeter of the house can cope with this problem.
In fact, this is a whole engineering and construction complex that fights an excess of moisture, protecting the foundations and basements, but not overdrying the surrounding area.
The near-wall type of drainage is advisable in the conditions of clay soil and loam, when melt, rain and groundwater cannot independently leave the zone located around the building. The complex design of pipes, wells and outlets removes excess water quite efficiently, despite the budget cost.

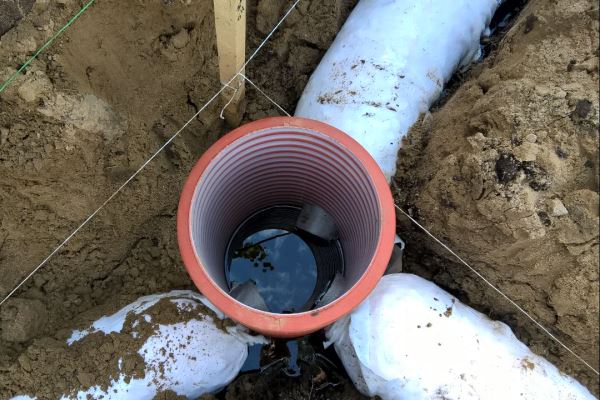
One of the popular schemes involves the connection of two systems - drainage and stormwater - in the area of the accumulation well, which is usually located at the lowest point of the territory adjacent to the house.
In practice, they often use the option when the drainage pipe is cut into the inspection wells storm sewer. However, this is possible only under one condition - if the total volume of effluents does not exceed the norms calculated for the installed equipment.
If the discharge zone is located above the water level in the drive, it is necessary to install pumping equipment. A popular option is submersible drainage pumpmatched by power.
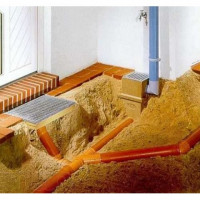
There are two options for arranging drainage around the foundation: traditional and more reliable. Traditional is the installation of pipes with gravel filling, a filter and a clay lock. Its performance has been proven for decades.

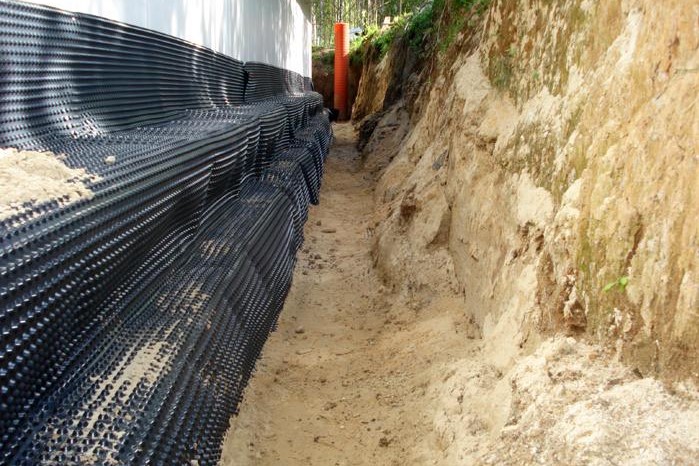
More reliable modern drainage is distinguished by the design of the foundation. Over its entire width, a geomembrane is fixed, the characteristics of which are not inferior to a clay castle.

The installation process is much simpler, if only because you do not need to make calculations and calculate the angle of inclination of the clay “cork”. Now almost all wall drainage schemes include the use of a geomembrane, because it is reliable, practical, fast and efficient.
Step-by-step technology
The process of installing drainage for the foundation can be divided into several stages. The first step is to draft a project that is best left to a professional engineer. The project should contain general drawings and diagrams, a detailed description of the drainage equipment, an action plan, an estimate.
Step # 1: Planning and Execution
According to the norms, drains are laid along the walls of the building at the level of the foundation foundation or 0.3-0.5 m below it. This prevents the accumulation of moisture in the upper layers and provokes the removal of groundwater to the lower levels. Slope parameters are standard - 0.02 m per meter of pipe.
Suppose, when taking into account the norm, the difference between the beginning and the end of the 40-meter pipeline is 0.8 m (2 cm x 40). These calculations are important for tranche equipment.
If the house has a simple rectangular configuration, viewing wells are arranged only in 2 corners. Larger buildings with a more complex shape are equipped with 4 wells.

When calculating the total length of the pipeline, do not forget that it will be located at some distance from the foundation, that is, the length of the branch along one wall will be at least 2 m longer than the length of the wall itself.
If it is not possible to provide a gravity flow system, it is necessary to connect pumping equipment. When choosing a drainage model, pressure (height of water rise) and productivity are important. The optimal power of household models is 400-1000 watts.
Step # 2: Preparing Materials and Tools
With the advent of new building materials on the market, designing a drainage system has become much easier. Polymer pipes and fittings, elastic heaters, geomembrane, geotextiles - all of these products can be purchased at the construction supermarket.
It is not necessary to prepare, as before, special solutions for waterproofing the foundation or to look for clay with special technical characteristics in the vicinity.
So, for the trench device, the following tools will be required:
- level;
- hammer drill;
- shovel;
- bucket;
- pickaxe or crowbar;
- wheelbarrow;
- tamper for filling backfill.
The main tool is the working hands, the more there are, the faster the digging and backfill process will go.

For the installation of the pipeline, polymer pipes (HDPE, polyvinyl chloride, polypropylene), as well as couplings and elbows from the same material are needed. Sealant for outdoor work will not hurt.
If the pipe laying area is not lower than the freezing level, as SNiP recommends, but at a shallow depth, an artificial insulation may be required to prevent the occurrence of ice and ice plugs.
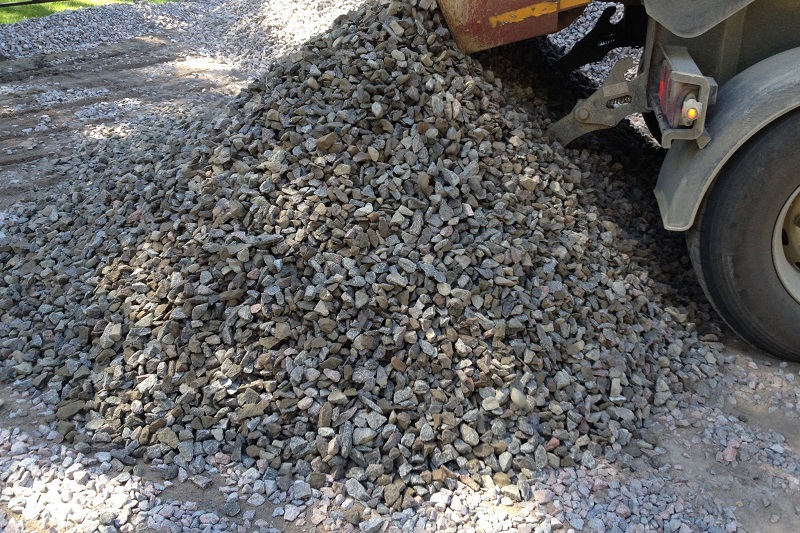
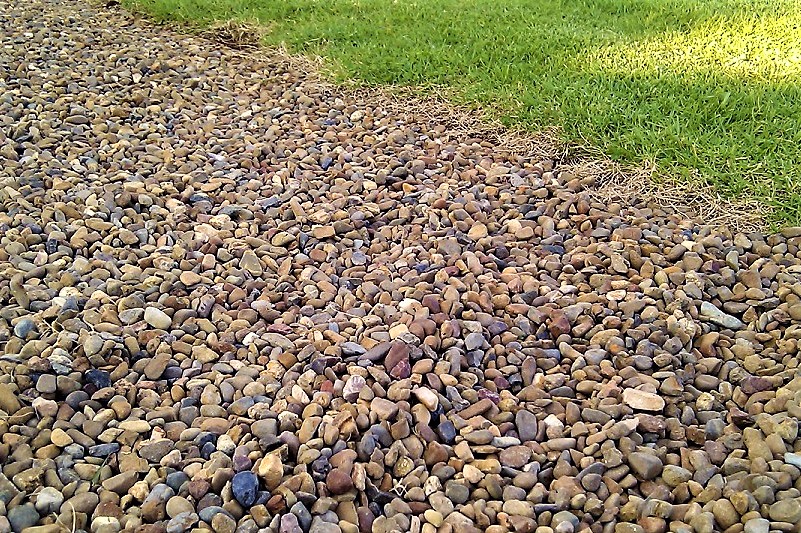
The device of the filter layer is made using geotextiles and crushed stone (gravel) backfill with a fraction of 0.3-0.4 cm, coarse sand will also be needed. For waterproofing, you can use traditional bitumen mastics or a profiled membrane, but it is better to use a combined method of protecting the foundation.
Step # 3: Select Drain Pipes
We dwell on the choice of drainage pipes, because they are the main parts of the drainage system. According to the recommendations of SNiP, it is possible to use ceramics, asbestos cement and plastic, but recently the first two options are practically not used.
Ceramic and asbestos-cement products are heavier than polymer analogues and have a more fragile structure. Plastic pipes (drains) differ in low weight, which is welcomed during transportation and installation, as well as high rates of strength and wear resistance.
Material for the production of pipes - PP, PND and PVC. Plastic drains are not deformed under soil pressure, tolerate the aggressive composition of groundwater, and have a long service life (up to 40-50 years).

The main difference between drains and ordinary pipes is cuts, which are laid on the sides during installation. To protect the holes from clogging with pieces of soil and silt, an effective filter is used - geotextiles. There are smooth and corrugated types, the second are more elastic and at the same time tough.
The choice of type, cross-section and method of installation of drains depends on the type of soil and the volume of water. For example, if crushed stone soil predominates on the construction site of the building, no additional measures are required to create a filter - just dig a trench and install a pipeline.

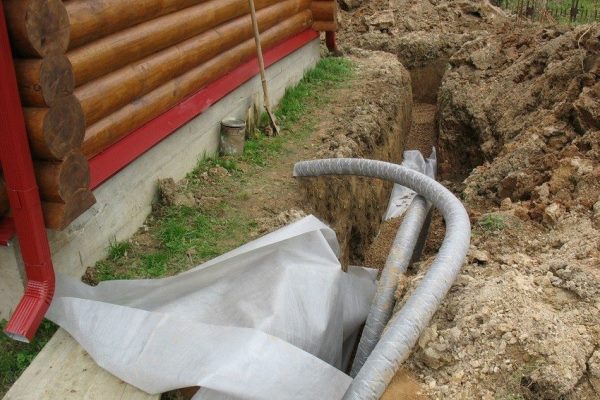
For pipes located in clay soils, crushed stone filling with a thickness of 0.20-0.25 m is mandatory, and in loams additional protection against siltation in the form of a geotextile winding is required. Designs placed in sandy soil require maximum attention: you need both crushed stone and geotextiles.
Step # 4: Trenching - Earthwork
Having prepared the material, you can start marking the place for laying the drains. To make it easier to determine the amount of work, pegs are placed along the contour of the trenches and the twine is pulled between them. Earthwork is the most time-consuming part of the drainage device.
When digging trenches, it is necessary to monitor the slight inclination of the bottom towards the drive. For accuracy, use the level and milestones, with which it is easy to determine the height difference.
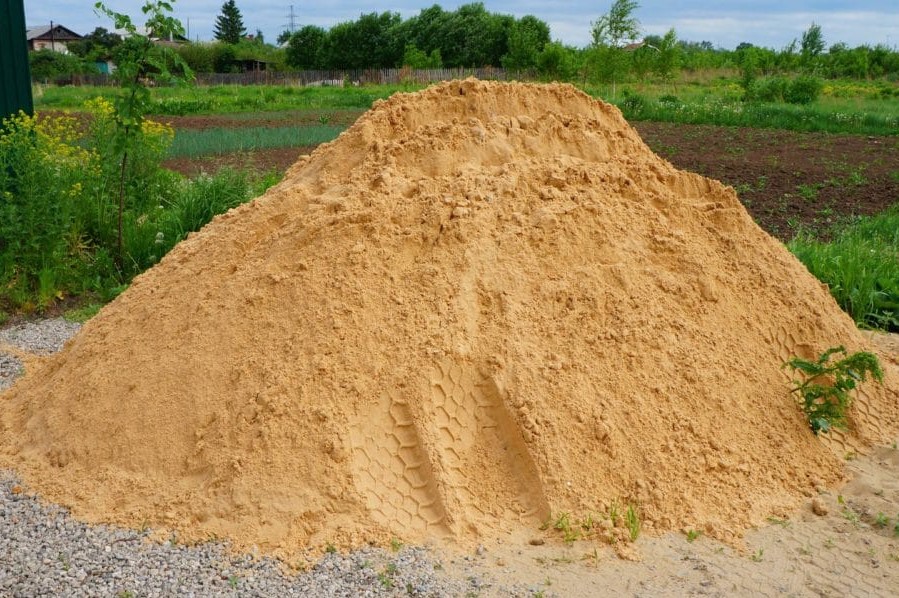
For more precise compliance with bias usually use sand, which is part of the filter.By the way, when using factory-made drains equipped with a geotextile layer, another “pillow” is not required - it’s quite sandy.

Having arranged a trench along the foundation, it is necessary to dig a pit for the accumulation well and one more ditch - to divert water beyond the fence (if it is not planned to use all the water for irrigation or technical needs).
A few tips with an eye on the SNIP:
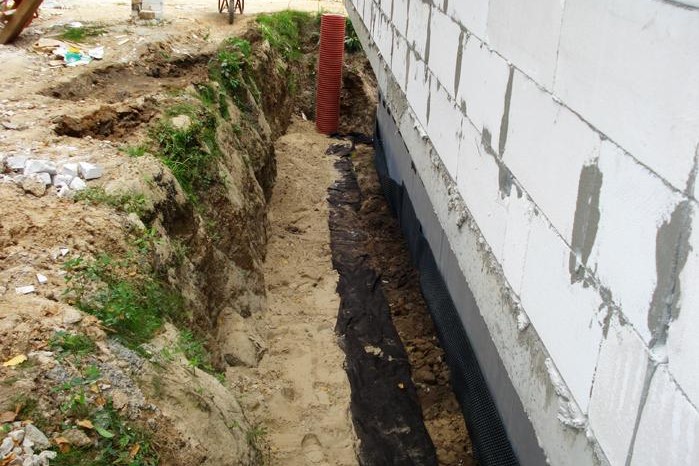
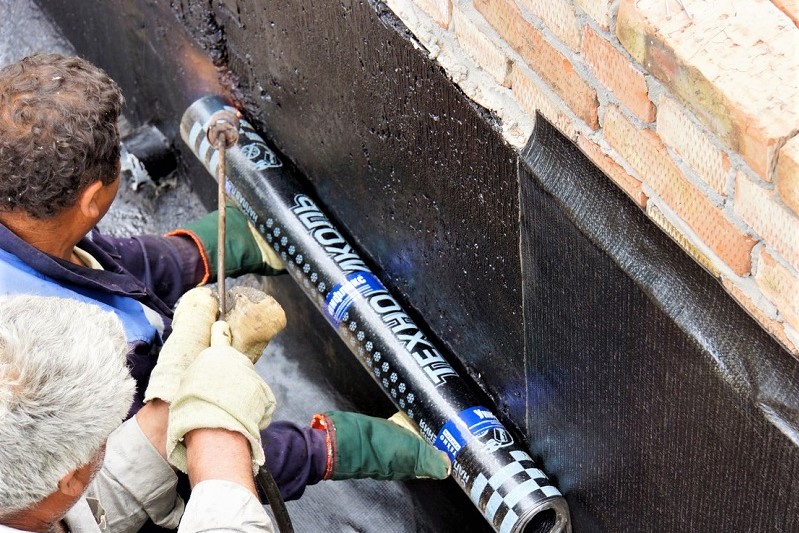
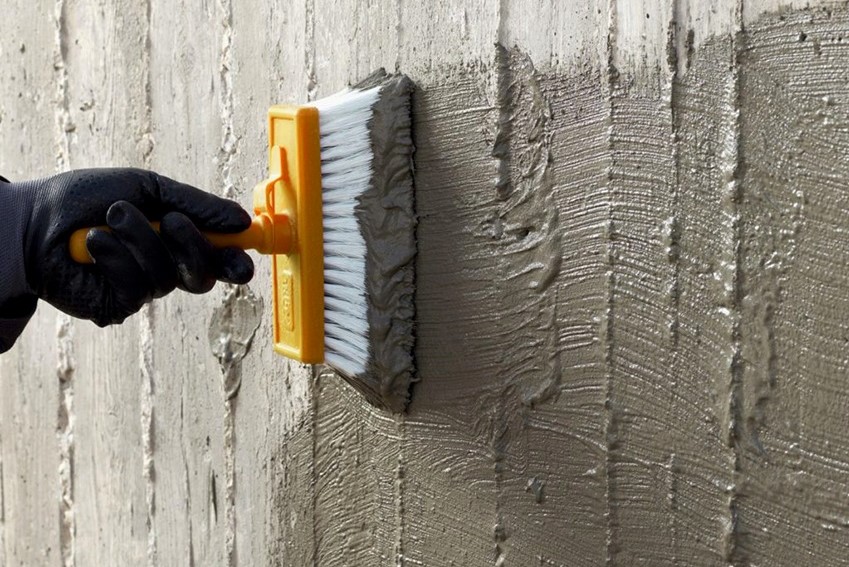
Step # 5: Waterproofing the foundation with a membrane and bitumen
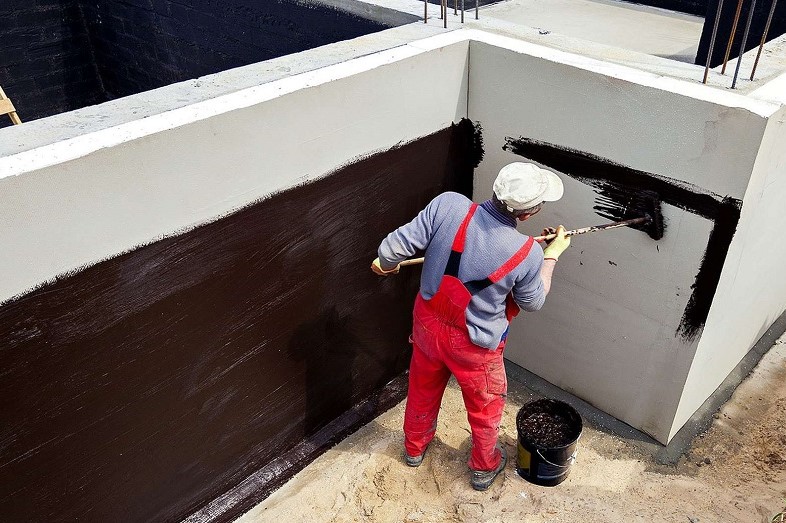
Waterproofing of concrete foundation parts is necessary in any case: even if there is no utility room or storage for canned vegetables inside the basement. A dense layer of protective material will enhance the strength of concrete structures and protect them from regular washing out with ground water if the drainage system cannot cope with their volume.
Bituminous mastic is traditionally used to treat foundation walls - to increase its water-repellent qualities, it is applied in several layers. At the joints of concrete structures, fiberglass reinforcement can additionally be made.
The thickness of the bitumen layer depends on the depth of laying: up to 3 m, a 2-mm bitumen layer is enough, more than 3 m - up to 4 mm. When the bitumen dries, PPM, a profiled roll-type polymer membrane, is fixed over the entire width of the foundation.

More expensive types of PPM are initially equipped with a layer of geotextiles. There are three-layer products, additionally reinforced with plastic wrap. The roll is rolled along the length of the foundation, trying to leave as few connecting places as possible.

The principle of membrane protection is simple: water seeps through geotextiles, collides with waterproof polyester material and rolls down to drainage pipes.
Depending on the method of waterproofing the foundation and laying the drains, it is necessary to prepare separate building materials:
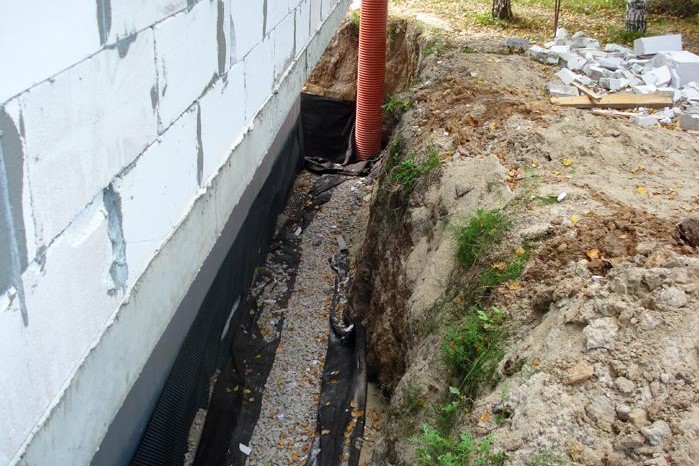
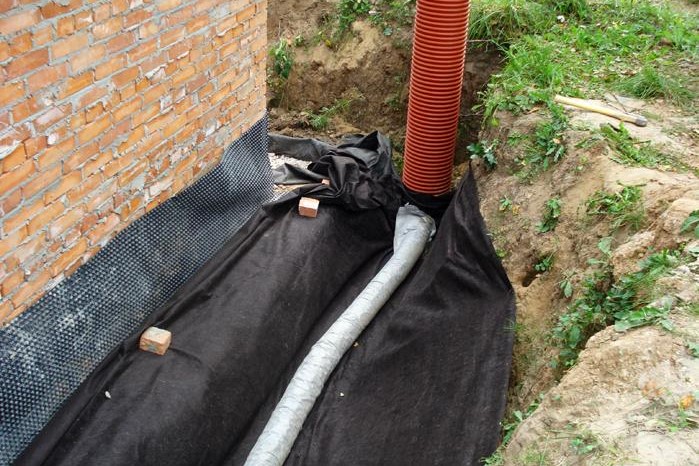
Step # 6: Laying the piping around the perimeter
Suppose that the necessary slope of the bottom of the trench (2 cm / 1 m) is taken into account even at the stage of excavation.
The common way of laying pipes looks like this:
- A layer of sand (0.15-0.20) m is poured to the bottom.
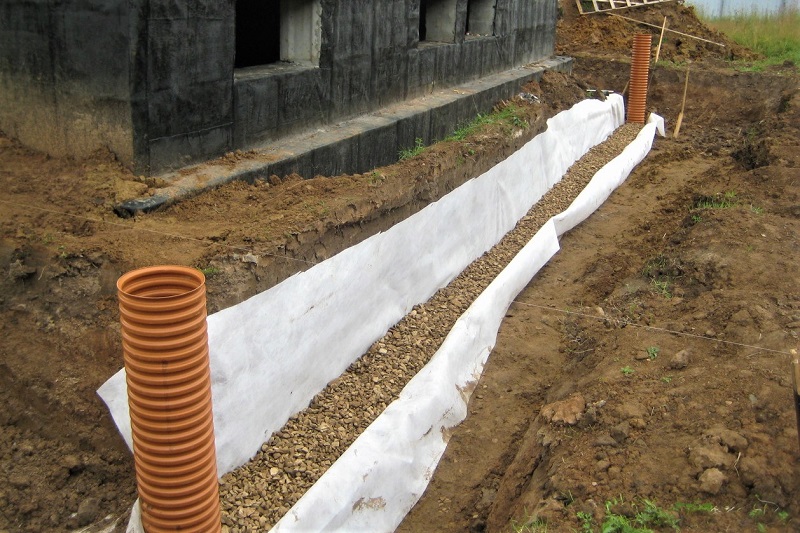
- The rolled geotextiles are spread along the entire length of the trench, the edges of the canvas are fixed in the upper part of the trenches.
- A thick layer (also at least 0.15 m) of clean gravel is poured onto the cloth. After each event, the slope is checked.
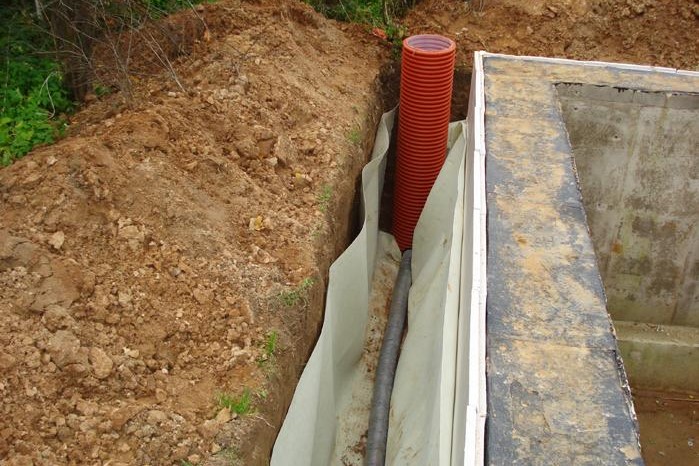
- Pipes with a diameter of 0.11-0.20 m are laid with openings to the sides, short fragments are connected by couplings.
- If the pipes do not have a protective layer, they are wrapped with geotextile and fixed with polymer twine.
- At bends, in places of drops and connections of drains, audit wells are arranged. It is possible to use pipes of wide cross section equipped with caps (later they will be required for flushing the pipeline).
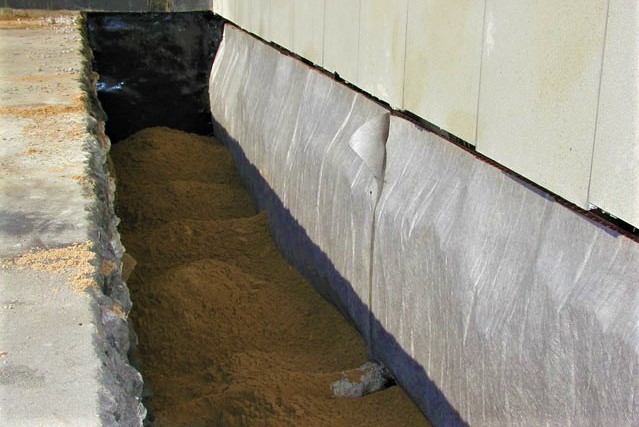
- Drains are covered with a layer of clean gravel (0.15-0.20 m).
- The free edges of the geotextile are laid with an overlap on top, for fixing, they are covered with a heavy layer of clean river sand (in some cases, to the level of the earth's surface).
At the very end, when all the pipes are laid and mounted manholes, make backfilling - return to the place part of the soil, slightly ramming it.

When installing pipes, do not forget about the concrete blind area - a necessary protective element, which is laid along the wall of the house. The width of the blind area is from 0.5 m to 1.0 m.
Step # 7: Install a drain (collector) drive
The simplest is considered a scheme in which a trunk without equipment is taken outside the limits drainage well. However, its presence is still necessary if:
- the removed drainage water is necessary for irrigation of crops or plantings;
- additional storage is a backup storage of process water;
- there is no way to discharge water beyond the boundaries of the site.
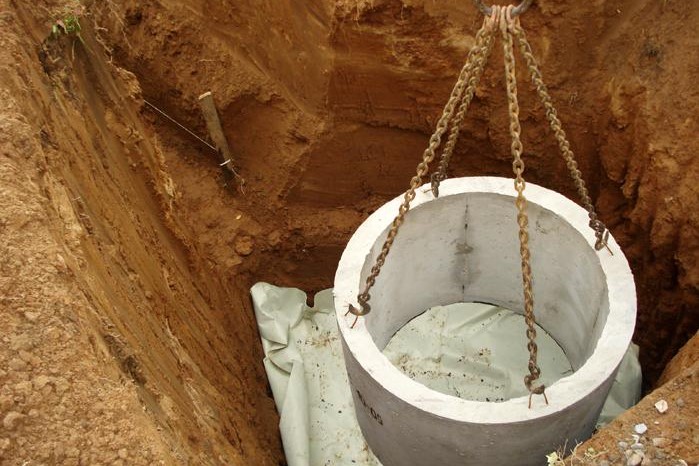
In the latter case, they often equip not a drive, but a filter well, which instead of the bottom is equipped with a powerful filter made of gravel and sand filling.
For the construction of the tank, brick and concrete rings are used, but in connection with the progress in the production of special equipment, prefabricated tanks made of polymer material are increasingly being installed.

A durable plastic barrel is mounted on a flat bottom and covered with soil. In the upper part there is a hatch through which it is easy to access water and equipment.
Valuable tips and tricks
If you follow the rules below, there will be much less problems with the functioning of the drainage system.
- Drainage pipes are mounted along the lower boundary of the foundation foundation. The permissible step up / down is from 0.3 m to 0.5 m. If you lower the drains below, groundwater and rainwater will systematically wash out the soil from under the foundation, which is fraught with subsidence of the building.
- If there is no way to protect the foundation with a geomembrane, you will have to build a clay castle.
- The level of accumulation of drainage water (drainage area) should be lower than the level of the finishing floor in the basement or cellar.
- Backfilling with river sand is more effective than backfilling with native soil.
Given the dynamic movement of groundwater, be sure to fix the geotextile when installing the pipeline. It should tightly, without gaps, cover the filter "roll".

For more effective removal of excess moisture, along with wall drainage, they are installed gutter system and stormwater - underground or outdoor.
Conclusions and useful video on the topic
Three interesting videos will help you learn more about drainage systems.
Video # 1. Useful information on the purpose of drainage systems:
Video # 2. Nuances of choosing drains:
Video # 3. Drainage Tips:
A professionally designed and installed wall mounting system is a guarantee of protection for the foundation and basement. When equipping a do-it-yourself wastewater disposal, remember that it is better to entrust the calculations and preparation of the project to specialists, and you can implement the plans yourself.
Tell us about how you arranged a drainage system to divert ground and flood water from the foundation of the house. Please write comments in the block below. Ask questions here, share useful information, post a photo on the topic.
 How to make your own foundation foundation drainage: step-by-step instruction on arrangement
 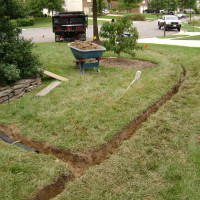 How to make garden drainage with your own hands: analysis of arrangement technology
 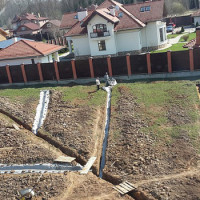 Do-it-yourself site drainage: features of the construction of various types of drainage
 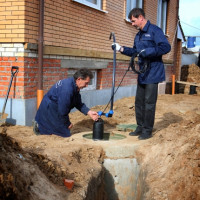 Site drainage project: selection of location, slope, depth, drainage system elements
 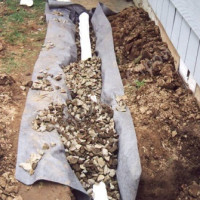 Drainage device around the house: design and installation of a drainage system with your own hands
 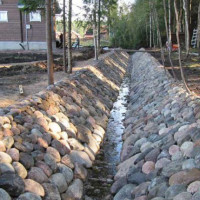 Slope of the drainage pipe: calculations, standards and features of the installation of drainage on the slope
  How much does it cost to connect gas to a private house: the price of organizing gas supply
  The best washing machines with dryer: model rating and customer tips
  What is the color temperature of light and the nuances of choosing the temperature of the lamps to suit your needs
  Replacement of a geyser in an apartment: replacement paperwork + basic norms and requirements
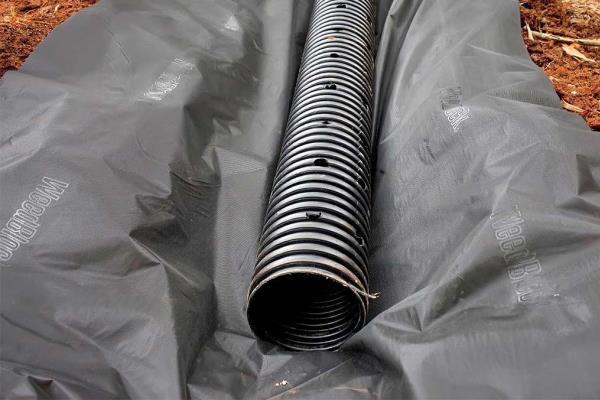
I want to say about bitumen mastic - a thing! I managed to buy a house with its subsequent reconstruction in a swamp. At the same time, it was like a hill, and then the old-timers said that there was a stream flowing there, which in turn was filled up. In short, fear and horror.Like rain, there is a lake under the floor. And before that I lived in the steppe - it was always dry with us. Local builders wanted to breed me on rubber sheets, for some miracle a mixture for 10 thousand rubles a bucket, etc. In short, I was on a business trip - I saw how the basement of high-rise buildings passes with mastic. Well, I'm no worse. Bottom line: for 3 years pah-pah-pah and WITHOUT DRAINAGE. But I don’t have a basement.
The builders made a drainage that drains the soil around the house and a storm system that draws and removes water from the gutter riser and gutters. The stormwater stood for a year and began to choke, and then completely stopped letting water through. It turned out that they calculated the flow rate incorrectly, installed a thin pipe, and incorrectly docked with the sand trap, as a result, the sand clogged the pipes. I had to re-lay pipes of larger diameter and break not two sides but not one. Otherwise, drainage alone would not have been able to cope with water drainage.