Replacing the nozzles in a gas stove: purpose, structure and detailed instructions for replacing nozzles

With things that have served for a long time and have become familiar, it is difficult for a prudent owner to part with him, is not it? If you purchased a new gas stove, and the previous one is still operational, then you must agree that it would be more rational to take it to the country house, where it will serve for many more years.
To transfer to bottled gas, you just need to replace the nozzles in the gas stove. This, having the skills of repair work, is not at all difficult to do on your own, so that you can save on both buying and calling a wizard. Why do we need a replacement and how is it done we will consider in detail in our article. Here are step-by-step instructions, providing them with visual photos and useful videos.
The content of the article:
Purpose and design of nozzles
Of the three systems existing in the gas stove, the gas system, consisting of shut-off valves, pipelines, burners and burners, is the base. In detail about the device of the plate we wrote in this material.
Regardless of the model of the stove, the composition of its components is the same, and in combination they serve to transport the gas supplied to the stove, mix it with air (to saturate with oxygen), dosed supply to the holes of the divider. On the gas path, the shut-off valve and the nozzle of the burner, otherwise called a nozzle or nozzle, are responsible for the dosage and pressure of the gas.
Principle of operation and nozzle arrangement
The gas supplied to the gas stove burner (the device where the gas-air mixture is formed) can be of various types - natural (methane) or liquefied (balloon - propane).
For effective, stable operation of the gas stove, gas mixing and the supply of burners to the divider must be carried out uniformly, with a certain speed. To do this, the gas burner design has an important detail - the nozzle.

Let us consider in more detail what are jets in a household gas stove. This is a part of the burner, designed to ensure that gas enters the burner with the appropriate pressure in the required volume. To do this, a calibrated orifice was made in the nozzle, which determines the parameters of the gas stream that meet the conditions specified by the manufacturer.
These conditions are related to the optimal power of the gas stove, determined by the maximum complete combustion of the consumed gas, indicated by the manufacturer among the technical characteristics of the equipment.
Diameter and thread of nozzles
The nozzles are bolt-shaped, equipped with an external thread and a hexagonal head. The access hole (nozzle) located in the center of the part has a diameter calculated according to the type of gas, its pressure, as well as the method of supplying the gas-air mixture and the power of the burner.
For balloon gas, the nozzle diameter (with the same design and power of the burner) needs a little less, for natural gas - a little more.
If nozzles for natural gas are installed on the stove connected to the bottled gas, the pressure of the gas entering the burner will be greater, air (and oxygen) will be trapped less, the tongues of the flame will be noisy and long, have an orange color and smoke. In this case, the situation can only be changed by replacing the nozzles with parts with a smaller nozzle diameter.

In most models, the hexagonal slot of different nozzles has one standard size, therefore, to unscrew the replaced part of different plates, you need a 7 mm key.
The diameters of the holes, the thread pitch and the length of the part are different in the nozzles (for natural fuels - the length is shorter, for liquefied - longer). The dimensions of the channel diameter are knocked out on the head of the part (in hundredths of a millimeter, marking is much less common in mm).

Jets refer to interchangeable parts. When selling stoves, nozzles designed for natural gas are usually installed on them. Many modern gas stove models are also equipped with nozzles designed to switch them to bottled gas. If this is not the case, then a set of jets can be purchased separately in the same place, in specialized stores, or via the Internet.
Nozzles are made of brass. It is thermally resistant, durable and resistant to corrosion. During operation, they heat slightly. In the old-style plates, the vertical nozzles were made of brass, and the base into which they were screwed was made of aluminum alloy. Therefore, when replacing or cleaning the nozzle, care must be taken not to damage the threads.
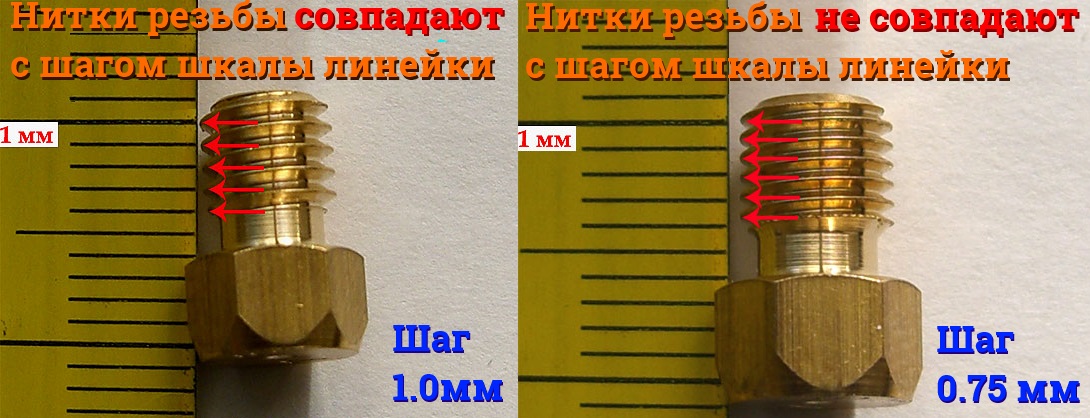
If the documents for the unit are lost, determining the thread of the nozzle of gas stoves when purchasing replacement parts may cause some difficulty. However, it is not difficult to determine the thread pitch of the nozzles of most plates, since there are only two values - 0.75 and 1.0 mm.
Until 2009, nozzles for plates were produced with a thread pitch of 1 mm. In most new plates manufactured since 2009, nozzles with a thread of 0.75 mm are installed. To determine the size, it is enough to attach a ruler with clearly visible millimeter divisions to the thread.
When transferring stoves to gas from a cylinder, not only nozzles are replaced.Replace and gas reducer.
Popular injector malfunctions
Usually jets serve for a long time. Their replacement is required when switching to another type of gas or in case factory defect. Often there is a need to clean them from soot and clogging.
The following symptoms are associated with nozzle blockage:
- stove smokes, instead of an even blue flame, red-yellow tongues appear above the divider;
- one of the burners does not light;
- the burner burns poorly, sometimes goes out;
- when you release the button (handle), which turns on the ignition device, the oven flame goes out or does not light up at all - this happens when, due to insufficient gas supply, the generated heat is not enough to heat the temperature sensor, and the fuel supply is automatically shut off by the gas control system.
Replacing a separate nozzle is required if the gas burns so intensely on the burner that the tongues of flame come off the divider. This happens in the case of factory marriage. If a similar pattern is observed on all burners, it is worth checking the gearbox.
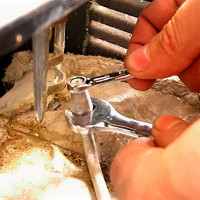
Tools for work related to nozzles will need a little: a set of open-end and combination spanners, a Phillips screwdriver, a thin needle (it is better to fix it on the end of a pencil), wire or fishing line. For cleaning, a soap solution or other liquid detergent with which dishes are washed is also useful. Abrasives must not be used!
Most often, keys are needed:
- for old jets - 8 mm (for liquefied gas - 7 mm);
- for burner nuts - 14 mm;
- for oven piping tip - 17 mm.
However, since plate designs are different, other keys may be needed. Therefore, it is more rational to stock up on their full set.
Cleaning tips for the nozzle
Most often, nozzles do not need to be removed for cleaning. It is enough to remove the burners. In some models, the hob top and other parts will also have to be dismantled.
First, try to clean the nozzle hole without removing it.

The nozzle opening is narrow; use a fishing line, copper wire or needle to clean it. You just need to scroll the needle with your fingers around its axis. After the needle has deepened, turn on the gas before removing it and remove the needle. A gas jet blows dust out of the hole. A few seconds is enough to purge.
If cleaning does not succeed on site, the nozzle should be removed, cleaned and rinsed. Replace after drying.
Cooker and oven nozzle replacement instructions
Next, we consider a detailed briefing on the replacement of nozzles on the stove, as well as the oven.
Instruction # 1 - Replacing Hob Nozzles
Further, what to do and how to replace nozzles on a gas stove. Since the designs of gas stoves differ, we will consider several of the most typical options. In the designs of new modifications, access to the nozzles is facilitated (just remove the burners). Other common models are of interest.
In terms of burner design, some models of Hephaestus and Darina stoves are similar. To replace the nozzles of the cooking part of the Hephaestus stove, a series of steps are performed sequentially.
Step 1. Remove the grill from the stove, remove all burners.

Step 2. Unscrewing the fastening screws, remove (lift) the top panel. Darina has latches, which are released by special stops from the set of plates.
Step 3. To release the burner, two screws securing its construction are unscrewed with a Phillips screwdriver.

Step 4. Using a flat-head screwdriver, the retainer (curved plate) is removed from the side of the valve handle, releasing the tube supplying gas to the burner. Take the phone to the side.
Step 5. Unscrew the other end of the tube from the seat by removing the retaining plate with your fingers or with a pair of pliers (in Hephaestus) / screwdriver (in Darina).

Step 6. In the Hephaestus plate, the end of the gas tube is connected to the nozzle through a transition cone (a sealing ring is installed on the tube under the cone). A key is thrown onto the hexagonal platform of the cone (by 14), in order to hold and not damage the tube when unscrewing, the nozzle is unscrewed by the second key (by 8).
Step 7. Having unscrewed the old nozzle, replace it with a new one, lubricating the thread with graphite grease. The sealing ring is also replaced, which is convenient to do with a match. Use a 7 key to tighten.


Step 8. Collect the entire assembly in the reverse order.
A similar operation is performed for the remaining burners of the cooking table.
Taking advantage of the fact that the upper part of the unit is opened, it is cleaned of debris and dirt. In addition to replacing nozzles, the plates can also be replaced with screws to control low gas flow (or low flame). They regulate a reduced gas supply sufficient to ensure that the flame on the burner does not die out with a minimum gas supply.

Replacing the jets, check their action, if necessary, then adjust the combustion process of the small flame with screws.
After replacing the nozzles, adjusting the small flame and air supply, as well as cleaning the inside of the stove, the hob is assembled in the reverse order.
Instruction # 2 - replacing the nozzles of the oven
In the designs of different models of stoves, the number of burners and their location can be different. So in the oven there can be one (bottom) or two (top for grilling and bottom) burners. In modern ovens, burners are more often oriented along the stove (longitudinally), and the nozzles are mounted on the back wall. On older stoves, gas is supplied to the left (lateral orientation), and the nozzles are also located on the left side of the oven.
In order to get to the nozzle of the upper burners, remove the door, unscrew and remove the grate that covers the burner, unscrew the screw that secures the burner to the frame. Pulling the burner toward you, it is carefully removed from the oven, after which the nozzle becomes visible. On some models, the tip must be removed to remove the burner. thermocouples.


The nozzle is twisted using a socket wrench. Having installed a new part, they assemble the equipment of the oven in the reverse order. If the nozzle can’t be unscrewed from this position without applying great effort, then they are reached from the back of the plate.
In some models, access to the lower burners opens from the space of the lower technical box. In others - from the oven, such as in the MORA stove, the replacement of the nozzle of which is given as an illustration.


The burner is installed in the longitudinal position. Fastens to a plate by means of a curved iron strip with two screws. A thermocouple is attached to the same strip.
The burner can only be removed after disconnecting the thermocouple tip. It is taken out together with an iron strip.

The replacement sequence of the nozzle in the lateral position of the burner can be more complicated.
Consider the step-by-step instructions for replacing further:
Step 1. Open the bottom door of the plate drawer all the way, getting the opportunity to fully open the oven door.
Step 2. Open the oven door to the limit. To remove the burner, we remove the floor of the oven chamber, pulling ourselves through the slot.
Step 3. Unscrew the two fixing screws on the burner. Remove the burner.
Step 4. Now we can see the nozzle on the left in the wall. Well, if it is not stuck and you do not need to exert a lot of effort for twisting. If so, the jet is removed and replaced already at this stage.

Step 5. If the jet stuck, then leave it. Dismantle the left wall of the plate. To do this, unscrew the fixing screws.
Step 6. Having removed the wall, we expose the gas line going to the burner. At the very bottom of the gas pipe there is a nut 17, which can be easily unscrewed with a wrench.
Step 7. We take aside the gas pipe with the nut and disconnect the nozzle holder housing from the stove.
Step 8. Lubricate the sticky nozzle WD-40 or other suitable means, wait until it works, and unscrew the nozzle.


Step 9. We install a new nozzle in the housing and assemble all previously removed parts, remembering to install a new sealing ring.
Useful nozzle replacement tips
To check the condition of the stove and the absence of gas leaks, it is recommended to call once a year gas service masters. General cleaning of the stove is best done weekly. Table cleaning - after each cooking.
Using excessive force can damage the gas pipe or nozzle, which can result in more serious stove repair or a jet breakdown. Therefore, where there are special platforms for the key, when unscrewing and twisting the nozzle, use two keys - one to hold the tube, the second - to rotate the nozzle.
The shape and color of the flame on the burner of an oven equipped with a thermostat should be checked correctly when the oven is cold. Otherwise, the temperature controller intervenes in the process, which reduces the gas supply when the temperature reaches a certain threshold. That is his purpose.
In the equipment of the old model, the feed rate to the air burner is additionally adjusted.
In the new units, the nozzles are screwed without thread winding. In old gas structures, the last 3-4 steps of the thread are sealed with fibrous materials.

If seals are installed in the joints, it is better to replace the old rubber rings with new ones.
On the forums there are tips for changing the cross section of the nozzle through hole by choking or putting wire in the hole. These are quite crude ways that it is not recommended to resort to. None of these methods can accurately adjust the gas supply. Nor will it be possible to drill a narrow hole with a thin drill. The best solution is to buy a new nozzle with a hole of the desired diameter.
Safety measures when replacing an atomizer
Ensuring safe replacement is an essential requirement when performing gas related activities.
Therefore, do not neglect a number of rules:
- Before replacing the nozzles, disconnect the stove from gas and electricity.
- Make sure the burners are cool.
- Before starting work, open the windows, devices that operate on electricity, capable of giving a spark, turn off.
- You can not do it yourself to modify the details of the plate or replace it with non-native, inappropriate in size or made yourself.
- After mounting parts, be sure to check all gas connections for possible leaks. For this, the compounds are washed on all sides (using a brush or sponge) and, by turning on the gas supply, it is observed whether bubbles form. If a leak is detected, the connection is either tightened or disassembled and reassembled.
No nozzles designed for a gas burner of stoves of a completely different design or other gas devices can be used.
Do not replace the nozzles in the gas stove yourself if you are unsure of your capabilities.
Conclusions and useful video on the topic
Home craftsmen have always preferred to do everything on their own. In the video, you can see how the fixing elements were found experimentally and the nozzle was replaced in the oven of the MORA stove:
The nuances of cleaning the nozzle in the following video:
Transfer of the Lada stove to balloon fuel:
Replacing such a seemingly small, but necessary for the correct operation of the stove, part is not difficult for those who are used to working with their hands. Knowledge of how to properly change jets on an old gas stove, a minimum set of tools and spare parts, careful adherence to the rules of replacement - this will be enough for a successful business.
Are you familiar with the process of replacing jets not by hearsay? Tell us about your experience, share useful tips with other users, take part in discussions - the feedback form is located below.
 Replacing the nozzles in the Hephaestus gas stove: a detailed guide for replacing nozzles
 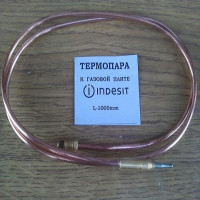 Thermocouple in a gas stove: principle of operation + instruction on replacing the device
  How to ignite an oven in a gas stove “Hephaestus”: ignition rules and the principle of operation of a gas oven
 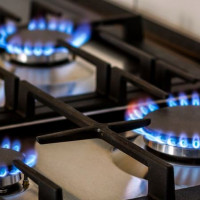 How to increase the power of the gas burner and improve the flame on the stove: an overview of popular ways
 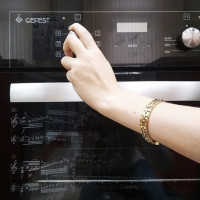 How to turn on the oven in a gas stove: recommendations for igniting gas in the oven and an overview of safety rules
  How to connect a gas cylinder to a gas stove: standards and connection guide
  How much does it cost to connect gas to a private house: the price of organizing gas supply
  The best washing machines with dryer: model rating and customer tips
  What is the color temperature of light and the nuances of choosing the temperature of the lamps to suit your needs
  Replacement of a geyser in an apartment: replacement paperwork + basic norms and requirements