How to connect a gas boiler Ariston: recommendations for installation, connection, configuration and first start-up

Gas boilers are produced by different companies, which is accompanied by the delivery of equipment to the market that requires an individual approach to installation and operation. But I don’t feel like overpaying for the call of a specialist for installation work, right? But how to connect the Ariston gas boiler yourself, taking into account the individual characteristics of the purchased equipment?
We will try to help you deal with this task - in our publication, the procedure for installing, connecting and tuning a gas boiler is considered. The sequence of work during the first start-up of the equipment is also given. The material presented is supplemented by visual photos and a video.
The content of the article:
- The procedure for connecting the Ariston boiler
- Stage # 1 - Studying the manufacturer's installation requirements
- Stage # 2 - preparation and installation of the boiler on the wall
- Stage # 3 - execution of hydraulic connections
- Stage # 4 - organization of air injection and chimney
- Stage # 5 - connecting the chimney / duct
- Stage # 6 - connecting the equipment to the mains
- Initial start-up and adjustment of the boiler
- Conclusions and useful video on the topic
The procedure for connecting the Ariston boiler
Wall-mounted boilers are perhaps the most common among domestic gas equipment - they are most often choose to install at home potential buyers.
So, the modern gas wall-mounted boiler of the Ariston Net model allows you to: start, stop and control the temperature background of heating and domestic hot water. Moreover, all these actions can be performed from anywhere at any time through the use of a familiar smartphone or personal computer.

The system provides constant monitoring of energy consumption, which is accompanied by significant gas savings. Thanks to special software, the owner of the equipment receives real-time notifications of malfunctions.
In addition, if you activate remote control, it becomes possible to solve most problems remotely. However, let's first consider how to properly install a gas boiler for household purposes of the Ariston brand, as well as the features of its connection, settings and the procedure during the first start-up.
Stage # 1 - Studying the manufacturer's installation requirements
Judging by the requirements of the manufacturer of boilers Ariston, the installation of equipment is the prerogative of specialists.
Hence the corresponding conclusion - independent installation and the first inclusion of a domestic gas boiler Ariston is theoretically impossible (or rather unacceptable). Moreover, the first commissioning of equipment is prohibited without a gas service representative.
The manufacturer also reminds the future user of the quality of water with which the gas wall-mounted boiler will work. It is noted: if the water quality (chemical composition) does not meet the technical requirements, the operability of gas equipment is not guaranteed by the manufacturer during the established warranty period.

In addition to the technological connection points indicated in the diagram above, there are four more connection points as part of the Ariston gas boiler design:
- Relief valve drain.
- Make-up water from the network.
- System drain channel.
- Return line from the boiler.
Ariston gas boiler is designed for inclusion in the schemes of hot water supply and heating, suitable for technical specifications.
Operation of equipment is considered unacceptable if the operating mode does not correspond to the intended purpose of the system. It is also unacceptable, according to the requirements of the manufacturer, to carry out repairs on their own.
Stage # 2 - preparation and installation of the boiler on the wall
Installation of the main unit (gas boiler) is carried out on a wall with a high degree of strength. Any vibrations transmitted along the structure of the wall where the Ariston gas boiler is installed are not allowed.
The pipelines connected to the equipment should be protected from possible mechanical damage, as well as the electric wires supplying the gas boiler.
The premises for installation must be selected taking into account the provided technical and sanitary conditions:
- a sufficient level of lighting;
- effective ventilation;
- strong designs.
Finally, during the installation process, the established safety rules must be observed.

Before starting installation of the system, it is necessary to carry out the operations:
- flushing the DHW and heating circuits;
- check gas for fuel type;
- check the design of the flue for compliance with the required norm;
- check the quality (chemical composition) of water.
Ariston boilers of a typical design “C”, endowed with a sealed combustion chamber, supporting the function of supplying external air, are not limited by the ventilation requirements and the dimensions of the working room.
The normal functioning of the Ariston gas boiler continues at a minimum operating temperature of +5 ° C inside the workroom. At the same time, it is recommended to protect the boiler from the possible impact of external factors and precipitation.
Ariston domestic gas boiler is mounted on a solid wall, built on the basis of non-combustible material, which can support the full weight of the equipment.The location of the gas boiler must be selected taking into account the exposure to the minimum allowable distances (diagram above) to nearby objects. These requirements are designed to provide access for convenient maintenance.
Stage # 3 - execution of hydraulic connections
According to the technical parameters of the manufacturer, the maximum allowable pressure inside the pipes of the system water supply is allowed at no more than 6 atmospheres. If this limit of the centralized network water pressure is exceeded, it is necessary to additionally install a pressure reducer in the system.

Sizing of water pipelines and heating devices that make up the heating circuit is performed by the residual pressure. The level of this pressure is calculated as a function of the required water flow. In this case, the technical characteristics of the circulation pump are also taken into account.
The operation manual requires connecting the drain pipe (supplied) to the outlet point to the safety valve. The drain valve of the safety valve is connected to the drain siphon according to the scheme, which makes it possible to visually observe the operability of the safety valve.
The design of the gas boiler Ariston provides for the connection of an external indirect boiler in order to produce hot water. The hot water temperature is regulated by default with an NTC sensor. If the temperature control is organized via a thermostat, you will need to make adjustments to the gas boiler control settings.
Stage # 4 - organization of air injection and chimney
The design of the gas boiler Ariston allows the organization of installation according to the scheme "B" (room air is used) and according to the scheme "C" (outdoor air is used).
In order to prevent the penetration of combustion products into the duct system, careful execution of mounting seals is required. It is required to install the flue gas exhaust module taking into account the exclusion of violation of seals and to prevent the penetration of flue gases into the duct.

According to the manufacturer's instructions, the horizontal sections of the flues are mounted with a slope of about 3%, directed away from the boiler. So prevented condensation.
Installation of gas equipment according to scheme “B” requires the organization of effective ventilation and air intake in the working rooms.
Rooms where the appearance of corrosive vapors is possible in the air, it is allowed to use only the installation according to the scheme “C” (inflow of outside air). Such requirements provide corrosion protection for gas boilers Ariston.
Installation of a coaxial (dual) system (gas removal and air supply), the manufacturer requires performing original accessories and accessories.
It is unacceptable to arrange a chimney in the immediate vicinity with materials that are flammable. It is also forbidden to install a chimney through structures made on the basis of flammable materials. If the old boiler is replaced with a new one, all parts of the ventilation and exhaust products modules must be replaced.
Stage # 5 - connecting the chimney / duct
There are several options for connecting the chimney, depending on the configuration of the gas equipment:
- coaxial system (pipe in pipe);
- separate system;
- single-channel chimney.
For the connection of a gas boiler according to the “pipe in pipe” scheme, materials and components with a high degree of resistance to condensate are used.Read more about the installation of a coaxial chimney in this article.
Chimney / duct kits are usually not listed on the Ariston gas boiler equipment list. Accordingly, additional kits are ordered for a specific connection.

Many gas boilers of the Ariston brand are made taking into account air supply and gas exhaust through a coaxial system, the pipe diameters of which are 60 and 100 mm. Or a separate version can be used with pipes for diameters of 80 by 80 mm. The selection of the configuration of the exhaust gases and the duct is accompanied by an additional aerodynamic drag.
Stage # 6 - connecting the equipment to the mains
To ensure complete safety, the manufacturer requires the involvement of a qualified specialist to connect and check all the electrical connections of the Ariston gas boiler. The manufacturer voids the warranty on the equipment if a low-quality power supply network is used and grounding system.

The power supply system is designed for the maximum power consumption parameter of a gas boiler. To connect the equipment used electrical conductors having a cross section of at least 0.75 mm2. Correct safe operation of the gas boiler provides reliable grounding.
The power parameters must be brought into line with the norms of the 230V / 50 Hz network, observing the polarity and the presence of the grounding conductor. The grounding conductor is required to be used longer with respect to the phase conductor and neutral. Wired connection - strictly permanent, without the use of outlets and plugs, made through bipolar machine.
Initial start-up and adjustment of the boiler
When the installation and connection are over, you can proceed to the setup and testing of the equipment.
First run
The initial action that accompanies the first launch of a gas boiler brand Ariston is heating circuit filling water. In this case, it is necessary to install the air valves of the radiators in the working (open) state.
The same actions aimed at bleeding the air from the system apply to the boiler circulation pump. As the circuit is filled with water, air is withdrawn from the system, and the water pressure on the pressure gauge reaches 1 - 1.5 atmospheres, the tap on the make-up line is closed.

At the next stage of commissioning of the gas boiler, they perform actions related to the gas supply.
The procedure is approximately the following:
- open the doors and windows of the working room;
- exclude the presence of open flames;
- Check burner circuit and control system for leaks.
The testing of the control unit and the burner for tightness is carried out by briefly opening (no more than 10 minutes) the main shut-off valve of the gas line. In this case, the solenoid valve and manual shutter of the boiler are installed in the closed position. With this position of the system, the gas flow meter should show a zero result (no leakage).
Control Panel Manipulation
Modern gas heating equipment is equipped with a control panel where the user can set the desired parameters of the unit. Next, we consider in more detail how to set up an Ariston brand household gas boiler.

Actually, the user actions on the control panel are obvious here:
- Turn on the device by activating the ON / OFF button.
- Mark the operating parameters on the display.
- Mark the display of the service mode functions.
Next, the gas parameters are checked, for which the front panel of the boiler is dismantled, the control panel plate is lowered and test manipulations are performed with the measuring pressure gauge connected to the pressure take-off pipes.
These operations are the prerogative of gas service specialists.. Independent execution is not recommended, since it is necessary to clearly know the functionality of the equipment.

Then the boiler starts in test mode through the “Chimney sweep” system function. To enter the test mode, the Reset button must be activated and held down for at least 5 seconds. Exit test mode by re-activating the reset key.
Maximum / Minimum Power Testing
This type of test also provides for control pressure selection at specialized points of the equipment with subsequent measurement of parameters on the manometer. It is necessary to disconnect the compensating tube of the combustion chamber. Again, the “Chimney sweep” mode is activated, activated through the control panel.
Similarly, the boiler is tested for minimum power. True, the modulator adjusting screw is additionally used if it is necessary to correct the minimum working pressure of the boiler. For this reason, a video is posted below, where the modulator is for some reason called a motor.
Putting equipment into operation
The process of starting the device provides for the following user actions:
- Activate the ON / OFF button.
- Select standby mode.
- Hold down the Mode button for 3-10 seconds.
- Wait for the passage of the air removal cycle (about 7 minutes).
- Open the gas line tap.
- Switch on the operation mode of the domestic hot water with the “Mode” button.
If all the actions were performed by the master of a specialized company, then he checks the compliance of the gas pressure during the operation of the unit and draws up the corresponding act.
And also provides training on safe operation gas equipment and puts the boiler on a guarantee.
Conclusions and useful video on the topic
A video about the features of the first start-up of the Ariston boiler, in particular, the service setting of the circulation pump is demonstrated. In fact, this is the work of specialists, but as the video shows, you can do it yourself:
Wall-mounted gas boilers from a series of modern equipment of the Ariston brand are a rather complicated technique, even if for domestic purposes. Hence the logical conclusion on the installation and start-up of a gas boiler Ariston - the initial start-up of the system should be entrusted to specialists. Costs, of course, are inevitable, but on the other hand, the correct operation of the gas system is guaranteed.
Did you install and configure a gas boiler of the Ariston brand on your own or entrusted this work to specialists? Share your experience with other visitors to our site in the comments section - add a photo of your boiler, tell us about the difficult moments that you encountered in the process of installing equipment yourself.
 How to connect a gas cylinder to a gas stove: standards and connection guide
  What to do if a gas boiler breaks down and hot water does not turn on? Diagnostic and repair instruction
 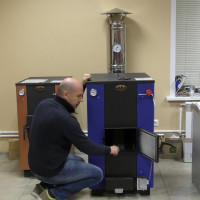 Gas boiler for sauna and bath: types of equipment for organizing gas heating
  Why a gas meter shakes a lot: analysis of the reasons and recommendations for their elimination
  TOP-10 non-volatile gas boilers for heating a private house: a review of models + selection rules
 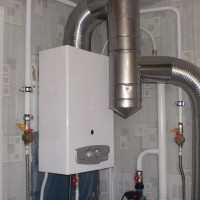 Flowing gas water heaters: TOP-12 models + recommendations for the selection of equipment
  How much does it cost to connect gas to a private house: the price of organizing gas supply
  The best washing machines with dryer: model rating and customer tips
  What is the color temperature of light and the nuances of choosing the temperature of the lamps to suit your needs
  Replacement of a geyser in an apartment: replacement paperwork + basic norms and requirements