LED lamp layout: simple driver device

LED light sources are quickly gaining popularity and are crowding out uneconomical incandescent lamps and dangerous fluorescent counterparts. They efficiently consume energy, serve for a long time, and some of them are subject to repair after failure.
To correctly replace or repair a broken element, you will need a LED lamp circuit and knowledge of the structural features. And we examined this information in detail in our article, paying attention to the varieties of lamps and their design. We also gave a brief overview of the device of the most popular led models from well-known manufacturers.
The content of the article:
How is the LED lamp arranged?
A close acquaintance with the design of LED-luminaire may be required only in one case - if it is necessary to repair or improve the light source.
Home craftsmen, having a set of elements in their hands, can assemble the lamp yourself on LEDs, but a beginner can’t afford it.

But, having studied the circuit and having basic skills in working with electronics, even a novice will be able to disassemble the lamp, replace the broken parts, restoring the functionality of the device. For detailed instructions on troubleshooting and repairing your LED lamp yourself, please go to this link.
Does repairing an LED lamp make sense? Of course. Unlike analogues with an incandescent filament at 10 rubles apiece, LED devices are expensive.
Suppose a GAUSS “pear” is about 80 rubles, and a better alternative to OSRAM is 120 rubles. Replacing a capacitor, resistor or diode will cost less, and the lamp life can be extended by timely replacement.
There are many modifications of LED lamps: candles, pears, balls, spotlights, capsules, ribbons, etc. They differ in shape, size and design. To clearly see the difference from an incandescent lamp, consider a common model in the shape of a pear.

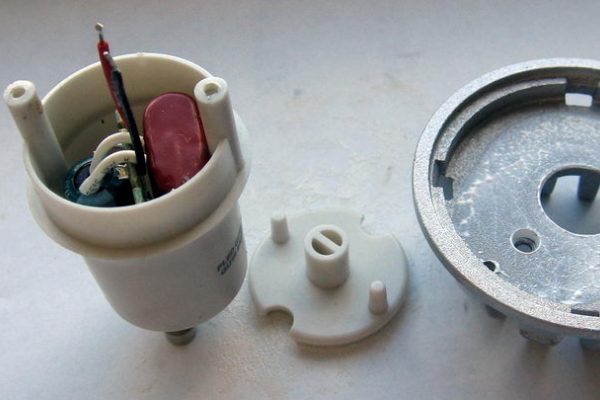
If you distract from the usual form, you will notice only one familiar element - cap. The size range of the socles remained the same, so they fit traditional cartridges and do not require a change in the electrical system. But the similarity ends here: the internal arrangement of LED devices is much more complicated than that of incandescent lamps.
LED lamps are not designed to work directly from a 220 V network, so a driver is included inside the device, which is also a power and control unit. It consists of many small elements whose main task is to rectify the current and reduce the voltage.
Varieties of schemes and their features
To create the optimal voltage for the device to work on diodes, driver collected on the basis of a circuit with a capacitor or step-down transformer. The first option is cheaper, the second is used to equip powerful lamps.
There is a third variety - inverter circuits that implement either for the assembly of dimmable lamps, or for devices with a large number of diodes.
Option # 1 - with capacitors to reduce voltage
Consider an example involving a capacitor, since such circuits are common in household lamps.

Capacitor C1 protects against electrical interference, and C4 smooths out ripples. At the moment of supply of current, two resistors - R2 and R3 - limit it and simultaneously protect against short circuit, and the element VD1 converts an alternating voltage.
When the current supply stops, the capacitor is discharged using resistor R4. By the way, R2, R3 and R4 are not used by all manufacturers of LED products.
For capacitor check quite often use a multimeter.
Cons of the circuit with capacitors:
- Possible burnout of diodes, since the stability of the current supply is not observed. The voltage at the load is completely dependent on the supply voltage.
- No galvanic isolationtherefore there is a risk of electric shock. During disassembly of the lamps, it is not recommended to touch live parts, as they are under phase.
- It is almost impossible to achieve high luminous currents, because this will require an increase in the capacitance of the capacitors.
However, there are also many advantages, it is thanks to them that capacitors remain popular. The advantages are ease of assembly, a wide range of output voltages and low cost.
You can safely experiment with self-production, especially since some of the details will be found in old receivers or televisions.
Option # 2 - with a pulse driver
Unlike a linear driver with a capacitor, a pulse driver effectively protects the LEDs from voltage surges and noise in the network.
An example of a pulse device is the popular electronic model CPC9909. Let us consider in more detail its features. The efficiency of its use reaches 98% - an indicator at which one can really talk about energy saving and savings.

The device can be powered directly from high voltage - up to 550 V, since the driver is equipped with a built-in stabilizer. Thanks to the same stabilizer, the circuit has become simpler, and the cost is lower.

The chip is successfully used for the development of emergency and backup lighting power grids, as it is suitable for boost converter circuits.
At home, based on CPC9909, they most often assemble luminaires with battery power or drivers with a power not exceeding 25 V.
Option # 3 - with a dimmable driver
Adjusting the brightness of the glow of lighting devices allows you to set the desired level of lighting in the room. This is convenient when creating separate zones, reducing the brightness of light in the daytime, or to emphasize interior items.
Via dimmer switch the use of electricity is becoming more rational, and the service life of the appliance is increasing.

There are two types of dimmable drivers, each of which has its own advantages. The first work with PWM control.
They are installed between the lamp and the power supply. Energy is supplied in the form of pulses of different durations. An example of using a driver with PWM control is a creeping line.

Dimmable drivers of the second type act directly on the power source and are used for devices with stabilized current.
When adjusting the current, a change in the shade of the glow can occur: white diodes, when the current decreases, slightly yellow light emits, and when the current increases, blue.
Short review and testing of popular LED lamps
Although the principles for constructing driver circuits of different lighting devices are similar, there are differences between them both in the sequence of connecting elements and in their choice.
Consider the scheme of 4 lamps, which are sold in the public domain. If desired, they can be repaired with their own hands.
If you have experience working with controllers, you can replace circuit elements, re-solder it, and slightly improve it.
However, meticulous work and efforts to find elements are not always justified - it is easier to buy a new lighting device.
Option # 1 - BBK P653F LED Lamp
The BBK brand has two very similar modifications: the P653F lamp differs from the P654F model only in the design of the emitting unit. Accordingly, both the driver circuit and the device design as a whole in the second model are built according to the principles of the first device.

The design is easy to detect flaws. For example, the installation location of the controller: partly in the radiator, in the absence of insulation, partly in the base.The assembly on the SM7525 chip produces 49.3 V.
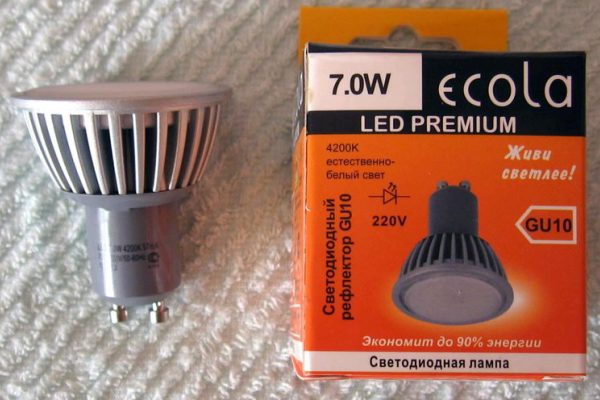
Option # 2 - Ecola 7w LED-lamp
The radiator is made of aluminum, the base is made of heat-resistant gray polymer. On a printed circuit board with a thickness of half a millimeter, 14 diodes are connected in series.
Between the radiator and the board is a layer of heat-conducting paste. The base is fixed with screws.

The board is completely placed inside the base and connected by shortened wires. Short-circuiting is impossible, since there is plastic around - insulating material. The result at the controller output is 81 V.
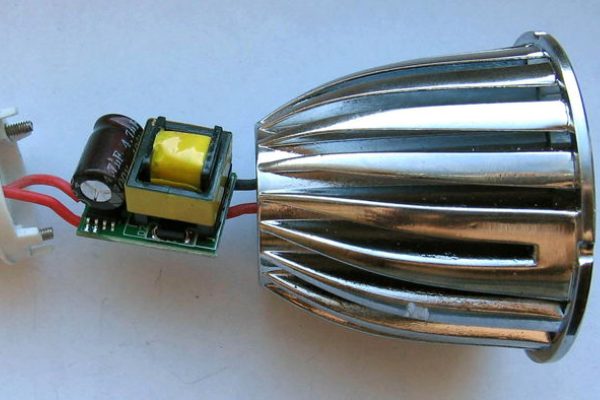
Option # 3 - Ecola 6w GU5.3 collapsible lamp
Thanks to the collapsible design, you can independently repair or improve the device driver.
However, the unsightly appearance and design of the device spoils the impression. The overall radiator makes the weight heavier, therefore, when fixing the lamp to the cartridge, additional fixation is recommended.

The disadvantage of this scheme is the presence of noticeable pulsations of the light flux and a high degree of radio interference, which will certainly affect the life of the device. The basis of the controller is the BP3122 chip, the output indicator is 9.6 V.
More information on Ecola brand LED bulbs we reviewed in our other article.
Option # 4 - Jazzway 7.5w GU10 Lamp
The external elements of the lamp detach easily, so the controller can be reached quite quickly by unscrewing two pairs of screws. The protective glass is held on latches. 17 diodes with serial communication are fixed on the board.
However, the controller itself, located in the base, is generously flooded with a compound, and the wires are pressed into the terminals. To free them, you need to use a drill or apply a wiring.

Radio interference is not observed - and all due to the lack of a pulse controller, but at a frequency of 100 Hz noticeable pulsations of light are observed, reaching up to 80% of the maximum value.
The result of the controller is 100 V at the output, but according to a general assessment, the lamp is more likely to be a weak device. Its cost is clearly overpriced and equated with the cost of brands that are characterized by stable product quality.
Other features and characteristics of the lamps of this manufacturer, we brought in next article.
Conclusions and useful video on the topic
You can find out how the drivers for LEDs are arranged, what are their features and functions from the videos below.
Analysis of the circuit of the LED lamp MR-16:
Driver scheme for self-assembly of lamps with power up to 15W:
How the FT833A driver looks and acts:
Homemade items at hand:
Now on commercial Internet sites you can purchase kits and individual elements for assembling lighting devices of various capacities.
If desired, you can repair a failed LED lamp or modify a new one to get the best result. When buying, we recommend that you carefully check the characteristics and compliance of parts.
Do you have questions after reading the above material? Or do you want to add valuable information and other light bulb schemes based on personal experience in repairing led lamps? Write your recommendations, add photos and diagrams, ask questions in the comments section below.
 How to choose a LED lamp driver: types, purpose + connection features
 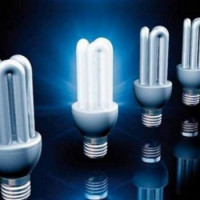 Fluorescent lamps: parameters, device, circuit, pros and cons compared to others
  Gas discharge lamps: types, device, how to choose the best
 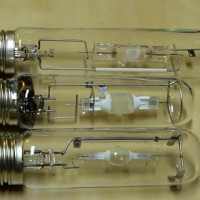 Metal halide lamps: types, device, pros and cons + selection rules
 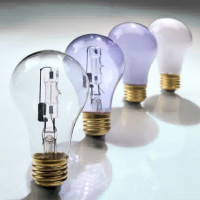 Halogen lamps: device, varieties, nuances of choice + review of the best manufacturers
  Induction lamps: device, types, scope + rules of choice
  How much does it cost to connect gas to a private house: the price of organizing gas supply
  The best washing machines with dryer: model rating and customer tips
  What is the color temperature of light and the nuances of choosing the temperature of the lamps to suit your needs
  Replacement of a geyser in an apartment: replacement paperwork + basic norms and requirements
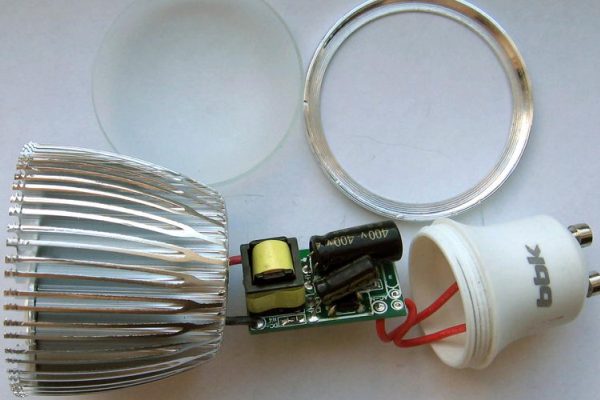
When electricity prices began to rise, I replaced all the lamps in the apartment with LED ones. Several pieces failed, but I did not know that they can be repaired. Having got acquainted with the information offered by you, I tried to repair it. I did everything gradually, as it is written here, and I managed to restore two LED lamps, at the same time I saved a little money on the purchase of new devices.
No matter how prices rise, health is more expensive. That G., which is now sold in stores, it is better not to use in the house. The color rendering index is usually less than 80. This is for plebs. As a last resort: LED lamps will not harm your eyesight when used in conjunction with several ordinary incandescent lamps in one chandelier.