DIY LED lamp repair: the causes of breakdowns, when and how you can repair it yourself

Having problems with light sources, but are you in no hurry to buy new ones and do not want to call an electrician? It’s nice to try to repair the LED lamps yourself, right? Moreover, this may not be so difficult. But you do not know where to start?
We will tell you how to find the problem and repair the problem area - the article discusses the most common causes of breakdowns. The main thing is to correctly identify the area of the problem and carefully correct the malfunction with the help of specialized tools. Correctly restored product will continue its service.
To help the home foreman, we picked up photo materials and supplied the repair instructions with informative videos. With their help, even a master who does not have colossal experience in works of a similar plan can cope with the task.
The content of the article:
Device diode device
Before proceeding with the repair of a damaged LED lamp, you need to find out what parts it consists of and where exactly to look for a malfunction.
The general arrangement of units of this type is approximately the same and includes such elements as:
- basement;
- driver;
- circuit board;
- LEDs
- radiator;
- optical elements.
Each part is very important and is responsible for a specific function. Having found the location of the problem, you can understand the level of severity of the problem and begin to eliminate it.
Purpose and variety of socles
In LED devices cap It is made of metal, ceramics or progressive high-temperature plastic, famous for its excellent heat resistance.
In products from branded manufacturers, when mounting the part into the lamp, soldering is not used. This completely eliminates the oxidation or sticking of the base element to the lamp holder.

Most often, LED devices designed for use in household and industry use threaded and pin bases.
Other species are considered more rare and are used in certain, specific cases. Himself the base has a good working resource and almost never fails.
LED Lamp Driver Role
The driver in the LED device plays one of the key roles. This small part acts as a common power supply, neutralizes voltage drops, and directs direct current directly to the diodes, which convert it into light visible to the human eye.

Drivers in modern lamps are electronic or capacitor. Each species has its own specific distinguishing features and advantages. More about the types and selection of current converters for LED bulbs we talked here.
The first option is valued more expensively and is more often used in branded products of the middle and luxury segment, the second is cheap enough for manufacturers and put into the budget series products.
Circuit Board Features
The circuit board serves as a springboard for the location of LEDs and other working elements. Manufacturers use different materials to create it. The most relevant is now considered a board made of anodized aluminum alloy.

It manifests itself as efficiently as possible and absorbs up to 90% of the thermal radiation that occurs during operation.
The nuances of the device LED elements
Light flow regenerating diodes come in several forms. Most often in lamps stand SMD and COB chips. The more they are located on the board, the more powerful the device is and the more heat is generated during operation.

For normal operation and long service life, it is necessary to ensure the correct heat dissipation, and the radiator mounted on the case is responsible for this.
The specifics of the radiator
Excessive heat is detrimental to the functioning of the LEDs. The lack of high-quality heat sink significantly reduces the lamp operation period and ultimately leads to its combustion.
Some manufacturers save and equip the device with several transverse or longitudinal holes, placing them throughout the entire housing.
Low-cost manufacturers supply cheap plastic, glass and composite parts. Advanced brands go further and equip their LED devices with radiators made of metal with anodized anti-corrosion coating.
Therefore, it is better to initially buy reliable lamps from the best materials. Although they will cost more, but the user will protect himself from constant damage.

Some brands, mainly of Chinese origin, supply bulbs with ceramic radiator elements.
Such products receive high-quality cooling, but, together with it, partially lose their structural strength and become more fragile in comparison with metal counterparts.
A few words about optics
The bulk of the LED lamps must be equipped with a diffuser made of matte plastic. It helps to concentrate the light flow at a certain angle and makes it more uniform.

Some models use lenses made from various modern and practical materials instead of diffusers. No damage is observed in these elements, and they do not fall under repair.
Common causes of malfunctions
Incorrect operation and sudden voltage drops in the central power supply often lead to failure of the LED lamp. The diode elements themselves in this case remain operational, but the driver may deteriorate.


If the lamp itself does not provide good ventilation, the driver will overheat. As a result, this will adversely affect its functioning and provoke damage.
The lamp will begin to flicker sensitively and blink, irritating the eye, when the current-limiting resistor deteriorates, and completely ceases to burn if the capacitor fails.
All these moments are unpleasant, but you should not panic. You can fix the problem without much effort at home with your own hands.
It will have a bad effect on the Led element and lead to its failure, an incorrectly organized electrical system in a house or apartment.
Plus, it will increase the load on the wiring and, possibly, create additional problems in the near future. Therefore, it is better to entrust its arrangement to professionals.

During operation in the lamp, a violation of the basic crystal structure of semiconductor diodes can occur.
The reaction to an increase in the density level of the injected current from the side of the material of which the semiconductor is made provokes this problem.
When the edges are soldered poorly, the heat removal loses the necessary intensity and weakens. The conductor overheats, overload occurs in the system and a short circuit disables the lamp.
All these trifles are not fatal and are subject to repair at a time and financial cost.
Preliminary device diagnostics
The LED module usually does not light due to interruptions in the general wiring, malfunctions in the circuit breaker system, in the absence of contact in the cartridge or when there are malfunctions in the lamp itself.
To understand the issue, you need to conduct a preliminary diagnosis and understand where the problem is located.
When the lamp does not light when the switch is activated, you need to unscrew it from the cartridge and screw in another, and not necessarily a diode one.
If the situation has changed and the light has appeared, then the lamp itself is faulty. Lack of lighting means that the problem is wiring.
The next step is to use a multimeter to find out if there is voltage in the electrical circuit.
To do this, it is enough to lean the device against the cartridge part with the circuit breaker activated and look at the indicators. They must be at the level 220 V. If the numbers are different, then the fault zone is detected.
When the correct voltage is confirmed, but the lamp still does not light, check whether there is contact between the base and the antennae of the cartridge. If abnormalities occur in this area, an arc arises and carbon deposits form on the antenna elements.

To remove it, it is necessary to disconnect the voltage, clean off incorrect formations, and carefully bend the antennae themselves. After all these activities, you can screw into cartridge working lamp and check the result.
If there is no voltage at the contacts of the cartridge, it must be removed and checked to see if there is a phase on the wiring itself. If it is present when the switch is activated, the cartridge must be replaced.
When it is not there, you should pay close attention to the switch and look for a problem in it.
If all the above-described elements, assemblies and parts, as a result of the verification, have confirmed their serviceability, it becomes completely clear that the problem is located in the LED lamp.
How to disassemble the LED module?
To carry out repairs, the LED lamp must be taken apart. This procedure is not very difficult, but requires accuracy, attention and some skill.
If you wish, you can shoot the entire process in a step-by-step mode on the phone so that you do not confuse the procedure later.
It is advisable to act with extreme caution. Not all internal elements of the device must be replaced, therefore it is extremely important not to cause damage to them and to preserve them intact.
This is especially true for such a vulnerable, but extremely significant detail, as a circuit board.
Method # 1 - unscrewing
LED lamp is a rather fragile device, which must be disassembled very carefully and accurately. It does not require any significant effort, and there is no need to use sharp tools where there is a chance to cope manually.
To remove the diffusing dome, it is enough to take the bulb with both hands by the edges and, with soft rotational movements, separate the upper part from the housing.
Usually this can be done easily, since the layer of fastening sealant is extremely thin and immediately reacts to movement and violation of integrity.

Then it will be necessary to solve the most difficult task - to separate the plate carrying the LEDs from the rest of the case. To do this, you will have to unscrew all the mounting bolts.
Since their heads are tiny in size, you have to use special precision screwdrivers.
In the next step, you will need to disconnect the mounting plate from the radiator device. An object with a flat sharp edge, for example, jewelry tweezers, will help to do this. They will be able to gently pry the edge of the board and carefully remove it whole.
Then you have to carefully solder the areas of contact of the power wire and finally separate the plate with diodes from related parts.
The radiator and the base will need to be separated by delicate rotational movements and lay out all the components of the lamp on the table in front of you. After that, you can proceed directly to the repair.
Method # 2 - hairdryer heating
The second option is most suitable for products with thick glass, not suitable for direct contact with a tool such as a screwdriver. Here you have to use a construction hairdryer and use it to warm up the lamp housing.
This is the only way to remove the glass fragment glued with a special composition from the cylindrical base.
The intense exposure to hot air will cause the objects to be processed to expand, and the adhesive layer that holds the glass will become elastic.
After these manipulations, the lamp will disintegrate into its component parts, even if the master does not exert any effort on this.
If the hairdryer is not at hand, you can go the other way. To do this, you need to take a solvent, an awl and a medical syringe with a needle. First, with an awl, carefully and without pressure, draw along the edge of the domed diffuser.
Then inject the solvent with a syringe and wait a bit. Just a couple of minutes will pass, the sealant will become pliable, and the dome will be able to be unscrewed without any physical effort. All further actions are no different from the method described above.
Can't you make out the lamp? There are others on our site disassembly instructions various types of light bulbs. We recommend that you familiarize yourself with them.
Self-replacement LEDs
Burned-out LEDs often cause the bulb to fail.. Usually, after disassembly, you can immediately see which elements are damaged and require replacement. But there are cases when at first glance all the diodes look normal.

In this case, you will have to use a multimeter and ring each element separately to identify a faulty one. Or remove the doubts from the board and test them using wires connected to a 12-volt power supply.
When only one diode is damaged, you can simply close its outputs. If a chain connection is used in the luminaire, this moment will in no way affect the loss of function of all other elements.
Old, faulty diodes will have to be unsoldered, then turn the board over and solder new chips to the visible contact paths.

In some cases, you can replace the LED without using a soldering iron. For this, the board will need to be warmed up well with a construction hairdryer. The soldering area will become soft and pliable, and the diode will be able to calmly be removed using ordinary tweezers.
You will need to mount a working light source on a still-cooled place. When the board cools well, it will firmly fix and will not move anywhere.
The main thing is to clearly remember the location of the element with respect to the smaller and larger contacts and place a working one in compliance with the pole.
Solving driver problems
Malfunctions in the driver are a fairly common LED lamp problem. Most often, a resistor or capacitor burns in the driver.
It’s quite difficult to identify the level of operability of this element with the measuring instruments at hand of the home master. Therefore, it is recommended that you simply replace it with a working one with similar parameters.

It is not always possible to find a suitable part in lighting stores. It’s better to immediately go to the radio market or to the place of sale of radio electronics and try to find the right thing there.
When it is purchased, you will need to dismantle the faulty unit, and put the working element in its place.
For the correct disassembly and repair of LED bulbs, complex, expensive equipment will not be needed. Minimize a set of simple tools to help you troubleshoot.
The multimeter will allow you to check the presence of voltage in the circuit, will make it possible to detect the presence of breaks and will show how efficient the remaining parts of the circuit are.


A soldering device with rosin and solder will be required to repair the breaks found in the circuit and the subsequent replacement of damaged parts and elements.
Using a small screwdriver, you can carefully separate the control elements from the lamp housing, and with a thin, durable clerical knife, you can delicately disconnect the parts from the circuit board.
Also, users often encounter problems such as blinking bulbs and burning lamps when the switch is turned off. What caused these malfunctions and how to eliminate them we said in our other articles:
- Why the LED bulbs blink: troubleshooting + how to fix
- Why LED lamps light when the switch is off: reasons and solutions
Conclusions and useful video on the topic
How to eliminate the typical breakdown of the LED bulb with E27 base. Detailed instructions for disassembling the product, interesting practical tips on using improvised tools.
Tips on how to correctly remove the flask from the device without damaging it in the process.
2020-04 / 1585745834_remont-svetodiodnyh-lamp.mp4
An easy way to repair an ice-type bulb without using a soldering iron. Instead of soldering, a special electrically conductive paste is used.
A full description of the work on the products of the Cosmos trademark owned by the KOSMOS Group, which controls about 25% of the domestic market for progressive and economical products to create high-quality lighting.
How to fix a corn led. Features of the disassembly process, structural nuances and other cognitive points. Significant increase in product life after all work.
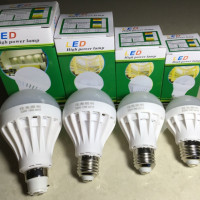
LED bulb - a practical source of lighting. The only negative of this product is the high price compared to other modules. True, LED devices are reliable and usually work out their full time..
And if suddenly during operation breakdowns occur, most of them can be repaired with your own hands. Any home master can find the necessary tools, and making time for repair work will also not be difficult.
Do you know how to repair LED lamps on your own and can supplement the material presented by us with valuable recommendations? Write tips in the comments to the article, add unique photos - many beginners who do not have experience in repairing lighting products will be grateful to you.
 Characteristics of LED lamps: color temperature, power, light and others
 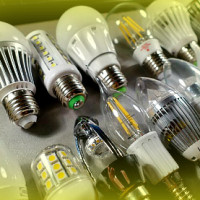 LED lamp bases: types, marking, technical parameters + how to choose the right one
 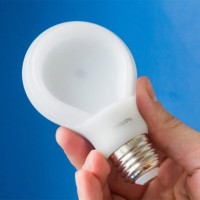 Philips LED lamp overview: types and characteristics, advantages and disadvantages + consumer reviews
  Replacing fluorescent lamps with LEDs: the reasons for the replacement, which are better, replacement instructions
 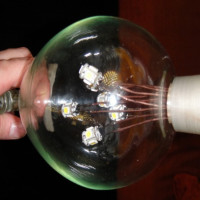 DIY LED lamp: scheme, design nuances, self-assembly
  Electronic ballasts for fluorescent lamps: what it is, how it works, wiring diagrams for lamps with electronic ballasts
  How much does it cost to connect gas to a private house: the price of organizing gas supply
  The best washing machines with dryer: model rating and customer tips
  What is the color temperature of light and the nuances of choosing the temperature of the lamps to suit your needs
  Replacement of a geyser in an apartment: replacement paperwork + basic norms and requirements
We buy LED lamps only with a guarantee, usually 2-3 years. Only once did the lamp deteriorate before the warranty period, and we replaced it without any problems.And after the end of the operating life, we just hand it over to the housing department and purchase a new one. After all, independent repair is not known what consequences it may lead to. Especially if you have never done this before, you should not risk it. Better get quality bulbs with a guarantee!
And what can independent repair lead to? Either the light will work or not. I have repaired these bulbs so many times. Mostly successful. Basically, I had to change the LEDs. Sometimes you can see which element burned out, and sometimes you had to ring.
Replacement made either with a soldering iron, or heated with a construction hairdryer. The only inconvenience is that the part is very small, you have to use tweezers. True, not all can be repaired.
After repair, they do not serve for a long time, especially those where the LED did not change, but simply closed the outputs. The load on the others is probably increasing, so they can’t stand it. For those that I repaired the glass was removed, I did not put them back, but it added brightness. Recently, the quality of the lamps has become better, less fail.
It’s interesting simply - “... but just closed the exits ...” - how long do they last: an hour, two or more?
Statistics for the lamp Feron LB-770, 11W. “Repair” was carried out by closing the terminals of the LEDs. The first - 07/13/19, the second - 07/17, the third - 05.08. It works fine today. Apparently, I got such an instance, because similar lamps in the same chandelier work flawlessly.
Quote: “Since their heads are tiny, you have to use special claim-type screwdrivers.” - What kind of screwdrivers are of such a CLAIM type? This type of claim to someone put up? Or this illiterate author meant precision (comes from the French. Précision "accuracy", then from the Latin. Praecīsus - see Wiktionary).
Or here’s another quote: “The heating temperature at the time of soldering should not exceed 2600. A simple soldering iron heats up more, so you need to wind a piece of copper core with a cross-section of no more than 4 mm on it with a tight spiral.” - Very entertaining and informative! It turns out that the melting temperature of gold is only 1063 degrees Celsius, and the boiling point is 2660, but for copper these figures are slightly different - melting 1083, boiling 2580 degrees Celsius! Slightly falls short of 2600! Unambiguous dislike for illiteracy.
After 260, the ° sign means degrees. This is not 2600, but 260 degrees.
“Claim screwdrivers” fixed, thanks.
Where did you see 2600 ???
In-in ... Where did they see 2600? It seems readable and visible-260 °. The author of the comment is obviously a troll or illiterate himself!
A precision screwdriver is not petenious. Older people often become inattentive and irritable ...
Lately, it has become difficult to repair the lamps: the diffuser does not stand on the thread or on the latches, heating with a hairdryer also ceased to help - there is no sealant or glue on the seam. The LEDs cannot be soldered: a soldering iron (even tweezers of different capacities!) And heating an aluminum board (with a hairdryer with temperature indication or in an oven for SMD mounting) does not work. An increase in temperature above 260 ° C does not help to remove the LED even if it is already destroyed by heating (approximately, at 380 ° C) ... Have they really started to be welded?
I also repaired LED bulbs. And here is what I will tell you. In theory, LEDs should be nearly eternal (about 30,000 hours). But this is in theory. In practice, manufacturers do not need this, otherwise who will buy new ones if the old ones work? Therefore, the main problem of these lamps is a poor, insufficient heat sink. As a result, the LED crystal overheats and quickly fails. Not every lamp will work for 1 year, a rare 2 years.
So my advice is: buy LED bulbs by weight — the heavier the better. Typically, the weight is directly related to the amount of aluminum in the heat sink.
Thank. How many volts are the LEDs in such lamps?
“Most often, a resistor or capacitor burns in the driver. It’s quite difficult to identify the level of operability of this element with the measuring instruments at hand of the home master. ” What? What kind of “philologist” did it post? Do not know how to use a multimeter - do not write garbage!
Tell electronics, what can burn out on the T8 lamp driver? How to repair it? Where to begin? LED strip is whole. Thank.
Today I dismantled the LED “pear” .. Two LEDs burned out. Why two? - Because 14 LEDs are combined in 2 parallel chains of 7 pieces in series in each. First, one LED burns out and one LED string stops consuming current. Accordingly, the driver passes a double current through the second chain and it burns out.
Therefore, carefully study how the LEDs are connected in a particular lamp ...
An attempt to check even one LED failed immediately. As it turned out, when applying voltage from the laboratory power supply, inside each LED there are actually 3 crystals in series! And only when applying 6-7 volts appeared a faint “three-point” glow. Therefore, it is easier to evaluate the repair result by directly connecting the lamp to the network.
Yes, the operation of Led lamps is due to the glow of the diodes. I’ve been repairing them for a long time, I remove the diodes with two soldering irons, set to 300 degrees. New elements, instead of the burned ones, I solder with one soldering iron.
To replace it is better to take new diodes. One hundred pieces on Ali-express pennies are worth. In addition, you can choose diodes for different voltages: 3,6,9,12,18, etc. I tried to use old lamps as donors for LEDs. It does not help: they burn out again, so it’s better to solder new ones.