Installation of spotlights in the ceiling: installation instruction + expert advice

Do you agree that home lighting is one of the most important issues during a renovation? Most people will probably answer this question in the affirmative. Especially those who for many years are content with the light of a single chandelier in a large corridor or forced to cook in the kitchen with the lighting of a gloomy lamp.
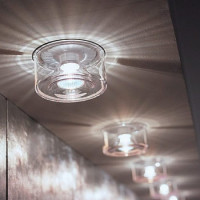
The installation of spotlights that guarantee uniform light will help solve the problem of insufficient lighting. It is with their help that you can finally illuminate the most secluded corners in the house, which will give the room an unprecedented comfort.
The advantages of spotlights over any other lighting devices are undeniable. But, after preference is given to this particular type of lighting, another question arises - how to install the spotlights and whether it can be done with your own hands. We will give answers to these questions in this article.
The main difficulty that arises during such works is the various types of materials the ceiling is made of. Because of this, the installation procedure differs, various tools will be needed.
The content of the article:
Installation of fixtures on a plastic ceiling
Ceilings, assembled from plastic panels, have long come into vogue in the repair and construction.
Firstly, they are incredibly cheap - this is perhaps the most economical repair option. Secondly, the ceiling made of plastic panels will last a very long time, because it is easy to care for. And thirdly, the abundance of various designs of plastic panels allows you to create an original interior in any room.

Despite the fact that plastic panels on the ceiling have a lot of advantages, they have a significant drawback - they are unstable to high temperatures. Therefore, it is recommended to install lamps with a power of not more than 40 watts for installation on this type of ceiling.
Experts recommend not using incandescent lamps, but purchasing special light bulbsequipped with a protective metal ring.
Despite the fact that the installation of spotlights in a plastic ceiling should be carried out after the installation of the panels is completed, it is necessary to prepare for their connection in advance.
As with the installation of other types of ceiling coatings, before starting installation, care should be taken for the wiring for the fixtures. It should be located under the ceiling and pass in those places where it is planned to place spotlights.
If there is no personal experience in wiring the electrical wiring, it is better to turn to professionals for help. This is the only stage of work where specialist assistance may be needed; everything else can be done independently.

In this case, one end will be connected to the lamp, and the other will lead to the junction box and switch. In order that in the future, if one of the bulbs burns out, all the others do not turn off, you should choose the parallel wiring option.
Read more about what corrugation for electrical wiring can be. Further.
For wiring, it is recommended to use a cable size 3x1.5. The distance between the fixtures is determined by the builder. At the same time, the bulb should be at least 60 cm from the wall.
Another factor that should be considered when installing a ceiling made of plastic panels is the distance between them and the base should be sufficient to accommodate the head of the lamp.

In order to install spotlights on a plastic ceiling, you don’t need special tools, most of them are in every apartment:
- a knife sharp enough to cut plastic;
- electric drill;
- roulette;
- crowns with which you can drill round holes.
Once the necessary tools have been prepared, you can proceed with the installation of the fixtures.
To do this, it is necessary to outline the points on the ceiling where the bulbs will be placed. Next, with the help of crowns and a knife, it is necessary to make holes that in diameter will slightly exceed the diameter of the cap.

In order to make the connection of the lamp with the wire as reliable as possible, it is recommended to use terminal blocks. With their help, reliable fixation of the joints is ensured, but in the future, at least once a year, they should be checked.
After fixing the wires, it is necessary to ensure their reliable insulation. The fixtures themselves are installed in a pre-made hole very simply - with the help of metal “paws” located on the back of the device.
Suspended ceiling mounting
Stretch ceilings - one of the most popular solutions during the repair. Thanks to this type of coating, you can create an original design. For example, you can make a multi-level ceiling or create an imitation of the starry sky. Complementing the ceiling spotlights You can achieve extraordinary comfort in any room.
The installation of spotlights on suspended ceilings, as in the previous case, begins with the wiring.

In order not to make a mistake during installation, it is recommended to pull ordinary threads that are attached to the profile and indicate the level of the future ceiling.
Further, it should be noted those places where the lamps will be placed. There are two ways to do this.
The first is to make appropriate markings on the ceiling with a pencil and tape measure. If at home there is a laser level, then the markup will be much more convenient.

In those places where the spotlight will be located, a special platform is installed. It looks like a plastic circle, inside of which a lamp will be placed. The platforms are installed in such a way that there is a distance of five centimeters between their edge and the stretched thread. By setting the platforms at the required level, you can remove the stretched threads.
After the preparatory phase is completed, you can proceed to the tension of the ceiling canvas. After these works are completed, it is necessary to touch to find the platforms installed in advance. According to their contour, a mark is made on the ceiling canvas.
Next, on the marks made on the glue, tread thermo rings sit. They perform several functions. Firstly, in the future the light bulbs protect the ceiling from thermal radiation. Secondly, the rings hold the canvas, not allowing it to burst during installation of the lamp.

The glue is applied very carefully, only on the surface where the thermal ring will be attached. Do not smear it all over the ceiling, just apply a thin layer on the thermal ring and press it well with your fingers.
After the glue has set, and it will take 3-4 minutes, you can proceed to the next step. So, inside the ring with a sharp knife, a hole is made through which pre-prepared wires are pulled out.
When stripping the film inside the ring, it is important to remove it completely, since its residues can further interfere with the cooling of the lamp. Then they are connected to the lamp, and the device itself is attached to the landing platform with special "ears".
We also recommend reading our other material, where we spoke in detail about the features of the choice. light bulbs for suspended ceilings.
Mounting on a concrete ceiling
In the event that a global repair of the house is not expected, the question arises - is it possible to mount spot lighting on a monolithic concrete ceiling. And if possible, how to drill holes and hide the wiring.
A concrete ceiling is typical for most apartments. In fact, it is a monolithic structure that cannot be ditched.
Special holes can be made for fixtures only if repairs are planned on the top floor, that is, there is no risk of a collapse of the ceiling. But even in this case, it is better to invite professionals to carry out the installation of fixtures.
Another option for installing spotlights in a concrete ceiling is to find technical holes on its surface, which are on almost all floors. They appear even during the construction of the apartment, and before the commissioning of the object, the builders cover them with concrete.
If you find this hole and free from the filler, then you can place a lamp in it. The disadvantage of this method is that the lamps will not be placed where the owner wants the apartment, but where the holes were left.

The easiest and most economical way to install spotlights on a concrete ceiling is to sew up its surface with drywall.This material is relatively cheap, as in the case of installing a stretch ceiling, it is possible to perform multi-level structures.
Conclusions and useful video on the topic
Visual installation instructions for fixtures are presented in the following video:
Thus, spotlights are an opportunity to make any room bright and comfortable. With their help, you can even illuminate the dark corridor, which from the moment of construction was lit only by a dim chandelier. You can install this type of lighting on any type of ceiling, and the entire amount of work can be done with your own hands.
How did you solve the problem of insufficient lighting? Have spotlights been used at home? If so, tell our readers what kind of ceilings the fixtures were installed on and whether there were any difficulties in installation. Share your experience in the comments.
 Bulbs for spotlights: types, characteristics, nuances of choice + best brands
  Photo sensor (photo relay) for street lighting: design, principle of operation and installation tips
 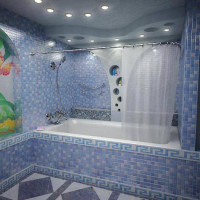 Lamps in the bathroom on the ceiling: types, placement principles, installation nuances
  Lamps over the bed: TOP-10 popular offers and tips for choosing the best
  Assembly and installation of the chandelier: detailed instructions for installing and connecting with your own hands
  Ceiling outlet under the chandelier: instructions for installing the outlet on the ceiling
  How much does it cost to connect gas to a private house: the price of organizing gas supply
  The best washing machines with dryer: model rating and customer tips
  What is the color temperature of light and the nuances of choosing the temperature of the lamps to suit your needs
  Replacement of a geyser in an apartment: replacement paperwork + basic norms and requirements