How to disassemble a light bulb: instructions for parsing various types of lamps

To do something interesting with their own hands, homemade lovers implement innovative ideas using improvised tools. There was also an application for a conventional bulb of a burnt incandescent lamp. But luminescent and LEDs are not suitable for these purposes, they are disassembled only for repair.
In any case, it is important to know how to disassemble the light bulb, and then you can experiment on its further application.
We suggest understanding the intricacies of this process. The article describes in detail how to act correctly if it becomes necessary to open and disassemble various types of lighting devices. In addition, we have prepared interesting homemade solutions from old incandescent bulbs.
The content of the article:
About disassembling an incandescent lamp
From old lamps create vases and containers for spices, miniature aquariums and many other crafts.
If you decide to master this process, then you should start with an ordinary incandescent bulb. Inside, she does not have a filling that is harmful to her health in the form of additives from harmful substances. Therefore, disassembling it is not only simple, but also completely harmless to health.
Briefly about the device
To begin dismantling the insides of the lamp, it is necessary to familiarize yourself with its structure in general terms. The main element is the glow body, the ends of which hold electrodes on them.
Additional rigidity is created by holders mounted on a glass support - glazing bead. The rod is connected with a leg, which includes electrodes, a plug, a plate.

All internal elements will have to be removed from the bulb through its lower part.
How to disassemble
Here it is necessary to take into account some nuances, as will have to work with glass.The foot material is very thin, and the base insulator is rather rough.
To prevent fragments from flying apart and the risks associated with this, you need to use a cardboard box as a workstation. Its bottom is covered with soft material.
Before starting the operation, you need to arm yourself with thin-nose pliers. With their help, it will be possible to dismantle the contact firmly sealed at the neck of the flask.
The element is shaken and rotated until two wires leading to the main part of the lamp - the glowing body - break off. Further, the released contact is removed.
The next task is to open the basement insulation. This will require the same tool. With the help of thin-nose pliers, the leg of the bulb is rocked and removed assembly with a plate, a pins, electrodes, a glow body.
Having opened access to the inner cavity of the lamp, carefully clean it with a piece of textile. Without the insides from the bulb, only a heat-resistant glass bulb remains.

How to apply it depends on your imagination - it can become a container for spices, a tiny aquarium, lampshade or lamp.
For some crafts, the base will be superfluous. It is not difficult to remove it, since the connection is not very strong. You can just hold it for a day in a mixture of hydrochloric acid with ammonium nitrate or in hydrofluoric acid. What will dissolve the glue that attaches the base to the base of the bulb.
In this case, it is important to rinse the product thoroughly with acid in a soap solution after acid. And do not forget to wear gloves to carry out all the manipulations.

Another way is to unscrew the part at the point of contact with the glass, then peel off the glue and remove the vessel. Sometimes it’s enough to scratch the junction of the base and the bulb with a glass cutter to get rid of it.
Dismantling the lamp with a cartridge
At replacing light bulbs all sorts of troubles happen. It also happens that it is separated from the base. In this case, you can not do without disassembling the cartridge. Work requires the use of protective equipment in the form of glasses and rubber gloves.
They turn off the electricity, make sure that there is no voltage by using the indicator. Remove fragments from the floor.
Further, they are armed with narrow-nose pliers and, rotating the base in the opposite direction to the clockwise movement, they turn it out. For a more reliable grip, the edges of the base are bent inward.

If the attempt fails, the connection must be relaxed by rotating in different directions. When this action does not bring any result, the tool rests on the inner walls of the base and unscrew it in this way.
Crafts from incandescent lamps
Consider examples of using incandescent lamps. Many decorators use an old lamp to make a mini-terrarium. Some do-it-yourselfers have learned to convert a typical lamp into an economical LED lighting fixture.
Original mini terrarium from a bulb
First, the bulb is prepared. Having removed the contact, they split the black insulation and pull it out. Using a flat screwdriver, the internal structure is rolled off, then it is removed. In the hands is an empty flask with a base and a smooth, neat hole.
Further, you can take a beautiful stone or make a twisted stand out of wire. In the first case, hot glue is applied to one of the faces at four points, a light bulb is glued. Now you can do the design.
As a filler for a terrarium use ordinary forest moss.To this you need to add a little soil and tree bark. To make it all inside, a cone is made of paper and inserted into the hole. At the bottom of the lamp, drainage of small pebbles is poured, a layer of sand is placed on it.
Everything is neatly leveled with a stick, add soil. After they take the tweezers, and with it, plants are laid. In a syringe with a needle, they collect water and "water" the planted. Now the hole needs to be closed. To do this, you can use a cap from the acorn or a cork cut from a branch.

Inside it forms its own microflora. Plants continue to grow and develop.
LED lamp manufacturing
Some home craftsmen based on incandescent lamps make LED lighting products with their own hands.
To do this, heat the soldering iron and remove the solder at the lowest point of the base. Next, break the insulation, remove the internal filling and expand the hole to the maximum.
In parallel, three LEDs are connected. To the "plus" of each of them is soldered by a resistor. Since the resistance value depends on the power source, its value may be different. Two wires are connected to the circuit to supply voltage.

The design is inserted into the hole, carefully straightened to prevent the wires from closing together. Lead wires through the hole of the cap. Connect the lamp to a constant voltage to check its performance. Then the base is sealed.
Safe operation with a fluorescent lamp
CFL can be disassembled, but not for the purpose of further use for crafts, but only if you need to repair the launcher. Flask fluorescent lamp it’s better not to touch it at all, since you should stay away from toxic mercury vapors.

The composition of such a lamp includes five parts:
- U-shaped or spiral flask;
- the upper part of the body with a bulb attached to it;
- electronic board with a ballast mounted on it;
- lower housing element with electronic ballast;
- base - together with the bottom of the case it is an integral design.
For disassembly and access to the start controller, use a flat-head screwdriver with a wide end. With its help, the housing latches are disconnected one by one. To perform the operation, you need to insert the tool into the groove and rotate it.
This is not so simple. After prolonged use, accompanied by constant heating, the plastic loses volatile substances and becomes solid. The latches themselves often break during the disconnection process.

If, however, a breakdown of constipation occurs, they are simply cut off with a sharp tool or sawed off. To do this, arm with a small disk mill. You can buy it or make it yourself.
First measure the circumference of the body with a caliper. Then, a pin with a mill is inserted into the drill chuck. Do this in such a way that the latter is above the bed at a height equal to ½ the diameter of the lamp housing.
The drilling equipment is turned on, the lamp housing is pressed against the cutting tool and the outer part of the housing is carefully cut. Similar cuts are made with an interval of 1.5 cm throughout the contour.
A screwdriver with a thin rod is inserted into the slots and the trim is lifted.After they take a screwdriver a size larger and open the body of the lighting device.
Next, the lamp bulb is checked for serviceability. Why take a multimeter and check the conclusions in pairs. Normal resistance is considered to be within 15 ohms. If everything is normal, make a conclusion about the malfunction ballast module.
If the filament is broken, the ballast may be operational. In this case, the flask is disposed of, and the serviceable device is used as a spare part.
If there is a fuse in the control circuit, it may blow. The issue is solved by installing in its place a resistor with a resistance of several ohms.

If only one filament burns out, it can be shunted by resistance, but this will entail overloading the ballast. Such a restored lamp will not be able to work for a long time - a maximum of a year.
Upon completion of the repair, two halves of the lamp are simply glued together. To simplify the reconstruction process, the product is sometimes heated using a building hair dryer.
If the lamp could not be repaired, then it must be disposed of. Read about where to put spent fluorescent lamps in this article.
How to disassemble the LED lamp
First of all, it is necessary to check the voltage supply to the contacts of the cartridge. To do this, screw in a working lamp, if the light turns on, the previous device is faulty.
The reasons for the failure of the LED lamp can be very different - the diode burned out or the board is not in order.
Often they stop working due to condensation collected inside the case. Anyway need LED lamp repair with preliminary disassembly of the structure.
The constituent elements of an LED lamp are:
- shell;
- basement;
- matrix with a package of LEDs;
- diffuser;
- driver.
The bulb of the lamp is leaky because there are no gases in it. The shell can be made of both plastic and glass. A plastic diffuser is located at the top.
Applicable LED lamp bases varied. The components of the package are groups of LEDs soldered to PCB or aluminum boards.
Drivers in the form of individual blocks or built into the housing serve to transform the input voltage to the value most suitable for assembled into groups of LEDs. The most popular transformer type power circuits.

To make the inside accessible, you need to open the mount clips that hold the diffuser dome. If it is attached to the housing by screws, they should be unscrewed.
There is another disassembly method used for appliances made with sealant sizing. For implementation, you need a syringe with a needle, an awl, a solvent. To disconnect the diffuser, you must remove the sealant through which it is attached to the locking ring.
Along the edge pass with an awl and a solvent is introduced into the groove with which the syringe is filled. After 30 seconds, the diffuser is removed by scrolling. The radiator is removed using a screwdriver, the LED matrix is sealed off.
A burnt out LED is easy to identify visually. He impersonates the presence of a black dot. Alternatively, to make the lamp work again, a jumper is placed at the edges of the unusable LED, but it is better to change it to a new one.
Conclusions and useful video on the topic
A video of the disassembly process, where everything is clear without further explanation:
The process of dismantling and repairing the LED lamp:
Dismantling a light bulb is easy. From it you can make a lot of interesting things, but you can not use it again for its intended purpose.Luminescent and LED bulbs can be disassembled up to a certain point and repaired.
Do you have experience disassembling fixtures? Or maybe you made interesting objects from old lamps? Please share your skills with readers - leave comments and attach photos of your homemade products. The feedback form is located below.
 How to change a light bulb: analysis of the technical nuances of a non-trivial task
 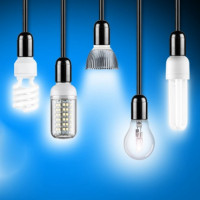 What types of bulbs exist: an overview of the main types of lamps + rules for choosing the best
 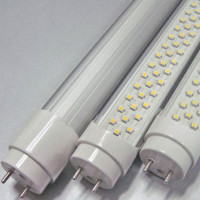 Replacing fluorescent lamps with LEDs: the reasons for the replacement, which are better, replacement instructions
  Household infrared lamps: how to choose an IR bulb + a review of the best manufacturers
 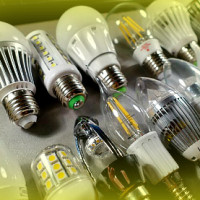 LED lamp bases: types, marking, technical parameters + how to choose the right one
 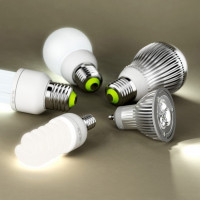 Types of lamp caps: standard marking and varieties of lamp caps
  How much does it cost to connect gas to a private house: the price of organizing gas supply
  The best washing machines with dryer: model rating and customer tips
  What is the color temperature of light and the nuances of choosing the temperature of the lamps to suit your needs
  Replacement of a geyser in an apartment: replacement paperwork + basic norms and requirements
Repairing LED bulbs is a good idea. I order a bunch of LEDs from Chinese stores and solder them into burned out lamps. You can save a lot on this. But, again, this is an activity for those who like to craft something with their own hands. The biggest problem is to remove the protective lamp from the diode bulb. It is necessary to remove so that it does not burst. Otherwise, the bulb will lose its aesthetic appearance.
I got the idea to decorate the interior in the workshop. I disassembled a lot of different old fixtures, held the lights around the perimeter. And from above hang bulbs with a terrarium inside. Further I will continue to search for inspiration, maybe I can find something else interesting on such sites. And one more question: after what time does the terrarium need to be changed (to clean the light bulb), etc.?