How to connect a chandelier to a two-gang switch: step-by-step instruction

Even the most original lighting fixture needs power. To rationally use electricity and implement interesting lighting ideas, they often use a switch with 2 or 3 keys.
To implement such a solution, it is not necessary to call an electrician, you can figure out how to connect the chandelier to the two-key switch and try to do all the work yourself.
The idea of saving is attractive, but have you never done such a job and are afraid to make a number of mistakes? We will help you - in this article we will consider a detailed briefing on connecting the chandelier to a switch with two keys. In addition, we give step-by-step photos of the installation process, providing them with a detailed description. And for beginners, add visual videos demonstrating the connection of a chandelier.
The content of the article:
Features of two-level light control
In one room, the brightness of all 9-12 light bulbs is not always required. Sometimes you want to create a romantic atmosphere by turning on 2-3 shades of an exquisite chandelier. They will allow you to get a dim light, ideal for holding intimate conversations in the evening.
The subtlety of controlling the light bulbs of the lighting device depends on the switch - if you put a two-key, you can effectively distinguish the possibilities of the chandelier, forming 2 light groups. This technique allows you to create a deeper light composition, and two buttons allow you to control the amount of light according to your wishes.
In addition, the user also receives additional benefits in the form of savings:
- electricity when you turn on one small group of bulbs;
- resource of the lighting devices themselveshaving a rest a certain period of time;
- space on the wall - The double model of the circuit breaker takes up less space than two single ones.
And if you want, you can do it yourself with a chandelier.To do this, you first have to choose the most suitable switch model from the variety offered by numerous manufacturers.
Suitable bicavalion and his proper connection simplifies the management of light in the room. True, it will still be necessary to create optimal groups of light bulbs that make up the chandelier.
In this matter, everything will depend on the number of points emitting light, and the presence of additional lamps in the room. And the model plays an important role: if it is a multi-level product, then it is advisable to connect the lamps of the top floor of the chandelier to one of the keys, and all the remaining ones to the second.

Groups can be formed at will, but the total number of lamps of the device has to be taken into account - the more there are, the more variations can be created.
So, for a product with 12 light emitters, the following options will be relevant:
- 3+9;
- 4+8;
- 5+7;
- 6+6.
It makes no sense to connect less than 3 lamps for one key - the room will be quite dark. For communication or watching movies, 3-4 pcs are enough.
The last option with an equal distribution is not the most successful, because with 6 bulbs it is inconvenient to read, knit or embroider, and they use quite a lot of electricity.
Step-by-step installation instructions
When the switch is purchased, and in a brand new chandelier it was possible to form 2 groups of bulbs, each of which will be controlled by its own key, you can proceed directly to the implementation of electrical work. It is important to pay due attention to personal safety.
Stage # 1 - preparation for installation
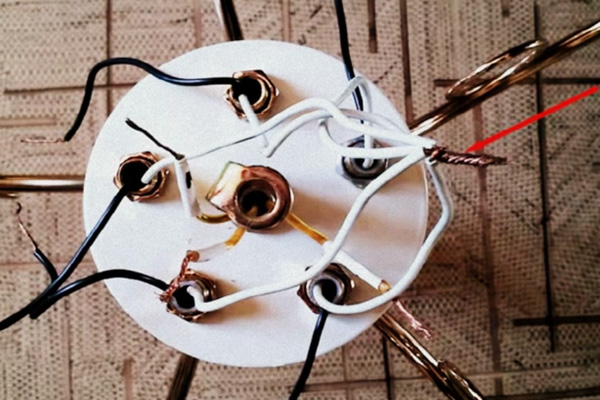
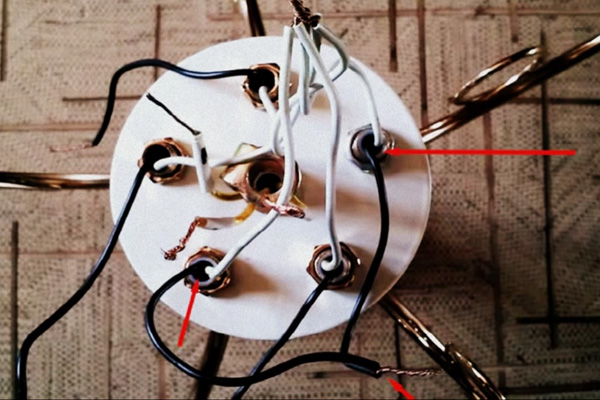
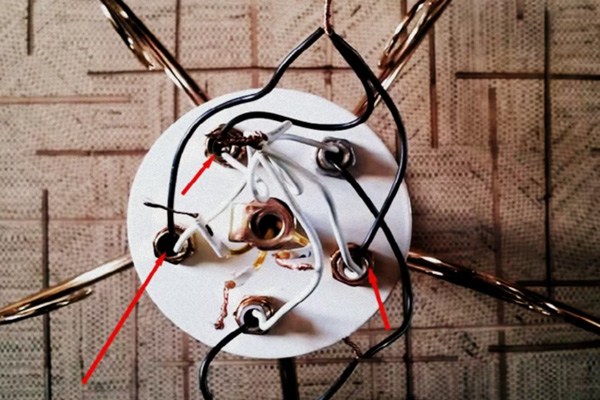
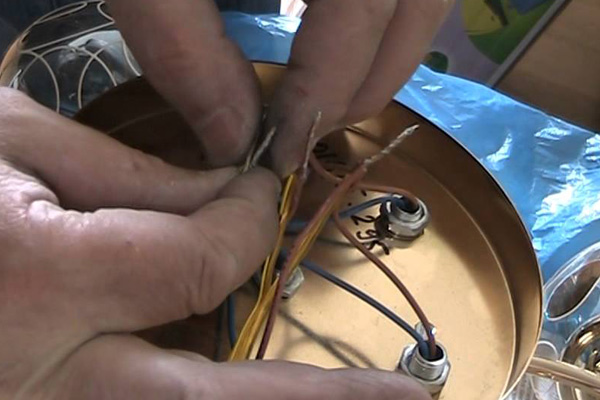
The first step is to deal with all the wires. And there can be a lot of them. In order not to get lost and not to confuse anything, you have to calmly consider them and determine which one is responsible for what. We wrote more about wire marking in this article.
You can start with the chandelier itself. She will leave wires from each cartridge and there may still be a central core. It all depends on the model.
If this product is a trusted manufacturer, which values its reputation and customers, then there will be instructions in the package. It is her recommendations that should be followed when carrying out work on the connection.

Lighting fixtures made by Chinese firms look no less attractive than chandeliers of famous brands. And their cost is much more attractive, which explains the popularity among consumers.
A significant drawback is the lack of instructions with a wiring diagram and labeling of wires. Often all of them can be of the same color - you will have to independently determine who corresponds to what.
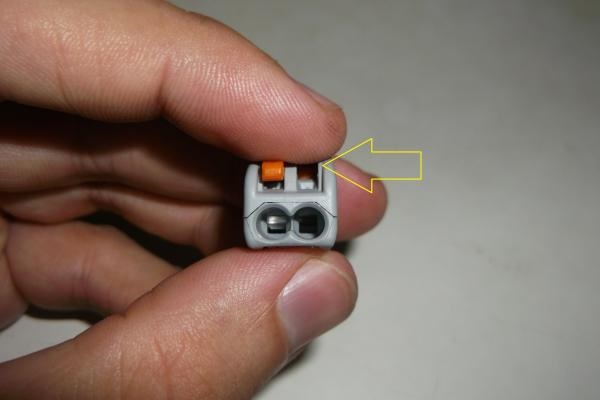
With self-assembly of all connection options, it is more convenient to use PPE caps and connecting the chandelier Vago terminal blocks.

Rest wire connection methods relevant for professional electricians with the right tools and skills for such work.
It is also necessary to determine the accessory of wires coming from the switch. They can stick out right from the ceiling. Or they will have to be freed by removing the old chandelier.
In any case, before carrying out work, it is important to disconnect the line to protect itself from electric shock.
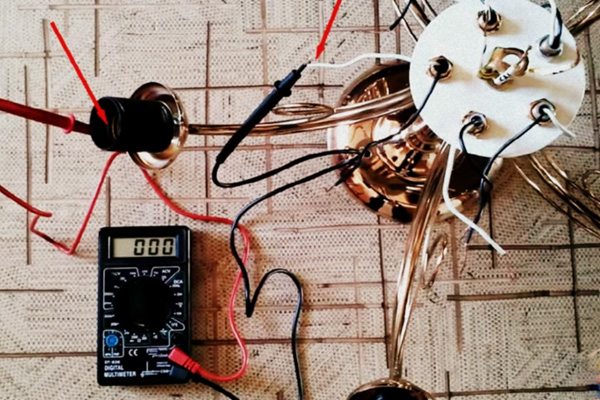
After removing the old light fixture and freeing the wires, they will have to be carefully examined for damage to the insulation. If it is not broken, then you need to separate them in different directions and turn on the power to check with an indicator screwdriver or multimeter the accessory of each of the cores.

Now you need to turn off the power to the line to carry out further work.
Stage # 2 - checking the correct connection of the switch
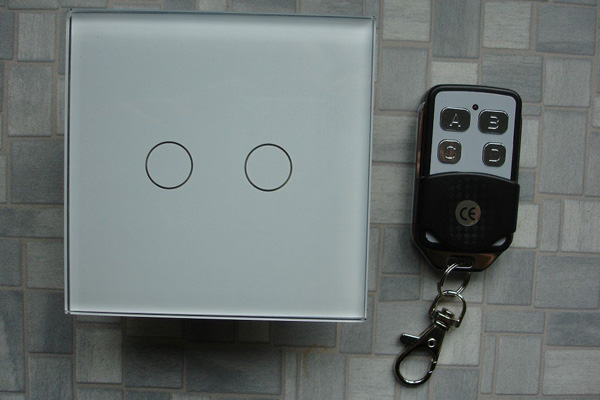
It is important, even before mounting the chandelier, to see if the operating mechanism of the switch with two keys is connected correctly.
To do this, remove the front panel with the keys and get the main part, to which the wires are attached.
Depending on the model and manufacturer, the two-key can have various designations on the back that indicate the purpose of the contacts. If there is an instruction, it will be easier to understand, and in its absence, you need to carefully study the numbers or letters on the back.

With self installation double breaker It is important to connect the wires correctly.If it is already standing, you need not be too lazy and unwind it in order to assess the adequacy of its connection.
When reaching the working mechanism, it is necessary to inspect the insulation, check the correct connection of the cores so that the power supply from the shield is in contact with the letter L. And you should also pay attention so that it does not fall out of its connector and does not hang out.
The operating mechanism of the switch, the wires and connections must be neat, the insulation in the right place. It is important that all the cores are separated and carefully laid in the socket, if it was used for wiring.
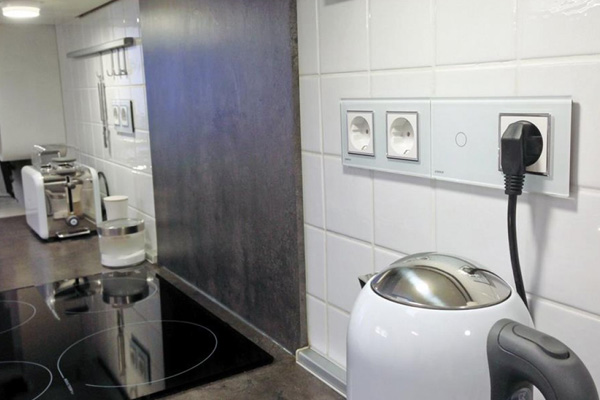
Stage # 3 - Providing Power to the Wires
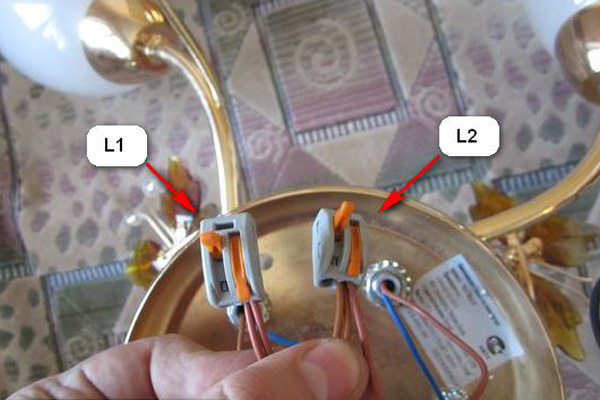
After checking the wires coming from the two-gang switch to the chandelier, you can continue to connect it. In principle, according to the color of the wires emerging from the working mechanism, it is clear which wires stick out from the ceiling.
They are to be connected with nodes formed from veins emerging from the horns of a lighting device.

To do this correctly, you need to calmly make connections, well stripping insulation.
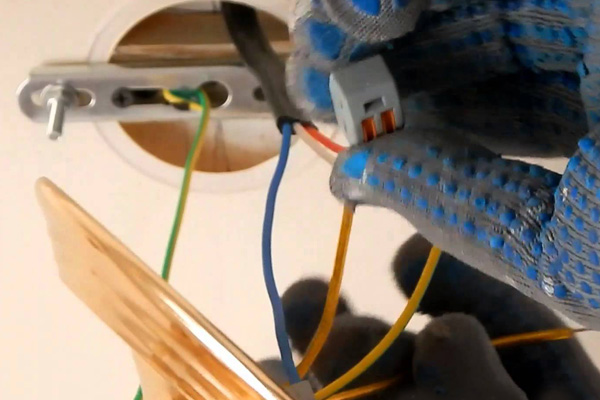
All work is preferably carried out with protective gloves. Even a novice can use WAGO or PPE caps. Moreover, the installation will have to be carried out under the ceiling, which is not very convenient.
When all the connections are made, you need to carefully place the wires, laying them inside the decorative lining of the lighting device.
It remains to attach the chandelier based on the characteristics of the model - hang it on a hook or fix it to the bracket.

More wiring diagrams and connection rules we examined in detail in our other article.
Common Connection Errors
With independent wiring, you often have to deal with questions that arise due to errors made during the connection process.
A common problem is a broken or malfunctioning chandelier, which should be controlled by a two-key.

The first thing you should pay attention to is zero. He never comes to the switch - he goes directly from the junction box to the ceiling. If this is not so, then you need to correct the mistake by letting zero out of the box to the chandelier, bypassing the two-clavicle.
The second error associated with the neutral wire when it was connected to one of the phase connectors.We recall the rule that zero immediately goes to the lighting device and is removed from the phase contact.
The third error - the incoming phase core is connected to the outgoing left or right contact in the working mechanism. Simply put, the connectors were mixed up during the connection process. This is not difficult to fix - you need to unscrew the connections and insert the wires correctly, re-securing them.
In addition to these errors, the following are often found:
- poorly made connections - the wire hangs, not providing proper contact;
- the wires are simply twisted together and wrapped with electrical tape on top - simple twisting is prohibited, you should put on a cap or insert them into Vago;
- core insulation is damaged;
- when making connections bad removed the insulation, which prevented the creation of tight contact wires.
All problems can be avoided if you immediately perform each of the processes calmly and not be too lazy to double-check the quality of work.
It should be noted that the power cable to the chandelier from the switch does not always pass through the distribution box. Options, when the phase goes immediately, bypassing it, are now gaining momentum.
In such cases, to hide all the connections and wires, you can put an additional undergrowth, on which a stub is placed, though not all manufacturers have such a design.

Conclusions and useful video on the topic
When conducting a self-assembly of a chandelier by a novice electrician, minor problems may arise. About this in more detail in the video:
About connecting a lighting fixture using a terminal block in a video:
Detailed instruction on the use of the multimeter in the video:
Connection and functional check of a chandelier controlled by a two-gang switch:
Having dealt with the intricacies of electrical work when connecting the chandelier, you can do it yourself.
Why do you have to comply with electrical safety rules and correctly connect all the wires, after dividing the light bulbs of the lighting device into 2 groups, each of which will be controlled by one of the switch keys.
Have experience in successfully connecting a lighting fixture to a dual switch and want to share it with other users? Or maybe you made a mistake during installation, then successfully fixed it and now want to warn other home masters who have no experience in performing electrical work about this? Write your advice and comments, ask questions in the comments section below this article.
 Connecting a chandelier to a double switch: schemes + installation rules
  Ceiling outlet under the chandelier: instructions for installing the outlet on the ceiling
 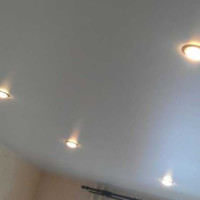 Installation of spotlights in the ceiling: installation instruction + expert advice
  Assembly and installation of the chandelier: detailed instructions for installing and connecting with your own hands
  Why the LED bulbs blink: troubleshooting + how to fix
  Why LED lamps light when the switch is off: reasons and solutions
  How much does it cost to connect gas to a private house: the price of organizing gas supply
  The best washing machines with dryer: model rating and customer tips
  What is the color temperature of light and the nuances of choosing the temperature of the lamps to suit your needs
  Replacement of a geyser in an apartment: replacement paperwork + basic norms and requirements
For a long time I did not understand why I could not connect the chandelier to the switch. As a result, he consulted with an electrician and realized that he simply mixed up the connectors when he connected. It is a pity that I lost so much time and effort without initially reading the instructions.
Good afternoon, Ivan. An electrician, a technique requires a preliminary sketch of a future circuit or product. Even a carpenter, making a stool, first estimates the parameters of individual elements of the future "masterpiece".
If there is no practice, you should always draw electrical wiring.The switch that you installed should “tear” the phase, and there are two of them on the chandelier after the switch. The zero wire is usually visible in the electrical box or at the exit of the ceiling. Attached to the comment is a sketch of your wiring.
The article, of course, is competent and sensible. But if you don’t have a multimeter, a suitable instrument, and if your hands do not grow from the wrong place, then it’s better not to undertake work related to electricity. In the end, it can cost you a lot. Saving on the service of an electrician is not worth it. It is always better to contact a professional. It will be calmer and more truly.