Installation of sockets in the bathroom: safety standards + installation instruction

The high level of comfort of a modern person involves the use of a large number of electrical appliances. Therefore, installing outlets in the bathroom is not a whim, but an important necessity.
The selection and installation of power points is carried out in accordance with the requirements of regulatory documents and the rules of the in-house or in-house power supply devices. These provisions have been studied by us and are described in detail in the article.
We will designate the zones acceptable for the installation of outlets, list the rules for laying the electric cable and give tips on choosing electrical appliances. The proposed step-by-step installation instructions will help you to perform all electrical work on your own, without turning to specialists for help.
The content of the article:
Why do I need a socket in the bathroom
In old buildings, sockets in bathrooms are extremely rare. The reason for this is the compact footage of the room, the elementary lack of free space on the walls and the weak general electrical network of the apartment.
In addition, until recently it was believed that electric points in bathrooms and toilets should not be installed, so they were carried out and mounted near the doors to the bathroom.
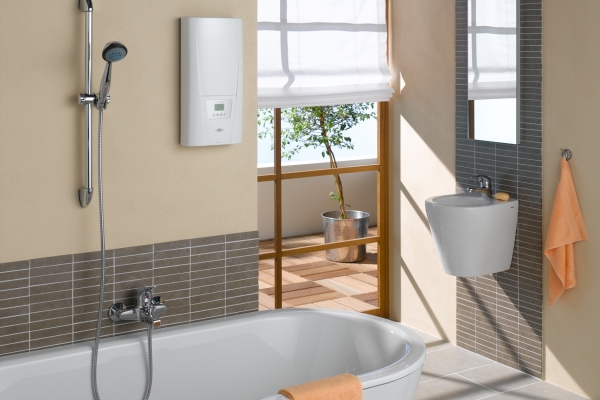
In modern housing, the situation is different: combined with a toilet and separate bathrooms are large, which allows you to freely place a washing machine, water heater, dryer, additional electric heater, heated towel rail, and a “warm floor” system in the interior.
The daily use of a hair dryer, electric shaver, hair curler, etc. remains relevant.

To find out exactly how many outlets are needed for the bathroom, you need to make a list of all devices and among them select those that are constantly on the network.
Assume a washing machine is often installed in a large bathroom. A separate electric point is usually allocated under it or a cable connection is mounted directly, using a terminal block.
According to the rules, the electric point must be located on the left, right or above the device, it is forbidden to install it behind the volume unit. It is necessary to provide easy access so that if the product fails, it can be quickly and easily replaced or repaired.

Power Point Installation Requirements
New modifications of electrical devices are designed to be operated in rooms with high humidity. But to them, and to sockets are increased requirements. You can clarify legal information in regulatory documents, for example, in GOST R 50571.11 (1996) and PUE (7.1).
What areas are suitable for installation
As you know, the combination of water and electricity in everyday life is very dangerous for humans. Therefore, the bathroom, where such contact is possible, is usually divided into zones. There are four of them - from 0 to 3.

According to the rules, electrical appliances can be placed in any of the zones, but they must comply with voltage standards, degree of protection, as well as be connected to UZO machines in the apartment electrical panel.
We will analyze the capabilities of each zone.
If partitions are installed in the bathroom or niches are made to prevent regular water splashes on the body of electrical points, installation requirements are milder. For example, you can do without a safety cover.
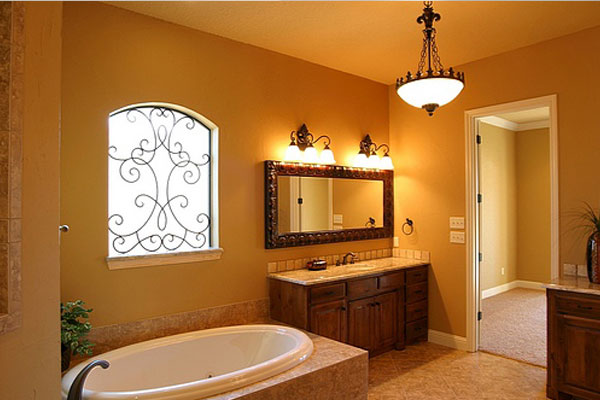
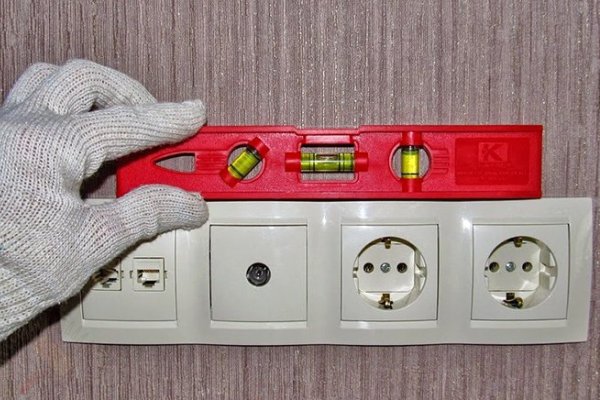
At what height should the socket be installed
The standards for the height at which sockets should be installed in the bathroom or the bathroom have not changed for half a century: 0.9-1 m from the floor surface.
However, there are no strict rules, therefore, during installation, they are often guided by ease of use. For instance, electric point for washing machine usually located below its top cover, on the side of the case.

In the modern reference documentation, you can meet height standardsradically different from previously accepted standards.
When planning apartments in high-rise buildings, a height of 40-45 cm from the level of the concrete slab is chosen, that is, taking into account the subsequent finishing - 30-35 cm above the finish floor covering.

We turn to the requirements of the PUE. It turns out that only the maximum distance of the outlet from the floor covering is indicated there - 1 m. There is no minimum specified, which means that it can be mounted even in the baseboard. Moreover, if there are children in the family, it is recommended to use special technical devices - with protective curtains.
However, the position at a distance of 0.3 m from the floor and especially in the baseboard is absolutely not suitable for the bathroom. In the places of passage of communications through which water circulates, it is impossible to place the sockets below, because there is always a risk of flooding the room.
You should also adhere to the rules common to all rooms:
- not less than 10 cm - distance to door and window openings;
- not less than 15 cm - distance to the ceiling;
- 90 cm - when installing the socket / switch unit, height from the floor.
We can conclude that the optimal location of the outlet at a distance of 0.5 m to 0.9 m above the level of the finishing floor. If it is necessary to replace the old outlet, it is better to simply dismantle it and install a new one without changing the place.
Rules for laying the power cable
In new homes, when replacing outlets, the cable is usually not touched, since it fully meets safety standards and is able to withstand the load. If the house is old, then during the repair in the bathroom before installing the sockets, it is better to replace the wires.

To install household appliances - a washing machine, a heater - it is recommended to mount powerful power lines, and in some cases, dedicated electric lines with a separate RCD.
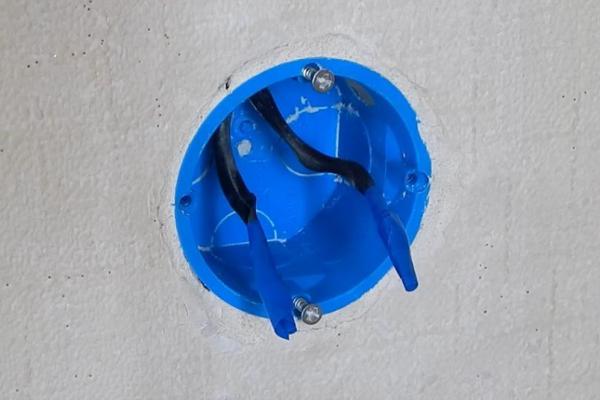
Necessarily require mounting boxes - for the distribution of wires along the lines. If 2 units of sockets are installed in the bathroom, respectively, and junction boxes It will also take 2.

Mounting boxes are placed under the ceiling at a distance regulated by the rules, and wires are lowered from them vertically down to the place of installation of the outlet.
The fact is that the location of the cable is not visible behind the lining, so its diagonal placement is strictly prohibited. Any wire outside the “junction box / receptacle box” channel can cause an accident.
At a close distance, that is, directly, the wires can be placed either under the floor covering, or over suspended structures - suspended or plasterboard ceilings. But in this case, it is advisable to place the wires inside the protective sleeves (non-metallic). This applies to all types of products: VVGNG, VVG and even NYM.
A few words about the type of wiring. For bathrooms, the safest is considered to be the inside, located in the gates under the lining. Outdoor is also used, but extremely rare, as it is characteristic of bathtubs in wooden houses. You can cover the wires with plastic boxes of non-combustible material.
How to choose a socket for a bathroom
Some devices for bathrooms, kitchens and combined bathrooms cannot be distinguished from ordinary ones - in appearance they look exactly the same. Others have a slightly modified design.However, the main difference is the protection, which can be identified by marking - the IP letter and two digits.
For the bathroom, both digital values are relevant. The first indicates the degree of protection against solid particles and dust, the second - from moisture. Experts recommend devices with markings on both parameters of at least 4, but preferably 5 or 6.

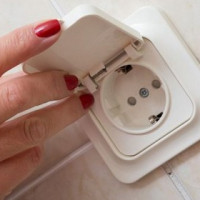
The socket housing, in the marking of which the numbers 6-8 are found, is sealed and protected even from direct jets of water, however, many devices are additionally equipped with covers. An integrated spring prevents accidental opening.
To use the outlet, you must carefully, with some effort, lift the lid up so that the plug contacts can be freely inserted into the holes.

Professional electricians recommend not saving on the purchase of products of well-known brands that serve without repair for years. For example, many good reviews from experts receive waterproof sockets companies: Schneider electric, Gira, Legrand, Berker, ABB, Wessen, Bticino, Makel, Vico.
Step-by-step installation instructions
The process of installing a new outlet or replacing an old one does not take much time, but only a professional with a full hand can quickly install it.
If you are doing this for the first time, each step must be thought out in advance, and all actions must be neat and unhurried. We give an example of installing an internal outlet, as it is considered the most complex and time-consuming.
Step 1 - preparing tools and materials
The number of tools depends on how voluminous the work will be. If the process of replacing the outlet is part of the overhaul or redecorating, then you need to prepare and “heavy artillery” - a perforator for making a strobe, a drill with crowns.
With a simple replacement, a screwdriver, pliers, nippers and electrical tape are enough.
In addition to the tools listed, you need to prepare work clothes, cotton gloves with insulation for wiring and a protective mask or glasses if you need to ditch the walls.
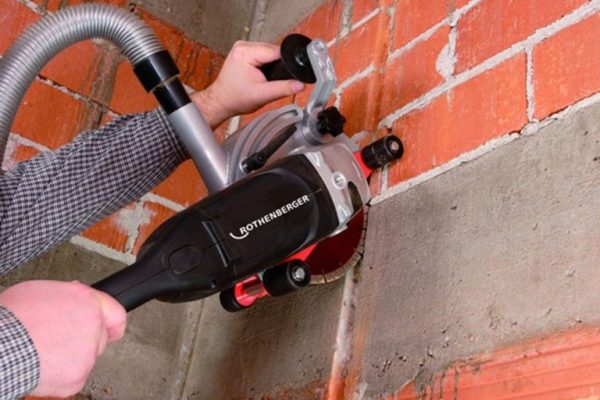
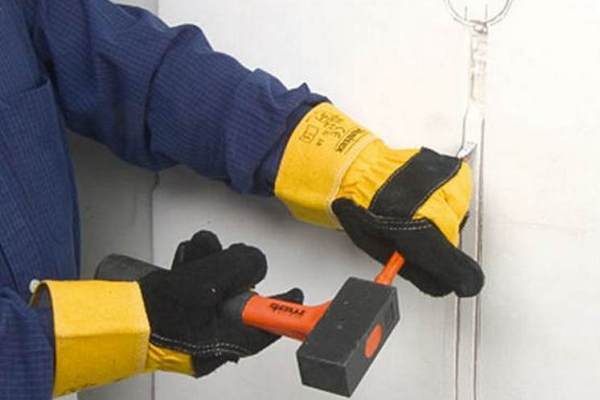
Step 2 - shredding walls for wiring
Creating a gate in a brick, concrete or aerated concrete wall is the most difficult and dirty stage during the installation of a socket or switch.
Get ready for the fact that you will have to work in difficult conditions - after the first blows of the punch, a thick cloud of dust will hang in the air. To avoid this, builders connect a vacuum cleaner to the chaser, but home craftsmen prefer to do without it.
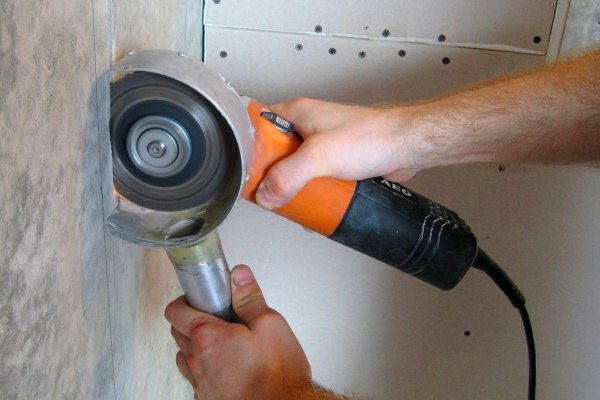
Consider with what tool you can make strobes in the walls, as well as in a cement screed on the floor, if part of the wiring will pass under the floor covering.
The drill will come in handy at the end of the chisel, for making a round hole under the socket. To do this, instead of a drill, put on a cylindrical crown of the desired diameter.
After the "dirty" work, it is necessary to clean - take out construction waste, wash the room. Dust may interfere with the installation of the outlet.
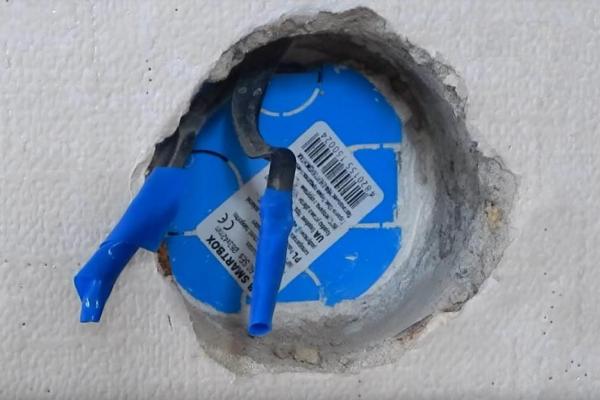
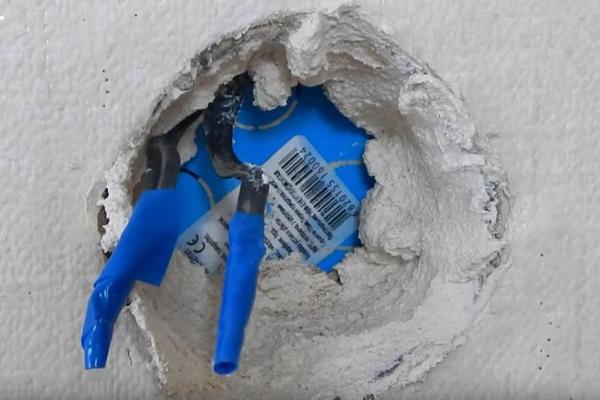
Step 3 - Install the Socket
Perform installation of a socket better at the stage when the wall is plastered, but the tile is not yet glued.
When replacing the outlet, it’s a little easier to act, since you don’t need to hammer and punch. It is enough to dismantle the old case, unscrew the fixing screws and remove the socket, which is also better to replace.
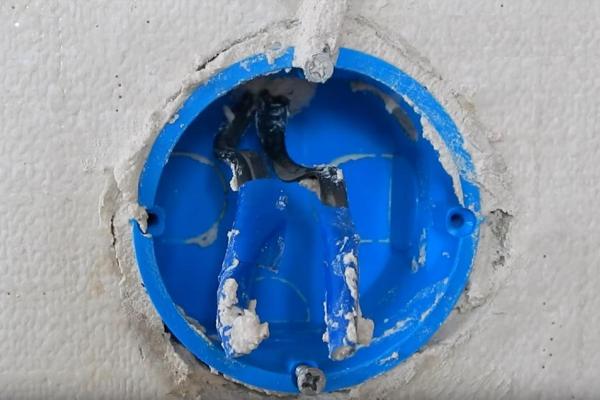
Only after 24 hours will it be possible to carry out further work, since the solution should set and firmly fix the undergrowth.
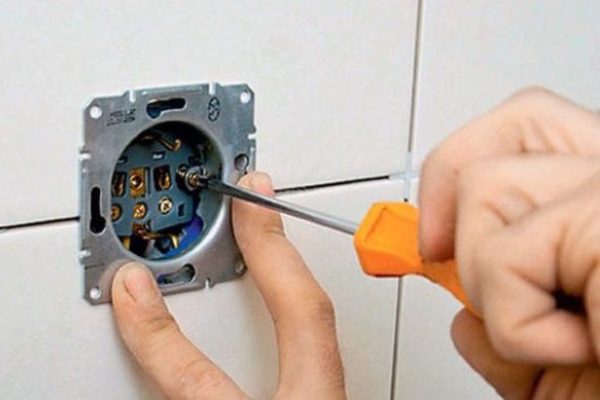
Step 4 - installation and connection of the outlet
The main stage of the connection is to work with wires, so before starting work, it is necessary to disconnect the power line by turning off the circuit breaker on the apartment electrical panel.
Then follows remove wire insulation and prepare them for connection. To do this, you can use nippers, side cutters or ticks.

When connecting, be sure to consider color marking wires.
With its help, it is much easier to determine the purpose of each branch:
- phase - white color of isolation;
- zero - blue, blue;
- grounding - yellow green or green.
We fasten the wires in the terminal blocks and carefully lay them inside the box, trying not to squeeze or bend.Then we insert the case and tighten the fixing screws. Lastly, we put on a decorative bar.
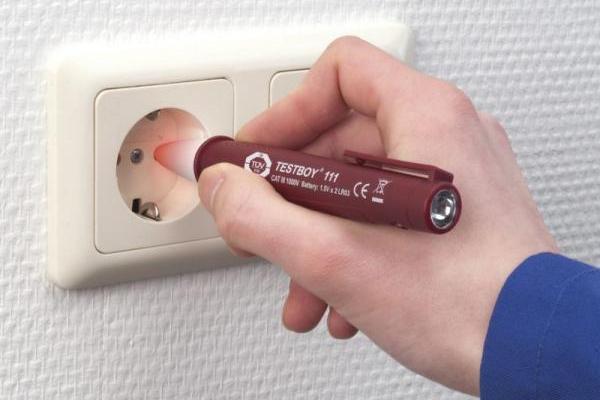
After installation, we will definitely test - apply current to the line and check the voltage in the network with an indicator screwdriver or a multimeter. If everything is in order, finish the wall cladding or put in order the area near the electric point.
The process of mounting an overhead outlet is much easier. It is usually installed with external wiring, that is, you do not need to ditch the walls and mount the internal socket. Before installation, the case is disassembled in the same way and the wires are connected.
Useful tips for wiring in the bathroom
Before installing large and powerful equipment, you need to think about whether a socket is needed to connect. Suppose, for the operation of a boiler with a power of 3.5-5.5 kW, which operates in a constant mode, it is better to use not a conventional power outlet, but a direct connection with a separate automatic machine.

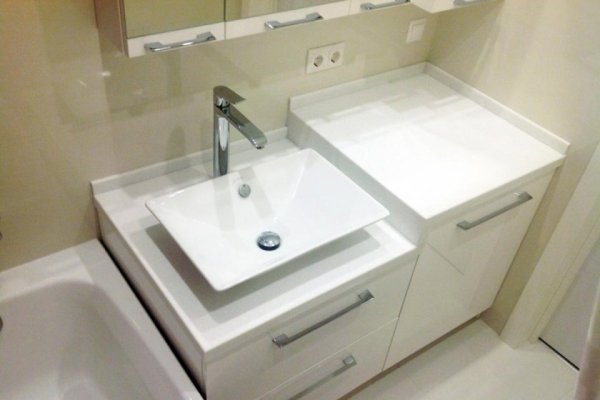
If a sink with a countertop is installed in the bathroom, then you can consider an interesting and convenient solution with a hidden module. The outlet block is hidden in the table, and only the element comes out, for which it can easily be pulled out.
The main advantage of the retractable module is absolute protection against water, but subject to timely masking.
The line going to the bath room must be equipped with an RCD, and each powerful device with a separate circuit breaker. So, if one device breaks down, the rest of the lines will work as usual.

Conclusions and useful video on the topic
What difficulties you may encounter when installing electric dots in the bathroom and how to deal with them, you will learn from the videos presented.
Video with comments on the installation of the outlet:
About the nuances of working with tiles:
Professional installation of the block of sockets on the tile:
Mounting an overhead outlet:
Electrical work requires a certain skill and safety precautions. However, home craftsmen can easily cope with activities such as replacing and installing sockets and switches.
If you still have difficulties or require work of increased complexity, it is better to contact a professional electrician.
Do you have personal experience installing a wall outlet in the bathroom? Want to share your knowledge or ask questions about the topic? Please leave comments and participate in discussions - the feedback form is located below.
 Installing a socket for a washing machine in the bathroom: an overview of the technology of work
 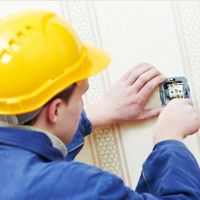 Connecting a double switch: standards and diagrams + installation instruction
  Placement and installation of sockets in the kitchen: the best schemes + installation instructions
 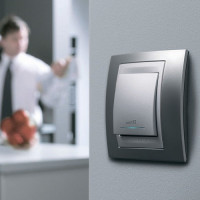 Installation height of sockets and switches: where and how to position?
 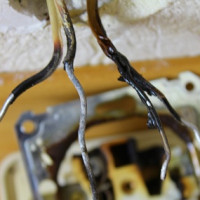 Common Outlet Malfunctions: How to Fix an Outlet Do It Yourself
  Power socket for an electric stove: types, device, technical standards and connection rules
  How much does it cost to connect gas to a private house: the price of organizing gas supply
  The best washing machines with dryer: model rating and customer tips
  What is the color temperature of light and the nuances of choosing the temperature of the lamps to suit your needs
  Replacement of a geyser in an apartment: replacement paperwork + basic norms and requirements
In general, the farther the outlet from the water source - the better, and you do not need to be limited to standard 60 centimeters. I would even play it safe and install splash protection. Well, sockets are better to use at least IP44 type. They are even better than their fully sealed IP55 counterpart, more convenient, although not as safe. But you can play it safe a bit by slightly increasing the height of the outlets above the floor, well, at least at eye level. So the boiler is conveniently connected, and the hairdryer reaches and the same washing machine is quite conveniently connected, the length of the wire is enough.
I wouldn’t install the outlet next to the bathroom. It is not needed there, in fact, it only creates an extra danger. A socket may be needed near the washstand, in fact, this is exactly what we have, but it was carried as far as possible, only to reach the cord, and it is waterproof from the discharge, with a lid. This is especially true if there is a child in the house who does not always observe safety precautions.
Good day, Elena. The installation of outlets is scrupulously described by the "Rules for the Installation of Electrical Installations" and section No. 701 of GOST R 50571.11-96 - they just write about Bathrooms and showers. The PUE, starting the section on the electrical equipment of bathtubs, showers, draws attention to the fact that the devices must meet the zones defined by GOST, and lists the zones and the degree of protection of the equipment intended for them (zones) (attached a screenshot).
At GOST, it will be interesting for you to read the zoning of bathtubs to assess how safe the distance to your outlet is (attached a screenshot). On the Internet, the full text of GOST is available.
According to my not very successful experience, I can note that the outlet in the bathroom is simply irreplaceable, but it requires a clear plan. After repair, we realized that we made a mistake in the calculations. The outlet was not at all in the place where the washing machine now functions. I didn’t really want to remove the tiles and call the workers over again. Fortunately, the car has a long cord, but it still causes some inconvenience.