Common Outlet Malfunctions: How to Fix an Outlet Do It Yourself

A failed outlet is one of the most unpleasant situations for the owner, since it requires almost immediate intervention. To eliminate all malfunctions of outlets, you can call an electrician or put your own hands. The second option is more economical, but without knowledge in electrics it is more dangerous. Do you agree?
We will tell you how to replace or repair an electric point with your own hands. We have described in detail the process of work. Based on our recommendations, even a person who is ignorant of the intricacies of wiring can handle this matter.
For a clear perception of information, we have attached useful diagrams, photo selections and video instructions to it.
The content of the article:
The main symptoms of a faulty outlet
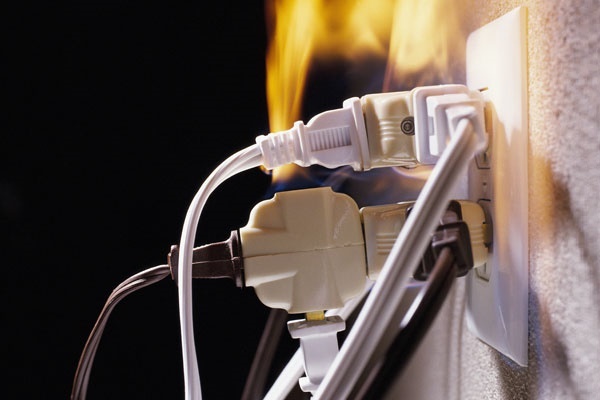
Every person in his life faced situations when, when the household appliance was turned on, strange things started to happen.
Among them, a strange crackle, a slight smoke or a bright flash, after which the light completely disappears in the room. A signal of malfunction is also a melted case and an unpleasant sensation of burning smell.
Together with the outlet in such cases, the fuses of the device may suffer, the wiring may suffer, and even the microcircuit of the household appliance will burn out. In most cases, it is possible to protect against the effects of a circuit due to automatic protection in the electrical panel.
But to rely and rely on it at 100% is not worth it, because machine, by analogy with other devices, tend to wear out and burn out.
If a malfunction is detected in the outlet, it is imperative to immediately remove the load by unplugging the household appliance from the mains and proceed with troubleshooting and solving problems.

To make sure that the outlet is really damaged, the first thing you need to do is connect an electrical appliance to it, in the correct operation of which there is no slightest doubt.
If a normally functioning lamp, for example, does not please with normal operation when connected to this point, measures must be taken to eliminate the breakdown.

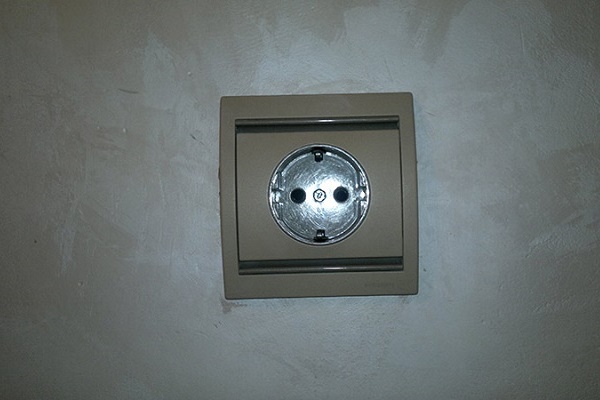
Initial inspection of the outlet
There are several options to determine the type of fault in the connector. The very first is a visual inspection of the front of the outlet for external defects.
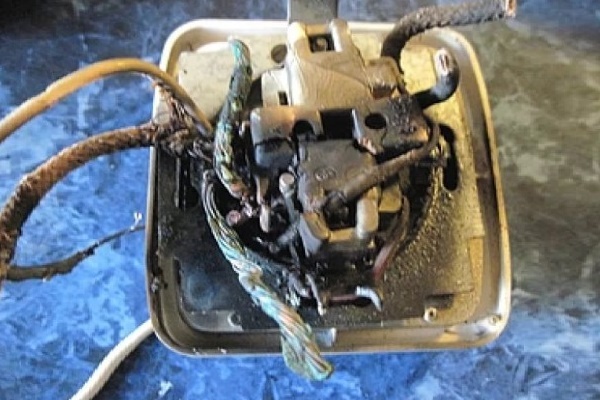
Since the front side of the outlet is made of plastic, there is a possibility of cracks during operation. More serious damage may include traces of soot or melted holes in the connector.
Socket reflow has three main reasons:
- The load current is higher than the capabilities of the device or wiring. When a power stream flows through a narrow channel for it, its density naturally increases. As a result, the load increases, then overheating occurs. In such cases, the outlet is subject to replacement with a new device with suitable characteristics.
- Insulation of conductors in the area of connection to the outlet mechanism is broken. The reason lies in non-compliance with the installation technology of the device, in cuts and damage to the insulation due to awkward actions. You need to change the fused outlet to a device with equivalent characteristics, not forgetting about the removal of damaged wire sections.
- Contact problems. They could corny oxidize or weaken. The problem is solved by stripping or pulling up.
In addition to visual problems with the output, there are a couple of ways to determine the malfunction with a connected device. Consider them below.

Loose contact system
In the case of any outlet, you can find two plates of copper. They have semicircular bends for the female plug.The principle of operation of these plates is completely simple. When connecting a household appliance to the power outlet, the plates tightly clamp the edges of the plug.
Accordingly, after many cycles of disconnecting and reconnecting the plug to the connector, the plates may bend apart. This will lead to the fact that the plug will keep weakening each time.

As one of the options for the correct diagnosis of problems, you can take the plug from any household appliance and insert it into the connector only halfway. If the cord does not fall out, then the probability that the contact remains intact is very high.
The second way is to connect audio speakers or a lamp to a wall outlet, after which you need to move the plug. If in this case there is interference, it is necessary to replace the outlet as soon as possible, since the copper contact plates inside, simply, have bent.

The detection of such malfunctions will allow timely repair of the breakdown, having spent significantly less time and money on this, as well as avoiding accidental fire.
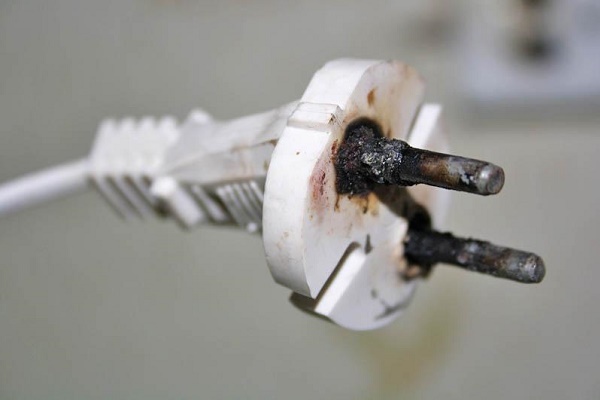
A rather frequent case of damage and subsequent malfunction of the mains plug is incorrect handling of the plug of household electrical appliances. If you handle the equipment carelessly, you can incorrectly pull on the device’s wire and it will cause trouble when the socket with the plug simply falls out of the wall.
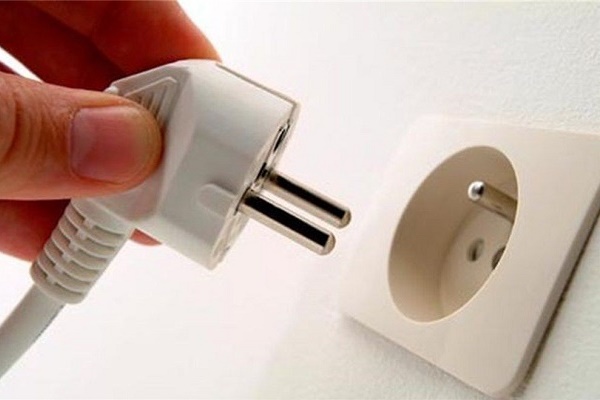
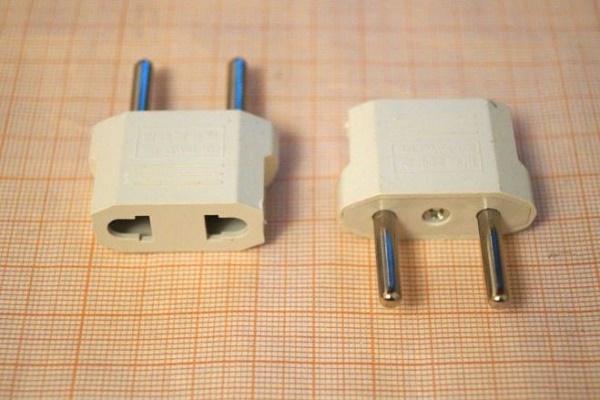
The differences between the two electrical standards
The joint work of sockets and plugs of two standards with a load of a couple of tens of watts is a perfectly acceptable practice. But, when the power of the consumed electricity increases, even up to the requirements recommended by the manufacturer, differences in designs and details can lead to failure of the power connectors or plugs.
The thicker electrodes of the European standard plug push the brass petals much more strongly in the socket of the Soviet-style socket. The springs are stretched, and this, in turn, gradually causes increased heating of the contacts.
Moreover, the standard socket does not have recesses in the case as on the euro connector. The plug is not fully inserted into such an outlet, which can lead to unpredictable contact with the electrodes or a short circuit.
There is no more stress
No less common option for the failure of the outlet. When you connect any household appliance - nothing happens, it does not work, because there is no voltage. This is confirmed by checking with tools equipped with an indicator. Most likely, the cause is a break in the supply wire.

Do it yourself repair repair
After conducting a visual inspection and finding out the exact causes of the malfunction, you can begin preparations for the repair. First of all, we tune in to work, stop panicking, worry and get nervous. Decisiveness and calm are the main weapons necessary for a successful repair.
Next, be sure to turn off the counter circuit breakers and circuit breakers by moving them from the ON / OFF state to the OFF / OFF mode. We unscrew plugs and automatic fuses.
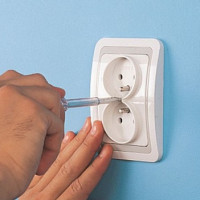
This must be done carefully so as not to accidentally touch the fragments under voltage with your hand. Thus, you can completely de-energize the room. It is also important to check for voltage in the outlet that needs repair. This is done using an indicator screwdriver.
Socket repair tool kit
So that after the repair there are only good impressions, it is necessary to have a set of improvised tools for all occasions.
Repairs, replacement and alteration of sockets it is much easier to carry out, having at hand tools such as:
- indicator screwdriver for determining the phase, the presence of voltage in the mains;
- Phillips and flat head screwdrivers;
- pliers or pliers;
- vinyl tape for insulation;
- sharp knife;
- soldering iron (in some cases).
One of the important points is that the handles of pliers, screwdrivers and other tools used must be insulated or rubberized. This will prevent accidental electric shock.
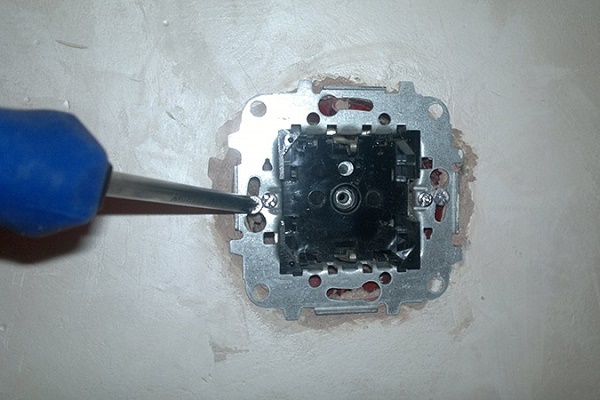
Do-it-yourself outlet repair
After checking the voltage, it's time to start the repair. Unscrew the screw that is located in the center of the connector with a screwdriver. This allows you to remove the cover of the outlet and gain access to the filling. Check the status of contacts. If copper has a greenish tint - this is a sign of oxidation, if gray or black - an indicator of poor contact.

How to fix such an outlet? For example, when the contacts are dark in color, they need to be cleaned. A file is usually used for this, but you can use sandpaper. There are situations when the metal in certain places has become much thinner, and through holes appear on the contacts themselves. In this case, the outlet must already be replaced.
Tighten the loose contacts
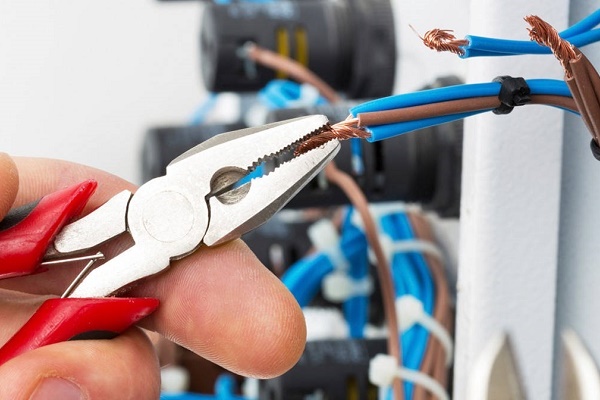
After removing the outlet from the wall, it is necessary to tighten all the fasteners, screws and contacts with a suitable screwdriver. If the wire or terminals are of an uncharacteristic color, soot, you can use a sharp knife and strip them to shine.
Highly charred wires must be replaced with a new length or simply cut off (with a sufficient margin of length). Any wire connections and the twists must be insulated with vinyl tape. A socket whose contacts are broken cannot be repaired and requires a complete replacement.
Typically, the plug enters the power outlet at a certain pressure. This is ensured by well-fitted contacts. If not, then we are engaged in solving this problem.
After that, you need to check how securely the wires are connected directly to the outlet. If necessary, tighten them, but not much. They should not twitch and fall out. Each bare wire that leads to the outlet must be well wound with electrical tape.

What to do when the whole outlet is walking from side to side? The solution to this malfunction is quite simple. It is necessary to tighten the installation bolts located on the left and right. If they are tightened correctly and correctly, then the socket will sit in its place.
Connect a new outlet
First of all, the supply wire is connected to the contacts. To do this efficiently, you need remove insulation 5–10 mm from the core through which current will flow. The bare part of the wiring must be shoved into the terminal and pressed well with a screw.
Do not be too zealous when tightening the screwdriver, otherwise it will lead to the wire being transferred, and in the worst case, torn.
There are two ways to connect wires: fast or reliable. Reliable connection means that the ends of the stripped wires will be bent into a ring of small diameter (4-5 mm). Only then must they be inserted into the terminals and tightened. Quick connect provides for easy connection without twisting.
A reliable way to connect contacts requires much more time, but is compensated by a number of advantages, for example:
- stronger contact;
- the degree of heating of the contact is much less, since the contact area of the wire with the current-conducting contact is much higher.
Connection ground outlets slightly different from mounting without it. The wire, most often green, connects to the ground terminal. Before connecting, make sure that this core is indeed a ground wire.

The next step is to install the device in the socket. The working part is installed after all the wires are fully connected. Installation takes place at the same level as the wall, without distortions and protrusions. All wires must be neatly twisted and hidden in the socket.
Securing the socket in the correct position is carried out using special clamping clamps. You can adjust them thanks to the screws. If you twist them, then the legs will fix the outlet from the inside.
If your outlet does not have paws, then this is a device of a new sample, which fixed in the socketset aside for holding down screws. The last step is to screw the cap.

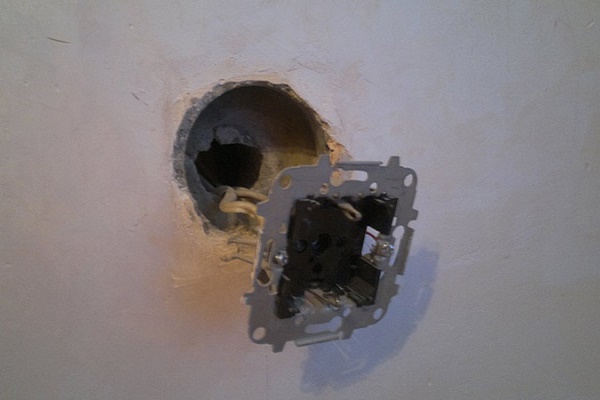
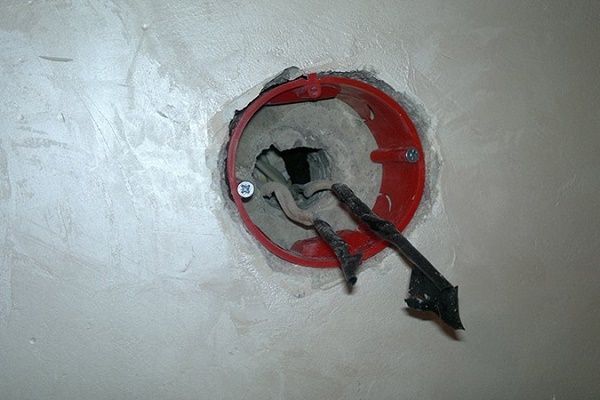
Recovering a wall outlet
A failure of this kind is not the most pleasant reward for the inaccurate use of household appliances.
To exit this situation, you can use the two most common options: short-term or long-lasting:
- The first method involves twisting the petals much more than usual. This will allow the product for some time to be in its place and serve faithfully.
- The long-lasting method requires significantly greater time costs, as well as the availability of tools and new devices.
The main reason for the outlet to fall out of the wall is just the inoperative petals. The solution in this case will be the modernization of the seat.
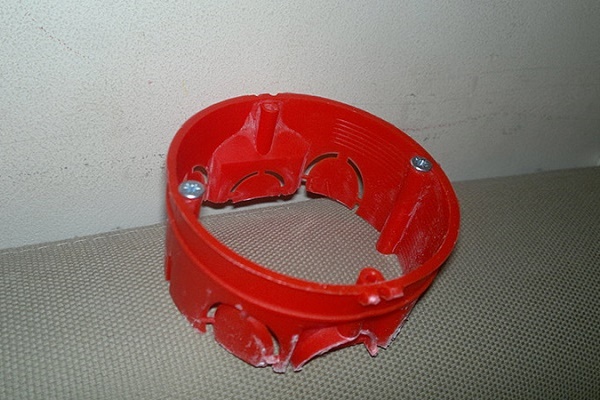
Additional tools for repairing the outlet
To return the outlet to its place will require:
- mounting box 68x45 mm;
- gypsum;
- construction knife;
- polymer primer;
- putty knife;
- tools that have already been written about.
Before starting work, it is necessary to de-energize the room and warn other people who, with a high degree of probability, can turn on the current supply on the machine again. If this is not possible, be sure to put a sign: “Repair work is underway”.
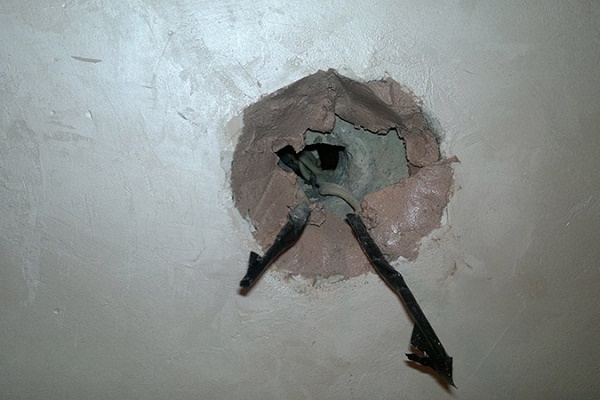
Getting started on restoration
When dismantling the outlet and the old mounting box, be sure to mark each wire with a marker. Remove all plugs and screws. This will provide free access to the wires in the box.
The bottom should also be removed from it, since the dimensions of the box often do not match the parameters of the holes in the wall. A box without a bottom is easily cut, but it cannot be deformed by compression.
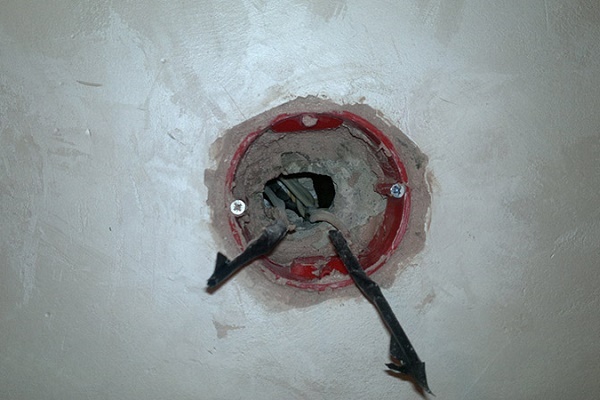
The socket must be installed so that it is firmly and motionlessly sitting in the wall. To do this, the hole is primed. Then gypsum is diluted in water and the hole is processed with this mixture, and the cracks are closed with a spatula.
A mounting box is inserted there. After 15 minutes, when the gypsum reliably grabs it, you can start the process of installing the inside of the new outlet and start connecting the wiring. The final step will be the installation of the front panel.
Conclusions and useful video on the topic
Video # 1. Installing a new outlet and dismantling the old:
Video # 2. How to properly replace a burnt outlet:
Video # 3. Step-by-step guide for replacing a power outlet by a professional electrician:
Video # 4. How to quickly and efficiently change the outlet with your own hands:
If problems with power points found you unprepared, and the process of repairing the outlet will occur for the first time, it is important to remember that you will be completely calm. It is required to de-energize the room, and if necessary, eliminate the fire.
Carry out repair and installation work with complete concentration and caution. If the results of the work do not suit you or you feel a lack of confidence in the success of the work done, immediately contact a professional electrician with experience. Do not save on safety!
Do you want to share the personal experience gained during the repair of the outlet with your own hands? Do you have questions in the process of reviewing the information provided? Please write comments.
 How to connect a double outlet: installing a double outlet in one socket
 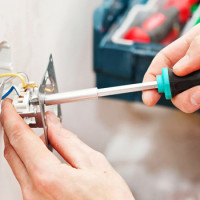 How to install and connect an outlet: a step-by-step guide
 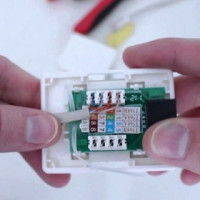 How to connect a telephone socket: connection diagram and installation rules
 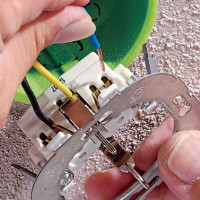 How to change and remodel the outlet: step-by-step instructions on how to replace
 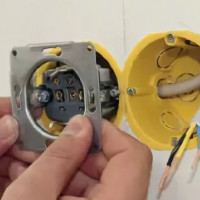 How to install a socket in drywall: installation rules and tips for installing a socket
 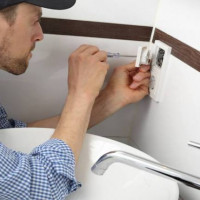 Installation of sockets in the bathroom: safety standards + installation instruction
  How much does it cost to connect gas to a private house: the price of organizing gas supply
  The best washing machines with dryer: model rating and customer tips
  What is the color temperature of light and the nuances of choosing the temperature of the lamps to suit your needs
  Replacement of a geyser in an apartment: replacement paperwork + basic norms and requirements
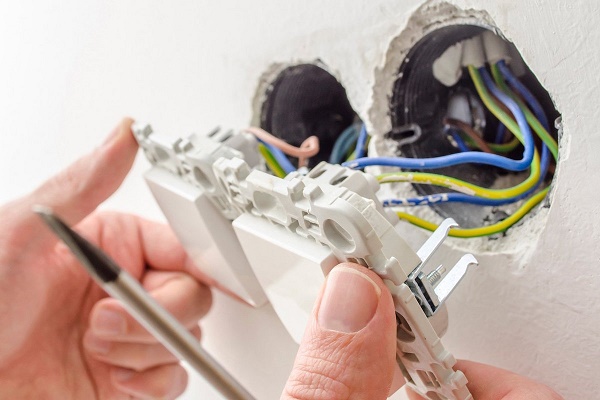
How many times, helping friends with the repair of outlets, I came across the same thing. An ordinary tin can was used in the wall instead of a stalk. Accordingly, when installing the outlet, the bursting legs rested against the side walls of the can and, as a rule, over time the outlet fell out along with the can. The sad thing is that it is impossible to eliminate this problem except by reducing the socket for a wall outlet using a solution.
Typical malfunctions of any outlets can be divided into two groups: fixing the outlet itself (mounting box) in the wall and the actual electrical part (oxidation of wires, poor contact). In the first case, you need a good, reliable fixation of the box in the wall and the socket itself will hold tight. Secondly, look (replace, strip) the oxidized wire, contact plate, screw. Neater with aluminum wire.
Pulling the plug by the cord is simply impossible! This is barbarism. Otherwise, the material is useful, thanks!