DIY wiring: how to properly perform electrical work

Faced with replacing the switch or connecting the outlet in everyday life is often enough, so everyone should have at least minimal skills in servicing the home electrical system.
We will try to figure out how to make the installation of electrical wiring with your own hands, focusing on the rules of the PUE and observing safety precautions. Also in this article we will consider the features of designing a project, the rules for introducing electricity into a house, and the intricacies of a reliable wire connection.
The content of the article:
What is required for a home wiring device?
First of all, you should understand the structure of the electrical network. It consists of electric points connected between each other and with the power line of various kinds of cables and wires, protective devices and circuit breakers, and the ground loop.
Do not confuse wires and cables. The first are conductors for internal wiring, which can be single and multi-core, the second are several wires connected by a common protective sheath.

Cables can be mounted in the ground, under water, in concrete structures; they are also used for home electrical devices, if you need to connect powerful devices or special protection.

The wire strands are composed of metals that conduct electricity well: copper and aluminum.
Copper is considered more valuable material for several reasons:
- has a high current density;
- differs in wear resistance and fracture toughness;
- has less resistance to oxidation;
- It does not shrink like aluminum, so it does not form gaps in the joints.
For internal stationary wiring, it is recommended to use single-core copper wires, which are stronger and more reliable than multi-core analogs.

Types of cables and wires for electrical work:
- VVG (from 1.5 mm² to 10 mm²) and its analogue NYM - both are multifunctional;
- PVA - for connecting fixtures;
- PV1 - for electrical panels;
- PV3(6 mm²) - for installation of the control system.
Varieties of VVG can also be useful: VVG-P (flat), VVGng (A), VVGng (A) -LS and etc.
In addition to choosing wires or cables, it is important to understand grounding systems that guarantee the safe use of electrical appliances. In a private house, the installation of a grounding loop is mandatory; in urban apartments, a bathtub and household appliances are usually grounded.
There are several strict rules: for example, you can not connect grounding wires to metal communications or do independent work in the electrical panel.
The installation of RCDs and circuit breakers, as well as any installation work in the electrical panel, is best delegated to qualified electricians who have approvals. They will be able to correctly determine the load and pick up circuit breaker.
Wiring Guidelines
Designing an intra-apartment or intra-house wiring is a responsible and complex matter requiring qualifications. There are many principles and norms for installing wires, switches and sockets.
Here are just a few of them:
- it is better to divide the wiring into groups - outlets, lighting, etc., highlighting individual lines for powerful electrical engineering;
- in the drawing it is necessary to indicate the power points and the installation locations of powerful energy consumers (oven, air conditioner, washing machine);
- the location of the outlets is from 0.3 m to 1 m from the floor;
- the optimal mounting height of the switches is 0.8-1 m from the floor;
- better than more outlets - no extension cords are required;
- a separate project - for a low-current system (to protect against interference, the wires are pulled separately from the power lines, with an indent of at least 0.5 m);
- bathroom switches lead to the corridor, etc.
It is very important to correctly lay the wiring itself - internal or external (open / closed type). We recommend that you familiarize yourself with electrical design rules in a private house.

The wiring diagram must be stored, it will come in handy during repair work.
If you have doubts about your own experience or skills, it is better to contact specialists - qualified electricians. They are familiar with many small but important nuances that a simple layman cannot take into account due to his inexperience.
An experienced designer will competently draw up a wiring diagram, take into account the standards and requirements of the EMP, make calculations, choose equipment of suitable nominal value and, in the end, take full responsibility. With independent design and installation, the owner will have to answer for errors.
Is power consumption important?
In addition to designing, it is necessary to take into account such a moment as the consumed power in the house.
In a multi-storey apartment building, they are usually standardized, but in a separate cottage, before approving documents, you will need to know what kind of allocated capacity to request from the electricity supplier.

It is a mistake to assume that the total power consumption is the sum of the individual capacities. The simultaneous inclusion of all devices in the network does not actually occur, therefore, when calculating it is necessary to use such a value as the simultaneity coefficient.
For sockets, it is a maximum of 0.2, that is, at the same time, usually no more than 20% of power points are involved.
Rules for entering electricity into the house
For private households, such an issue as the introduction of electricity into the house is important. Usually it is carried out using a self-supporting SIP wire.
If the transmission line support is located less than 25 m from the house, additional posts for support will not be required.

Input Requirements:
- with a wire length of more than 25 m, additional supports are required (on the pillar closest to the house, a shield can be installed, and a grounding circuit can be deepened near the ground);
- wire tension between supports - at least 2 m above the ground;
- if the wire crosses building structures, it is mounted in a protective pipe;
- the minimum distance from the ground for the connection point of the building is 2.75 m;
- if it is planned to extend the wire from the control room to the house underground, then it must be placed in a protective sheath, and then in a ditch with a depth of at least 0.7 m.
It is clear that when choosing an underground installation, entry directly into the building must be foreseen during the construction process.
Wire Connection Rules
The practical point is the connection of wires. It is carried out either by means of junction / installation boxes or directly, by means of terminals or twisting.

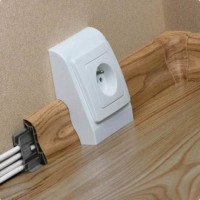
To hide distribution boxes under the plaster or wallpaper is risky - for repairs you will have to remove the lining. In this regard, some electricians implement another method of connecting wires - with mounting boxes for sockets and switches.
The advantage of this method is the free access to the connection points, minus the increased cable consumption.
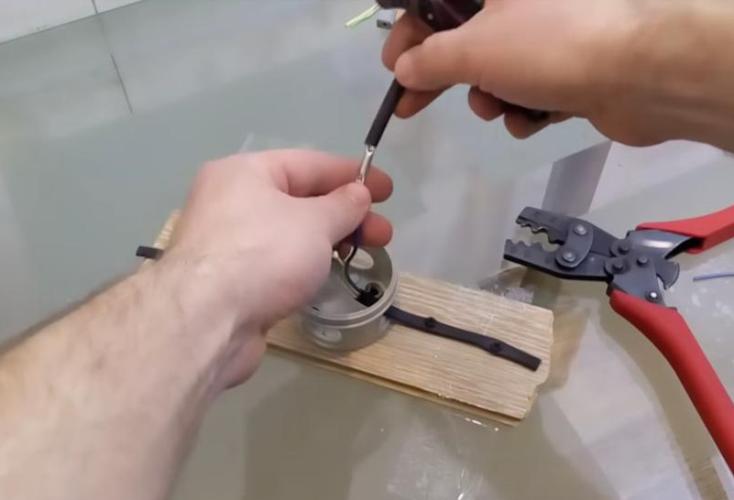
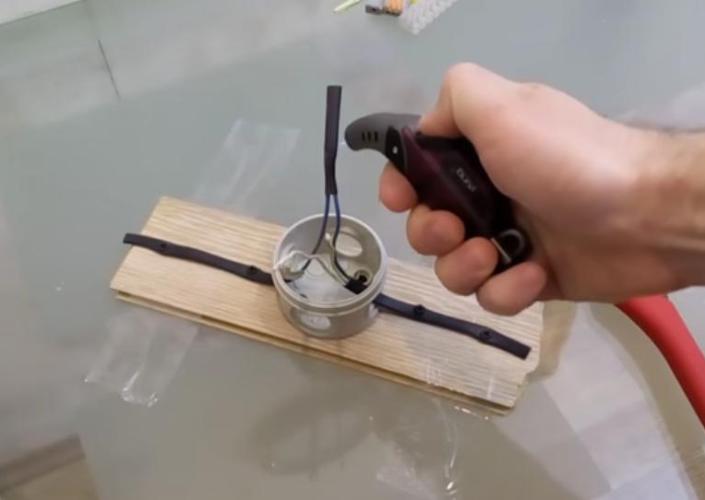
Heat shrink is used to connect the wires in the outlet line, for the installation of the lighting network - Wago terminals with spring mechanism.
In addition, many use terminal blocks, crimping and traditional soldering.
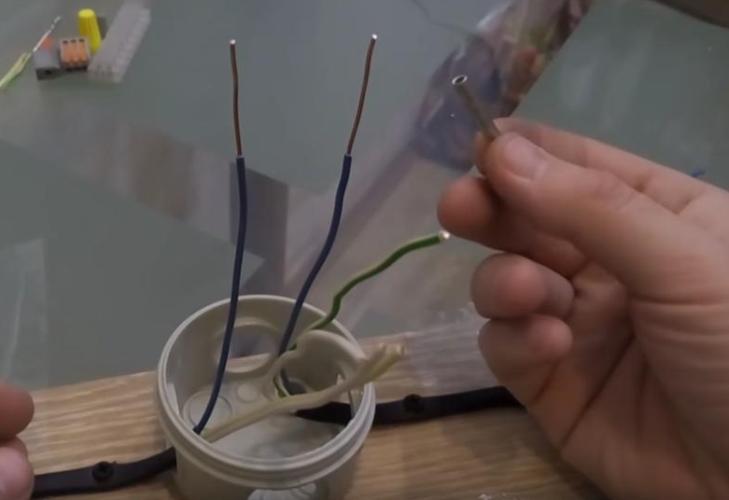
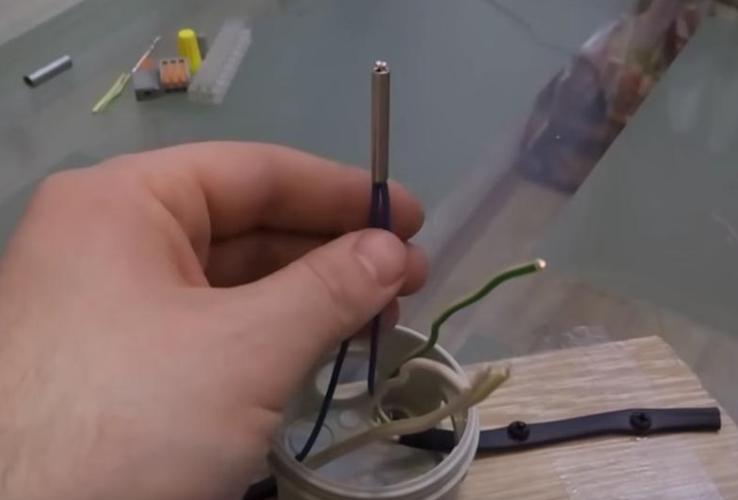
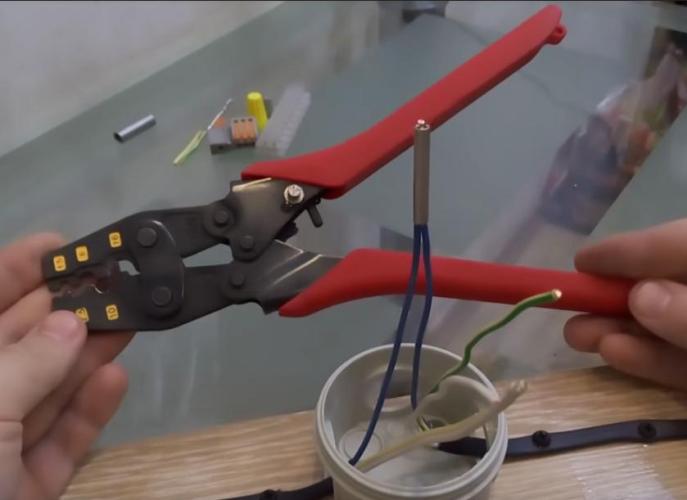
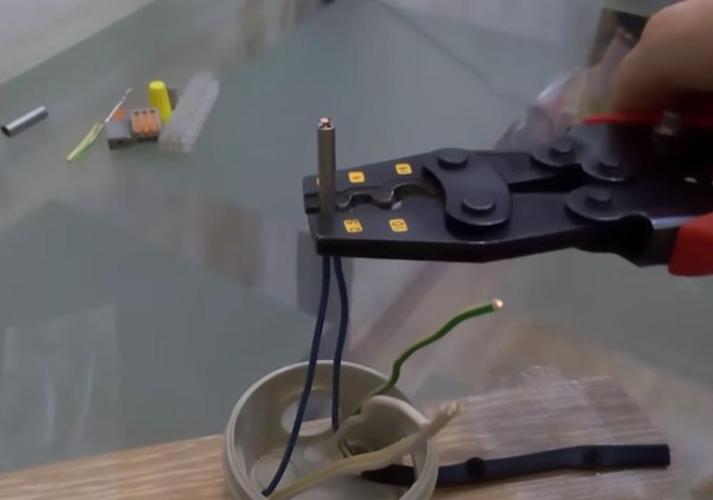
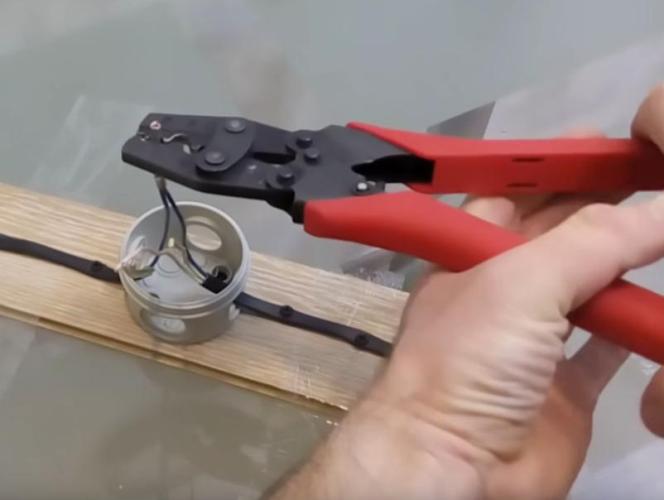
Consider the crimping procedure with sleeves:
This is one of the simplest and most effective ways of self-assembly of wires, for the implementation of which press tongs, sleeves in size, a burner and heat-shrinkable material are required.
A detailed analysis of the methods of connecting wires we reviewed here.
Installation Instructions
Consider one of the options in which you can do most of the electrical work yourself. For the most difficult issues, you will have to contact specialists, but you can independently sip through channels for wiring or connect sockets with switches.
Stage # 1 - electrical wiring
The project has already been completed, now with the help of a stepladder, level (laser or bubble), construction tape measure, marker we make markings - we draw horizontal and vertical lines directly on the plaster / concrete slab where the highways will be laid.

You need to start by beating off the horizontal level, which is called the "clean floor level" - that is, the floor with a finish floor covering. It is from him that the distance to sockets and switches is measured.
The power line is laid about 0.3 m from the ceiling, a low-current line can be placed half a meter below. It is not recommended to plan the installation next to the jambs.

Be sure to mark the locations of the installation of powerful electrical appliances (preferably with the main characteristics), the width of the shtrob, equip the places of passage through the building structures.
By the end of the marking operations, the walls, floors and ceilings in the rooms should turn into original drawings with bright and clear signs.
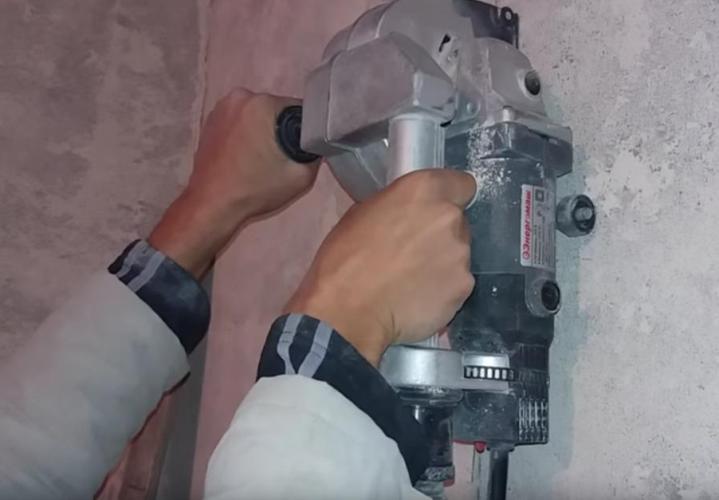
Stage # 2 - wall chipping
Half the success of smooth gating is the right tool:
- shtroborez equipped with a vacuum cleaner;
- hammer drill (it is desirable that the impact energy was at least 15 J), drills, crowns, drills of the same manufacturer;
- grinder, wheels for concrete;
- chisel;
- hammer.
Hand tools are useful in hard-to-reach areas and where jewelry precision is needed.
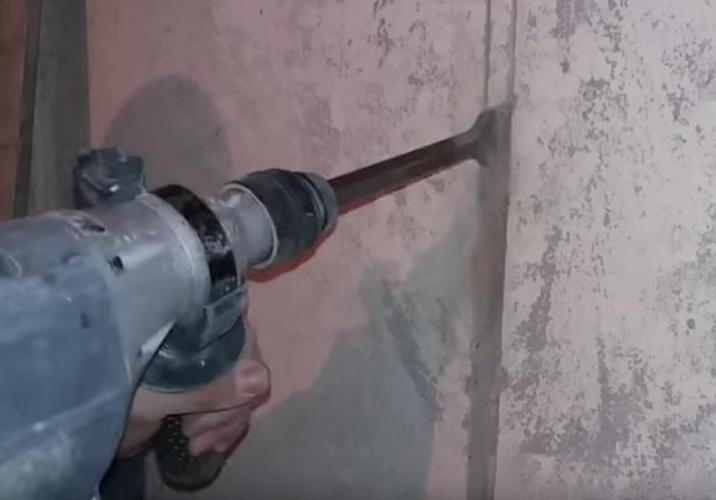
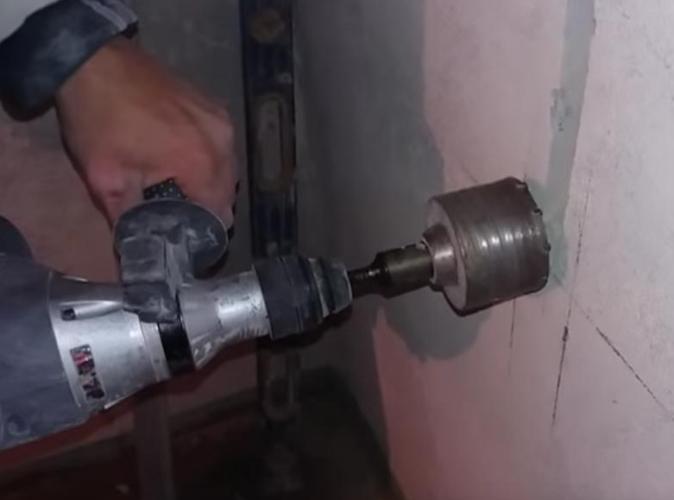
Next, following the markup, we make the gating:
Without taking the tool far away, we check whether the strobes correspond to the thickness of the cable, and the cut out sockets correspond to the dimensions of the mounting devices.
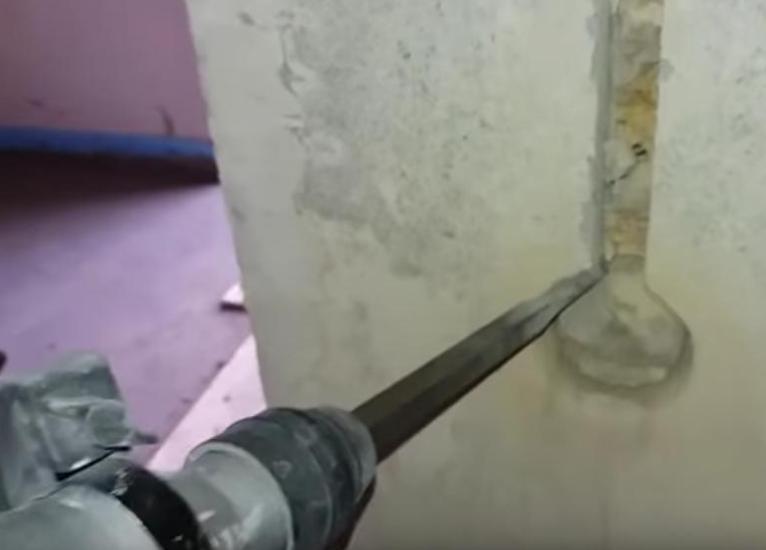
If everything is in order, we clean all recesses and niches with brushes and brushes, remove debris, erase dust and prime the working surface with a deep penetration compound.
Stage # 3 - installation work
To install electrical wiring, you need a little more tools: stripper, pliers, wire cutters, a special knife for cutting cables, screwdrivers with dielectric handles, tongs for wire crimping, indicator screwdriver, soldering hair dryer, tester, screwdriver, putty knife and gypsum container.

Then, in turn, starting from the ones closest to the shield, lay the trunk. When calculating the length of the wires, do not forget to take into account the releases from the mounting and distribution boxes of 0.2 m.
A part of the wires is placed in protective corrugated tubes, if indicated in the design. We try to twist the wires so as not to provoke internal stress.

Subsequently, they are fixed with alabaster solution (gypsum), but not along the entire length, but pointwise. The interval of mounting fixtures is 0.5 m, but at bends and corners - 0.1 m from the bend.
A corrugated pipe is always used to lay the cable over the ceiling, and it is mounted on special clips (taking into account the subsequent installation of the suspension structure).
Stage # 4 - installation of mounting boxes
The basic principles can be understood by the example of installing a single mounting box, which is performed in the following sequence:
- remove the connecting “ears” with a knife;
- we check the conformity of sizes;
- insert the corrugation with the wire into the intended hole on the box (cut by perforation);
- cut off the excess corrugation, leaving a small end (1 cm);
- we fix the box on gypsum: we moisten the recess with water, quickly apply gypsum, insert the box and hold it for a while with an even straight object (for example, level);
- remove the gypsum that got into the box with a wet finger.
When 2 to 5 mounting boxes are mounted, a rigid frame, for example, an aluminum corner, is used for strength and uniform distribution.
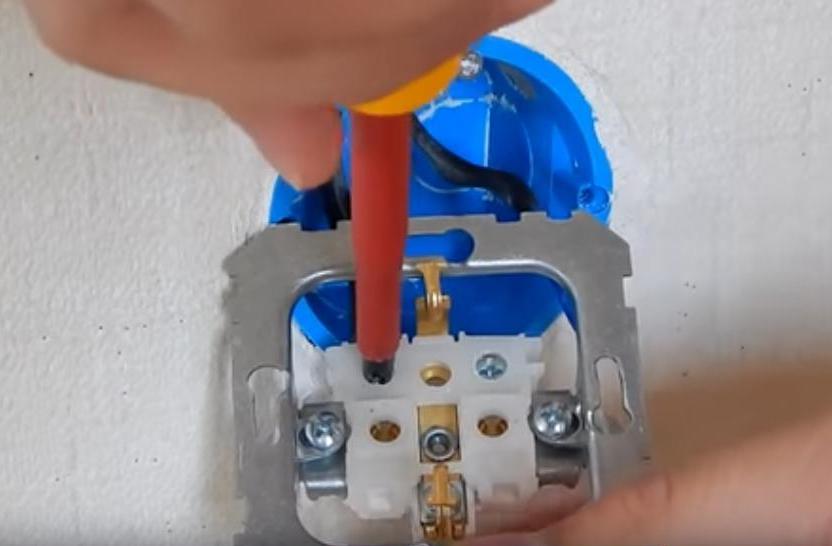
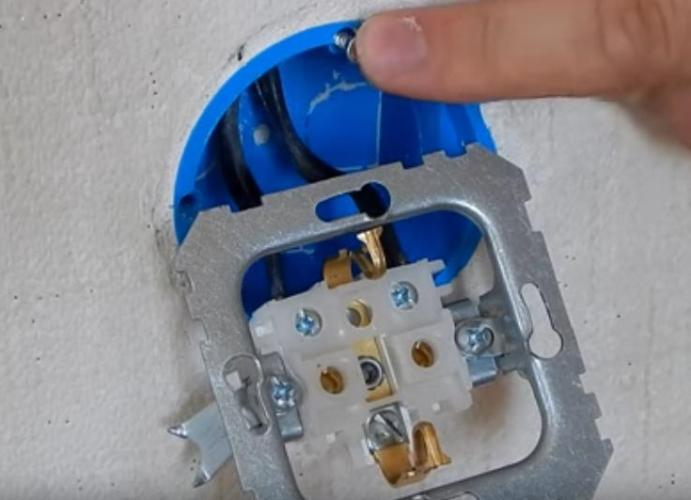
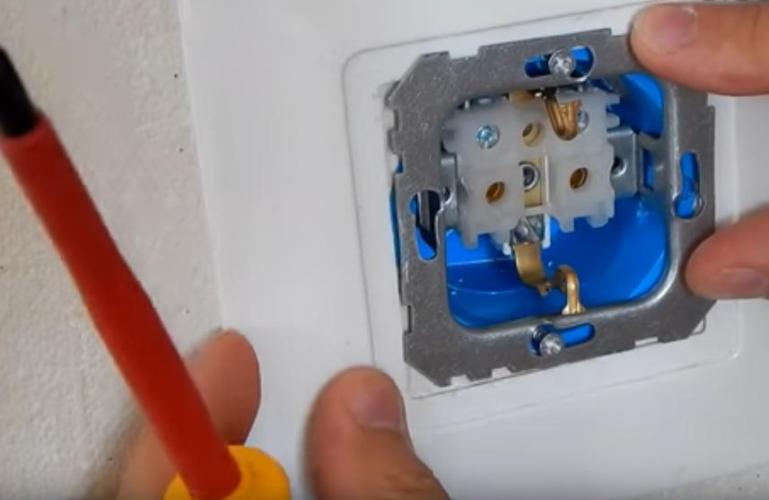
Stage # 5 - Connecting Outlets
After mounting the wires and boxes, we connect the sockets in turn. Work with switches is carried out in the process of designing a lighting system.
Example of connecting a single outlet without grounding:
What to do if there are 2 or more outlets? We connect strictly according to the following scheme:

A loopback connection - from one outlet to another - is recommended to be excluded due to irrationality.
We have detailed instructions for connecting outlets in various ways. They are discussed in the following articles:
- Serial and parallel connection of sockets: a loop and a star
- How to connect a double outlet: installing a double outlet in one socket
- A socket with a switch in one housing: how to connect a socket with a switch
Stage # 6 - installation of the lighting system
Wires for the lighting system are installed before or during the installation of suspended ceilings.
You must do the following:
- connect one-, two-, three-key switches to the power line (depending on the purpose and functions);
- if necessary, mount and feed-through switches;
- install lamps (spotlights, sconces, chandeliers, etc.) and connect them to the switches.
To install the switch, we recommend using the circuit diagram, which is often located on the back wall, and using the generally accepted color codes for the wires.

The fundamental difference between the two-key switch is that it has 3 contacts for connection, one of which is common, and the other two are separate. That is, when connected, a two-wire wire will not work, only a three-wire one. In this case, a phase is connected to the common contact.
Stage # 7 - electrical panel device
It is better to hire a specialist to assemble an electric panel, because it is a complex work requiring experience and knowledge. Circuit breakers and RCDs are enclosed in the metal case of the shield, the rated power of which can only be calculated by a professional electrician.
Not only the correct functioning of the entire electrical system, but also the safety of the tenants of the apartment depends on the correct assembly. A detailed briefing on the assembly of the electrical panel is considered in this article.

It is strictly forbidden to carry out electrical work, including maintenance work, in apartment buildings with common panels independently, this is done by specialists from the management company. They control the operation of metering devices.
Security measures during wiring
In order to protect yourself and those who accidentally may be nearby, during electrical work, the following rules must be observed:
- Use only serviceable equipment - power tools, carryings, extension cords.
- Before starting work, be sure to turn off the power supply using automatic machines and RCDs. To prevent accidentally turning on the voltage on the site, you can hang a sign or warn neighbors.
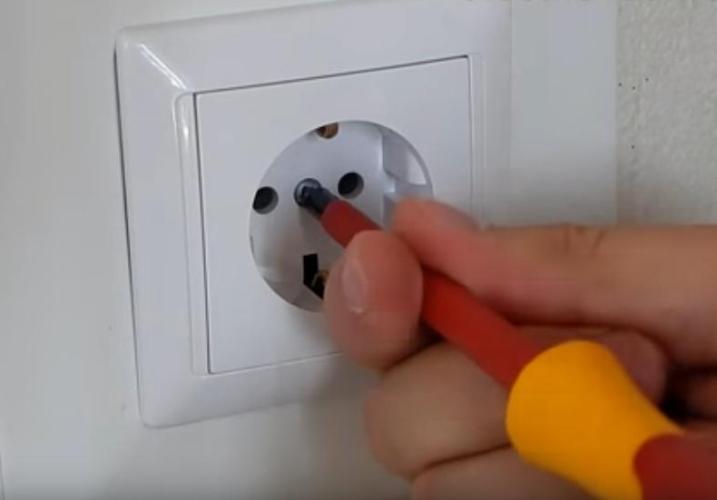
- For insurance use testers and indicator screwdrivers.
- Ensure that the insulation on the tool handles is in order.
- Try not to work alone - you may always need help at work or medical assistance.
Separate rules apply to working with a hammer drill, chaser, or a powerful drill. In addition to protective clothing, gloves (with an isolated handheld) and a mask (respirator) are required. Shoes should fit tightly around the feet and not slip.
The wiring under the ceiling must be done only from the platform: chairs or tables are categorically not suitable.
Every professional electrician is familiar with the rules of first aid for electric shock, but unfortunately, ordinary people do not always act correctly.

Ideally, in any room where electrical work is carried out, it is necessary to have a fire extinguisher on hand. Sparking or sparking wires must not be filled with water.
Conclusions and useful video on the topic
You can find out how to work with tools, wires and various electrical devices, as well as plan work, by watching a useful video.
Wall chipping and ceiling mounting:
An interesting theory about wiring and protection:
Mounting the outlet block:
Electrical work is considered complete when the wires are connected and masked, the junction boxes are covered with lids, and the electrical panel is fully equipped. You can replace the socket or install a chandelier at any time - the installation of lighting devices and decorative elements is most often done after finishing work.
But with any manipulations with the electrician, remember the most important thing - the safety of human life.
Do you have significant experience in performing electrical work and have independently been involved in the design and installation of electrical wiring in the house? If you notice errors or inaccuracies in the instructions given by us, please indicate them to us by leaving a comment in the block under this article.
Or are you just studying the installation rules and want to clarify some of the nuances? Ask your questions - we will try to help you.
 Installation of open wiring: a review of the technology of work + analysis of the main errors
 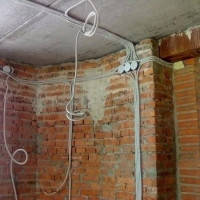 How to conduct wiring in the apartment with your own hands from the shield: basic schemes and rules + installation steps
  Do-it-yourself wiring in the kitchen: wiring diagrams + features of the electrical work
 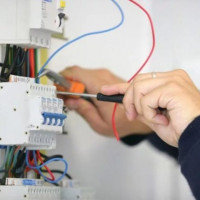 Wiring diagram in the apartment: electrical wiring for different rooms
 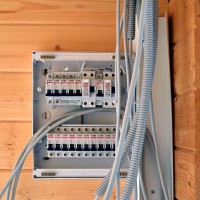 Wiring in the apartment: an overview of the main schemes and the procedure for performing work
  Corrugation for electrical wiring: how to choose and install a corrugated sleeve for cable
  How much does it cost to connect gas to a private house: the price of organizing gas supply
  The best washing machines with dryer: model rating and customer tips
  What is the color temperature of light and the nuances of choosing the temperature of the lamps to suit your needs
  Replacement of a geyser in an apartment: replacement paperwork + basic norms and requirements
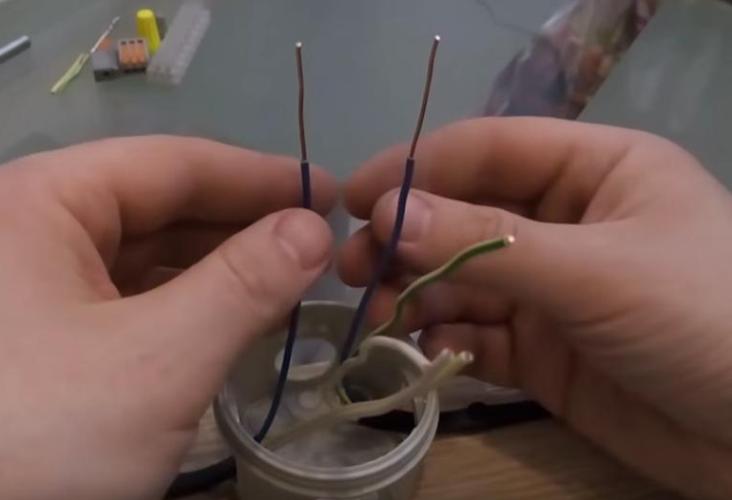
The first figure shows the wrong connection of wires - aluminum is connected to copper by twisting. Correctly, copper and aluminum are connected either by clamping connectors or by a threaded clamp. Otherwise, these two metals will begin to react and oxidize, and over time, the contact will become floating. And with powerful consumers (a household welder) it will start to sparkle, as a result, the contact will soon burn off.
And didn’t you read the description under the picture? It says that you can’t connect like that ...
Also always connect the copper and aluminum wires only through the terminals to avoid unnecessary situations. I kept a good table of the power consumption of electrical appliances, I did not think that the vacuum cleaner consumes so much energy. Is it possible to somehow determine when installing the chandelier where the cable passes in the ceiling, so as not to get into it when you install the mount?
Good afternoon, Dmitry.
I answer the question, I assume that the house is brick. In these houses, floor slabs are used, where the distance between the lower plane of the plate to the cylindrical voids through which the wires are laid to the lamps, chandeliers is 30 millimeters (attached screenshot of the cross section of the plate). This parameter helps determine whether to drill through. If not, you won’t have to buy the device.
Otherwise, buy ADA Wall Scanner 50. The last digit is the depth limit at which live wiring is detected. By the way, he also finds fittings. Has a light, sound indication.
And yet - the antenna of the transistor receiver, moved in the intended area of the wire, also "senses" the voltage - the receiver makes a characteristic noise.
Hello.I agree with Vasily, only buying a detector is not necessary for one chandelier, just call any electrician (unofficially cheaper at times, do not charge for a call) and ask him to ring the wiring with his equipment.