How to find a wire break in a wall: an overview of ways to detect and repair a break

Due to the violation of the integrity of the wiring, walled up under a layer of finishing materials, residents of the apartment may be left without the usual amenities. To restore the current supply, you need to know how to find a wire break in the wall and correct the situation.
We will tell you in what way and with what tools damage to the wiring is detected. We will show you how the detected malfunctions are eliminated. You will learn what to do to prevent such problems.
The content of the article:
Signs of a cable break
It is possible to suspect damage to electrical networks in the event of a partial disappearance of the supply of electric current. A wire break can be indicated by a lack of voltage in outlets located in a certain area, or lighting not working in a separate room.
Sometimes problems with the wiring may also be accompanied by smoke or sparking the cable. The cause of sparking can be not only a break, but also a melting of insulation as a result of illiterate wire and cable selection.

Damage occurs on various sections of the network: power supply may be interrupted at the junction of the cable with a socket or with a switch; in the area between these devices and the box or lighting device.
Causes of Failure
Subject to the rules for the operation of electrical communications, they can function properly for decades. But in practice, quite often there are damage to electrical networks, which can be caused by various reasons.
These factors include:
- Long-term cable operation. The wiring can function impeccably for many years, but after a certain time limit it begins to break down. In this case, twists are scattered in the network and leaks appear, which regularly drive out RCD (its absence affects the increase in leaks). Sooner or later, such violations lead to interruptions, and then to a complete cessation of the supply of electric current.
- Mechanical damage. Without knowing the layout of the electrical network, when drilling holes and driving nails into the wall, you can easily touch the wire, causing it to break, and sometimes a short circuit. Sometimes minor mechanical damage gives a delayed effect: in this case, the integrity of the core can not be broken immediately, but after a few months or even a year.
- Defective wire or poorly executed electrical installation. Damaged cables tend to constantly heat up, which can lead to fatal consequences. After a sudden power surge, such cores may break.
- Incorrect use of adapters. Wiring malfunctions can be caused by improper use of extension cords or tees. This can happen if several high-power household units are connected to the device, for example, a washing machine and a dishwasher.
If the adapter is used incorrectly, the cables coming from it undergo overheating and increased load, which can lead to melting of the insulation.
In all cases, it is necessary to identify the place of damage to the cable in order to immediately eliminate the damage.
Instructions for finding a cliff
If a malfunction is identified, immediate measures must be taken to determine the cause of the damage and to find an approximate location for the defect in the power supply network.
First of all, you need to check in which rooms there are problems with the supply of electric current.

Then you need to find out if the cable breakage affected lighting fixtures or sockets by checking them with a tester. Depending on the answers to the last question, you should follow the instructions below.
In this case, a malfunction may be caused by a malfunction in the phase or neutral cable.
Phase wire break
First of all, you need to determine which machine the damaged outlet is connected to. Having found out the power source to which the faulty cable is connected, it is necessary to turn off the electricity and disconnect all cores from the switchboard: “zero”, “phase”, “ground” (if any).

Then you need to arm yourself multimeterwith the help of which it is necessary to consistently check all the connections adjacent to the damaged object, starting from the cable in the shield.
In this way, you can identify the affected area: usually between two outlets there are two, and in the presence of "ground" and three wires. If only one core (for example, zero) can be identified on this site, we can safely assume that the cliff is located here.
Junction boxes are often unavailable because they are hidden under a layer of finishing materials. If you have access to such devices, it is advisable to open them, because often they damage the cores.
If at the same time no malfunctions are detected, you should check the non-working wires with the indicator, starting with the twists, and also examine the terminal strip and the dismantled twists.
Possible wiring option that does not include junction box installation. In this case, the cables go unimpeded from one outlet to another, while two wires that make up 4 wires enter each socket.In this case, to identify a defect, it is required to remove the devices located at the beginning and end of the faulty section, and then examine all the wires with a multimeter.
Neutral wire damage
The search for a zero wire break is practically no different from the work on detecting a “phase” break, however, it has certain features.
You can find out about the gap of the zero core at the contacts of the outlet by holding the indicator screwdriver to this place: it will glow on the “phase”, but it will show the absence of “zero”. In this case, it is useless to use a multimeter to check the voltage, since this device will show an arbitrary value from 0 to 220 V.
It is important to observe strict precautions: due to the existing phase, there is a danger of electric shock even when the outlet is not working.

If a three-core cable is used for electrical wiring, as a last resort for the transfer of "zero", you can use the "ground" core. However, in this case, the “ground” function will be absent from the outlet: this is undesirable at all and unacceptable when it comes to high-power household appliances, for example, a washing machine.
Troubleshooting lighting wiring
If damage has occurred between the box and the circuit breaker or artificial light source, you should use the indicator (single-pole voltage indicator) to use it to detect the presence or absence of a "phase".

To do this, open the switch from the lighting device; in the off position, the presence of a "phase" on the contacts is checked. If it is missing, the breakage point is located between the box and the switch.
If there is a "phase", its presence is also checked on the lamp (in this case, the switch is turned on). In the absence of a “phase” on all conductors, the place of damage should be sought between the lamp and the box.
There is an option when, when the lighting is not working and there is no “phase" on the switch, the indicator shows its presence on the lamp. This alignment means that the neutral and phase wires are reversed.
To solve the problem, it is necessary to trace the passage of the “phase” wire along the entire distance of the laid cable, starting from the box to the lamp and further to the switch. It is necessary to find the point where the change of wires occurred, disconnect them and perform new fasteners, correctly positioning the wiring.
If a hidden wiring scanner is used in the search for an open circuit, all steps to detect damage will take a couple of minutes:
When performing a damage search, disconnect the power to the cable, which can come from any source. In some cases, it may be necessary to burn through the insulation of the wiring, which reduces the level of resistance.
Precise Location Detection
Having established the approximate area of damage, you should proceed to an in-depth search for the place of damage, which can be done using different methods. There are a variety of ways to find a damaged wire.
Opening the wall during overhaul
The easiest way to detect cable damage is to completely clean the walls of the finishing materials. In this case, it is easy to inspect the gates made to accommodate hidden cables. They differ in color from the rest of the surface, in addition, putty is additionally applied to them.

However, since in this case a complete exposure of the walls and the dismantling of decorative coatings (paints, wallpapers) are required, it is therefore advisable to use it in the overhaul of the premises, which provides for a new design of vertical surfaces.
Logical Search Method
If residents do not have a power plan, you can try to recreate it using logic.
Professional electricians are well aware of the basic principles of electrical communications, namely:
- Installation of wiring is always carried out strictly along vertical and horizontal lines, that is, cables always run parallel and perpendicular to the floor.
- Power lines located above sockets and switches always go straight up, which is why drilling and hammering of nails are strictly prohibited in this area.
- Wiring is usually stretched at a distance of 15 cm from the floor or, more often, the ceiling, so there is also no need to carry out repair work.
Knowing the location of sockets and switches, you can create a communication scheme in the apartment.

Nevertheless, to check the proposed plan for the location of electric networks, it is advisable to use special devices (professional or home-made), which will be discussed below.
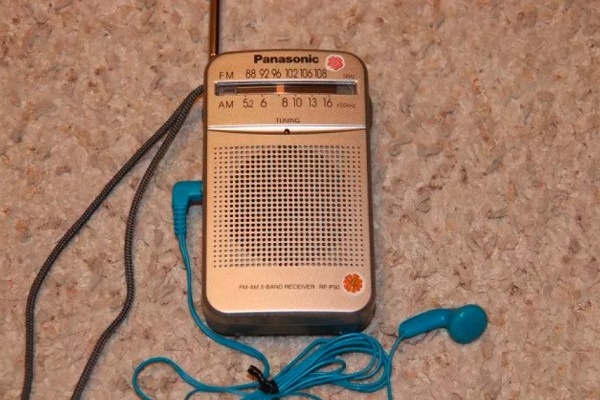
Tools available: radio and microphone
If necessary, a conventional transistor receiver will allow you to set the cable damage section. It must be tuned to 100 kHz waves and brought to the intended lesion area. Above the place where the power supply passes, the noise of the receiver will increase, and above the rupture point the crack will subside.

Instead of a radio, you can also use a microphone from a portable tape recorder. It should be connected to the network and held above the wall surface, where, as expected, the faulty cable is located. As in the previous version, a crackle will be heard above the electric track, which will be silent when a break is detected.
It is important to consider that improvised devices give an error of 10-15 centimeters. In order to avoid electric shock during the repair work, it is better to be safe, taking additional precautions.
Still in the search for a cliff hidden in the strobe wiring will help:
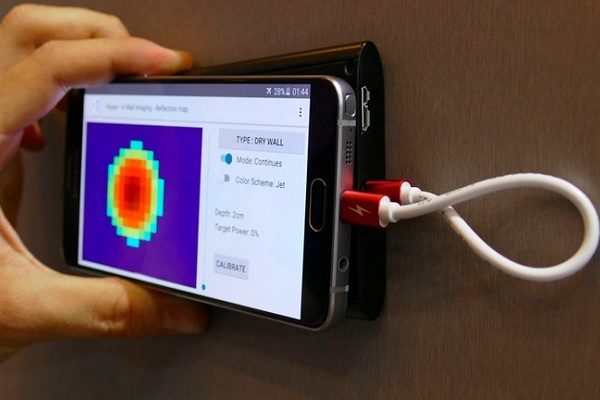
Search with professional equipment
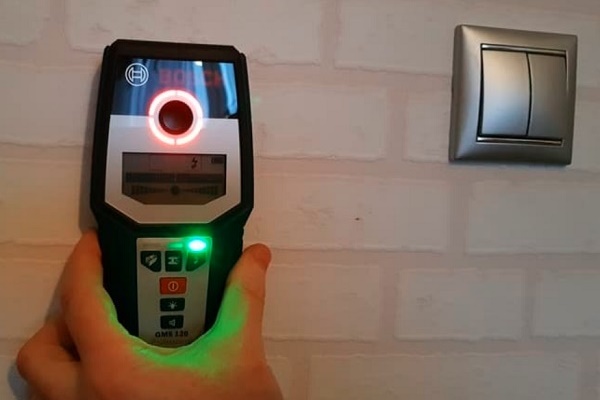
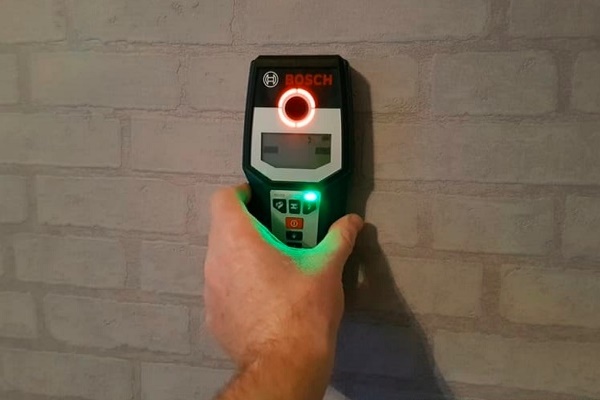
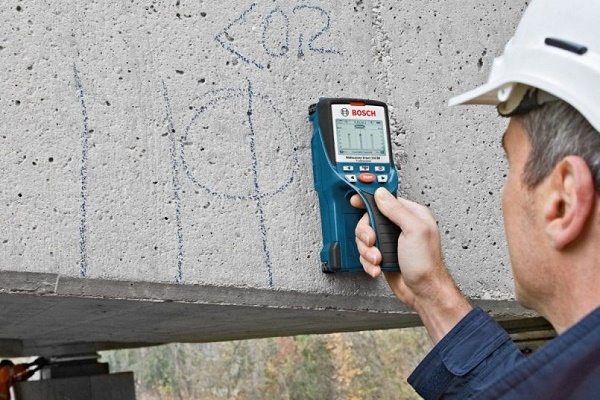
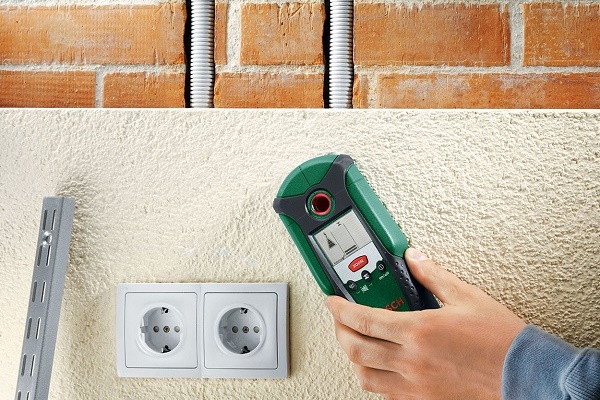
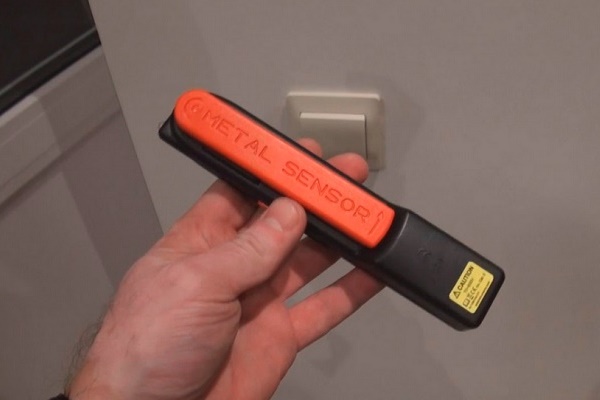
Special devices - hidden wiring indicators they allow not only to detect the cable, but also to find the area where the burnt or broken wire is located.
Among the various devices used to search for damage include:
- Signaling device E-121 ("Woodpecker"). With it, it is possible to carry out work at a depth of up to 7 centimeters, which makes it possible to detect electrical wiring and a torn core even in a wall finished with drywall.
- MS detector. Another popular detector that is easy to use and allows you to get a fairly accurate result.
These and similar devices give a quick and reliable result, but they have certain disadvantages. First of all, with their help it is impossible to find a cable protected by a foil screen.
Such devices respond not only to wiring, but also to other metal objects, for example, nails and screws located in the wall. Finally, although these detectors are easy to use, working with them requires attention and certain skills.
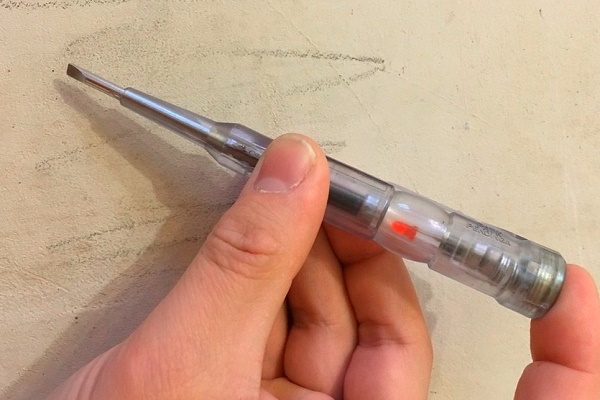
You can also examine the wire in the wall with the help of an indicator screwdriver, however, this method is suitable only for the case when the conductors are energized at a shallow depth in concrete.

Bosch DMF 10 zoom, VP-440, POSP-1, GVT-92, GVD-504A and others are also suitable for detecting hidden wiring and points of damage to the conductor under the plaster.It is possible to use a locator or other professional equipment.
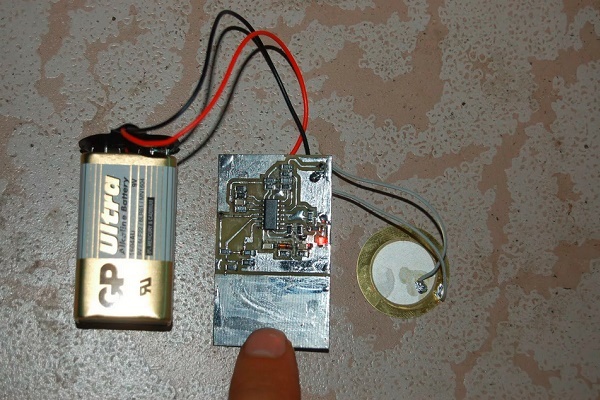
Checking the wiring with a homemade device
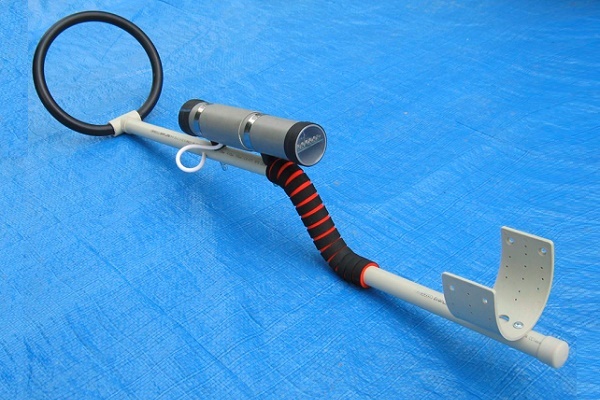
An alternative to expensive professional equipment can be a low-cost metal detector made from improvised material.
One of the most popular options is a device for the manufacture of which old CDs are used. Despite the apparent simplicity of this device, it allows you to find live wiring under decorative decoration to a depth of 10 cm.
For the device you will need:
- unnecessary CD and DVD discs (double-sided can make the device more sensitive);
- battery "Krona";
- calculator (simple model);
- glue;
- insulating tape.
Step-by-step instruction:
- First of all, you need to cut off the headphone plug. Strip the insulation on two wires, exposing the conductors by 0.5-1 centimeter.
- Naked wires should be divided into 2 parts, so that 4 veins are obtained.
- Each of the drives is attached to one of the contacts taken from different groups. On two-sided media, they are attached arbitrarily, on one-sided - to the writing side.
- The installed wires are fixed with glue, and then additionally fixed to the disks with the help of electrical tape.
- The remaining two conductors are connected in a standard way with the plus / minus of the battery, after which the bare contacts are carefully insulated with tape.
- The included calculator is also mounted on a CD using insulating material.
- A DVD is placed on top of the calculator, then the structure is fixed with electrical tape for integrity.
- A battery is attached to the surface of the video disc with tape.
After that, you can test the device, which will make a sound over metal objects.

Modern construction technologies often involve the use of beacons or markers in places where electric networks pass. This greatly facilitates the process of finding a damaged core using both professional and amateur means.
Search for wiring for preventive purposes
Usually, electricians or residents begin to look for cables passing through the apartment when there are disturbances with light.
Meanwhile, this should be taken care of in other situations:
- Before conceived redevelopment of the apartment. For any manipulations involving even non-supporting structures (for example, when dismantling a partition or when moving a doorway), it is important to consider location of electrical communications.
- Before installing the sconce, hanging a picture or other wall accessory. To carry out such work, it is important to know where the cable is located, so as not to stumble upon it when drilling holes or driving nails.
- When purchasing a home. Immediately after buying an apartment, it is advisable to draw up a plan of the electrical networks located along the walls and ceiling. The location of sockets, switches, and junction boxes is also worth noting on the diagram. Such markup will help with the overhaul / redecoration of the apartment, as well as with the arrangement of furniture.
To search for electric routes, you can use home-made or professional devices that have been described above.
Elimination of a break of a phase and zero wires
Having found out the exact place of cable breakage and determining its feature (damage to the “phase”, “zero”), we can proceed to repair it.
To repair a damaged phase wire, the following steps should be taken:
- First of all, you need to disconnect the phase wire.
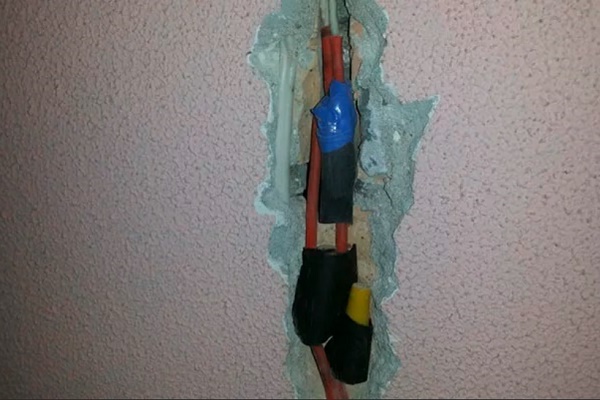
- Use a hammer or other tool to remove the plaster or other finish from the wall surface.It is necessary to free the area along the route by about 10-15 cm, capturing the area to the right and left of the estimated center of damage.
- It is required to separate the damaged core from the network, trying not to touch the insulation on other cables.
- Copper wiring is best soldered. To do this, you need to take an additional piece of a similar product, from which the repair jumper is made.
- It is also advisable to first put on the core of the damaged cable a PVC or heat shrink tube. The ends of the jumper are twisted with the ends of the broken wire, after which the connections are soldered.
- An insulating tape is applied tightly (in several layers) to the repaired place, after which the tube, dressed on the wire, gently retracts onto it. This ensures the tightness of the fasteners.
Aluminum wires are worse soldered, which also requires special solder and flux. In this case, the most reliable connection method will be WAGO terminal, while the place of its attachment is required to be wrapped with electrical tape and additionally coated with sealant.
The wires can also be connected using a junction box. To do this, insulation is removed from the tattered wire, after which its ends are bred in different directions. Using a puncher equipped with a special crown, a hole is punched in the wall, the dimensions of which coincide with the parameters of the branch box.
The device is inserted into the opening, after which it is fixed with alabaster. Wires are placed in the box, while damaged cores are connected in color and wrapped with insulation tape. In conclusion, the box with the restored wires is closed by a lid.
If the cables are placed in special tubes, the damaged conductors should be carefully pulled out, and instead, with the help of a broaching device, insert new wires.
If the zero cable is damaged at the beginning of operation, it must be disconnected from the bus by attaching a phase conductor. The rest of the process coincides with the regulations described above.
After any type of repair, the strobes are covered with plaster. It is possible to give voltage to the repaired wiring only after the coating has completely dried.
Open grid installation
Repair work associated with a wire breakage of hidden wiring usually requires complex construction and repair work: dismantling of the finish, wall chipping, followed by termination and coating of the wall section with decorative materials.

Since the immediate conduct of such manipulations is not always available, in some cases it can be recommended to lay a new wire on the surface of the wall, covering it in a special box or tube.
With a detailed description of the rules and technology open mains gaskets You will familiarize yourself by reading our recommended article.
Conclusions and useful video on the topic
The videos below provide detailed video instructions for finding a damaged cable.
Video # 1. Search for cable breaks with a metal detector:
Video # 2. If you have a radio at hand, it can also help:
The search for a wire break is a rather complicated and responsible process. It requires attention, accuracy and strict adherence to instructions. Using the methods described above, you can find the place of damage to the wire and eliminate the defect found.
Please leave comments in the box below. Your stories about finding a break in an electrical circuit and how to fix it are interesting. Ask questions, share useful information and photos on the topic of the article.
 Wire cross section for home wiring: how to correctly calculate
  Cable for the Internet: varieties, device + what to look for when buying wire for the Internet
 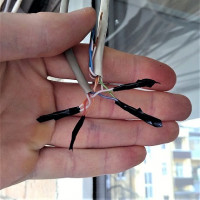 How to connect a twisted pair cable to each other: methods + instructions for building up a twisted wire
 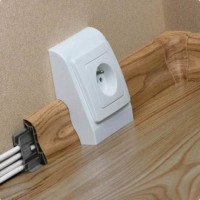 Installation of open wiring: a review of the technology of work + analysis of the main errors
 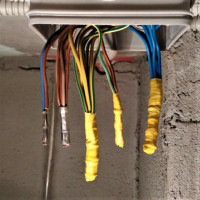 How to connect wires without soldering: the best ways and their features + installation recommendations
 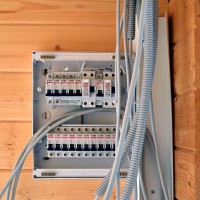 Wiring in the apartment: an overview of the main schemes and the procedure for performing work
  How much does it cost to connect gas to a private house: the price of organizing gas supply
  The best washing machines with dryer: model rating and customer tips
  What is the color temperature of light and the nuances of choosing the temperature of the lamps to suit your needs
  Replacement of a geyser in an apartment: replacement paperwork + basic norms and requirements
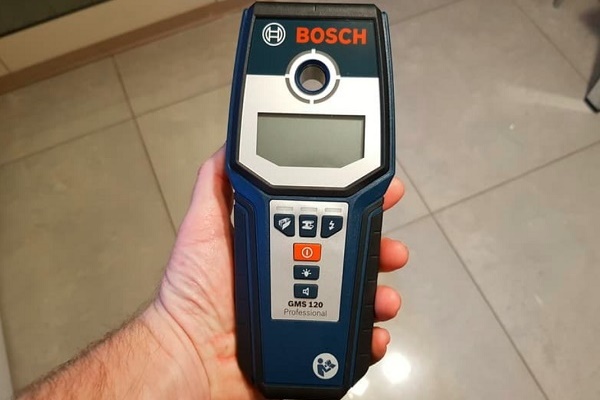
These are, excuse me, hemorrhoids ways to repair damage to the wiring and have led to the fact that I'm just doing a new outdoor wiring in the boxes. I tried to repair the damage myself after smoke wiring. Apparently, the zero burned out, because I was so shocked by the current that I fell from the stepladder. And every time we call electricians, to shut the walls - well, no! Now all the wires are just outside!
Good day, Andrey.
You will have to repair the wiring once. Remember the basic rules of PTBE - attached a screenshot of the desired section. Even turning off the introductory automatic of the apartment panel - check the absence of voltage.
When laying a new electrical wiring, do not skimp on highlighting the lines of hotel rooms, devices. I advise you to provide machines in the apartment shield:
- to the washing machine;
- on the refrigerator, microwave;
- for air conditioning;
- other powerful household appliances.
Also highlight room-by-room rosette groups, lighting.
In my house, when I was looking for a broken wire, it turned out that the wire burned out, and there was a deposit. I did so, took the indicator and led from the box to the outlet. If the indicator does not show a break along the entire length, this means that the core on which the whole phase sits, and the break goes to the zero phase, then you need to swap the wires in the box that go to the outlet, and then again you need to keep the indicator across length.
Previously, people had to gut the walls to find out the place of wire breakage. Now everything is easier. Instrumentation to help us: they accurately identify damaged areas of hidden wiring. You can find out a lot of things here. Thanks for the valuable recommendations and more such information! Having read this one, now I know which device I should buy for the economy for the future.
But it’s unlikely that you will have such measuring instruments at hand if you are not a professional electrician. Is that a do-it-yourself device from the material above to do.