Do-it-yourself satellite antenna tuning
Satellite television provides potential users with slightly greater visual entertainment options than standard-type TVs. True, modern technologies are already bringing society closer to completely abandoning any antennas and using exclusively small modular consoles.
But while satellite television reception remains in demand. So, the satellite antenna tuning remains relevant in the conditions of independent organization of TV reception. Let's analyze this moment in more detail.
In the article, we examined in detail the question of choosing a place to install the “dish”, the technology of its installation, and also examined the step-by-step configuration of the antenna for satellite broadcasting.
The content of the article:
Preparing equipment for configuration
What is a satellite "dish" - to explain, perhaps, is not necessary. This element of television equipment has already become a firmly established part of everyday life, and therefore it is practically familiar to everyone.
Meanwhile, it’s one thing to represent the satellite dish in general and another thing entirely is to consider the device technically and technologically.
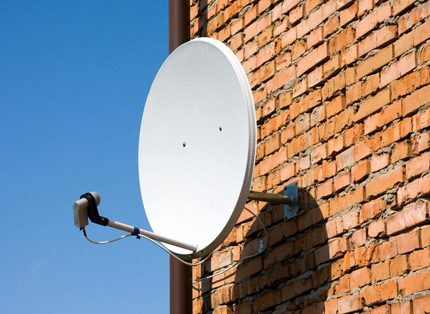
Firstly, dish-type satellite dishes are available in different diameters. Secondly, in order to receive a signal from a satellite, the “plate” included in the installation kit must be precisely tuned.
Different in diameter antennas allow you to receive signals of different frequencies (different satellites). And each satellite used is in an individual geostationary orbit.
True, for the domestic sector, the use of antennas with a diameter of not more than 1 m, and often not more than 50-60 cm (NTV-plus, Tricolor-TV), is characteristic.
Therefore, we will dwell on such products in order to show potential owners how to set up a satellite dish with a diameter of 50-60 cm per satellite.
Correct antenna installation
Correctly executed mounting a "plate" largely favors the setup procedure. Therefore, all manufacturer's recommendations should be followed exactly when installing the antenna.
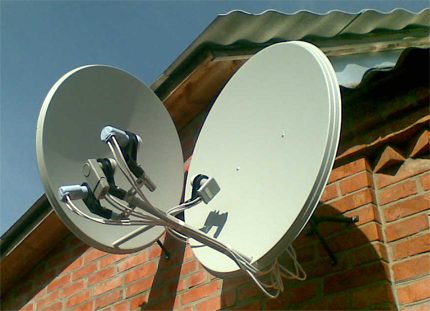
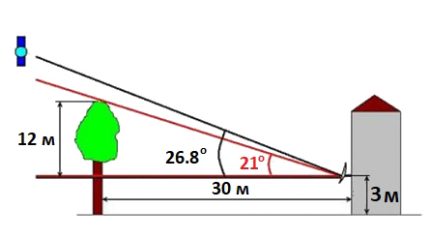
So, for the installation of Tricolor, the characteristic values of distance and angle are the numbers 100 and 40. In other words, in front of the antenna mirror at a distance of 100 m, the presence of any objects (objects) that hide part of the sky is excluded.
However, the set “clean” distance parameter is not the only criterion. In addition, the same “clean” angular view should be provided.
That is why at a marked distance, in height from the horizon (along the central axis of the antenna) at 40 m, the presence of any foreign objects should also be excluded.
Given that the satellite “dish” is mounted at a certain angle and at a certain height from the earth’s surface, the picture of the ideal installation should be approximately the same as shown in the diagram below.
When installing the equipment, it is necessary to provide protection from possible ice, snow, water falling from the roof or other objects.
The mirror surface of the mounted satellite dish is directed to the "southern" area of the sky. After the installation, cable entry and installation of the receiver, you can proceed directly to fine tune the satellite.
Choosing the best weather
To begin with, you should learn the main rule: setting up the “plate” is recommended under favorable weather conditions.
Therefore, it is important to ensure that there is no: dense cloud cover, precipitation or strong wind.
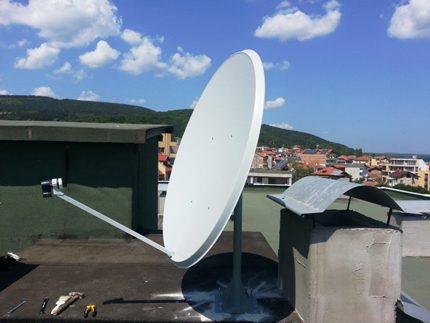
Satellite Dish Setup Steps
The next step is a detailed instruction description of how to independently set up an installed satellite dish to receive high-quality pictures on a TV screen.
For a potential owner of television equipment, these recommendations will be very useful - guided by them, you can begin to configure.
Step # 1 - setting the "azimuth" and "elevation angle"
Along with tuning the antenna, the installer will have to learn concepts such as elevation angle and azimuth angle. To facilitate learning, recall: the azimuth should be represented by the angle of horizontal deviation of the "plate" to the left or right.
Both angle parameters are usually provided by the manufacturer’s instructions. Typically, a table is placed in the instructions where large settlements and angle values are indicated with respect to the location of these settlements.
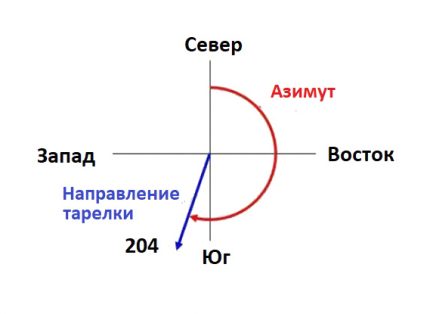
To accurately determine the azimuth angle for a specific location, a potential installer will need a compass. Holding the device in the palm of your hand, find a position where the red arrow exactly matches the label “South”.
Next, on the scale, you should find the value of the "azimuth angle" for a given area, for example, 204 °, and combine the found point with the center of the device, putting, for example, a small ruler on the scale. The resulting direction is the orientation for the antenna.
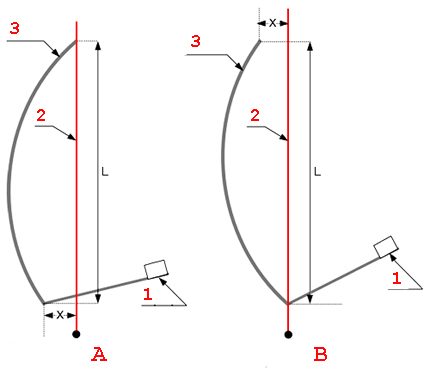
The elevation angle can be determined using a simple construction plummet and a protractor ruler. The load, acting as a plumb line, is attached to the zero mark of the protractor - the conditional horizon line. Next, on the conveyor scale, the desired elevation parameter is indicated.
Step # 2 - providing a high-quality TV signal
Pre-installation of the antenna mirror in "azimuth" and "elevation" does not always give a high-quality picture on the screen of the TV receiver.
Often, the installer has to perform the so-called “fine” adjustment, which consists in minor changes in the position of the mirror with subsequent control of the picture on the TV.
First of all, the installer should use the menu item "Antenna Settings". This section of the system menu is endowed with, in addition to options with parameters, a pair of tuning scales.
They are located at the very bottom of the “Antenna Settings” menu window and are indicators of “fine” mirror settings.
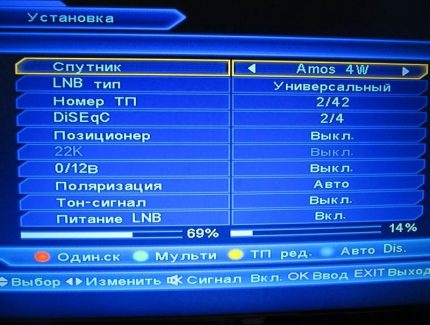
As noted above, initially the frontal plane of the mirror is directed to the "South". Traditionally, users who perform installation on their own do not use the compass due to the banal lack of a tool, but put a mirror “by eye”.
Therefore, you have to somewhat correct the position of the "plate" by moving horizontally.
Usually changing the position of the mirror is required with some displacement towards the "East". The offset, as a rule, does not exceed 10 mm (1 cm), after which it is necessary to wait a bit (criterion for signal capture) and check the levels of the jackal indicator windows of the settings window.
Theoretically, both scales in terms of signal level should increase. So, moving the antenna mirror with small shifts, it is necessary to achieve maximum performance of both indicator scales (optimally - 80%).
Step # 3 - fine tune
Sometimes in the process of fine-tuning operations, a potential installer may well encounter some nuances.
For instance:
- up to 80% of only one indicator is observed;
- the indicator scales are full, but there is no picture.
Such nuances are usually caused by the detection of false signals coming from other satellites or the appearance of some foreign objects in the radiation pattern.
In such cases, you should continue moving the antenna mirror until a real signal appears.
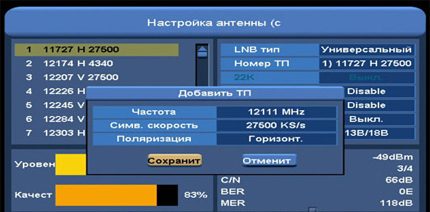
If a real source is detected, a stable image appears on the screen, which can only be brought to an acceptable quality (filling at least 80% of the scales of both indicators) with the above adjustment methods.
Under the condition of a real signal, the options of the settings window are filled with information regarding the source.
For more information on tuning the satellite dish tuner, see this article.
Having achieved optimal tuning of the antenna mirror, the installer needs to fix the “plate” in the optimally selected position. On this, the configuration work can be considered completed.
Some homemade products refuse satellite dishes and make TV signal catchers on their own. Such options are quite functional if the TV tower is installed nearby.
You can find interesting ideas and detailed instructions for their implementation in the article - DIY TV antenna: step-by-step instructions for assembling popular TV antenna models
Conclusions and useful video on the topic
The following is an actually full-fledged video course that perfectly matches the topic in question.
After reviewing the video materials, a potential installer gets every chance to become a professional master in setting up equipment:
The practice of self-tuning satellite dishes shows - do it yourself is achievable. With all the apparent difficulties, the technical installation moments are solved in fairly simple ways.
The conclusion is obvious: doing a self-installation, a potential buyer of equipment saves considerable money on the installation and configuration procedure.
Have something to supplement, or have questions about setting up a satellite dish? You can leave comments on the publication, participate in discussions and share your own experience installing and connecting the “plate”. The contact form is located in the lower block.

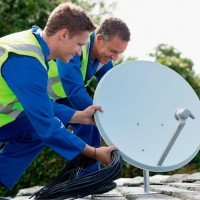 Do-it-yourself installation of a satellite dish: detailed instructions for installing and setting up a satellite dish
  How to set up a satellite dish tuner yourself: equipment setup steps
  DIY TV antenna: step-by-step instructions for assembling popular TV antenna models
  Antenna amplifier for a TV: the principle of operation and the rules for choosing a TV antenna amplifier
  Do-it-yourself antenna for DIY: options and schemes for homemade products + manufacturing instructions
  How to make a DIY TV bracket: popular homemade options
  How much does it cost to connect gas to a private house: the price of organizing gas supply
  The best washing machines with dryer: model rating and customer tips
  What is the color temperature of light and the nuances of choosing the temperature of the lamps to suit your needs
  Replacement of a geyser in an apartment: replacement paperwork + basic norms and requirements
I installed a satellite dish and tuned it myself. Indeed, everything is not as complicated as it seems. The main thing is that your hands grow from where you need to. But I was lucky that I live on the seventh floor, I have a balcony, and the windows of the apartment face the south side (I tuned to Express AMU1 satellite, 36.0 ° E.- Tricolor). Those. I calmly screwed the “plate” on the balcony, brought a satellite receiver with a portable TV, and tuned it into a satellite. No luck to those with windows facing north. Then the satellite dish will have to be installed on the roof. I am afraid that in this case one cannot do without a call from specialists.
Not everyone has the patience to tune a satellite dish. It must be twisted very slowly, literally a millimeter. Plus there are many nuances. Better to trust a professional.
Can you recommend any program for calculating the azimuth? I found a couple on the net, but they are in English, and to me in Russian.
To calculate the azimuth when setting up a satellite dish, there is a special program called Satellite Antenna Alignment. It is available both in desktop version and for smartphones. The interface is slightly different, but the essence remains the same, then you decide which program you will be more comfortable with in the process of setting up a satellite dish. But I would recommend using the version for mobile phones, as it is more practical. You can immediately adjust the required azimuth on the spot, without having to go away to view data on a PC or laptop.
Also, to simplify the process of setting up a satellite dish, I am attaching a simple circuit for guidance.