How to make a DIY TV bracket: popular homemade options

Placing a plasma TV includes several options, one of which is its mounting on the wall with a bracket. This solution allows not only to save space, but also to somewhat modernize the interior. Despite its functionality, factory brackets have one drawback - an unreasonably high price.
Agree, it makes no sense to overpay for a design that you can make yourself. Further, the article will provide step-by-step instructions on how to make a do-it-yourself bracket for a TV of any model.
Depending on the degree of functionality, there are several types of construction, of which only two can be built independently. Next, you can familiarize yourself with the options for making home-made brackets from improvised materials, including step-by-step instruction for each of them.
The content of the article:
Plasma Mounting Requirements
Most of the manufactured TVs involve the use of mounts on the VESA system.
All factory brackets are made in accordance with the distances between the mounting points located on the back of the device. Usually these are four holes forming a square or an elongated rectangle.

When bracket installation on main walls it is recommended to choose steel dowels. For walls made of foam block or cinder block, it is better to use dowels made of propylene. The diameter of the screws used must be at least 4 mm.
Depending on the type of load-bearing wall, the recess may be:
- 10 mm for concrete walls;
- 30 mm for brick walls;
- 50 mm for foam block walls.
The requirements presented do not apply to plasterboard walls, since they do not have good load-bearing capacity.If the sheets fit snugly against the dripping wall, then the bracket is mounted directly on the wall.
In the event that the drywall sheets are fixed on the frame, and the skin thickness is less than 12 mm, it is not recommended to install a TV on such a wall. The only option is to mount the bracket directly on the frame, but in this case, you need to know exactly its location under the sheet.
Choosing the right mounting location
Before starting the construction of a makeshift bracket and its subsequent installation, it is important to determine where exactly the structure will be located.
When buying a TV with a large display, it is recommended to choose a wall with a large free area so that the equipment blends in harmoniously with the interior.

The strength and bearing capacity of the wall material should also be considered. Among the loose materials are foam concrete and drywall, which have less strength than concrete, brick and wood. Ideally, everything sockets should be located in close proximity to the TV, which will do without the use of extension cords.
The screen should be located in such a way that, even with a significant rearrangement, it is in the normal visibility zone. In addition, the TV should be installed as far as possible from cabinets, chests of drawers and other furniture. So, due to the free space, the best cooling of the equipment is ensured.
DIY TV bracket
A well-designed bracket design allows you to rotate, tilt and even zoom the screen to the optimum distance.
When constructing a homemade product, you pay only for materials, many of which you will find at home. In this case, it is important not to deviate from the briefing and strictly abide by all the rules.

On the modern market there is a huge selection of brackets, thanks to which you can adapt the equipment to your needs.
Among all possible types, it is worth highlighting only two options that you can build yourself:
- Fixed. This bracket allows you to securely fix the plasma on the wall, without the possibility of its rotation or tilt. This is the easiest mounting option, requiring a minimum of holes and screws.
- Swivel. Using this bracket, you can rotate the screen in any direction, and bring it closer if necessary. In this case, a more complex structure is used, with many connections.
The cost of the latter design is especially high, so having built a swing-out bracket on your own, you can save a large amount of money. By the way, the cost of factory mounting directly depends on the number of inches of purchased plasma.
Option # 1 - Fixed Wall Bracket
One of the simplest types of construction is a fixed bracket. Its mounting system is as simple as possible, but it is not designed to tilt or rotate the screen.
You can build a fixed TV bracket from accessories that are easy to find in any building materials store.

In the first version, the fixed mount is made of wood. For this you will need: two wooden planks, self-tapping screws with a ring, hooks and plastic dowels. It is better to give preference to hardwood slats, since they are the ones with the highest strength.
Take straps with a length of not more than 10-15 centimeters, that is, their dimensions should not exceed the length of the TV case. The upper bar should be slightly thicker than the bottom, which will allow for a slight tilt of the screen. Next, to the upper face of each bar, it is necessary to fasten two screws with a ring.
Using the bolts that you will need to tighten into special holes, secure the brackets to the back of the TV. One bar is located on top, the other - below. In this case, it is worth relying on mounting holes designed for the bracket.
Measure the distance between the rings horizontally and vertically, and transfer them to the wall. Further, relying on the marks, it is necessary to drill four holes in the wall, and install dowels with hooks on which the plasma will be hung.

To manufacture the second version of the fixed structure, you will need: four aluminum corners, one bicycle spoke, bolts, screws and plastic dowels. If possible, it is better to take aluminum corners, because unlike steel, aluminum is easier to process.
The installation location, the size of dowels and holes are selected in accordance with the dimensions of the screen. Pre-drill two holes at each corner. Take the two corners and fasten them to the back cover with bolts. The second pair of corners will need to be screwed to the wall.
To do this, attach them to the wall and mark with a pencil the holes for the plastic dowels. To connect the corners to each other, you will need to drill another hole in the upper side of each corner.
It is important that one corner comes into another, so the distance between the wall corners is better to make a couple of millimeters less. Next, attach the TV to the wall and expose the drilled holes in one line so that a bicycle spoke can be passed through them.

The spoke allows you to hold the body of the equipment in a vertical plane, and the corners prevent its accidental horizontal displacement. If it is necessary to remove the device from the wall, it is enough to remove the spoke and the connection will be disconnected.
Option number 2 - rotary-retractable design
Using this bracket, you can rotate the screen in the right direction, and bring it closer if necessary. Some designs even allow you to adjust the angle of the screen, which is especially important when the TV is suspended too high.
For independent construction of the rotary-retractable structure, you will need two metal plates, a section of a square pipe, connecting bolts, screws, dowels. First of all, take two plates of 20x20 cm, attach one to the wall, and the second on the back of the device. Each plate is equipped with two metal corners.
In order to ensure sufficient freedom of movement of the fastening, a piece of pipe is installed between the corners. Place it between the two corners, and connect it together using a long bolt, and screw it to the plate. The pipe should rotate freely without touching the plate.

The plate mounted on the wall is equipped with angles that need to be fixed parallel to the floor. So, you can turn the TV right and left.
Corners mounted on the rear of the TV are aligned perpendicular to the floor. Thanks to this, you can adjust the screen tilt depending on your needs.
In order for the TV to serve you as long as possible, we recommend that you purchase an uninterrupted power supply for it. And how to choose the right device, read this stuff.
Conclusions and useful video on the topic
You can find out how to make a swing-out bracket on your own from the following video:
The step-by-step process of making a swivel bracket with your own hands is presented in this video:
The article presents the basic requirements for installing a TV mount, tips for choosing a suitable place and several options for constructing brackets of different designs.
Based on step-by-step instructions for the manufacture of a fixed and rotary-retractable structure, you can independently make a bracket depending on your needs. So, you do not have to spend money on buying a factory product.
If you have already tried to make an arm for your TV yourself, then please share your experience with our readers. Perhaps you know the little-known secrets of making a reliable design. If you wish, you can leave your comment in a special field immediately after the article.
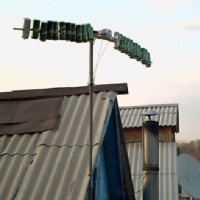 Do-it-yourself antenna for DIY: options and schemes for homemade products + manufacturing instructions
 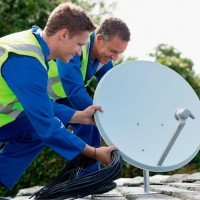 Do-it-yourself installation of a satellite dish: detailed instructions for installing and setting up a satellite dish
  Antenna amplifier for a TV: the principle of operation and the rules for choosing a TV antenna amplifier
  DIY TV antenna: step-by-step instructions for assembling popular TV antenna models
  Do-it-yourself satellite dish tuning: do-it-yourself briefing on tuning the dish on the satellite
  TV signal amplifier: how it works and how to choose a digital TV signal amplifier
  How much does it cost to connect gas to a private house: the price of organizing gas supply
  The best washing machines with dryer: model rating and customer tips
  What is the color temperature of light and the nuances of choosing the temperature of the lamps to suit your needs
  Replacement of a geyser in an apartment: replacement paperwork + basic norms and requirements