How to set up a satellite dish tuner yourself: equipment setup steps

Satellite television is a technology for a wide range of applications, including domestic use, which has gained a high level of popularity. The digital equipment that forms the basis of the technology is a sophisticated electronics.
However, for all the complexity of the hardware, it’s quite easy for the end user to figure out how to configure the satellite antenna tuner on their own, without involving a wizard.
This problem is solved in almost the same way as setting up any other modern household appliances. The basis of tuning is following the instructions supplied with each particular tuner. Consider this point to further facilitate the self-tuning of the equipment.
The content of the article:
Purpose of the tuner and its location
For users, and there are quite a few who are completely indiscernible in radio-television electronics, the word “tuner” is perceived to be difficult to fully understand.
However, there is nothing complicated in this word, since, in fact, it hides the usual sense of the receiver of the signal.

In this case, we are talking about the receiver of a television signal broadcast via satellite.
The signal received by the tuner is converted for consistent processing by the TV. As a result, the user perceives visually on the TV screen the television picture formed by the signal.
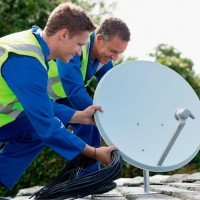
Before proceeding with the installation of the tuner, we recommend that you read our other articles, where we described in detail how to install satellite dish do it yourself and tune the “plate” to the satellite.
Correct installation of the tuner
After acquiring a television receiver, the user will need to configure it.That is, perform a series of sequential steps according to the instructions before the received signal is converted correctly and displayed on the TV screen.
Next, this process will be examined in detail using the example of the Tricolor TV system tuner.
Even before the start of settings, the tuner should be installed on a flat, solid surface, preferably next to the TV, but no closer than 10-15 cm from the screen panel or the back wall.

The receiver module should be installed taking into account unhindered access of air to the ventilation areas, usually the lower and upper covers or side. Violation of the ventilation mode threatens overheating and malfunctioning of the device.
Usually the scope of delivery is:
- tuner module;
- control panel (remote control);
- power adapter module;
- connecting cable type 3RCA.
The tuner installed locally must be connected with the corresponding cables to the TV. Perform this operation necessarily when the network cable is disconnected.
Interfaces and Controls
The case of the standard tuner is rectangular, has a front and rear panel, where work control elements and system interfaces are located. The first, as a rule, occupy the area of the front panel. The second are located in the area of the rear case panel.
Of the control elements, the main ones are the power on / off button, the mode and channel change buttons, the information display and the user card slot.

Interfaces are usually located on the rear panel. The number of interfaces of the modern tuner is quite large and can reach more than 10:
- Under the cable RF (RF OUT) connection to the TV.
- Under terrestrial antenna cable (RF IN).
- Connection to another tuner (LNB OUT).
- Satellite dish cable connection (LNB IN).
- Composite video (VIDEO).
- For connection to a computer (USB).
- TV connection (SCART).
- TV connection (HDMI).
- Connecting sound through the tulip (AUDIO).
There, on the rear panel, a socket for the plug of the power adapter is traditionally located, sometimes mode switches and fuses.

Connecting the tuner with a cable to a television receiver is usually done via a “SCART” cable (complete wiring) through the appropriate connector.
However, other options are not excluded, including the RF OUT signal through the standard antenna input of the TV. But in these options, the image and sound quality is reduced.
Step-by-step configuration
So, after connecting the tuner and the TV through the appropriate interfaces, you can connect the power adapter and set the network button to the “on” state.
The first launch is usually accompanied by the appearance of the “Setup Wizard” function on the TV screen. For inexperienced users this is the best tuning option.
Step # 1 - choose the language and time zone
The first screen of the “wizard” is settings according to regional standards of such parameters as the language used to communicate with the menu, audio language and time zone.
The selection of parameters on the screen of the required options is carried out using the buttons "arrow" up-down, left-right remote control.

Confirmation of choice - OK button.If the menu language is traditionally selected according to the regional one, the audio language, as a rule, is selected in two options - one of which supports automatic selection depending on the content.
Step # 2 - configure audio / video interfaces
At the second (screen) setup stage, you should decide on the settings that are responsible for connecting to a television receiver.

Again, using the “arrow” buttons, you should sequentially go through the list of on-screen menus.
And set the parameters on the appropriate tabs:
- Video mode - RGB or CVBS. As a rule, RGB is selected if it is connected via a “SCART” cable.
- Audio channel - TV SCART or AUDIO L / R. Mono / stereo mode is also defined here.
- Screen format - usually 16x9, less often 4x3.
- Image format - usually the default, in addition: envelope, cropped, combined.
You must also select the options in the tab Television Standard - PAL B / G, PAL D / K, PAL I, SECAM D / K). The desired standard can be defined in the documentation on the TV.
Step # 3 - configure the antenna system
Typically, the parameters of this part of the general setup menu are set by default by the satellite TV equipment provider.

However, individual user settings may be required:
- LNB power;
- type LNB;
- lower frequency limit;
- upper frequency limit;
- tone of a signal.
The screen of this part of the setup, in addition to the setup tabs, contains control bars for tuning the antenna signal.
Using one scale, the signal level is adjusted; with another, the decoding quality is adjusted.
Step # 4 - perform a channel search
The transition to this part of the setup is accompanied by an automatic search and detection of broadcast channels. The detected broadcasts are arranged on the screen in two lists - television channels and radio channels.
Then the function of the “Setup Wizard” is completed, and the user is informed of the corresponding message. Confirming the message, the user can go to the TV viewing functions.

Actually, the tuning of the satellite TV tuner can be considered completed on this. All subsequent operations performed with the remote control are practically no different from those carried out with a conventional TV.
Remote control after basic settings
Depending on the tuner model, the control functionality may vary slightly. But with any tuner in the delivery package there is always a user manual, which describes all the control functions in sequence.

Digital tuners - devices are sufficiently functional. Therefore, in addition to the standard functions of the transition from channel to channel, there are still a lot of all kinds of manipulations.
For example, all channels defined by the search can be formed in different ways, as convenient for the user:
- one column, two or three;
- quick sorting;
- listing favorites, etc.
Using the remote control, it is permissible to display a list of available audio languages and set the desired language.It is also possible to choose between mono and stereo broadcasting or, if necessary, connect subtitle accompaniment.
The remote control functionality, as a rule, supports the display on the screen of the so-called "information banners", which play a kind of television program.
The info banner also shows the current date and time, the displayed channel, the telecast and other information broadcasting parameters.

The “Guide” functionality is seen as even more “advanced” in this regard, which, in addition to the current broadcast, indicates a number of other broadcasts designated for transmission in the near-time range.
In a word, the control functions of the tuner, even the “cheapest” by the standards of the user, are a very rich set of manipulations that require a separate study.
We also offer interesting ideas for building and setting up. TV antennas from improvised materials.
Conclusions and useful video on the topic
The author of the video demonstrates the tuner emergency tuning, which may be required in various cases of failure on a previously configured receiver. Such moments happen infrequently, but can be useful in user practice:
As the user manual above demonstrates, it is quite possible to independently configure the reception of the TV signal from the satellite by the tuner. Moreover, the process is quite uncomplicated, as it might initially seem to an inexperienced user.
Each manufacturer completes the delivery with instructions and calls this user manual. Therefore, there is no need to order the setting from the master, when all this is really done with your own hands.
Perhaps you had to tune the tuner yourself and you know some subtleties that we did not mention in this material? Please share information with visitors to our site - leave your comments in the block below. There you can ask questions of interest on the topic of the article.
 Do-it-yourself installation of a satellite dish: detailed instructions for installing and setting up a satellite dish
 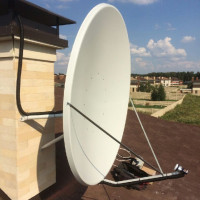 Do-it-yourself satellite dish tuning: do-it-yourself briefing on tuning the dish on the satellite
  Antenna amplifier for a TV: the principle of operation and the rules for choosing a TV antenna amplifier
  TV signal amplifier: how it works and how to choose a digital TV signal amplifier
  DIY TV antenna: step-by-step instructions for assembling popular TV antenna models
  Do-it-yourself antenna for DIY: options and schemes for homemade products + manufacturing instructions
  How much does it cost to connect gas to a private house: the price of organizing gas supply
  The best washing machines with dryer: model rating and customer tips
  What is the color temperature of light and the nuances of choosing the temperature of the lamps to suit your needs
  Replacement of a geyser in an apartment: replacement paperwork + basic norms and requirements
We have attached to the tuner colorful and detailed instructions with step-by-step instructions for setting up the device. She managed it herself in half an hour. But my friend bought a TV set in the status of B / U, there was no question of any documents there. She and her husband searched for such materials on the Internet and tuned the tuner for them))) I take care of my instructions, because They say that sometimes the settings fly off completely, and everything has to be done again.
At one time, the first tuner tuned what is called the “scientific poking method”. Then such an instruction would be very useful to me. But nothing, set up. When Tricolor TV got to our province, I connected it, although there was a choice what to watch. And from this year, television is being transferred from analog to digital. I think the number of people using a satellite dish will increase significantly.
If the dish is correctly tuned to the satellite, then in order to connect to it and configure the receiver, you do not need to have special technical knowledge. The setup process is described in detail in the instructions for the receiver.
Another thing is if you have several heads tuned to different satellites, and you use the DiSeqC switch. The guy in the video tried to explain the setup process, but, in my opinion, he got even more confused. In this case (if there are several heads), you still need to contact professional tuners. Too many nuances.