Schemes and methods of connecting solar panels: how to properly install the solar panel

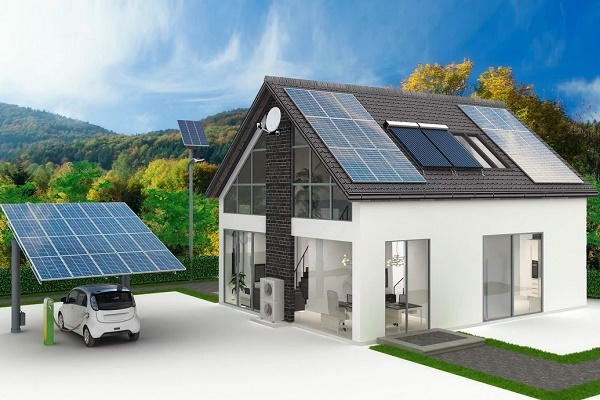
An alternative energy source based on solar panels is an excellent option for organizing an independent energy supply. It will provide high energy efficiency not only in hot days, but also in cloudy weather. It would be nice to have such a device at home, right?
To do this, you only need to correctly select the technical components and install. Everyone can do this, knowing the schemes and methods of connecting solar panels. We will tell you how to build a production system that processes “green energy” into electricity, which is needed to power household equipment.
In addition, you will learn how to choose a place to install solar panels and how to combine them with a stationary power grid. Useful tips and important recommendations will effectively help home masters. To simplify the perception, thematic photographs, diagrams and videos are given.
The content of the article:
Solar device
When planning to connect solar panels yourself, you need to have an idea of what elements the system consists of.
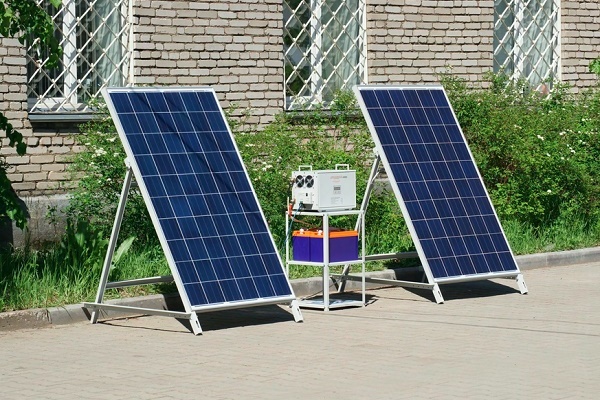
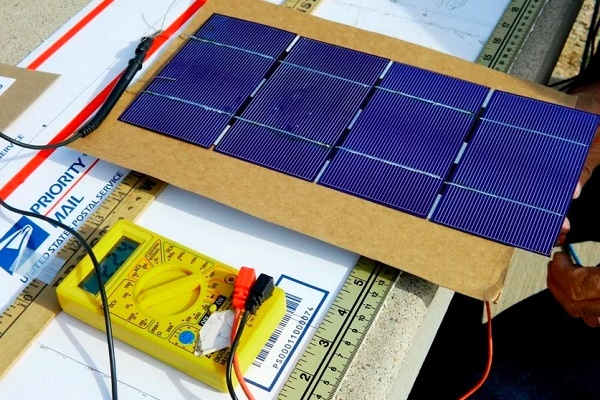
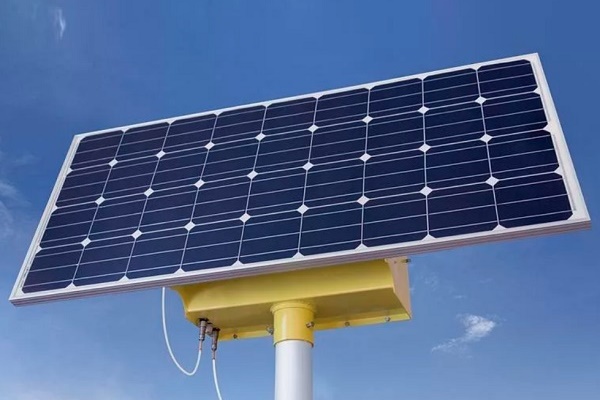
Solar panels consist of a kit batteries on photovoltaic cellswhose main purpose is to convert solar energy into electrical energy. The current strength of the system depends on the light intensity: the brighter the radiation, the greater the current generated.
The main structural elements of the system are:
- Solar battery - Converts sunlight into electrical energy.
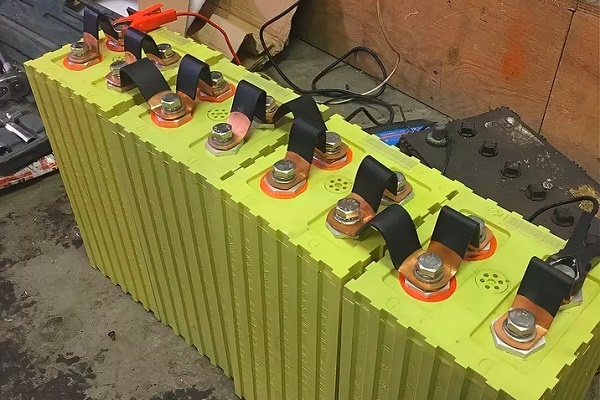
- Battery - A chemical current source that accumulates generated electrical energy.
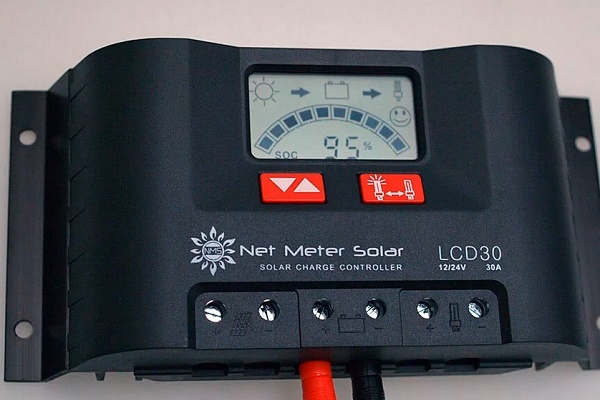
- Charge controller - monitors the voltage of the batteries.
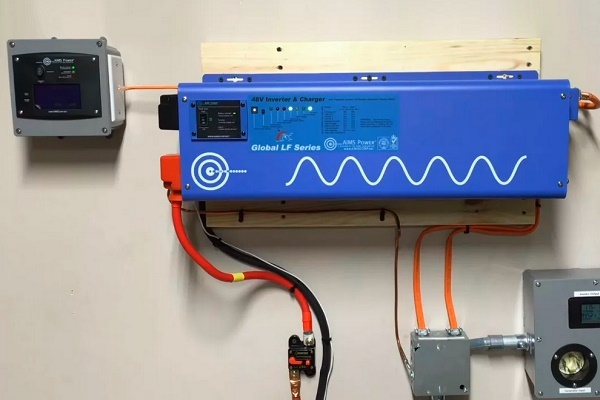
- Inverter, which converts the constant electric voltage of the battery into AC 220V, which is necessary for the functioning of the lighting system and the operation of household appliances.
- Circuit breakersinstalled between all elements of the system and protecting the system from short circuit.
- Set of connectors standard MC4.
In addition to the main purpose of the controller is to monitor the voltage of the batteries, the device turns off certain elements as necessary. If the indicator on the battery terminals in the daytime reaches a mark of 14 volts, which indicates that they are recharging, the controller interrupts charging.

During the night period, when the battery voltage indicator reaches an extremely low level of 11 volts, the controller stops the power plant.
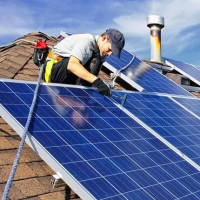
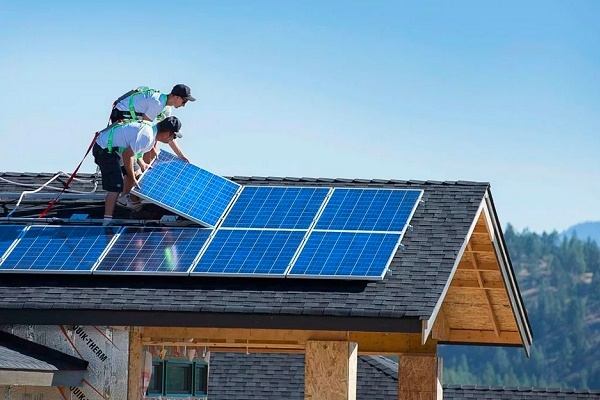
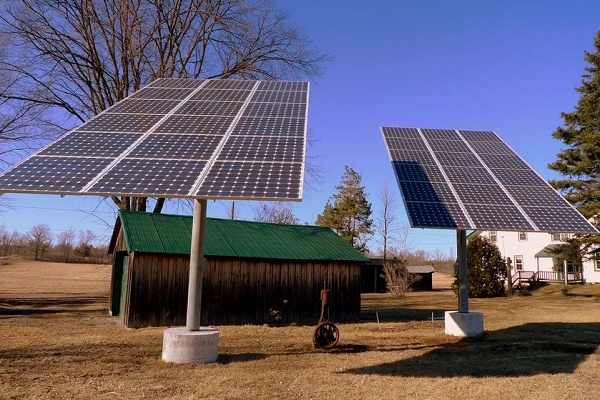
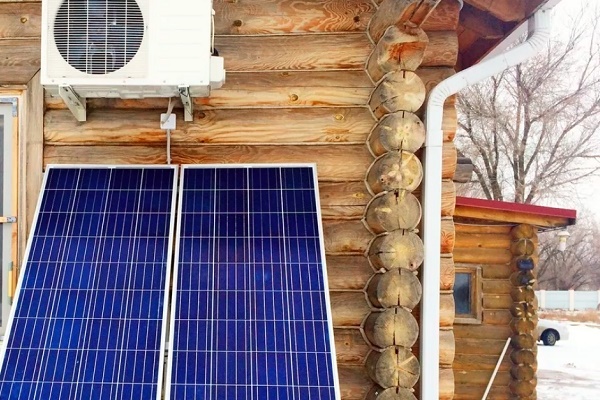
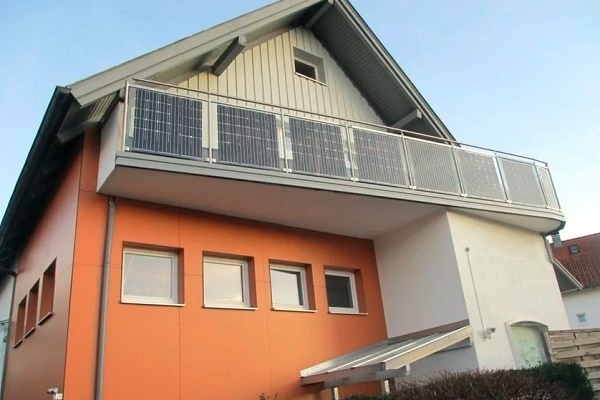
Where is it better to install the panels?
The first thing to do before installing and connecting the solar battery is to determine the location of the unit.

Solar panels can be placed in almost any well-lit spot:
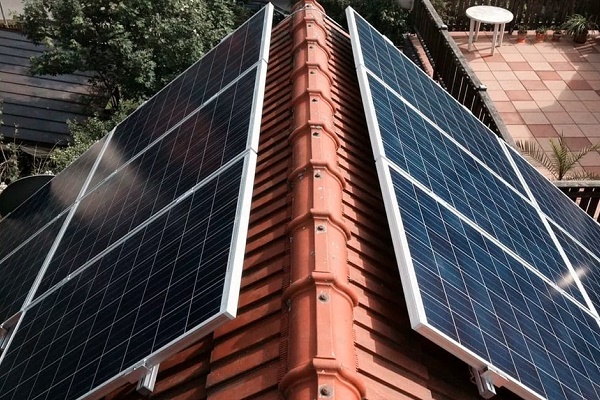
- on the roof of a country cottage;
- on the balcony of the apartment building;
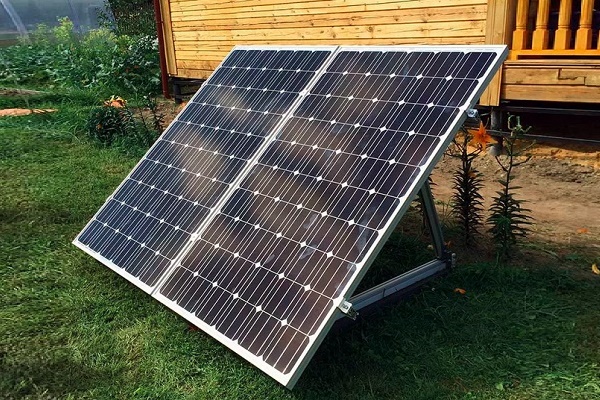
- in the territory adjacent to the house.
The main thing is to provide the necessary conditions for obtaining maximum power generation. One of these is the orientation and angle of inclination relative to the horizon. So the light-absorbing surface of the unit should be directed to the south side.
Ideally, the sun's rays should fall on it at 90 °. To achieve this effect, it is necessary to select the optimal slope angle depending on the climatic conditions of the region. For each region, this indicator is different.

For example, in the Moscow region, the angle of inclination of the surface of the solar panels for the summer months is 15–20 °, and in the winter months it changes to 60–70 °.
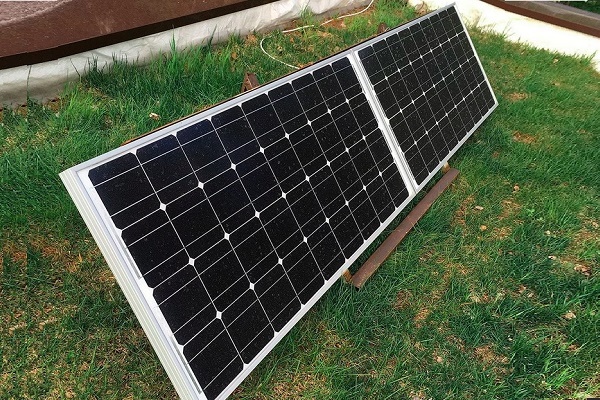
When placing solar panels on the territory adjacent to the house, it is better to lift the panels above the soil surface by at least half a meter - in case of heavy snowfall. This solution is correct in the sense that it provides a sufficient distance for air circulation.
It is worth remembering that even a small shadow adversely affects the generation of electricity by the unit. Panels should be placed only in places that are not subject to even the slightest shading.

There are several ways to fix the panels:
- by activating the clamps;
- by bolting through the through holes located at the bottom of the frame.
The supporting structure must be made of corrosion-resistant materials. Regardless of the installation method, it is impossible to make changes to the panel design and drill additional holes.
The homeowner's task is to keep the panels clean. The accumulation of dust, snow and bird droppings on the screen by at least 10% reduces the amount of electricity produced by the system.
Solar cell connection options
Solar panels consist of several separate panels. To increase the output parameters of the system in the form of power, voltage and current, the elements are connected to each other, applying the laws of physics.
The connection of several panels to each other can be performed by applying one of the three schemes for installing solar panels:
- parallel;
- sequential;
- mixed.
A parallel circuit involves connecting the same terminals to each other, in which the elements have two common nodes of convergence of conductors and their branching.

The value of the maximum possible output current in a parallel circuit is directly proportional number of connected items. The principles for calculating the quantity are given in our recommended article.
The serial circuit involves connecting the opposite poles: the “plus” of the first panel to the “minus” of the second. The remaining unused “plus” of the second panel and the “minus” of the first battery are connected to the controller located further down the circuit.
This type of connection creates the conditions for the flow of electric current, in which there remains the only way for the transfer of energy from the source to the consumer.

A serial-parallel or mixed circuit is most often used when it is necessary to connect several groups of batteries. By applying this circuit to the output, both voltage and current can be increased.

This option is beneficial in the sense that in the event of failure of one of the structural elements of the system, other connecting circuits continue to function. This significantly increases the reliability of the entire system.
The assembly principle of the combined circuit is based on the fact that the devices within each group are connected in parallel. And the connection of all groups in one circuit is carried out sequentially.
Combining different types of connections, it will not be difficult to assemble a battery with the necessary parameters. The main thing is that the number of connected elements must be such that the operating voltage supplied to the batteries, taking into account its drop in the charging circuit, exceeds the voltage of the batterieswhile the load current of the battery provided the required value of the charging current.
Assembly diagram of a solar electrical system
The connection of solar panels is carried out through the use of built-in connecting wires with a cross section of 4 mm2. Single-core copper wires are best suited for this purpose, their insulating braid is resistant to ultraviolet radiation.
In the case of using a wire whose insulation is not resistant to UV rays, it is recommended to corrugate its outer lining.

Regardless of the selected scheme before connecting solar panels without fail it is necessary to check the correct wiring.
When connecting the panels, it is not recommended to exceed the technical requirements for the permissible current and maximum voltage of other devices. It is important that you follow the manufacturer’s specifications for the charge controller and inverter.
The standard assembly scheme of the simplest solar power plant is as follows.

To avoid breakage the controller, when connecting system elements it is important to follow the sequence.
Installation works are performed in several stages:
- The battery is connected to the controller, using the appropriate connectors for this and not forgetting to observe the polarity.
- To the controller through the connectors, observing the same polarity, a solar battery is connected.
- A load of 12 V is connected to the controller sockets.
- If it is necessary to convert the electrical voltage from 12 to 220 V, then an inverter is included in the circuit. It is connected only to the battery and in no case directly to the controller.
- To the free output of the inverter connect electrical appliances designed for a voltage of 220 V.
After making the connection, you need to check the polarity and measure the open circuit voltage of the panels. If the indicator differs from the passport value, the connection is incorrect.

At the final stage, the solar battery must be grounded. To minimize the likelihood of a short circuit, fuses are installed at the junction between the battery, inverter and controller.
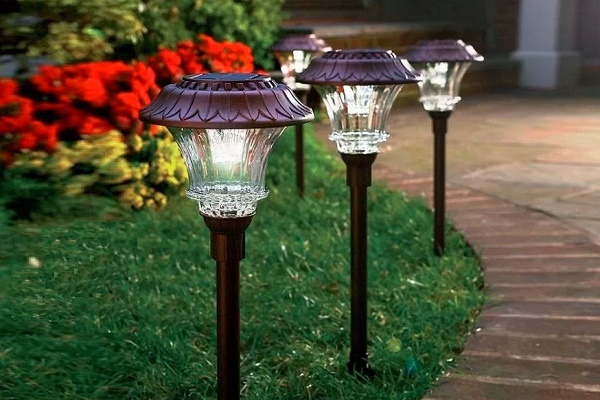
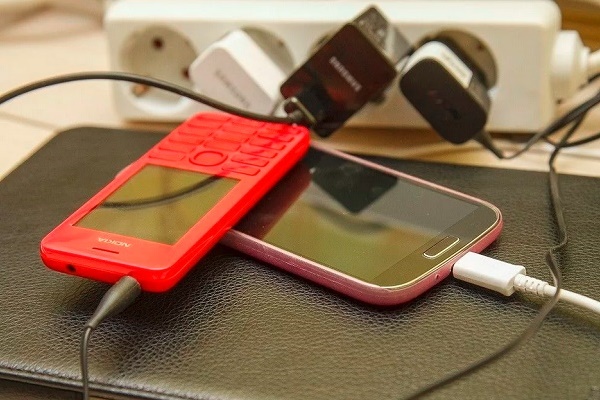
The energy of solar power plants will find application in powering low-power household appliances and in charging batteries of mobile equipment:
Those who wish to build a solar battery with their own hands will help the information given in the next article.
Connection of multidirectional elements
Using a sequential installation scheme for solar panels, so as not to reduce the efficiency of the devices, all panels of the common circuit should be placed at the same angle and on the same plane.
If the panels are located in different planes, this can lead to the fact that the near or more lighted will work more powerful than those located a little further.
This means that the near panel will generate electricity, some of which will go away to heat the far panels. And the reason is that the current flows along the path of least resistance. To minimize losses, it is better to use a separate controller for each panel.

You can solve the problem by installing cut-off diodes. They are placed inside between the plates. Due to this, giving the maximum power indicator, the plates do not overheat.
Equally important is the voltage drop in the connections, as well as the wires themselves of the low-voltage part of the system.

An example is the fact that a meter section of a cable with a cross section of 4 mm2 when the current passes through the indicator 80A (voltage 12 V), the values fall by 3.19%, which is 30.6 watts. When using twists, the voltage drop can vary from 0.1 to 0.3 V.
Combination of solar energy and a stationary network
When planning to use electricity from the sun in parallel with the equipped centralized stationary network, the connection scheme is slightly different. And the main reason for this decision is that the private consumer does not have the opportunity to "dump" the remaining energy.
And this can provoke voltage drops lasting up to one second.

According to the above diagram, the voltage from the heliopolis is first directed towards the battery, and from there it is transmitted to the load.
When designing such an installation option, two types of load should be taken into account:
- not reserved - light in the house, household appliances, etc .;
- reserved - emergency lighting, refrigerator, electric boiler.
Consider: the larger the battery capacity, the more redundant electrical appliances will work offline.
When choosing this method of generating energy into the network, be prepared for the fact that you will have to draw up a permit in local energy networks.
Though solar inverters They generate voltage, the quality of which is sometimes higher than that in a centralized network, local energy networks do not give the green light to the meter to rotate in the opposite direction.
For this reason, according to the scheme, solar inverters stop working at the time of a power failure. And the redundant load starts to “be fed” from the battery.
Conclusions and useful video on the topic
The authors of the video material, which is provided below, share their personal experience and analyze the nuances of installing solar panels.
Video # 1. An example of assembly and installation of a factory-built system:
Video # 2. How to install the panels correctly:
There is nothing complicated in the process of connecting several panels with other elements of the system. But for a novice master, the process can become difficult. Therefore, in the absence of experience in calculations and installation skills, you should contact a specialist who has the necessary knowledge.
Want to tell how you built your own solar power station for a summer house or a country house? Perhaps you know the subtleties of the process that are not described in the article? Please write comments in the block below, ask questions, share opinions and photos on the topic of the article.
 Connection diagram for solar panels: to the controller, to the battery and to the serviced systems
 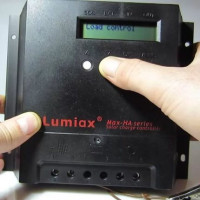 Solar charge controller: circuit, principle of operation, connection methods
  How to make a solar battery with your own hands: methods of assembly and installation of a solar panel
 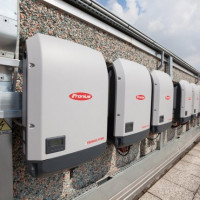 Inverter for solar panels: types of devices, model overview, connection features
 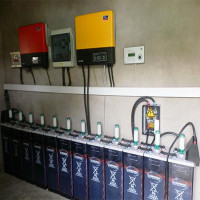 Solar batteries: an overview of the types of suitable batteries and their features
 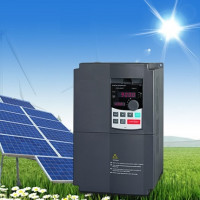 Hybrid inverter for solar panels: types, overview of the best models + connection features
  How much does it cost to connect gas to a private house: the price of organizing gas supply
  The best washing machines with dryer: model rating and customer tips
  What is the color temperature of light and the nuances of choosing the temperature of the lamps to suit your needs
  Replacement of a geyser in an apartment: replacement paperwork + basic norms and requirements
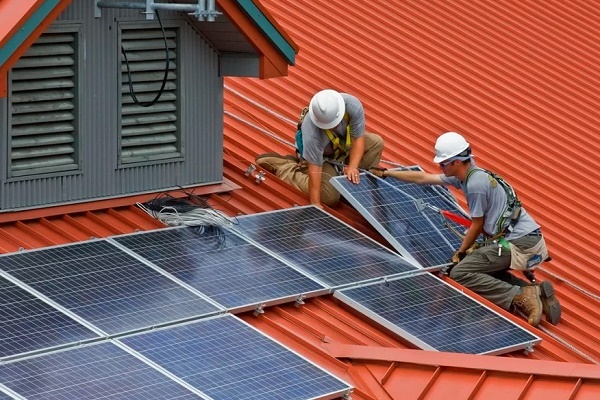
I'm going to transfer my house from electricity to solar panels. Already throughout the territory he put lights on solar energy. Of course, I trust the installation of solar panels only to a professional, because objectively without experience I can’t do everything for sure. Tell me, if I plan to convert only part of the electrical appliances to solar energy, and leave some of them on power, is this possible?
Oleg, there is an answer to your question in the section “Combining solar energy and a stationary network”. That combination allows you to maximize the use of solar energy and use electrical appliances at any time, regardless of weather conditions.
Just do not forget about such cons as:
- Hitting a shadow on one candy bar blocks the work of the others associated with it;
- Battery life up to 10 years;
- On sunny days, not only is the maximum energy efficiency, but also the heating of the panels themselves (especially in calm weather). And increasing the panel temperature by each degree reduces the efficiency by an average of 0.5%;
- Dustiness of the surface reduces the efficiency of the panel;
- Over time, the panel's efficiency decreases to 0.8% per year (actively in the first 2 years - up to 2%).
Having today panels with an efficiency of up to 20% (maximum for new ones), the prospect of their use is debatable in most cases, even in the absence of electric networks, a simple diesel generator will become a more useful purchase.
Tell me how to connect the solar panels and the MRT controller 12-24 V, 20 A. The panels have a voltage of 32-40 V, 280 W. How to connect two panels - in series or in parallel?
In your case, it is better to use a serial-parallel connection scheme, this is stated in the article, read more carefully. It is such a connection scheme that allows you to get such a voltage at the output that normal functioning of household appliances is possible.
As an example, I can give a connection diagram with an 80 A controller, but for your case it will also be relevant.
When mounting all elements, be careful, in particular, follow all instructions. For example, the inverter is connected only to the battery, and not directly to the controller, in order to avoid damage to the inverter. After you assemble the circuit, then check the polarity and measure the open circuit voltage, which should coincide with the passport. If it is different, then the circuit is not assembled correctly.
So serial connection gives the summation of voltage. A parallel - the summation of amperage.
Wow: the cost of the panel is from 200 thousand rubles. And if it breaks? Yes, 200 thousand is enough for me until the end of days to pay for ordinary electricity.
Yes, the price is rather big, but you can not worry about the fact that the solar panel will break. For a long time I will not explain how and why now solar panels are not afraid of mechanical influences (shock, fall, bending). I can only say that in their manufacture special technologies and chemical processes are used.
If you do not believe me, then you crash test "in Russian", as they say https://www.youtube.com/watch?v=iBbdW7pxBTg It can be seen that there is no video editing - everyone can check the solar panel for strength.
Regarding the price, the more sunny days per year in the latitudes where the installation of solar panels is planned, the shorter the payback period. It is clear that acquiring such panels for residents of the northern regions is clearly not economically feasible.