How to make a wind generator with your own hands: device, principle of operation + best home-made

It is difficult not to notice how stable the supply of electricity to suburban facilities differs from providing urban buildings and enterprises with electricity. Admit that you, as the owner of a private house or cottage, have repeatedly experienced interruptions, inconveniences associated with them, and damage to equipment.
These negative situations, together with the consequences, will no longer complicate the life of lovers of natural open spaces. Moreover, with minimal labor and financial costs. To do this, you just need to make a wind generator of electricity, which we describe in detail in the article.
We have described in detail the options for manufacturing a system that is useful in the economy and eliminates energy dependence. According to our advice, an inexperienced home foreman can build a wind generator with his own hands. A practical device will help to significantly reduce daily expenses.
The content of the article:
Legality of installing a wind generator
Alternative energy sources are the dream of any summer resident or homeowner whose site is far from the central networks. However, receiving bills for electricity consumed in a city apartment, and looking at increased tariffs, we realize that a wind generator created for domestic needs would not be in the way.
After reading this article, perhaps you will make your dream a reality.

In order not to waste money, effort and time in vain, let's decide: are there any external circumstances that will create obstacles for us during the operation of the wind generator?
To provide electricity to a cottage or a small cottage is enough small wind power plant, the power of which does not exceed 1 kW. Such devices in Russia are equated to household products. Their installation does not require certificates, permissions or any additional approvals.

No taxation of electricity production, which is spent on providing for their own domestic needs, is not provided. Therefore, a low-power windmill can be safely installed, generated with its help free electricity, without paying the state any taxes.
However, just in case, you should ask if there are any local regulations regarding individual energy supply that could create obstacles to the installation and operation of this device.

Complaints may arise with your neighbors if they experience inconvenience associated with the operation of the windmill. Do not forget that our rights end where the rights of others begin.
Therefore, when buying or self-manufacturing wind generator for home serious attention should be paid to the following parameters:
- Mast height. When assembling a wind generator, it is necessary to take into account restrictions on the height of individual buildings that exist in a number of countries of the world, as well as the location of its own site. Be aware that nearby bridges, airports and tunnels of buildings with a height exceeding 15 meters are prohibited.
- Noise from gearbox and vanes. The parameters of the generated noise can be set using a special device, and then document the results of measurements. It is important that they do not exceed established noise standards.
- Ethereal interference. Ideally, when creating a windmill, protection against the creation of tele-interference should be provided where your device can provide such troubles.
- Claims of environmental services. This organization may only prevent you from operating the installation if it interferes with the migration of migratory birds. But this is unlikely.
When creating and installing the device yourself, learn these points, and when buying a finished product, pay attention to the parameters that appear in his passport. It is better to protect yourself in advance than subsequently to be upset.
The principle of operation of a wind turbine
A wind generator or wind turbine (wind turbine) is a device that is used to convert the kinetic energy of a wind stream into mechanical energy. The resulting mechanical energy rotates the rotor and is converted into the electrical form we need.
The principle of operation and device kinetic windmill described in detail in the article, which we recommend that you read.
The structure of wind turbines includes:
- propeller blades
- turbine rotating rotor
- the axis of the generator and the generator itself,
- an inverter that converts alternating current into direct current, used to charge batteries,
- battery.
The essence of wind turbines is simple. During the rotation of the rotor, a three-phase alternating current is generated, which then passes through the controller and charges the DC battery. Further, the inverter converts the current so that it can be consumed by supplying lighting, a radio, a TV, a microwave and so on.

In general, the principle of operation of a wind generator of any type and design is as follows: in the process of rotation there are three types of force acting on the blades: braking, impulse and lifting.

The last two forces overcome the braking force and set the flywheel in motion. On the fixed part of the generator, the rotor generates a magnetic field so that an electric current flows through the wires.
Classification of types of energy generators
There are several signs by which wind power installations are classified. How to choose the best version of the device for suburban ownership is described in detail in one of most popular articles on our website.
So, windmills differ in:
- the number of blades in the propeller;
- blade materials;
- the location of the axis of rotation relative to the surface of the earth;
- step sign of screw.
There are models with one, two, three blades and multi-blade.
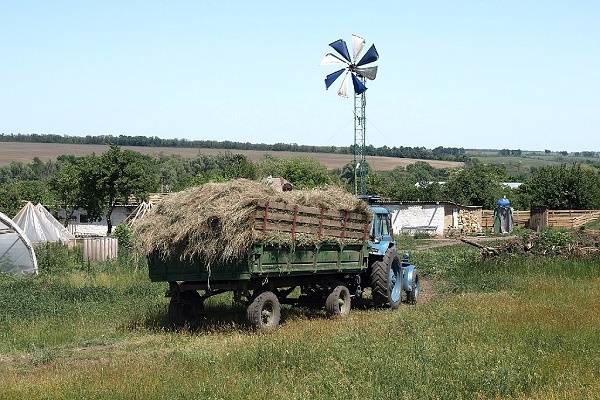
Products with a large number of blades begin to rotate even with a small wind. Usually they are used in such works, when the rotation process itself is more important than generating electricity. For example, to extract water from deep wellbores.

The blades can be sailing or rigid.Sailing products are much cheaper than rigid ones, the manufacture of which is metal or fiberglass. But they have to be repaired very often: they are fragile.
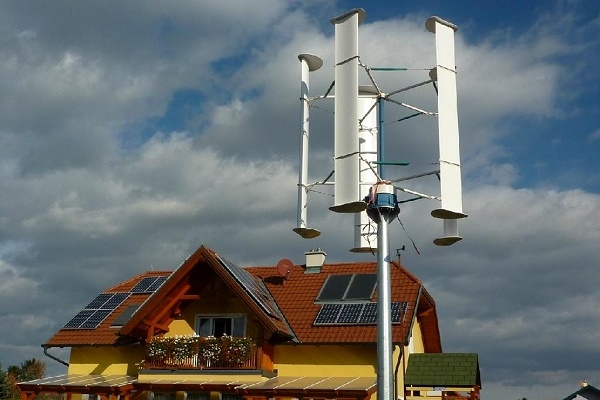
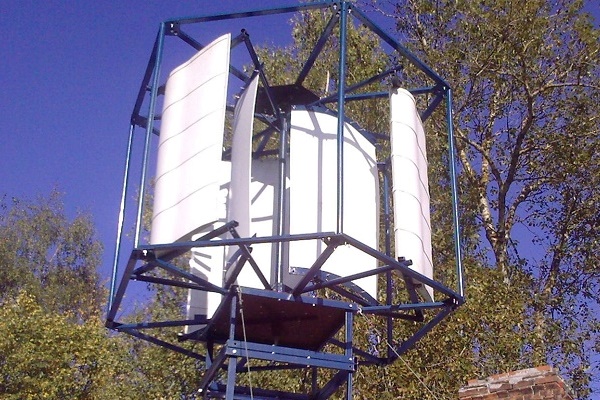
As for the location of the axis of rotation relative to the earth's surface, distinguish vertical windmills and horizontal models. And in this case, each variety has its own advantages: vertical ones respond more sensitively to every blow of the wind, but horizontal ones are more powerful.
Wind generators are divided by step signs into models with fixed and variable steps. Variable pitch allows you to significantly increase the speed of rotation, but such an installation has a complex and massive design. Fixed-pitch wind turbines are simpler and more reliable.
Rotor type wind turbine
We will figure out how to make a simple windmill with a vertical axis of rotation of the rotor type with your own hands. Such a model may well meet the electricity needs of the garden house, various outbuildings, as well as illuminate the house area and garden paths at night.

Our goal is to manufacture a windmill with a maximum power of 1.5 kW.
To do this, we need the following elements and materials:
- 12V car generator;
- 12 V helium or acid battery;
- Semi-tight switch of the “button” type at 12 V;
- converter 700 W - 1500 W and 12V - 220V;
- a bucket, a large-capacity pan or other capacious container made of stainless steel or aluminum;
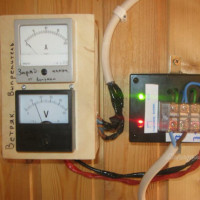
- automobile relay control lamp charge or charge the battery;
- automobile voltmeter (any one is possible);
- bolts with nuts and washers;
- wires with a cross section of 4 square mm and 2.5 square mm;
- two clamps to secure the generator to the mast.
In the process of doing the work, we will need a grinder or scissors for metal, a construction pencil or marker, a tape measure, wire cutters, a drill, a drill, keys and a screwdriver.
The controller for the power generation system can also be assembled by yourself. With rules and manufacturing schemes controller for a windmill will familiarize you with the article, the contents of which we advise you to read.
The initial stage of manufacturing the installation
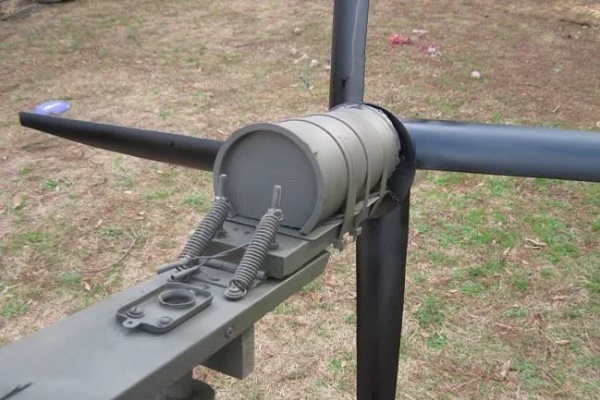
Making a homemade windmill we begin by taking a large metal tank of cylindrical shape. Usually, an old boil-down, bucket or pan is used for this purpose. It will be the basis for our future wind turbine.
Using a tape measure and a construction pencil (marker), we mark up: divide our capacity into four identical parts.

The metal will have to be cut. You can use a grinder for this. It is not used for cutting containers made of galvanized steel or painted tin, because this kind of metal will necessarily overheat. For such cases, it is better to use scissors. We cut the blades, but do not cut them to the very end.
Options, schemes and recommendations for the manufacture of various models wind turbine blades You will find in the article we recommend.
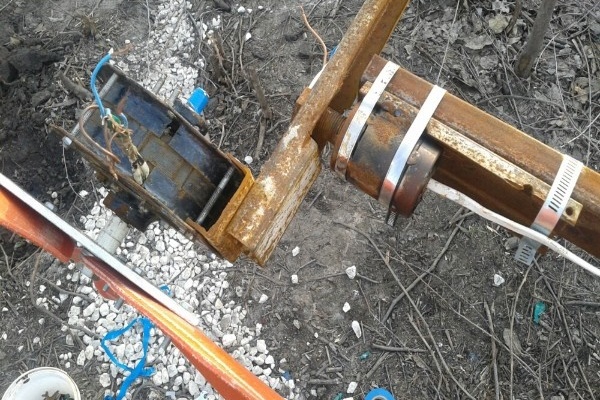
Along with the continuation of work on the tank, we will remake the generator pulley. In the bottom of the former pan and in the pulley you need to outline and drill holes for the bolts. The work at this stage should be taken as carefully as possible: all openings should be located symmetrically so that no imbalance occurs during rotation of the installation.

Bend the blades so that they do not stick out too much. When we do this part of the work, be sure to consider in which direction the generator will rotate.
Usually the direction of its rotation is oriented clockwise. The bending angle of the blades affects the area of influence of air currents and the speed of rotation of the propeller.
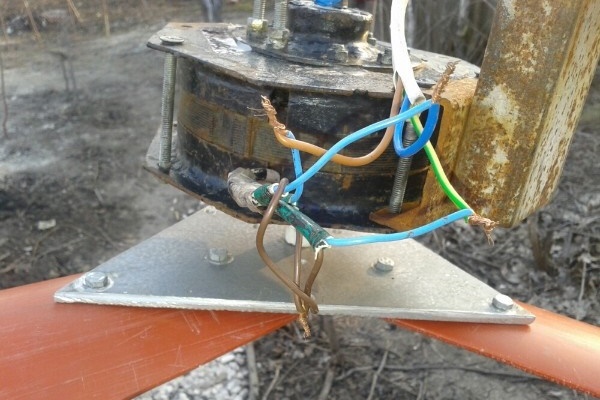
Now you need to fix the bucket with the blades prepared for work on the pulley. We install the generator on the mast, fixing it with clamps. It remains to connect the wires and assemble the circuit. Prepare to record the wiring diagram, wire colors, and pin markings. Later it will certainly come in handy. We fix the wires on the mast of the device.

To connect the battery, you need to use wires with a cross-section of 4 mm². It is enough to take a length of 1 meter. That’s enough.
And in order to connect the load to the network, which includes, for example, lighting and electrical appliances, enough wires with a cross-section of 2.5 mm² are enough. Install the inverter (converter). For this, a 4 mm² wire will also be needed.
Advantages and disadvantages of a rotor model of a windmill
If you did everything neatly and consistently, then this wind generator will work successfully. In this case, no problems during its operation will arise.
If you use a 1000 W converter and a 75A battery, this installation will provide electricity and video surveillance devices, and burglar alarms and even street lighting.
The advantages of this model are as follows:
- economical;
- elements can easily be replaced with new ones or repaired;
- special conditions for functioning are not needed;
- reliable in operation;
- provides complete acoustic comfort.
There are also disadvantages, but not so many: the performance of this device is not too high, and it has a significant dependence on sudden gusts of wind. Air flows can simply disrupt an improvised propeller.
In order to accurately select the model of the wind generator of the required power before starting work, we recommend make a calculation according to the formulas given in the recommended article.
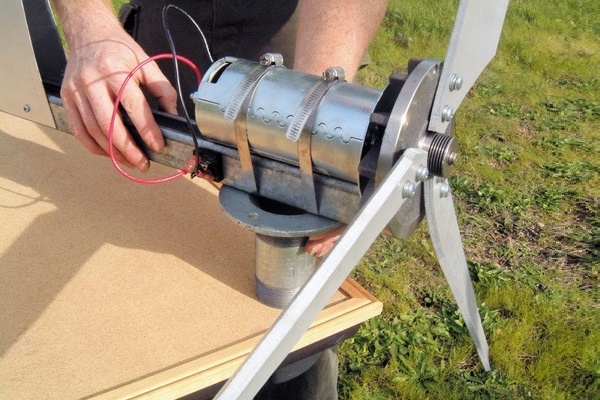
Assembly of axial wind turbines on neodymium magnets
Since neodymium magnets appeared in Russia relatively recently, axial wind generators with ironless stators began to be made not so long ago.
The appearance of magnets caused a rush of demand, but gradually the market was saturated, and the cost of this product began to decline. It became available to craftsmen who immediately adapted it for their various needs.

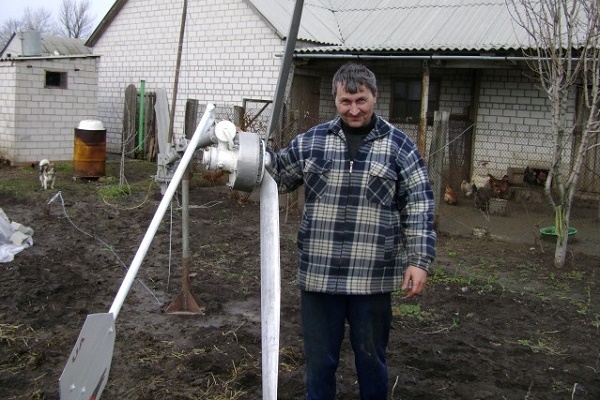
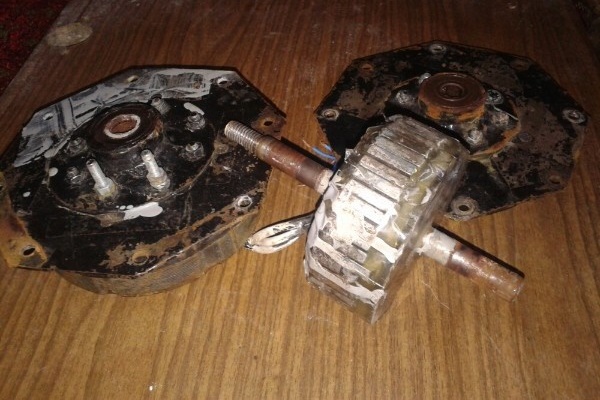
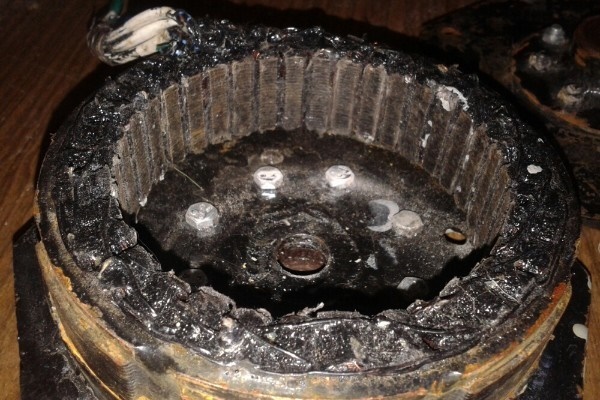
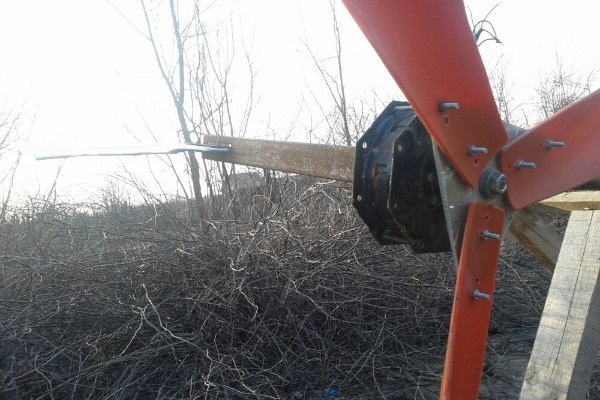
If you have a hub from an old car with brake discs, then we will take it as the basis for the future axial generator.
It is assumed that this part is not new, but already in operation. In this case, it is necessary to disassemble, check and lubricate the bearings, carefully clean away sedimentary deposits and all rust. Ready generator do not forget to paint.

Magnet distribution and fixing
Neodymium magnets must be glued to the rotor discs. For our work, we take 20 magnets 25x8mm.
Of course, you can use a different number of poles, but the following rules must be observed: the number of magnets and poles in a single-phase generator must be the same, but if we are talking about a three-phase model, the ratio of poles to coils should be 2/3 or 4/3 .
When placing magnets, the poles alternate. It is important not to make a mistake. If you are not sure that you will arrange the elements correctly, make a hint template or apply sectors directly to the disk itself.
If you have a choice, it is better to buy not round, but rectangular magnets. In rectangular models, the magnetic field is concentrated along the entire length, and in round ones, in the center.
Opposing magnets must have different poles. You will not confuse anything if you use a marker to mark them with minus or plus signs. To identify the poles, take the magnets and hold them to each other.
If surfaces are attracted, put a plus on them; if they repel, then mark them with minuses. When placing magnets on disks, alternate the poles.

For reliability of magnet fixing it is necessary to apply high-quality and maximally strong glue.
To enhance the reliability of fixation, you can use epoxy resin. It should be diluted as indicated in the instructions, and fill it with a disk. The resin should cover the entire disc, but not drain from it. It is possible to prevent the possibility of runoff if you wrap the disk with tape or make temporary plasticine protections from a polymer strip around its perimeter.
Single-phase and three-phase generators
If we compare single-phase and three-phase stators, then the latter will be better. The single-phase generator vibrates when loaded. The reason for the vibration is the difference in the amplitude of the current, arising due to its unstable return for a point in time.
The three-phase model has no such drawback. It is distinguished by constant power due to mutually compensating phases: when an increase in current occurs in one, it drops in the other.
According to the results of testing, the return of the three-phase model is almost 50% more than the same indicator of the single-phase. Another advantage of this model is that in the absence of unnecessary vibration, acoustic comfort increases when the device is functioning under load.
That is, the three-phase generator practically does not buzz during its operation. When vibration decreases, the life of the device logically increases.

Coil Winding Rules
If you ask a specialist, he will say that before you reel the coils, you need to perform a thorough calculation. The practitioner in this matter will rely on his intuition.
We chose a not too fast option generator. We have a procedure for charging a twelve-volt battery should begin at 100-150 rpm. Such initial data require that the total number of turns of all coils be 1000-1200 pieces. We still have to divide this figure between all the coils and determine how many turns will be on each.
A low-speed windmill can be more powerful if the number of poles increases. The frequency of the current oscillations in the coils will increase. If a larger cross-section wire is used for winding coils, the resistance decreases and the current strength increases. Do not lose sight of the fact that a higher voltage can “eat up” the current due to the resistance of the winding.
The winding process can be facilitated and made more efficient if you use a special machine for this purpose.

The performance and performance of homemade generators are greatly influenced by the thickness and number of magnets that are located on the discs. The total final power can be calculated if you wind one coil, and then scroll it in the generator. The future power of the generator is determined by measuring the voltage at specific speeds without load.
We give an example. With a resistance of 3 ohms and 200 rpm, 30 volts comes out. If we subtract 12 volts of battery voltage from this result, we get 18 volts. Divide this result by 3 ohms and get 6 amperes. The volume is 6 amperes and will go to the battery. Of course, in the calculation we did not take into account losses in the wires and on the diode bridge: the actual result will be less than the calculated one.
Usually the coils are made round. But, if you pull them out a little, you will get more copper in the sector and the turns will be straighter. If we compare the size of the magnet and the diameter of the inner hole of the coils, then they must correspond to each other or the size of the magnet may be slightly smaller.

The thickness of the stator, which we do, must correctly correlate with the thickness of the magnets. If the stator is done more by increasing the number of turns in the coils, the inter-disk space will increase, and the magnetic flux will decrease. The result may turn out to be this: the same voltage is generated, but, due to the increased resistance of the coils, we get a lower current.
Plywood is used to make the stator mold. However, sectors for coils can be marked on paper using plasticine as borders.
If fiberglass is placed on top of the coils at the bottom of the mold, the strength of the product will increase. Before applying the epoxy resin, you need to lubricate the mold with Vaseline or wax, then the resin will not stick to the mold. Some use tape or film instead of grease.
Between themselves, the coils are fixed motionless. In this case, the ends of the phases are brought out. Six outward wires should be connected with a star or a triangle. Rotating the assembled generator by hand, test it. If the voltage is 40 V, then the current will be approximately 10 amperes.
Final assembly of the device
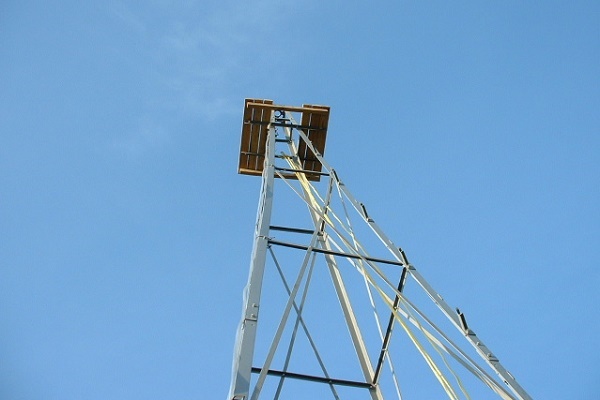
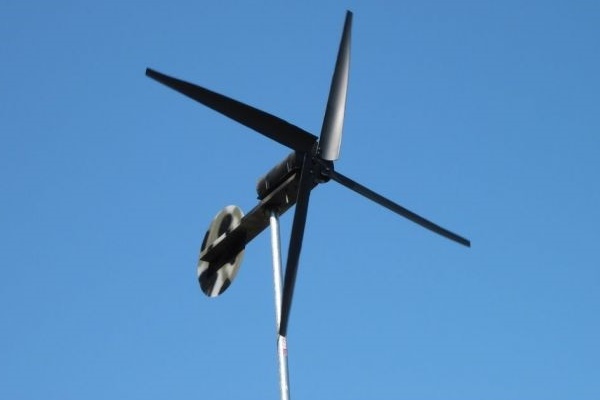
The length of the finished mast should be approximately 6-12 meters. With such parameters, its base should be concreted. The windmill itself will be mounted on the top of the mast.
So that it can be reached in the event of a breakdown, it is necessary to provide a special mount at the base of the mast, which will allow the pipe to be raised and lowered using a hand winch.

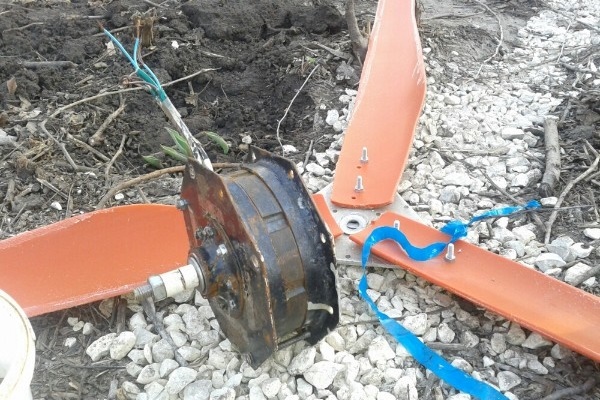
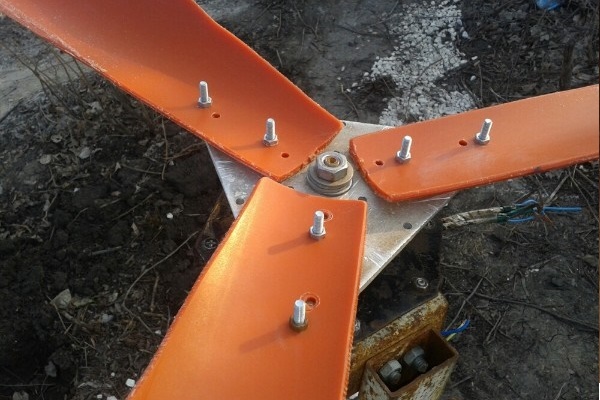
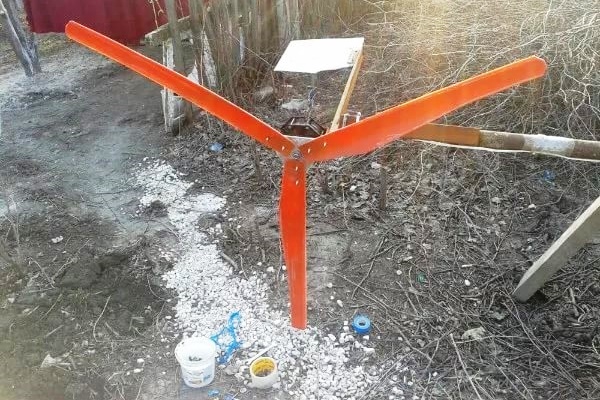
To make a screw, you can use a PVC pipe with a diameter of 160 mm. It will be used to cut a two-meter screw consisting of six blades from its surface. The shape of the blades is best developed independently by experience. The goal is to increase torque at low revs.
The propeller should be protected from excessive wind. To solve this problem, use a folding tail. The generated energy is stored in batteries.
For the attention of our readers, we have provided two versions of 220-do-it-yourself wind generators that enjoy the increased attention not only of owners of suburban real estate, but also ordinary summer residents.
Both wind turbine models are effective in their own way. These devices are able to demonstrate particularly good results in the steppe area with frequent and strong winds. They are effective enough to be used in an organization. alternative home heating and in the supply of electricity. And they are not so difficult to build with their own hands.
Conclusions and useful video on the topic
This video shows an example of a wind turbine with a horizontal axis of rotation. The author of the device explains in detail the nuances of the design of the installation made by himself, draws the attention of viewers to errors that can be made in the process of self-manufacturing a wind generator, gives practical advice.
Please note that getting to a device elevated to a decent height is not so easy. Reinstalling such a wind turbine will most likely be problematic. Therefore, the folding mast design in this case will not be superfluous.
This video shows a rotary wind turbine with a vertical axis of rotation. This installation is not high, it was made originally and is highly sensitive: even a slight wind causes the blades of the device to move.
If you live in an area where winds are not considered a rare occurrence, the use of this particular source of alternative energy may be most effective for you. The above examples of self-made windmills prove that making them yourself is not so difficult. Wind energy is a publicly available and renewable resource that can and should be used.
Those who are interested in the topic of the article are invited to express their opinion in the comments and ask questions that arose during the familiarization with the material.
 How to make a controller for a wind generator with your own hands: device, principle of operation, assembly diagram
 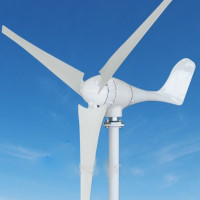 Kinetic wind generator: device, principle of operation, application
 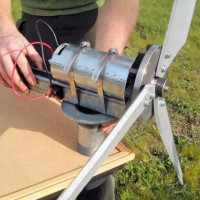 Do-it-yourself wind generator from a washing machine: assembly instructions for a windmill
 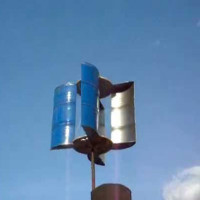 DIY wind generator from a car generator: windmill assembly technology and error analysis
 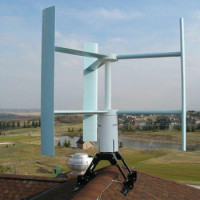 Do-it-yourself vertical wind generator: how to assemble a wind turbine with a vertical axis of rotation
 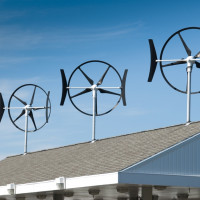 Wind generator for a private house: device, types, overview of the best offers
  How much does it cost to connect gas to a private house: the price of organizing gas supply
  The best washing machines with dryer: model rating and customer tips
  What is the color temperature of light and the nuances of choosing the temperature of the lamps to suit your needs
  Replacement of a geyser in an apartment: replacement paperwork + basic norms and requirements
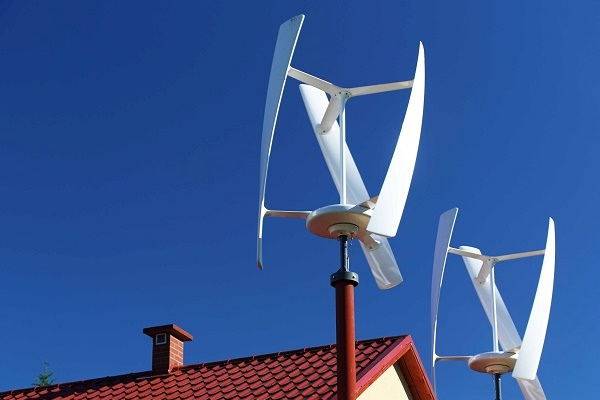
A very interesting idea if you want to do something interesting and fundamental with your own hands. Unfortunately, in our realities the practical value is rather dubious. In other countries, this is beneficial, since electricity prices there are noticeably higher and it is beneficial for them to come up with alternative sources. With us, it’s only profitable to do this if you have free access to details.Although of course I can’t deny that the future lies with such technologies.
I don’t think you are right. Having at hand a free source of energy, you could-do what you wouldn’t-do with paid energy, because heating does not pay off-in the barn with livestock for the winter, the light in the greenhouse. You can organize a fountain or a pond. Heater in winter even in every room, street lighting, warm floor. All this requires energy.
It is a very tempting idea to provide yourself with an independent energy source using a wind generator. Itself was once captured by this idea and shoveled a lot of literature. But there is one very significant drawback. All wind generators are very noisy installations. If you use it in a rural area or a cottage village, then the noise level produced by the installation will exceed all permissible norms for the settlement.
For handy craftsmen, this is probably an interesting experiment - to assemble a wind generator with your own hands. But as a practical person, I have a few questions. Firstly, the price of the undertaking, not everyone has an engine from an old car, it will also need to be bought, like other parts. Plus the time it takes to build. Secondly, in Russia, electricity is quite cheap and there is no certainty that this venture is generally advisable ... I think this is more of an entertainment for enthusiasts than a really useful and practical idea. But curious, of course.
Engine from an old car?
Not an engine, but a generator from an old car (this is, as it were, a significant difference ...).
They tried to make a wind generator with a neighbor and install it in the country. Just with the blades from the barrels of paint. They wanted to generate current for their own needs. But everything rested so far in search of a normal generator and stabilizer. They found an idea with neodymium magnets on your site - we are thinking of trying it. Unfortunately, in this post the topic of voltage stabilization is not covered at all - and this, as I understand it, is of fundamental importance.
Here, many say that email. energy is cheap in Russia, and there is no reason to bother. It’s immediately clear that these people do not know what it is to live in the wilderness with a high probability of disabling e-mail. energy. For example, in my bear’s corner, where there are not even roads, not to mention the power transmission line, where the local power station provides electricity, where any weather threatens with the closures of old, Soviet times, local e-mails. lines, breakdowns of the diesels themselves, the human factor (a neighbor’s home sawmill without transformers in the network - God forbid you have such electricity :)) And here is autonomy ... I understand that many people don’t have to see it, but I would not call autonomy - entertainment for enthusiasts.
A generator from disassembly costs 500-1000 rubles ...
Take any 12V motor (for example, a car fan), a working car battery, a voltage converter of 12v / 220v, preferably at 6000w (can be ordered from China), and 4kW. power is provided to you. And the propeller can be taken from an old home fan.
Denis, my car battery is not working - can I take a battery from an uninterruptible battery instead? And yet, is it possible to take a cooler with a propeller from the processor, and they will provide 4 kW of power?
Either I don’t understand something, or are you really going to use a CPU cooler in a wind generator? How can you expect to receive 4 kW power with it if this part is designed to cool a PC processor, which in total does not consume such power per hour? The battery from the UPS will not work for you, since it has a completely different operating principle.
As for the use of a car battery, it should be working, at least restored. The author of the comment above recommends using a propeller from a domestic fan, but not from a PC cooler. However, a power of 4 kW on such a propeller cannot be obtained, even at high wind speeds, longer blades are needed here.
Hello! I watched your videos of wind turbines. Question: if the generator rotates in the wind, is the cable coming from it (the generator) wound around the mast? Tell me please.
I understood the essence of your question. Here you need to carefully think through everything in the design process, in order to avoid these obvious, but nevertheless difficult to solve problems. This applies to the installation of wind turbines on their own, factory solutions use the internal cable routing (inside the mast). Using special adapters, hinges and fasteners, it is possible to organize the connection in such a way that the cable will not wrap around the mast in any way.
I repeat again! The only right solution is to lay the cable inside the mast! Look at the images, there’s simply nothing to wrap around the mast, no matter how tall it is!
Cool. About the bucket and generator - it's just a masterpiece! Did the author himself assemble a windmill at least 100 watts? The article has one theory and photos of other people's windmills.