Do-it-yourself wind generator from a washing machine: assembly instructions for a windmill

Electricity is an expensive resource, and its environmental safety is in doubt, because hydrocarbons are used to generate electricity. This drains the bowels and poisons the environment. It turns out that you can provide the house with wind power. Agree, it would be nice to have a backup source of electricity, especially in areas where electricity outages are common.
Converting plants are too expensive, but with some effort, you can assemble them yourself. Let's try to figure out how to assemble a wind generator with your own hands from the washing machine.
Next, we will tell you what materials and tools will be required to work. In the article you will find schemes of a device for a wind generator from a washing machine, expert advice on assembly and operation, as well as videos that clearly demonstrate the assembly of the device.
The content of the article:
The device and features of using a windmill
Wind generators are rarely used as the main sources of electricity, but as additional or alternative they are ideal.
This is a good solution for cottages, private houses located in areas where there are often problems with electricity.

Homemade wind generator from a screwdriver, car generator or the engine of a washing machine will cost literally a penny, but it will help to save decent amounts on energy bills.
This is a good option for prudent owners who do not want to overpay and are ready to make some efforts to reduce costs.

A standard wind generator consists of several mechanical devices, the function of which is to convert the kinetic wind energy into mechanical energy, and then into electrical energy. We recommend that you look at the article about wind generator and its working principle.
Most modern models are equipped with three blades to increase efficiency and begin to work when the wind speed reaches at least 2-3 m / s.
Wind speed is a fundamentally important indicator on which the power of the installation directly depends.
In the technical documentation for industrial wind generators, the nominal wind speed parameters are always indicated at which the installation works with maximum efficiency. Most often, this indicator is 9-10 m / s.

There are also parameters of the maximum permissible wind speed - 25 m / s. With such indicators, the efficiency of the wind turbine is already significantly reduced, because installation blades change position. If we are talking about a home-made design, it is difficult to determine its technical characteristics.
It makes sense to focus on averaged indicators and calculate the amount of energy needed for basic needs.
If you need to make a homemade wind turbine for 220V, we recommend that you familiarize yourself with the detailed assembly instructions.
What energy costs can the installation cover?
Installing a wind generator is cost-effective if the wind speed reaches 4 m / s.
In this case, almost all needs can be provided:
- A device with a power of 0.15-0.2 kW will allow the conversion of room lighting to eco-energy. You can also connect a computer or TV.
- A wind turbine with a power of 1-5 kW is enough to ensure the operation of basic household appliances, including a refrigerator and a washing machine.
- For autonomous operation of all devices and systems, including heating, you need a 20 kW wind generator.
When designing and assembling a windmill from the engine of a washing machine, the instability of wind speed must be taken into account. Electricity can disappear at any second, so the equipment cannot be connected directly to the generator.
Batteries and charge controllerbecause electrical appliances need a voltage of 220V.
Types of wind generators and the principle of their work
Both industrial and home-made wind generators are different.
They are classified according to several criteria:
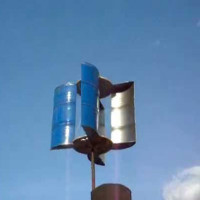
- Features of rotor rotation with blades attached to it - vertical or horizontal. The former respond less to negative environmental factors, while the latter have a higher efficiency.
- The number of blades. The most practical are three-bladed installations, but the blades can be more or less.
- Material. For the manufacture of blades using various materials - hard or sailing. The former are usually more durable, while the latter are cheaper.
- Blade pitch. It can be fixed or variable.
When making a wind generator with your own hands, you have to independently determine the design. In this case, the necessary power should be calculated and the operating conditions of the installation taken into account. A detailed calculation of the wind generator by the formulas we examined in this article.

Horizontal windmills are convenient in that they do not need high-precision calculations to create them, the design itself is easier to manufacture and starts at the slightest wind. Cons - loud noise at work and bulky.
A vertical wind generator is suitable for people who are ready to spend time and effort assembling and maintaining a complex, but compact design. We recommend that you look at the step-by-step instructions for making a vertical wind generator do it yourself.

The wind generator works due to the rotation of the blades attached to the rotor. The rotor itself is fixed on the shaft of the generator, which generates an electric current. Energy is transferred to batteries. Here it accumulates and feeds household electrical appliances.
The wind turbine is equipped with a controller that converts three-phase alternating current into direct current and controls the charging of the battery. The installation diagram must take into account that an inverter must be connected after the battery.
Compare the pros and cons of installation
Wind generators have been used for many years, their designs are constantly being improved, and the wind is an easily accessible source of energy.
Devices working from it are absolutely safe for the environment and convenient, because located on the masts and do not occupy the usable area. They are easy to maintain and repair.

Windmills make noise at work. Sound may be louder or quieter, but it is always there. This sometimes interferes with homeowners and even neighbors.
Other inconveniences may be noted. Wind is an unpredictable element, therefore the operation of generators is unstable and it is necessary to accumulate energy so as not to be left without electricity during periods of calm.
Instructions for assembling a windmill from a washer
Let's look at how to assemble a simple installation with your own hands, using the electric motor from the washer as the basis.
Stage # 1 - preparing the necessary materials
To create a homemade windmill from the engine of the washing machine, you need to purchase several parts.
Some of them will probably be found in old household appliances, and some will have to be bought:
- rotor with blades - make blades you can do it yourself;
- a gearbox that will regulate the speed of rotation of the rotor of the windmill;
- a casing designed to protect the elements of the windmill from moisture and other negative environmental factors;
- an accumulator whose function is to store energy and power electrical appliances when the blades do not rotate;
- inverter for current transformation;
- the tail part, with which the installation is rotated in the wind;
- mast on which the structure will be mounted.
All these parts separately cost money, and to assemble them into a complete design, you will have to spend a lot of time.
To make a generator, you need an electric motor from a 1.5 kW washing machine.
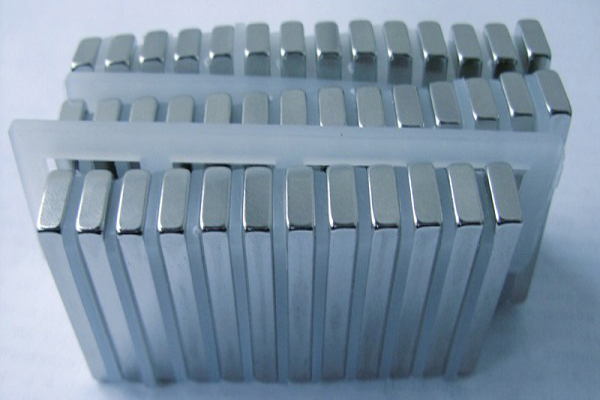
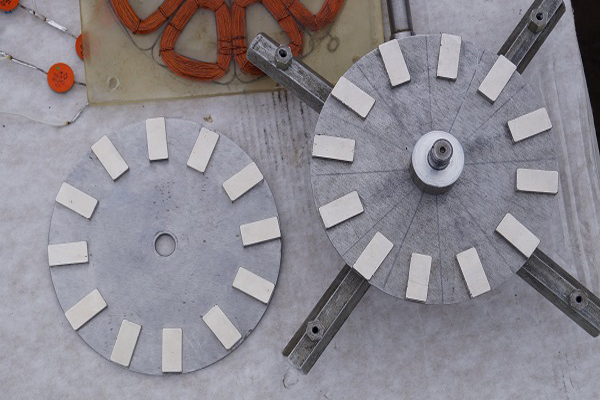
You will also need to buy 32 neodymium magnets of 0.5, 1, 2 cm, glue, sandpaper and cold welding or epoxy.

Neodymium magnets can be ordered online or purchased at offline retail outlets. They will need to be installed on the rotor.
Stage # 2 - making the frame of a windmill
The cores are removed from the rotor of the induction motor and partially cut off using a lathe (depth 2 mm). 5 mm deep grooves are cut in the cores.

When the cores are ready, you need to install the magnets in the right places. First, a tin coating is made for the core, after which the magnets are placed at an equal distance from each other.
It is important to maintain the correct distance, otherwise the magnets will stick together over time, and the power of the wind generator will decrease significantly.

The finished template with magnets is placed on the rotor, and the gaps are filled with flexible cold welding or epoxy. When the work is finished, you need to gently grip the rotor and grind the surface with emery cloth.
It remains only to verify the strength of the housing and bearing bolts. If the parts are worn out, it is better to replace them.
Stage # 3 - checking the performance of the homemade
To check the assembled generator, some additional devices will be required:
- battery;
- rectifier;
- controller;
- tester.
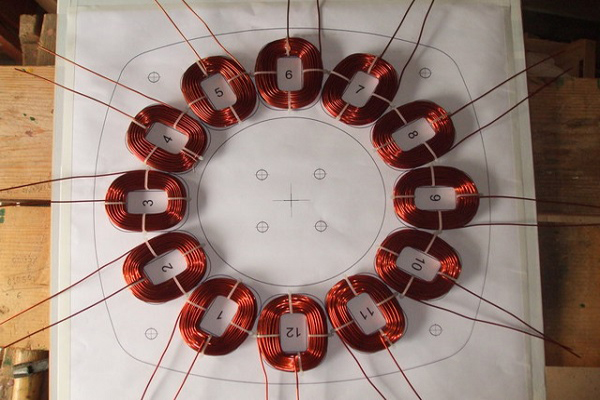
First, it is determined which two wires lead to the working winding, and all the others are removed. These wires are connected to the rectifier, and that in turn - to the controller connected to the battery. The system for verification is ready.
The generator power is checked as follows: voltmeter probes are brought to the battery, and the assembled device is untwisted using a conventional drill or screwdriver (speed should be at least 800 rpm, preferably 1000). The voltmeter 200-300 V is considered good.

When assembling a wind turbine with a generator from a washing machine, difficulties arise with the manufacture of the impeller. You need to choose a durable, but lightweight material.
A good solution is blades made of fiberglass pieces.They are lightweight, but durable and wear-resistant. Steel pipes with a diameter of 32 mm are suitable for the mast.
So you see, it’s not so difficult to assemble a windmill, but it will take time to find the right materials.
If you order a ready-made wind station with installation, you will have to pay 70-80 thousand rubles. But the wind generator assembled from the engine of the washing machine will cost no more than 3.5 thousand rubles.
The difference in price is so tangible that the decision to engage in self-assembly and installation of a windmill seems appropriate. As a result, you can get a device with a power of 2.5 kW, and this is quite enough for the operation of home appliances.
If you do not want to fool yourself with calculations, searching and buying materials and assembling, you can always buy a ready-made installation. What types of purchased wind turbines are there and how to choose the best we examined in detail in another article.
Conclusions and useful video on the topic
Self-assembly of any technical devices is a complex task requiring attention to detail. When it comes to power systems, work must be done especially carefully. We offer video tutorials to help you avoid mistakes.
How a self-made wind generator looks and works can be seen in the video:
Description of the process of assembling a wind generator from a washing machine:
Unnecessary household appliances can help out in the most unexpected situations. Hopelessly outdated washing machine can become a new source of "green energy".
The wind generator will serve more than one year and will help to save decent money. The best part is that such a transformation will cost a reasonable amount. The main thing is to search, learn from someone else's experience and not be afraid to experiment.
Have you assembled a wind generator yourself using an electric motor from a washer? Share your homemade photo and assembly experience - leave a comment under this article.
Or maybe you are just starting to build the installation and you have questions that we did not touch on in this material - ask them, and we will try to help you with practical advice.
 DIY wind generator from a car generator: windmill assembly technology and error analysis
 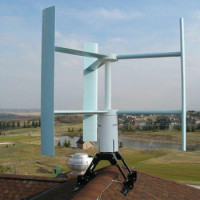 Do-it-yourself vertical wind generator: how to assemble a wind turbine with a vertical axis of rotation
 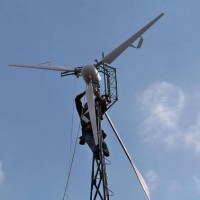 How to make a wind generator with your own hands: device, principle of operation + best home-made
 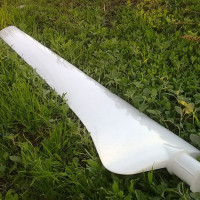 How to build do-it-yourself blades for a wind generator: examples of self-made blades for a wind turbine
 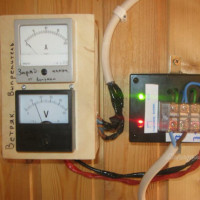 How to make a controller for a wind generator with your own hands: device, principle of operation, assembly diagram
 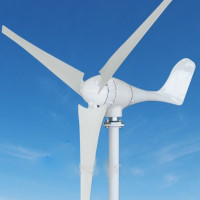 Kinetic wind generator: device, principle of operation, application
  How much does it cost to connect gas to a private house: the price of organizing gas supply
  The best washing machines with dryer: model rating and customer tips
  What is the color temperature of light and the nuances of choosing the temperature of the lamps to suit your needs
  Replacement of a geyser in an apartment: replacement paperwork + basic norms and requirements
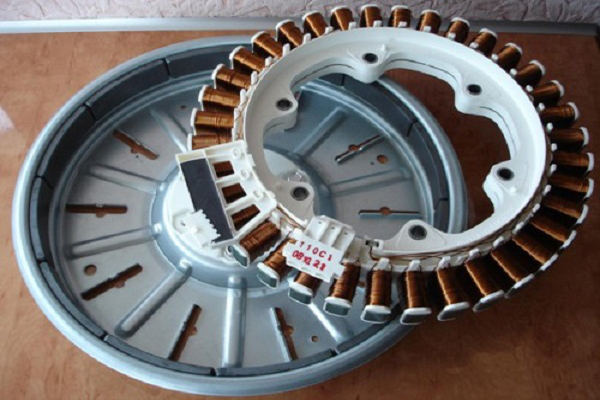
Of course, it is useful to be able to assemble a wind generator yourself. You never know, suddenly you find yourself on a desert island :) But the question arises - will it work at full capacity, given the artisanal way of production. Not all Chinese products made in factories work as they should, but here - with their own hands. Moreover, I would like to note the uselessness of wind generators in Russia - there is little wind, there are cheap energy sources. In general, it would be interesting, but useless to build a wind generator.
In a factory, a worker collects dozens, and sometimes hundreds, of devices for a shift (as an option, the robot collects - the worker controls), so in pursuit of the number he cannot always devote an adequate amount of time to each of the products. Hence the low quality. You will devote all your attention and time to one single wind generator. Even the initial directness of the hands is not so important, there would be a desire to learn and do.
If you try, then you can assemble a wind generator yourself with absolutely anyone. The husband remade the old metal barrel and installed it directly on the roof. The main thing is to protect the case itself from precipitation. Of course, the efficiency of the energy generator will depend on the complexity and effectiveness of the design. But even the simplest option brings considerable benefits.