DIY wind generator from a car generator: windmill assembly technology and error analysis

Windmills are a promising alternative for traditional energy. Wind energy, converted into electricity, promises to be cheap, easy to produce and low cost. And if you take into account the bills that are now coming for electricity, then in order to save money, you should try to assemble your own wind generator, agree?
There are real examples of installations that generate a decent amount of energy. Nevertheless, the possibilities of wind turbines are still far ahead of competitors that can withstand the traditional method of generating electricity.
We presented a guide, following which you can assemble a wind generator from a car generator with your own hands. In the article proposed for familiarization, the widespread mistakes that are made when designing windmills are discussed in detail. For clarity, the article is accompanied by thematic photo and video materials.
The content of the article:
About homemade windmills for the home
Of particular interest in wind energy is at the household level. This is understandable if you look at the next account for the energy consumed from the corner of your eye. Therefore, all sorts of craftsmen are activated, using all the possibilities of obtaining electricity inexpensively.
One of these possibilities, quite real, is closely connected with a wind generator from an automobile generator. A ready-made device - a car generator - just equip correctly made bladesin order to be able to remove some value of electrical energy from the terminals of the generator.
True, it will work effectively only if there is windy weather.

Using virtually any car generator is acceptable for constructing a wind turbine. But they usually try to choose a powerful model for business that is capable of delivering large currents. Here at the peak of the popularity of the design of generators from trucks, large passenger buses, tractors, etc.
In addition to the generator, a number of component parts will also be required to make a windmill:
- two- or three-blade screw;
- car battery;
- electrical cable;
- mast, support elements, fasteners.
The design of the screw on two or three blades is considered the most optimal for a classic wind generator. But a household project is often far from engineering classics. Therefore, most often they try to pick up ready-made screws for a home construction.

Such, for example, can be an impeller from an external unit of a split air conditioning system or from a fan of the same car. But when there is a desire to follow the traditions of designing wind generators, you have to build a propeller of the windmill from start to finish with your own hands.
Before deciding on the assembly and installation of a wind generator, it is worth evaluating the climatic data of the site and calculating the payback. Significant help in this will be provided by information interesting articlerecommended by us for familiarization.
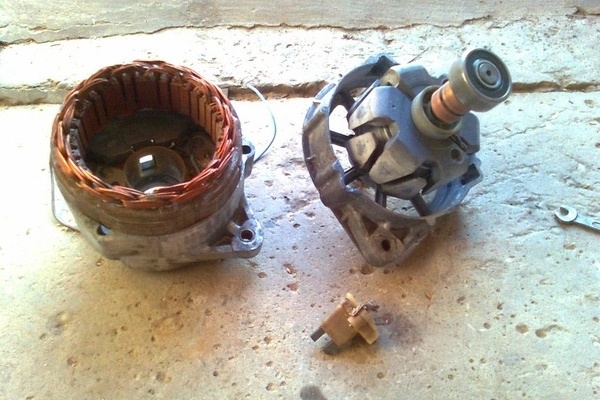
Wind generator assembly technology
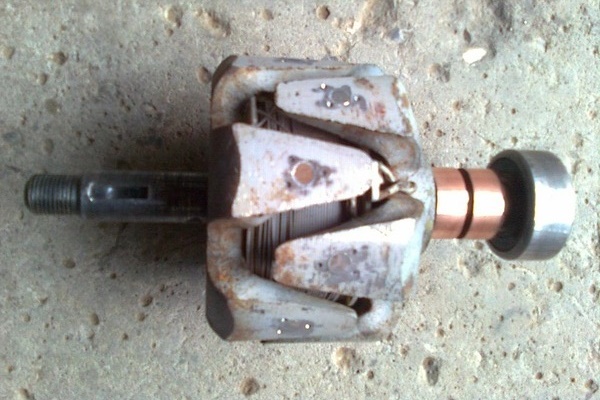
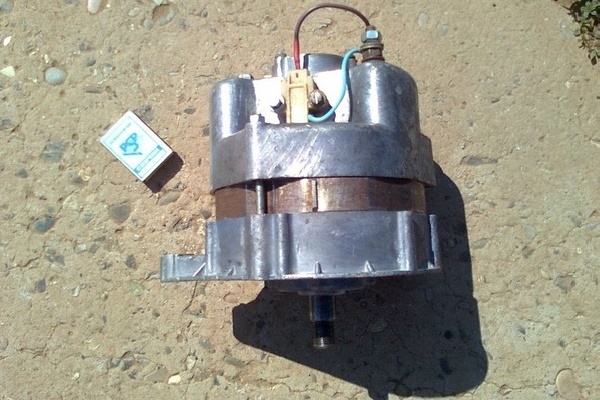
The AT-700 model taken from a tractor of the DT series is seen as the optimal basis for a home wind turbine generator. True, this tractor generator in its original form is designed for a rotor speed of up to 6000 rpm. Under the design of a home wind turbine, this parameter is clearly excessive.
There are two ways out:
- Apply some kind of gear-multiplier, giving the desired gear ratio.
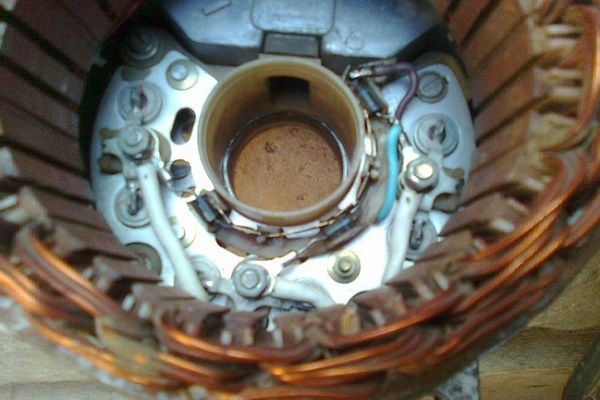
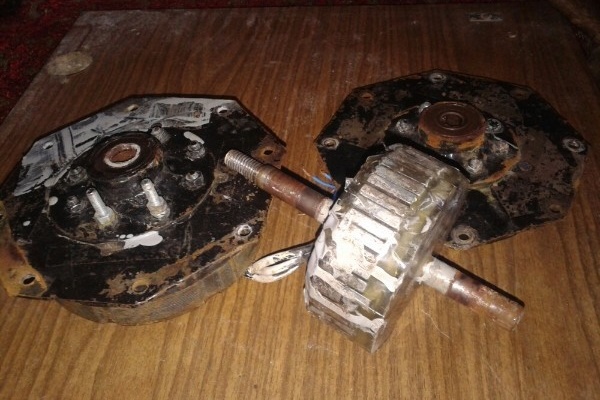
- Rewind the existing AT-700 stator winding at low speed.
In principle, both options for upgrading the device are achievable. But, judging by the reviews of the held designers, the option of rewinding the stator winding is more acceptable. Especially considering the weight of the AT-700 generator itself, which reaches 6 kg.

If the device is supplemented with a reducer, the weight of the common module will double. And this is an important parameter for the construction of a windmill. Weight is always striving to reduce.
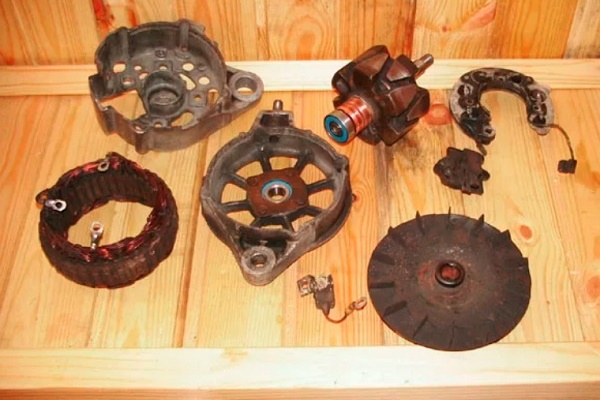
When using the K 701 generator in the design of a windmill, some modernization will be required:
Step 1. Wind power screw
The material for the manufacture of screw blades is an irrigation aluminum pipe (d = 200 mm) 0.7 - 1.0 m long. Initially, it is cut lengthwise into four segments, and then the blades of the required shape are cut from two or three parts obtained.
Since aluminum is a material that can be processed well, it is not a problem to cut the desired shape of the blade from a piece of pipe. The main thing is to correctly calculate and draw a template.
The manufactured blades of the future screw must somehow be fastened and planted on the generator shaft. This work is more complex, requires precise balance, and especially when performing a three-blade design. There are many options for making a screw disk. One of them is the creation of this part from aluminum plates.
It will be necessary to calculate the diameter of the screw disk taking into account the meter length of the blades. For a wingspan of 2 meters, the estimated disc diameter can be 150-200 mm. Based on the calculated diameter, the required number of round plates (6-7 pcs.) Is cut out of sheet aluminum.

The cut round plates are superimposed on each other, aligned at the edges and fastened. For bonding, it is best to use high-quality epoxy glue. But other fastening methods are also possible.
On the finished glued disk, it is necessary to mark and drill a hole for mounting on the generator shaft at a central point. Finish the hole with a keyway for the size of the key mounted on the generator rotor shaft.
A propeller disk prepared in this way is marked for mounting the blades. On the planned lines, drill holes for the bracket mounting bolts. These parts are also made of aluminum with a selection of thickness sufficient to compensate for the transmitted forces.
It remains to attach the previously made blades to the disk at the intended connection points, balance them on a flat surface and fasten with bolts.
Step # 2. Making a mast from a pipe
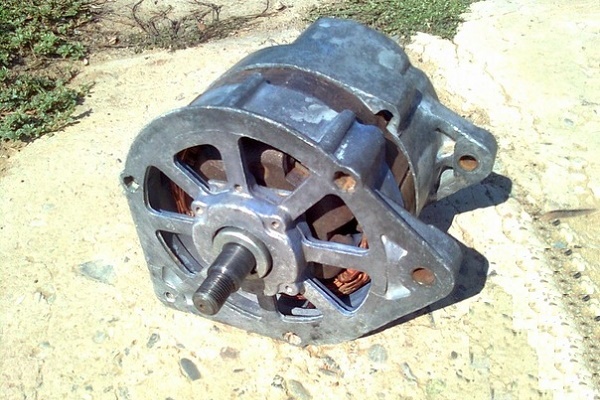
The AT-700 tractor generator, equipped with a homemade screw, is already a real windmill. In order to obtain the maximum effect from the structure, it is desirable to raise it by 5-7 meters and also provide 360 ° circular movement.
Therefore, a wind vane-windmill is placed on a mast, which is easiest to make on the basis of a metal pipe.

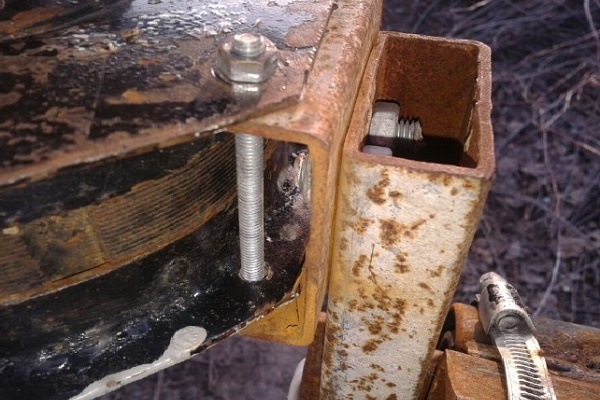
A mast with a height of 5-7 meters, equipped with a wind generator at the top, will experience significant loads. Accordingly, the diameter of the metal pipe is needed large enough - at least 50 mm in outer size.
The mast is fastened by four cable ties, fixed from above closer to the windmill and stretched as opposed to each other.
Under the upper edge of the mast pipe, in the inner region, a pair of suitable bearings is pressed in or fixed in some other way. It will be a supporting rotating block, where a weather vane with a generator and a screw will stand. It remains to make the weather vane itself and install all the necessary equipment on it.
Step # 3. How to make an aluminum weather vane
The weather vane design, on one end of which there is a place for a car generator with a screw, and on the other - a place for a “shank", is recommended to be made of lightweight durable material.
For example, an aluminum pipe of a rectangular profile would fit just right under the base.It is more convenient to use clamps made of soft metal tape (preferably stainless) as fasteners of the generator to the profile pipe.

The tail of the weather vane can be constructed from the same aluminum sheet and fixed to the profile pipe with corners. At the point of center of gravity, on the profile pipe, it is necessary to strengthen the stainless steel metal pin.
This part - in the form of a long bolt (250-300 mm), with a diameter of about 30 mm (calculated), runs across the body of the aluminum profile tube and is secured with a nut from the bottom. A lock nut is placed on top of the nut.
The diameter of the thread of the bolt should be slightly less than the inner diameter of the bearing rings, pressed into the mast pipe. In the center of the bolt, along its axis, a hole of 7-10 mm is drilled. An electric cable from the generator will pass through this hole and go down the pipe to the connection point.
Step # 4. Installation and connection of a wind generator
After all the preparations described above (required in calm weather) proceed with the installation:
- On the basis of the weather vane, a tractor generator is clamped.
- Raise the mast from the ground by 1.5 - 2 meters and install the weather vane with a support bolt on the bearings.
- At the same time, the cable from the generator is passed through the body of the bolt and further inside the pipe to the lower exit point.
- Also, just below the vane base, a limiter is rigidly fixed, allowing the vane to rotate 360 ° in one or the other direction, but no more.
- They lift the mast completely and strengthen it with cable extensions.
- Connect the ends of the cable to the receiver (usually via controller to the battery).
On this, the design of the wind generator can be considered completed. However, there is still a mass of individual parts of the process that you will encounter during the period of application of the device.

These details are already connected with automation regulating the accumulation and distribution of energy. Devices such as a charge controller, a current inverter, and others, are mandatory components of wind generators.
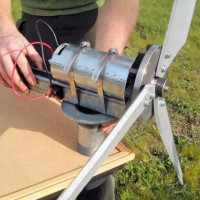
Photo example of building a windmill in steps
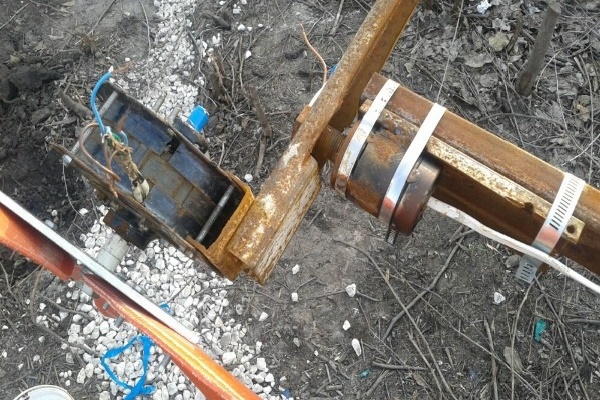
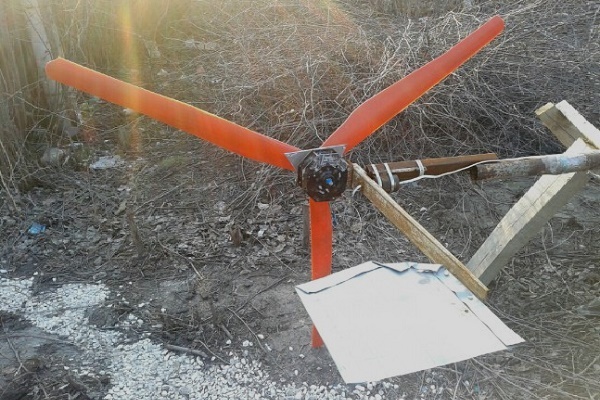
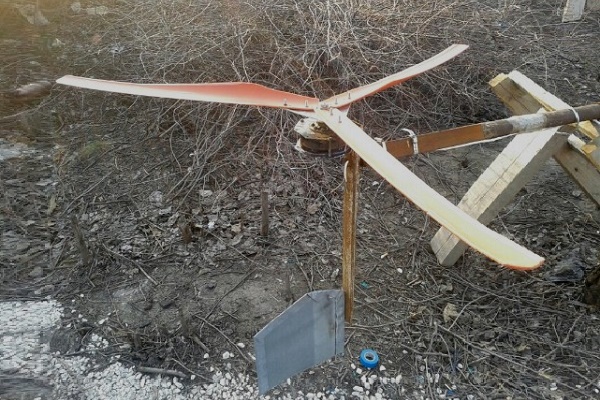
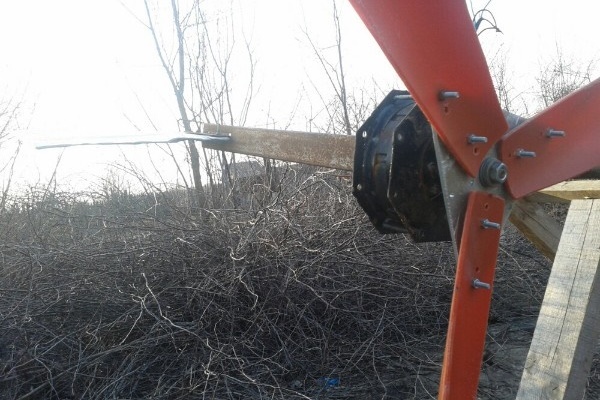
Consider an example of constructing a 24 V windmill assembled on the basis of an automobile generator. The homemade product starts to work stably with a wind force of 5 m / s. In medium-windy weather with gusts of 15 m / s, the unit delivers from 8 to 11 A, and on days with strong winds, the efficiency increases. Power no more than 300 watts.
In fact, all the work has been done, it remains to connect the disparate components of a useful installation:
A self-made installation develops 24 V, it can be used to charge batteries of mobile equipment and to supply energy to lighting lines with energy-saving lamps.
Parsing Design Errors
Assembling a wind generator in the home with your own hands is, of course, not an unmistakable matter. Engineers make mistakes even in the construction of industrial wind turbines. But they learn from mistakes, which is confirmed by well-established household constructions.
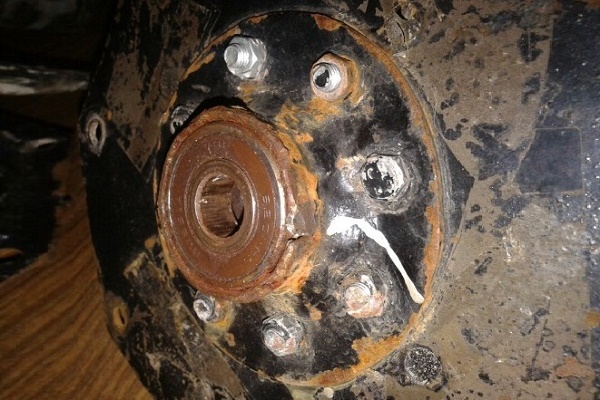
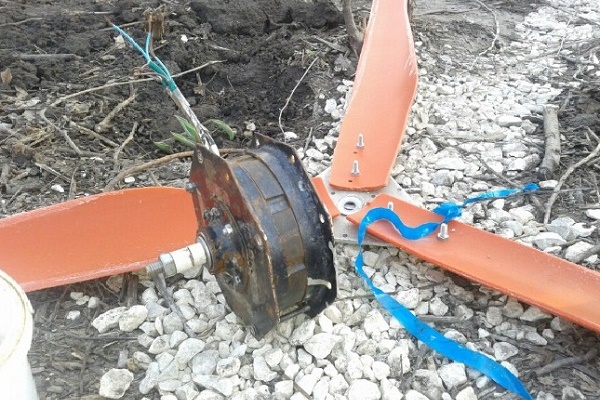
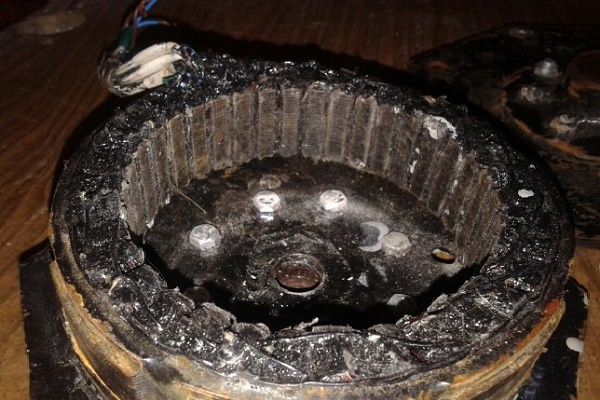
So, among the errors in the construction of household wind generators, such a detail often appears as the absence of a braking module in the design of the generator. The standard version of such devices (automobile or tractor) does not provide for such a part. So, the generator needs to be modified.
However, not every "designer" wants to do this delicate matter. Many ignore this detail, hoping for a chance. As a result, in strong winds, the screw untwists to incredibly high speeds. The generator bearings do not stand up, they break the seats of aluminum covers. A rotor wedge occurs.

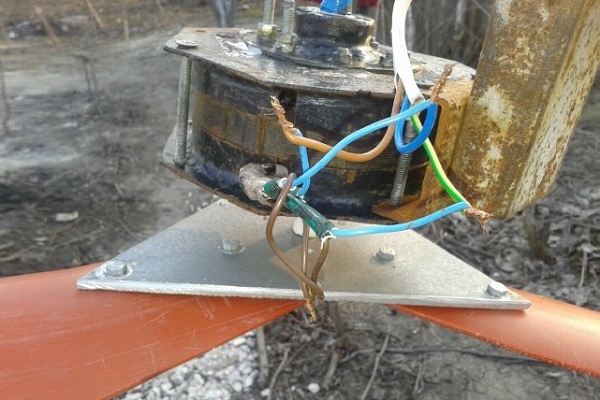
The flaw associated with the lack of a limiter for turning the weather vane belongs to the same topic. Often, this component is simply forgotten to be installed and remembered only when the wind flows begin to spin the “cockerel” around its axis, like in the program “What? Where? When?". The result is deplorable.
Minimum damage - twisting and breaking of the electric cable, and in severe cases - the spacing of the entire structure.
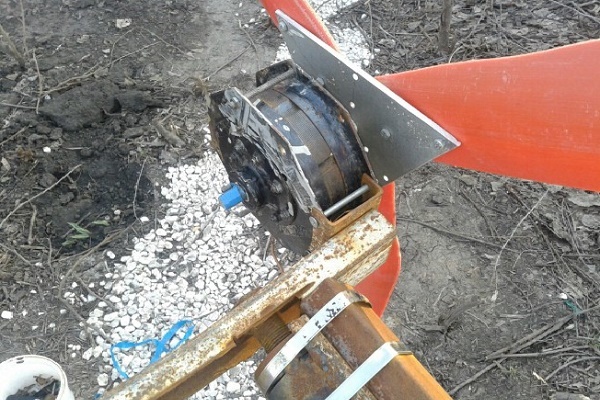
Another notable assembly error is the incorrect calculation of the center of gravity point on the basis of the wind vane. In this case, the device may function normally for some time. But over time, a skew occurs on the bearing assembly, freedom of rotation is limited, the efficiency of the structure for energy transfer decreases sharply.
How correctly calculate the wind generator, learn from the article we proposed.
Often, the current received from the generator, they try to directly power the battery. Very soon they start to wonder - why the battery does not hold a charge or detect a breakdown of 2-3 cans.
This is a commonplace and natural mistake, since in any case the battery charge must pass under conditions of certain currents and voltages. This requires control of this process.
Home masters interested in the subject wind generator assemblyWe suggest you familiarize yourself with another original version.The proposed article describes the manufacture of a generating installation from waste parts of the washer.
Conclusions and useful video on the topic
Even an ordinary electric screwdriver can become a windmill, if you know the basics of a wind generator.
Interest in wind generators is not declining. On the contrary, this option for the production of electric energy is increasingly being considered at the level of suburban real estate owners.
Obviously, if you combine several types of energy at once - wind, sun, hydroturbines or nuclear power plants, such a combination can give an economic effect. In this case, the user's risks to remain without electricity are reduced to zero.
Want to talk about how you personally assembled a windmill to provide electricity to the cottage? Would you like to share useful information not mentioned in the article? Please write comments in the block below, share your impressions, only you know the technical nuances and photos on the topic of the article.
 Do-it-yourself wind generator from a washing machine: assembly instructions for a windmill
 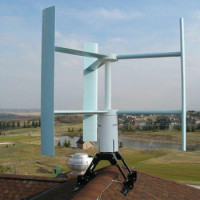 Do-it-yourself vertical wind generator: how to assemble a wind turbine with a vertical axis of rotation
 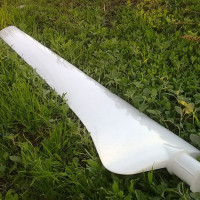 How to build do-it-yourself blades for a wind generator: examples of self-made blades for a wind turbine
 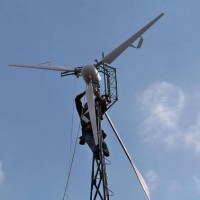 How to make a wind generator with your own hands: device, principle of operation + best home-made
 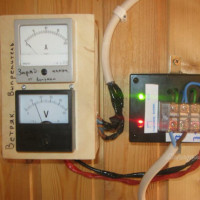 How to make a controller for a wind generator with your own hands: device, principle of operation, assembly diagram
  Wind generator for a private house: device, types, overview of the best offers
  How much does it cost to connect gas to a private house: the price of organizing gas supply
  The best washing machines with dryer: model rating and customer tips
  What is the color temperature of light and the nuances of choosing the temperature of the lamps to suit your needs
  Replacement of a geyser in an apartment: replacement paperwork + basic norms and requirements
This is interesting, I did not think that you can not only save on the method of generating energy, but also on the device itself. It’s even unusual that you can turn one thing into another and get such a good result. And think about the planet, because such alternative sources have a good effect on the ecological situation. I’m also interested, you write that you need process control to avoid errors. Or maybe there is a device that can help identify these errors without the participation of the owner? And you’re not always near him.
How little else do we pay attention to windmills
Yes, few, but not as few as is commonly believed. In Russia there are 22 large wind farms.